How to Run Pod Using “kubectl run”
Kubernetes is an open-source and universally used container orchestration system. It executes the cluster of pods in which containerized applications or programs are created and deployed. These pods are then encapsulated in the Kubernetes nodes. The Kubernetes is used by the developers to automate the operational task, roll back the changes, and monitor and scale the applications and software. To manage and operate the Kubernetes cluster and its components, the kubectl commands are used.
The kubectl is an open-source and free command line tool that provides different commands to manage and operate the Kubernetes cluster. For all the basic operations from creating, deleting, and deploying any Kubernetes component, the kubectl commands are necessary.
In this blog, we will demonstrate how to create and deploy a Kubernetes pod using the “kubectl run” command through the provided outline:
- What is the “kubectl run” Command?
- Prerequisites: Install kubectl, minikube tool, and Docker Desktop Application
- How to Run Kubernetes Pod Using “kubectl run” Command?
- Examples of Using the “kubectl run” Command to Execute Pod With Different Options
- How to Deploy User Application in Kubernetes Using “kubectl run” Command?
- Conclusion
What is the “kubectl run” Command?
The “kubectl run” command is utilized to run or deploy the containerized application in the Kubernetes component known as Pod. The user executes the “kubectl run” command, it will create a new pod that will have the container created by a specified image or container snapshot. The pod can have single or multiple containers.
Syntax: The syntax used to create and deploy the new Pod is as follows:
Options
The above syntax or command can use different operations that work differently depending on developer needs. The options that can be used with the “kubectl run” command are listed below in tabular form:
| Option | Description |
| –attach | This option is used to attach the pod with std input/output and error stream. If its value is true, wait for Pod execution, and then attach std i/o and error stream to the Pod. |
| –command | It is used to pass extra arguments or run commands inside the pod. |
| –dry-run | Its value will be “none”, “server”, or “client”. If the value is client strategy, it will only show or print the object that would be sent without sending it.
If the value is server, it will only submit server-side requests. |
| –env | It is used to set or pass the Environment variables in the Pod container. |
| –expose | It is used to create a ClusterIP service connected with the pod. |
| –field-manager | It is used to specify the manager name used to track field ownership. |
| –image | It specifies the container image or snapshot. |
| -o, –output | It is used to set the output format such as json, name, yaml, go-template, templatefile, jsonpath-as-json, or jsonpath-file). |
| –pod-running-timeout | It is used to set the pod timeout like 5s, 2m, or 3h to wait until at least one pod is running |
| –port | The port is utilized to specify the container exposes. |
| –privileged | This option is utilized to execute the pod container in privileged mode. By default, its value is “false”. |
| -q, –quiet | It will suppress the prompt messages if its value is true. |
| –restart | It is used to specify the Pod restart policy. Its value can be Always, OnFailure, or Never. |
| –rm | It is utilized to remove the pod after it exists. It is only valid when it is attached to the container. |
| -i, –stdin | It is used to execute the Pod interactively by keeping the stdin open on the container in the pod. |
| -t, –tty | It allocates a pseudo-TTY terminal for the Pod container. |
Prerequisites: Install kubectl, minikube tool, and Docker Desktop Application
To get started with the Kubernetes cluster, users are required to understand and install the following tools on the system:
- Kubectl Tool: Command line tool used to manage, control, and operate Kubernetes cluster and its components.
- Minikube Tool: Minikube is a Kubernetes cluster implementation tool that creates a virtual machine on the user system to run the cluster. It can execute single-node clusters and is mostly used by beginners or for testing purposes.
- Docker Desktop Application: Docker Desktop is a well-liked universally used containerization application. It is basically used to create, deploy, and ship programs and software in containers. It can also run the Kubernetes server as a separate service.
To get started with Kubernetes and to install essential components like “kubectl” and “minikube”, go through our linked “Get Started With Kubernetes and Kubectl” article. In order to install the Docker Desktop application on Windows, follow our “Install Docker Desktop on Windows” article.
How to Run Kubernetes Pod Using “kubectl run” Command?
To run the Kubernetes pod inside the Kubernetes cluster, the “kubectl run” command is used. This command will create and start the new pod that contains small executable packages known as containers. To use the “kubectl run” command, go through the following demonstration:
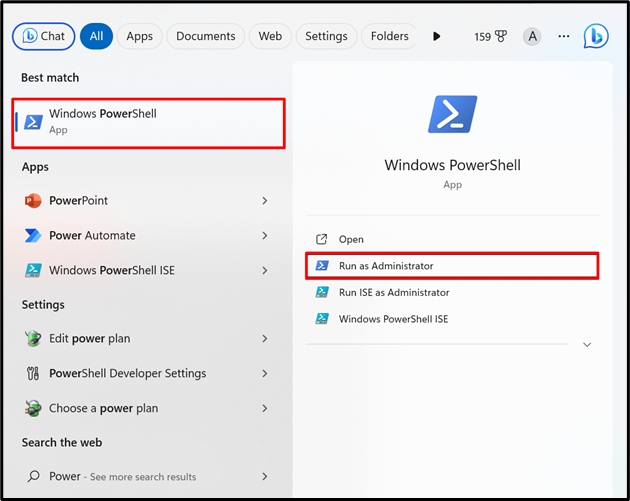
Step 1: Launch PowerShell with Administrative Rights
To start the Kubernetes cluster on Windows built-in Hyper V, users are required to start the cluster with administrative rights. For this purpose, launch the PowerShell with administrator rights via the Start menu:
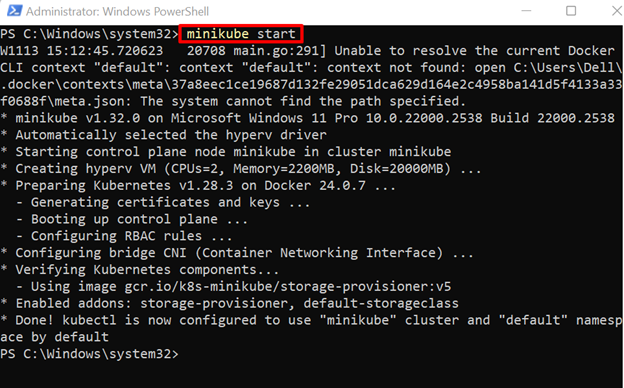
Step 2: Start Kubernetes Cluster
Next, start the Kubernetes cluster on the system using the “minikube start” command:
Note: At that point, sometimes users may encounter an error in starting the Kubernetes cluster. To resolve the error, use the “minikube delete” command:
After that, again start the cluster using the “minikube start” command:
Note: Minikube can run only one node in the Kubernetes cluster. That node will act as both the Master node and the Slave node.
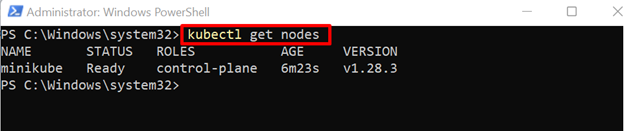
Step 3: Access Kubernetes Nodes
After starting the cluster, check the Kubernetes node to confirm that if the Kubernetes cluster is executing or not:
The output shows that the Kubernetes cluster is successfully started and running the “control plane” node:
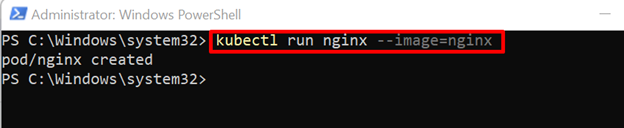
Step 4: Use “kubectl run” to Create and Start the Pod
Now, run the “kubectl run” command to create and start the pod. Here, the “–image” option is used to specify the container image to containerize the application inside the Pod:
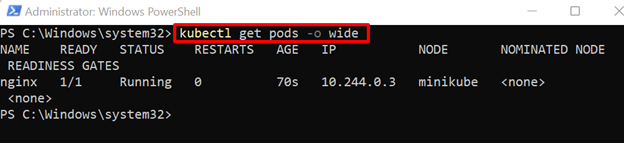
Step 5: View the Pod IP Address
In order to view the running pod of Kubernetes nodes, utilize the “kubectl get pods” command. Here, the “-o” option is used to show the output in wide format to access the networking information of Pod (IP address):
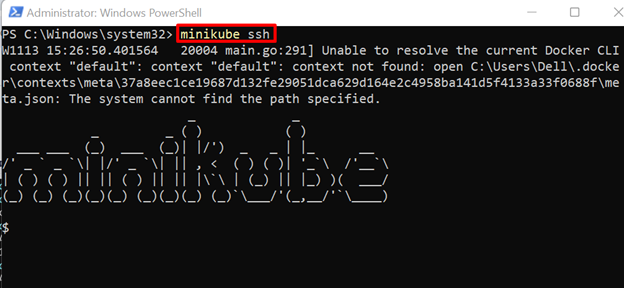
Step 6: Log in to Minikube Cluster
For verification, access the application running inside the pod. To do so, first log in to the minikube cluster using the “minikube ssh” command:
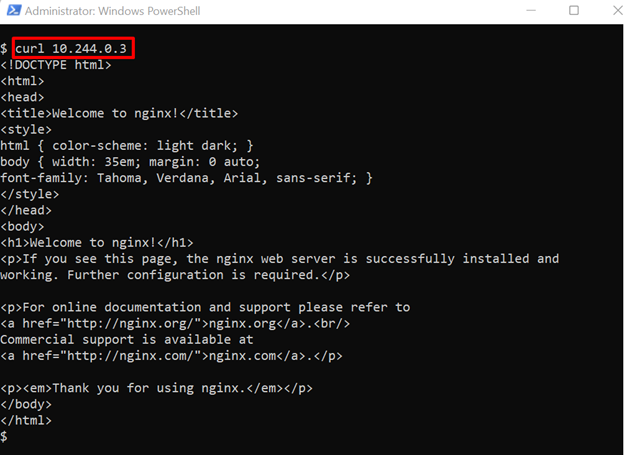
Step 7: Verify Application is Executing in Pod
After accessing the Kubernetes node shell, run the “curl” command along with the IP address and confirm that if the application is executing or not:
The output shows the default nginx page which means we have successfully executed the application in Kubernetes pod using “kubectl run” command:
Examples of Using the “kubectl run” Command to Execute Pod With Different Options
The “kubectl run” command supports different options that attach the extra functionality along with creating and starting the Kubernetes pod. For demonstration, we have given some examples.
Example 1: Run Pod on Specific Port Using kubectl run Command
Sometimes, the user wants to run the containerized application on a specific port, or some applications have their default port from where these are accessible. To specify the exposed port of the application that is running inside the Kubernetes pod, the user can use the “–port” option along with the “kubectl run” command:

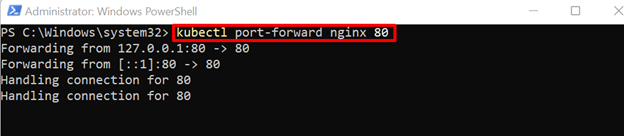
As the containerized application is running inside the Pod and that pod is running in the Kubernetes cluster. Users cannot access the application directly on the system. To access it from the local system, you are required to apply the port forwarding process. To do so, utilize the “kubectl port-forward <pod-name> <port-no>” command:
For verification, open the browser and navigate to “http://localhost:80” URL and verify that if the application is accessible on exposing port or not:
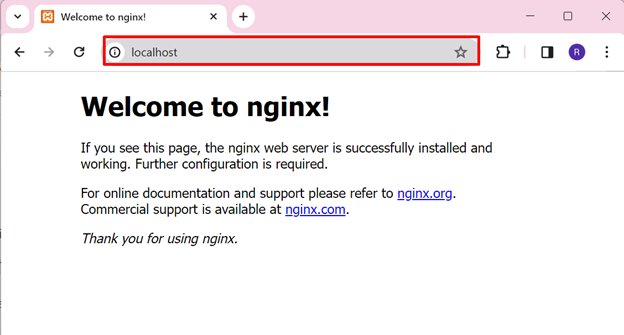
The above output shows that we have effectively accessed the containerized application that is executing inside the Kubernetes Pod through the “kubectl run” command.
Example 2: Dry Run the Pod Using kubectl run Command
In order to create, start, and dry-run the Pod, simply use the “kubectl run <Pod-name> –image=<image-name> –dry-run=<client/server>” command. This will print the object that would be sent without sending it (It is used to show dry-run only):

Example 3: Restart the Pod on Failure Using kubectl run Command
Sometimes, developers are required to define the restart policy while executing the Pod such as if some problem occurs, restart the Pod automatically. Its value can be “Always”, “OnFailure”, or “Never”:

Example 4: Set Environment Variable of Pod Using kubectl Command
To set the environment variable of containers while creating and starting the Kubernetes pod, utilize “–env” option in “kubectl run” command:

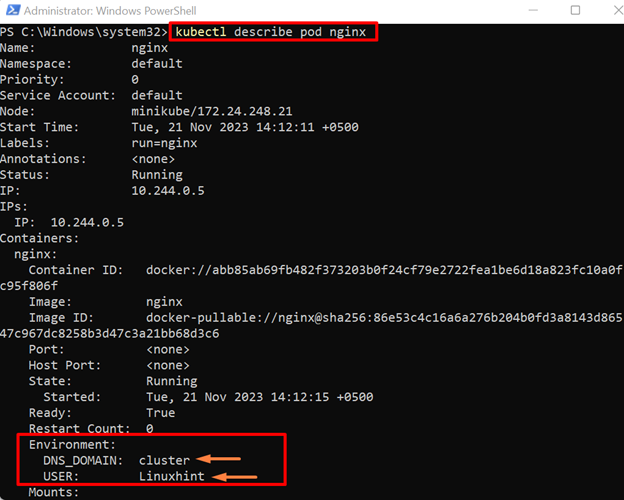
For confirmation, inspect or describe the Kubernetes pod using below command:
The below output shows that we have effectively set the container’s environment variable:
How to Deploy User Application in Kubernetes Using “kubectl run” Command?
Usually, users are required to containerize the applications and want to run these applications inside the Kubernetes cluster. To deploy the application in the Kubernetes cluster, users are required to create a snapshot or image of the container. For this purpose, the Docker Desktop platform is more suitable and it also runs the Kubernetes server as a separate service.
To deploy the user-defined application in the Kubernetes cluster using the “kubectl run” command, go through the following demonstration.
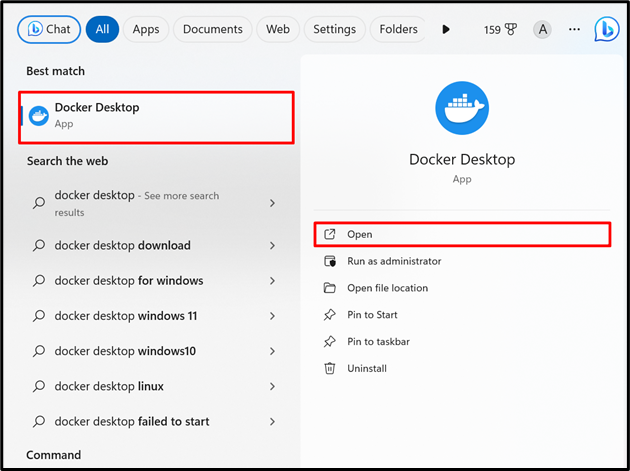
Step 1: Launch Docker Desktop Application
First, launch the Docker Desktop application via the Windows Start menu:
Step 2: Create a Program
Create an “index.html” file to specify the HTML program inside the file. After that, paste the following code into the file:
<head>
<style>
body{
background-color:rgb(9, 4, 4);
}
h1{
color:rgb(221, 219, 226);
font-style: italic;
}
</style>
</head>
<body>
<h1> This is First HTML page </h1>
</body>
</html>
Step 3: Dockerize the Program Using Dockerfile
Create another file named “Dockerfile” without any file extension. After that, add the given snippet into the file:
COPY index.html /usr/share/nginx/html/index.html
ENTRYPOINT ["nginx", "-g", "daemon off;"]
Here, the “FROM” command is utilized to define the base template or image of the container, the “COPY” command copies the source or program file to the container’s specified path, and “ENTRYPOINTS” defines the default running points of the container.
Step 4: Build the Docker Image
Next, navigate to the directory where “Dockerfile” exists. After that, generate the container snapshot or template to containerize the HTML program using the below command:

In case if Dockerfile exists in another directory, the user can use the following command to read the build context from the file:
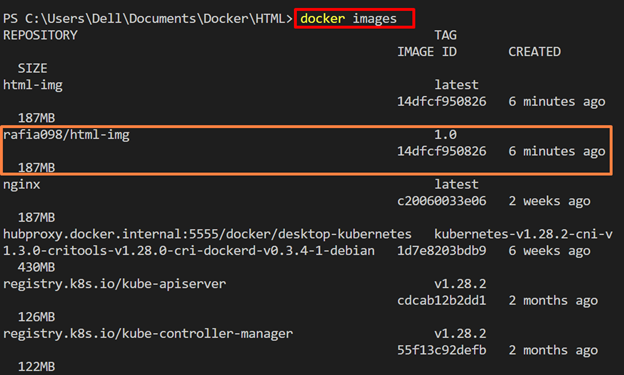
For verification, view the newly generated Docker image using the “docker images <image-name>” command:

Step 5: Tag the Image
Next, the user needs to publish the image on the Docker Hub official repository. For this purpose, tag the image with the user repository name where the image is going to be published. To do so, use the “docker tag <image-name> <user-repository-name>/<image-name>:<version>” command:

Upon doing so, the new image will be created with the specified tag. For verification, list down all the images using the below command:
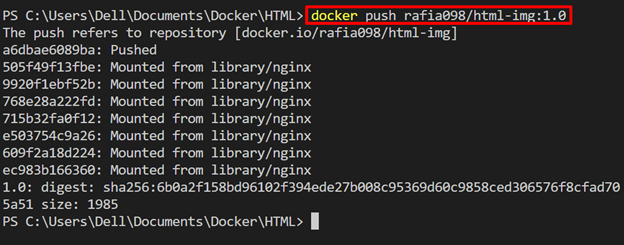
Step 6: Push the Image
Now, push the image to the official Docker Hub registry using the “docker push <image>” command:
Note: In case you are not logged in the Docker Hub registry, follow our linked “Login to Docker Hub” article.
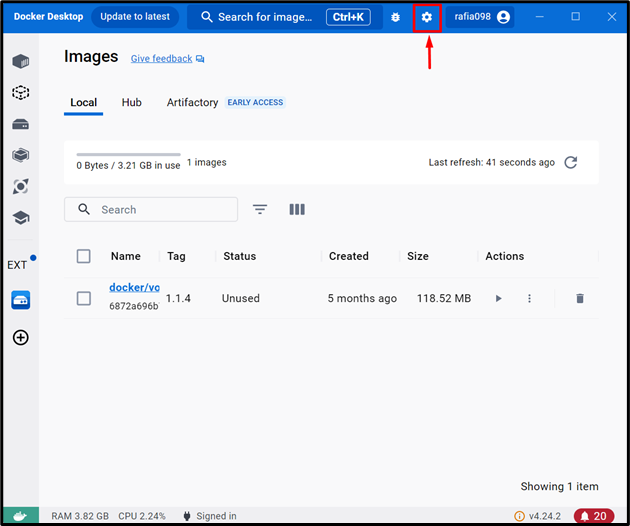
Step 7: Start Kubernetes Server on Docker Desktop
Open the Docker Desktop application interface and click on the “Settings Gear” icon to open the settings:
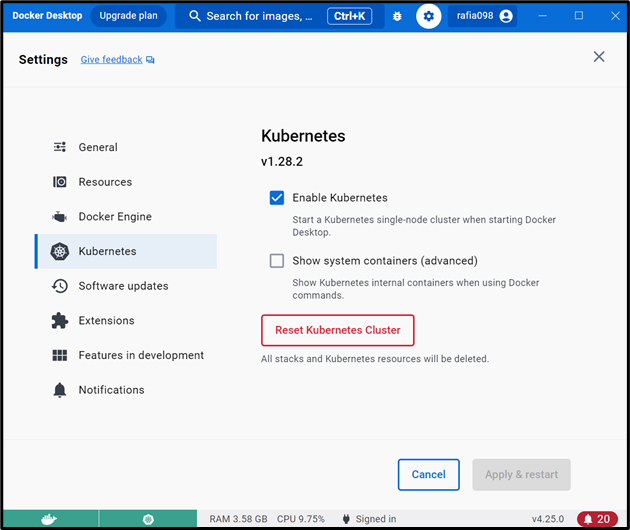
Go to the “Kubernetes” option. Then, mark the below pointed “Enable Kubernetes” icon and press the “Apply & restart” button:

The “Kubernetes Cluster Installation” box will appear on the screen. Press the “Install” button to install and start Kubernetes service:

Here, you can see we have effectively installed and started the Kubernetes cluster from the Docker Desktop application:
Step 8: Switch to Docker Desktop Context
Now, configure the Kubernetes cluster context. To switch or set the Kubernetes context to Docker, utilize the below command:

Note: It is not necessary that the user must require a Docker Desktop Kubernetes cluster. User can start the Kubernetes cluster using minikube and can directly access the Docker Hub images as done in the above section:

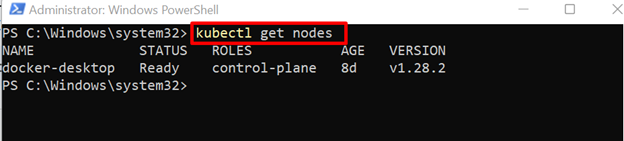
Step 9: Get Nodes
Now, get the Kubernetes nodes by executing the below command:
Step 10: Deploy the Pod Using “kubectl run” Command
Now, deploy the program inside the pod. For this purpose, create and start a new pod using the “kubectl run” command. Here, “html-pod” is the name of the pod and the “–image” is used to specify the image to build and run the container inside the pod. For instance, we have used “rafia098/html-img:1.0” which was created and published in the previous steps. The “–port” option defines the port where the container output will be exposed:

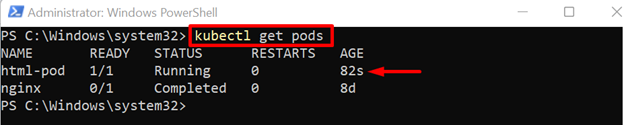
For verification, get the Kubernetes pods and verify if the pod is created and running on the system:
Here, you can see “html-pod” is executing in Kubernetes node:
Step 11: Apply Port Forwarding
To access the container exposing port from the local system, run the port forwarding process. For this purpose, use below command:

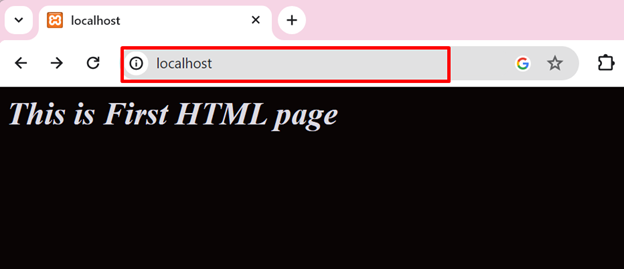
Now, open the browser and navigate to “http://localhost:80” to verify if the container executing in port is running properly or not. You can see we have effectively deployed the HTML program in the Kubernetes pod using the “kubectl run” command:
That is all about the Kubernetes pod and the “kubectl run” command.
Conclusion
To run the Kubernetes pod, first, start the Kubernetes cluster either with a Docker Desktop application or using minikube. After that, run the “kubectl run <pod-name> –image=<image-name> –<option>:<“value”>” command. The “kubectl run” command supports different options to perform extra functionality such as “–dry-run” only prints the object for the dry run, “–port” specifies the port where the container in the pod will execute, and “–restart” to define Kubernetes pod’s restart policy. This blog has illustrated what the “kubectl run” command is and how to use it to deploy the Kubernetes pod.
Source: linuxhint.com