How to Create a Private NAT Network Interface on Proxmox VE 8
By default, a bridged network is created in a new Proxmox VE installation. The default Proxmox VE bridge network assigns IP addresses to the virtual machines and LXC containers using the DHCP server of the router/switch your Proxmox VE server is connected to. So, all the virtual machines and LXC containers are accessible from your home/office network. You may not want that.
If you want to put some of the Proxmox VE virtual machines or LXC containers in a private network, you have to use the Proxmox VE SDN (Software-Defined Networking) feature to create a private NAT network. Once the private NAT network is created, you can configure the virtual machines or LXC containers that you want to put behind a private NAT network to use it.
In this article, I will show you how to create a private NAT network with DHCP support on Proxmox VE 8 and configure Proxmox VE virtual machines and LXC containers to use it to obtain private IP addresses.
Table of Contents
- Enabling SDN Support on Proxmox VE
- Creating an SDN Zone in Proxmox VE 8
- Creating a VNet and Subnet for the Private NAT Network in Proxmox VE 8
- Applying SDN Changes to Proxmox VE 8
- Using Private NAT Network on Proxmox VE Virtual Machines (VMs) and LXC Containers
- Monitoring IP Addresses Assigned to Proxmox VE VMs/Containers using SDN IPAM
- Setting Fixed IP Address to Proxmox VE Virtual Machines and Containers using SDN IPAM
- Conclusion
- References
Enabling SDN Support on Proxmox VE
To enable SDN (Software-Defined Networking) support on Proxmox VE, you must have the libpve-network-perl package installed on your Proxmox VE server.
Proxmox VE 8.2 comes preinstalled with the libpve-network-perl package. But if you’ve upgraded to Proxmox VE 8 from Proxmox VE 7, you may not have the libpve-network-perl package installed by default.
You also need to install the dnsmasq package and frr-pythontools package on your Proxmox VE server to use the full SDN functionality of Proxmox VE.
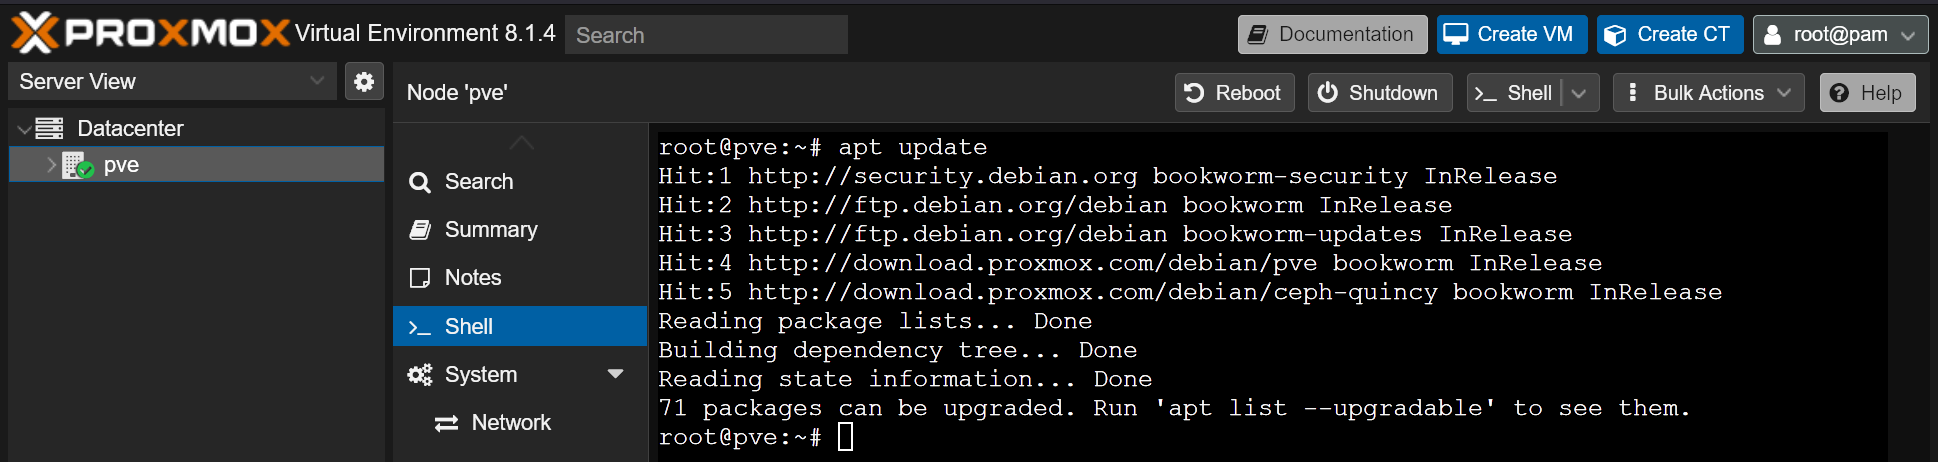
First, update the Proxmox VE package database cache from the Proxmox VE shell with the command below:
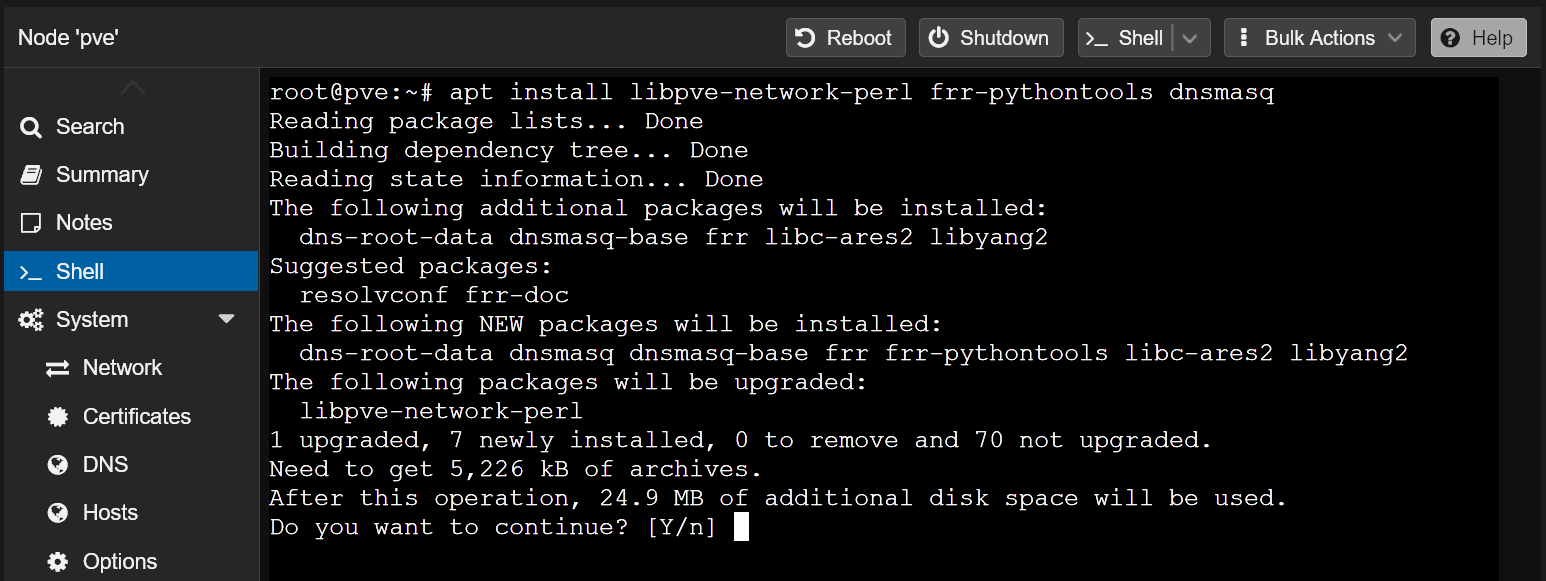
To install the required Proxmox VE SDN packages, run the following command:
To confirm the installation, press Y and then press <Enter>.
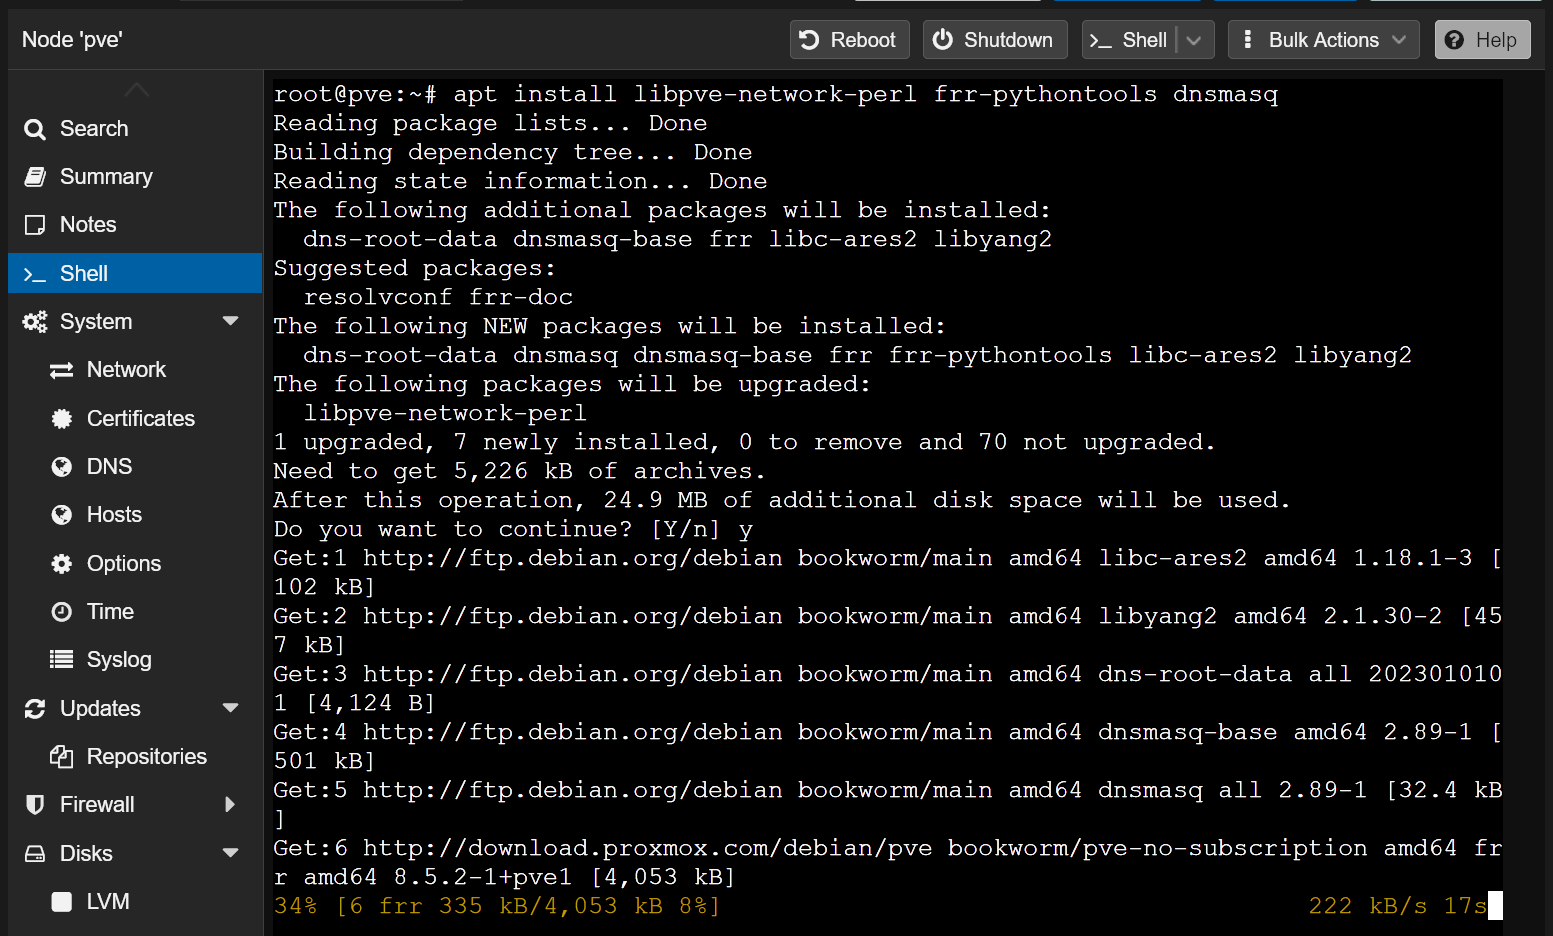
The required software packages are being downloaded and installed on your Proxmox VE server. It will take a few seconds to complete.
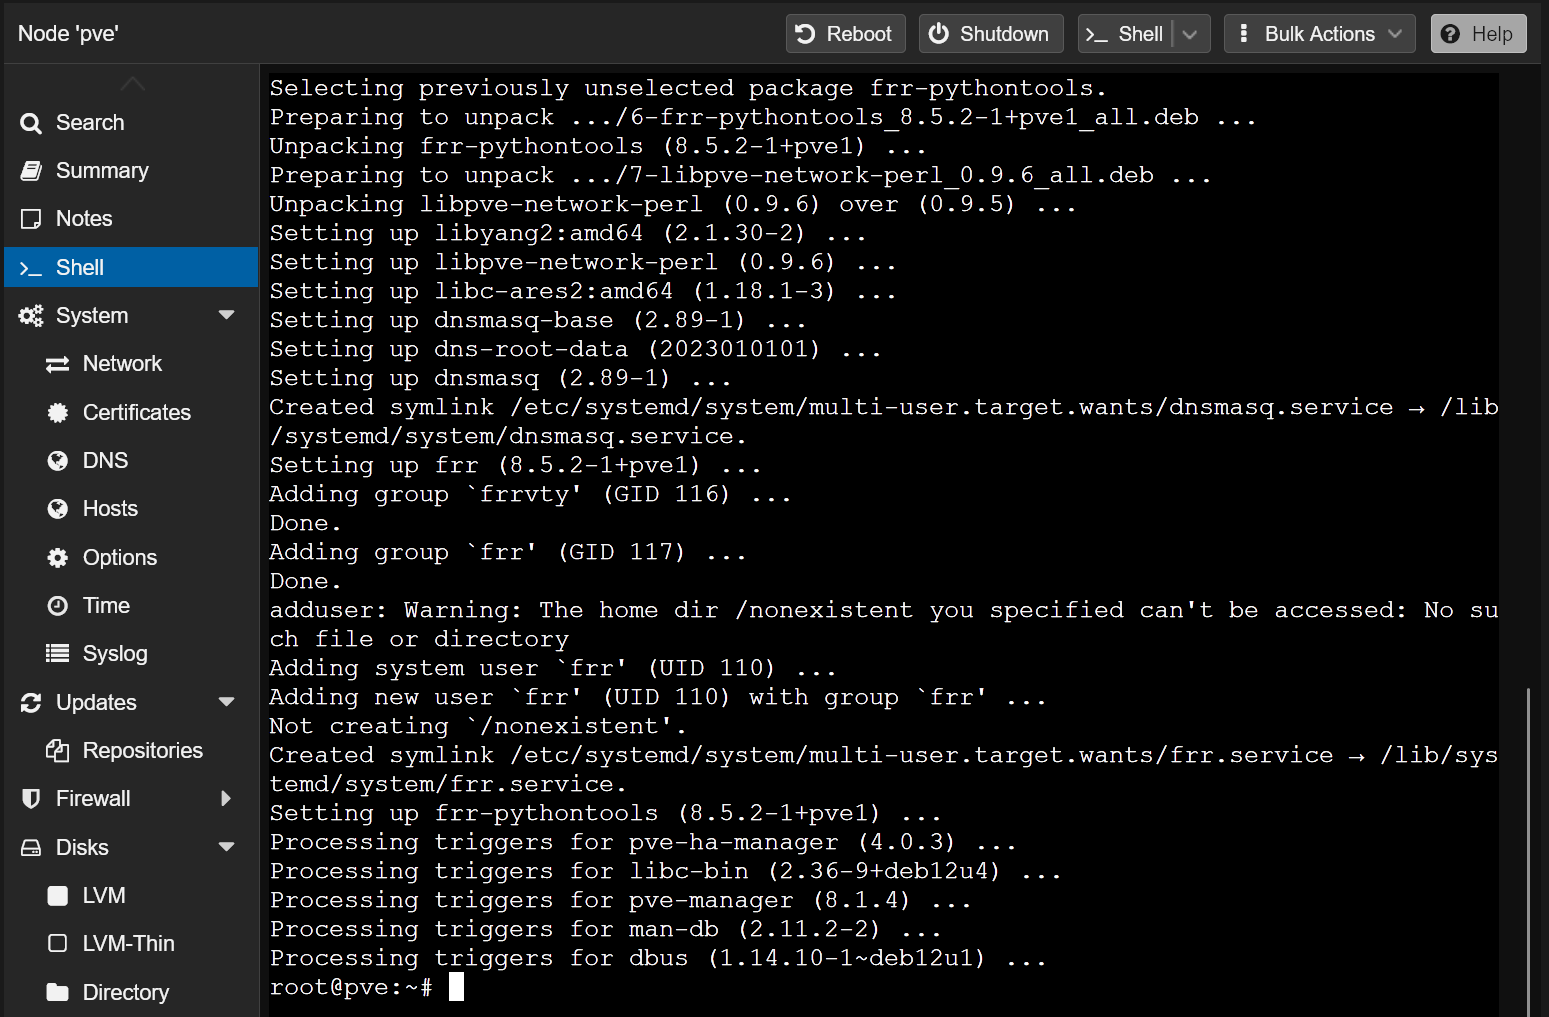
At this point, the required SDN packages should be installed on your Proxmox VE server.
For the changes to take effect, reboot your Proxmox VE server with the following command:
Creating an SDN Zone in Proxmox VE 8
The first step of creating a private NAT network in Proxmox VE 8 is to create a new SDN zone.
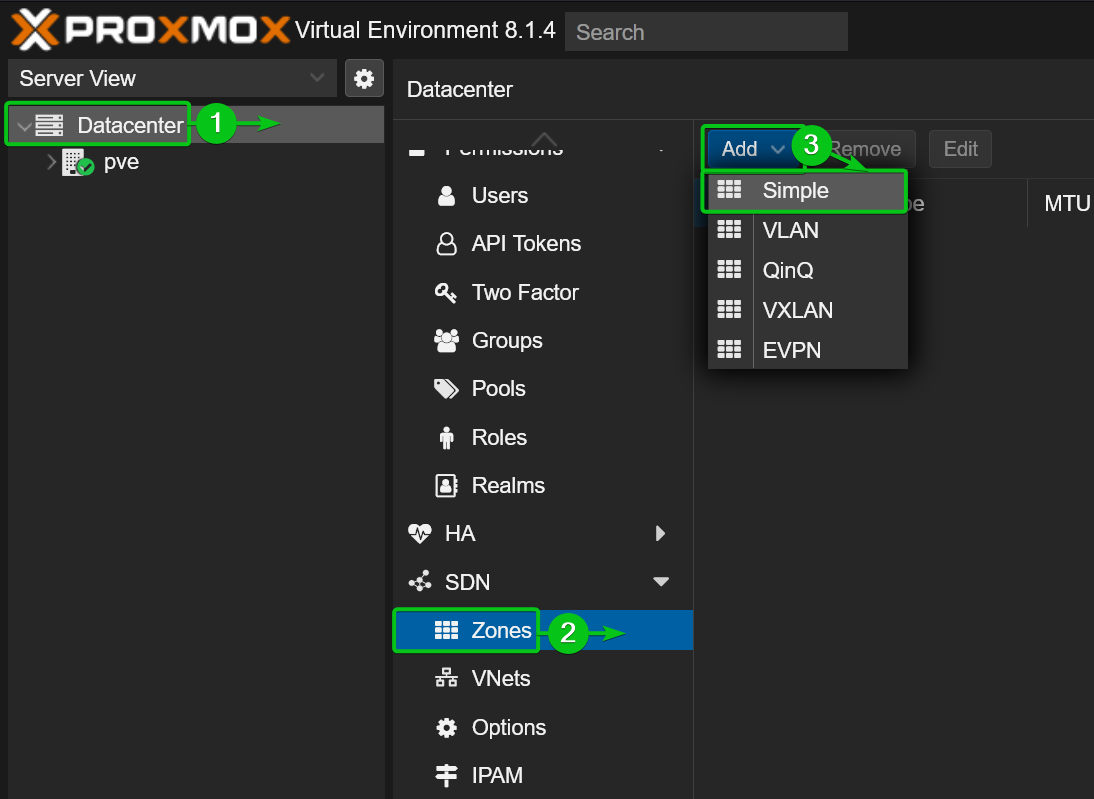
To create a new SDN zone in Proxmox VE, navigate to Datacenter from the Proxmox VE web management interface[1]. Then, navigate to SDN > Zones[2] and click on Add > Simple[3].
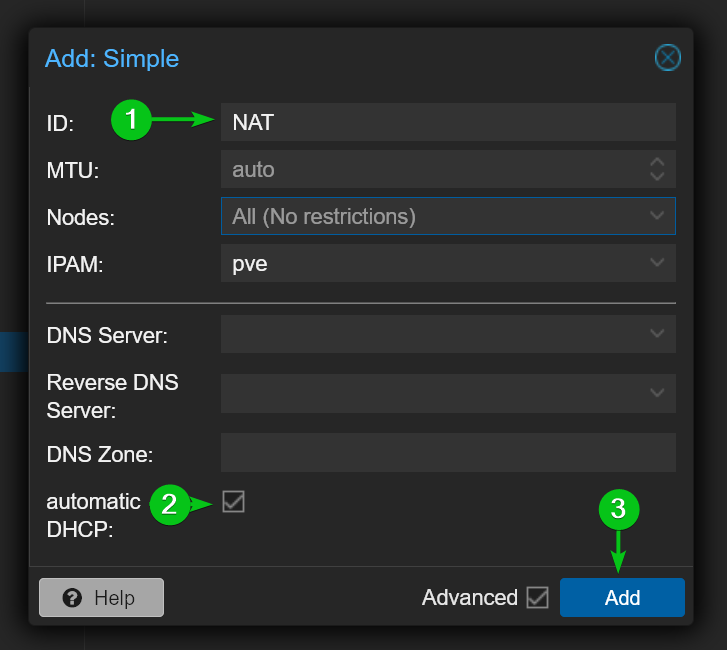
Type in a name for the new SDN zone in the ID section[1]. I will just call it NAT for simplicity.
Tick automatic DHCP to automatically assign IP addresses to Proxmox VE virtual machines and LXC containers that will use this network via DHCP[2].
Once you’re done, click on Add[3].
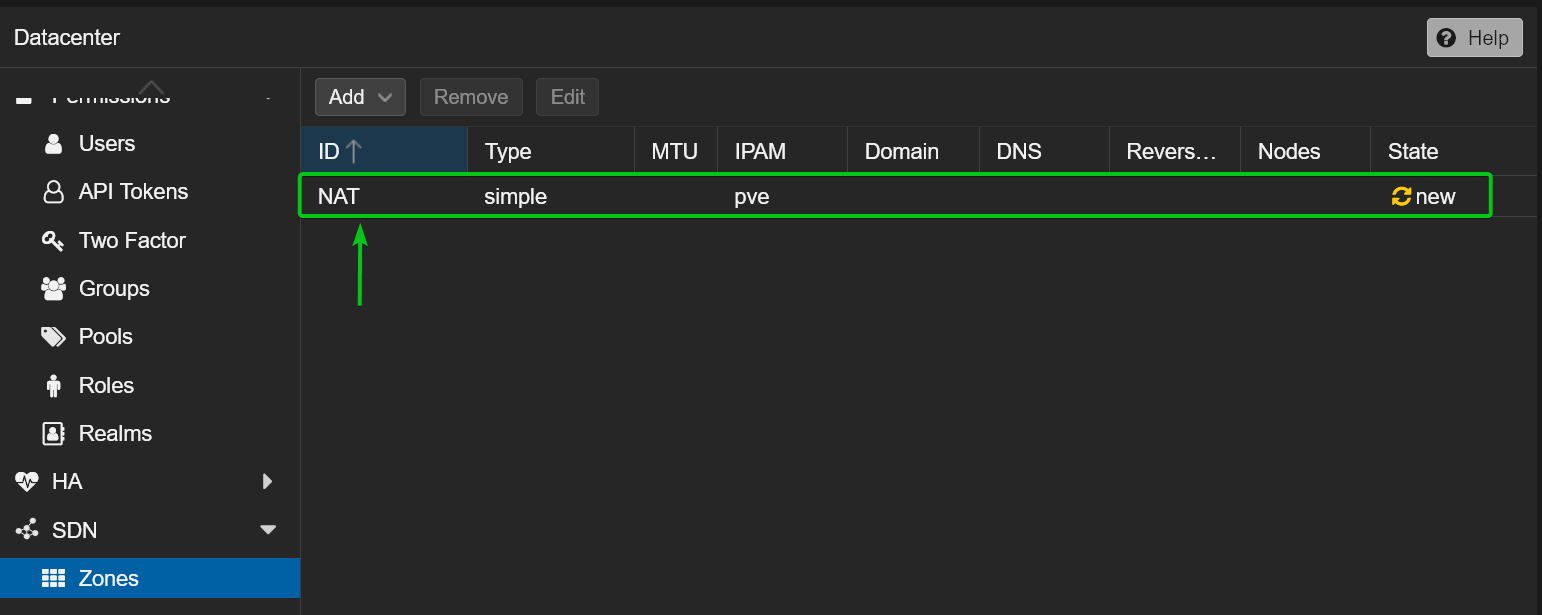
A new SDN zone NAT should be created on your Proxmox VE server.
Creating a VNet and Subnet for the Private NAT Network in Proxmox VE 8
Once an SDN zone is created, you have to create a new VNet (virtual network) and a network subnet in that SDN zone.
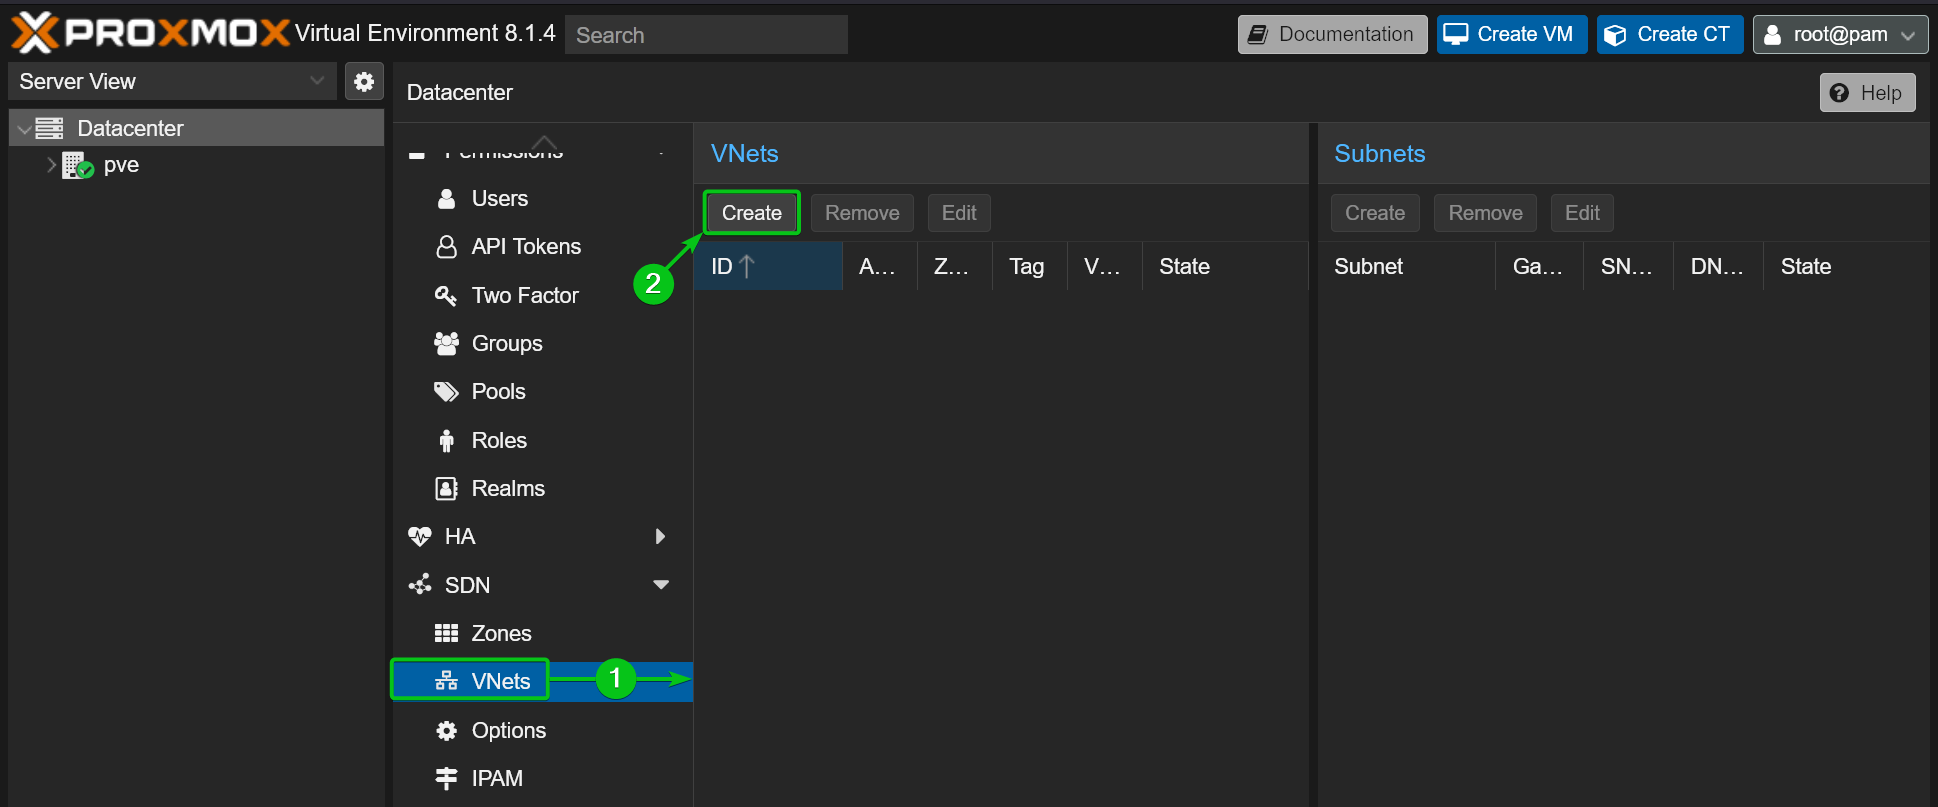
You can create and manage VNets and Subnets from the Datacenter > SDN > VNets[1]section of the Proxmox VE web management UI.
To create a new VNet, click on Create from the VNets section[2].
Type in a VNet name in the Name section[1]. This name will be displayed in the network selection option of Proxmox VE virtual machines and LXC containers. I will call it nat10 for simplicity.
Select your newly created SDN zone (NAT in this case) from the Zone dropdown menu[2] and click on Create[3].

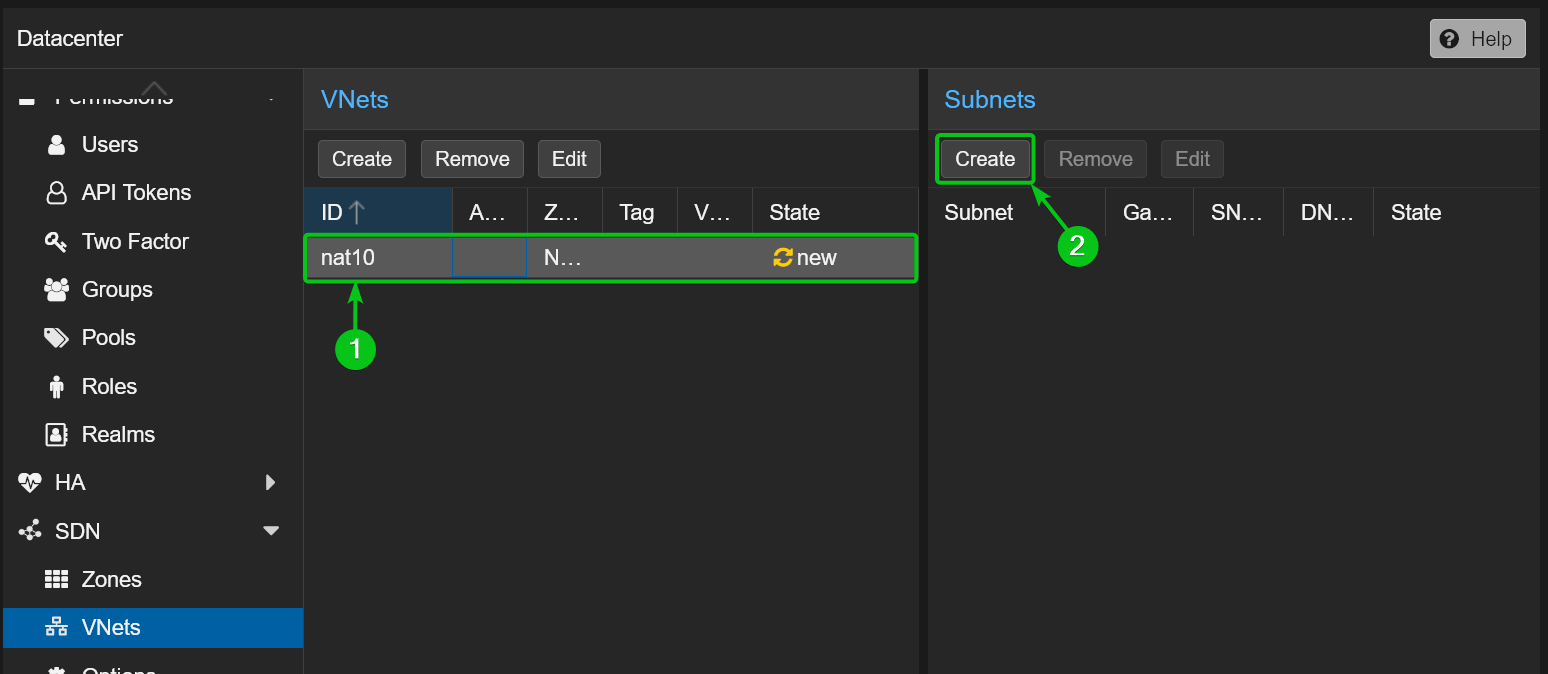
A new VNet nat10 should be created in the SDN Zone NAT[1].
To create a new subnet in the nat10 VNet, select it from the VNets section[1] and click on Create from the Subnets section[2].
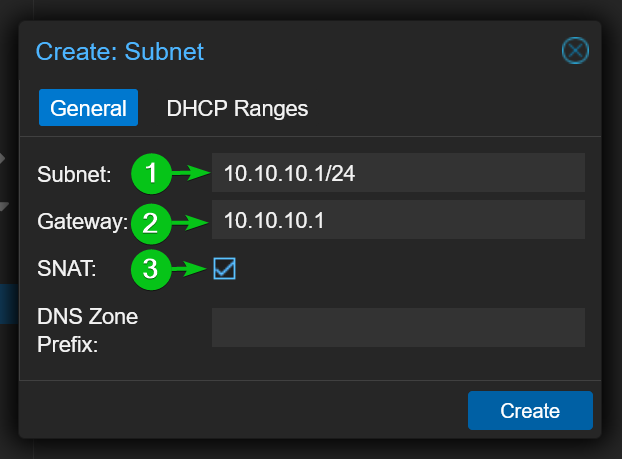
Type in your desired network Subnet[1]and Gateway[2]for the private NAT network nat10. I will use the network 10.10.10.1/24 and the gateway address 10.10.10.1 for demonstration.
To enable network address translation for this VNet, tick the SNAT option[3].
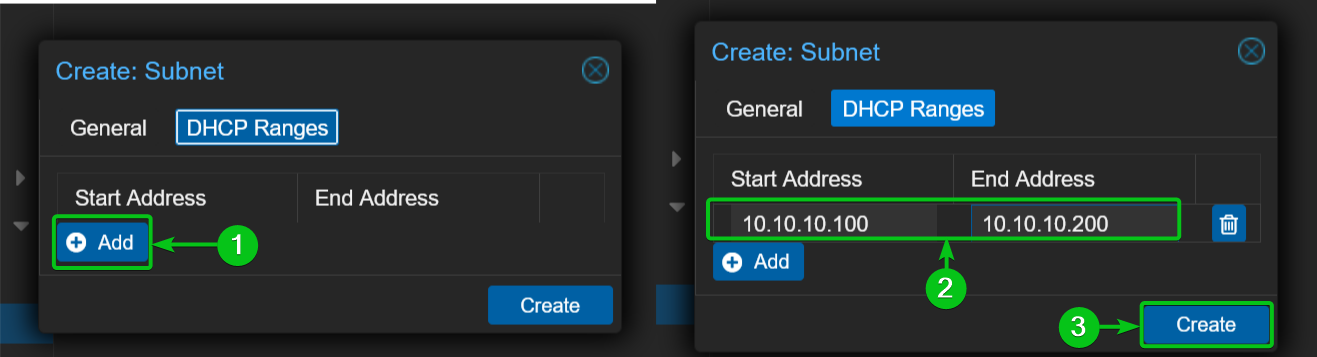
Now, navigate to the DHCP Ranges section and click on Add[1].
Type in your DHCP start and end address range in the Start Address and End Address sections respectively[2].
Once you’re done, click on Create[3].
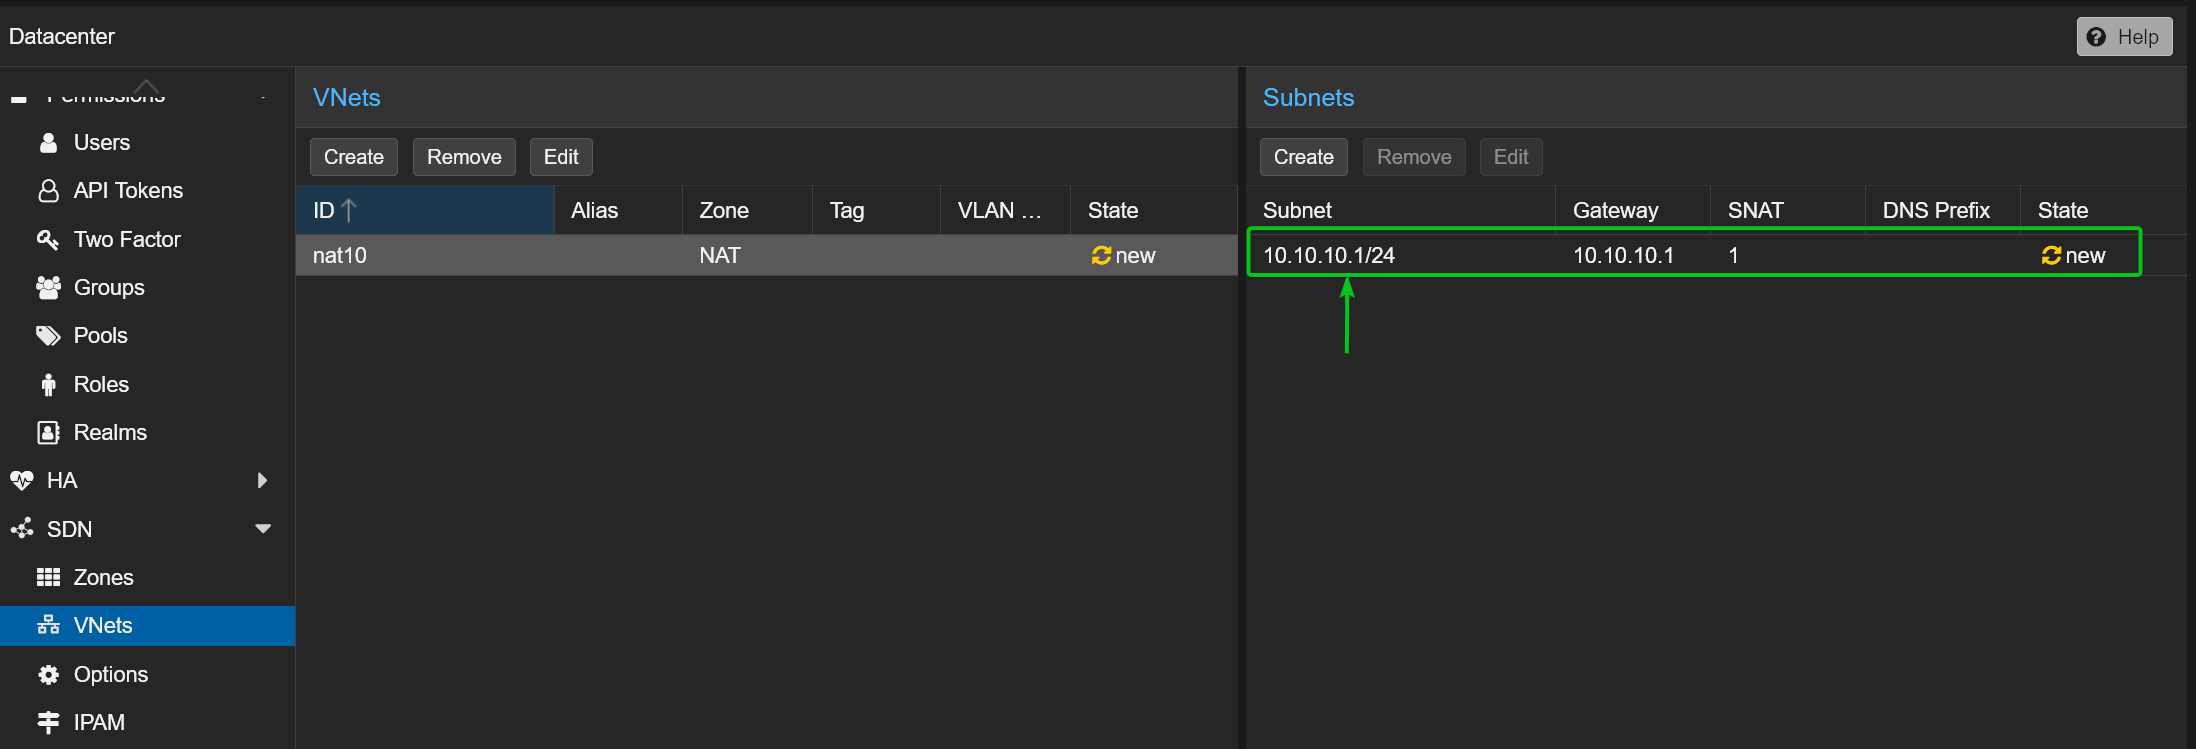
A new subnet should be created for the nat10 VNet.
Applying SDN Changes to Proxmox VE 8
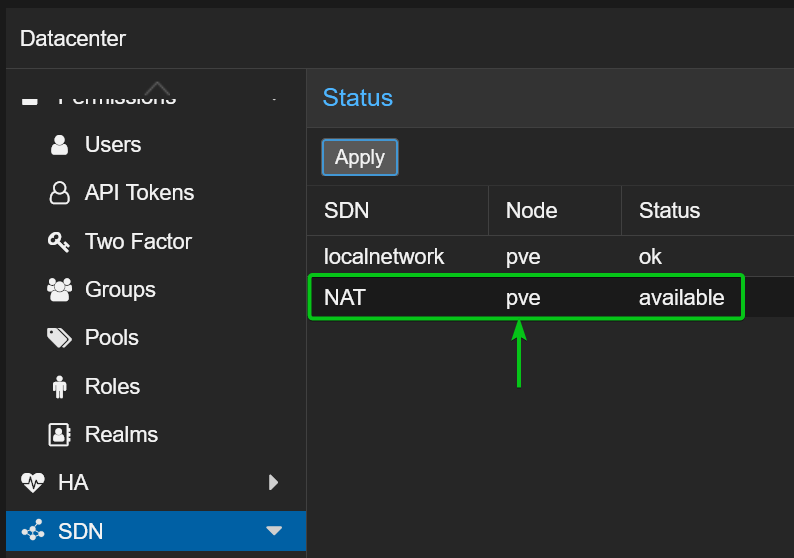
To apply the changes, navigate to Datacenter > SDN from the Proxmox VE web management UI and click on Apply.
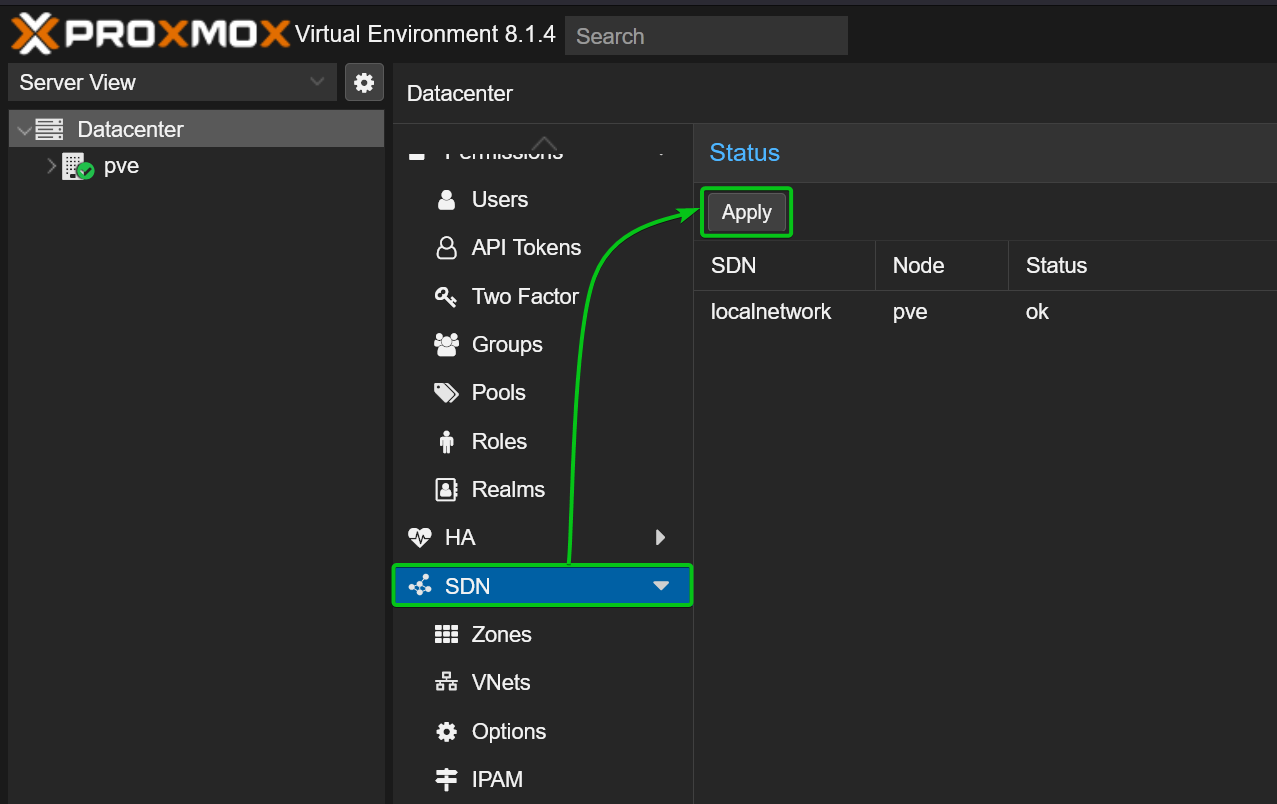
The private NAT network should be ready to use on your new and existing Proxmox VE virtual machines and LXC containers.
Using Private NAT Network on Proxmox VE Virtual Machines (VMs) and LXC Containers
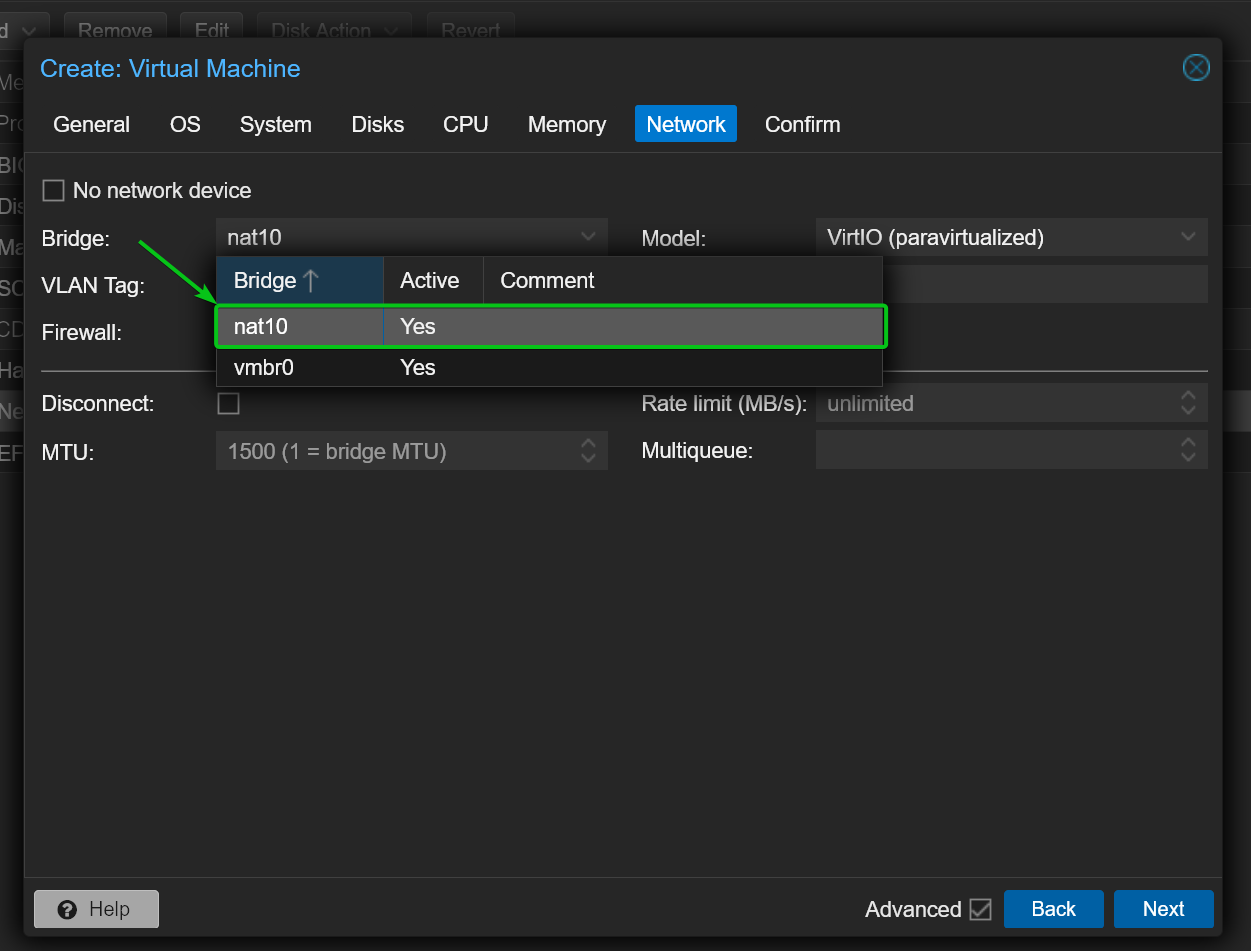
Once the private NAT network nat10 is created, you should be able to select it from the Network section of the new Proxmox VE virtual machine (VM) or LXC container creation wizard.
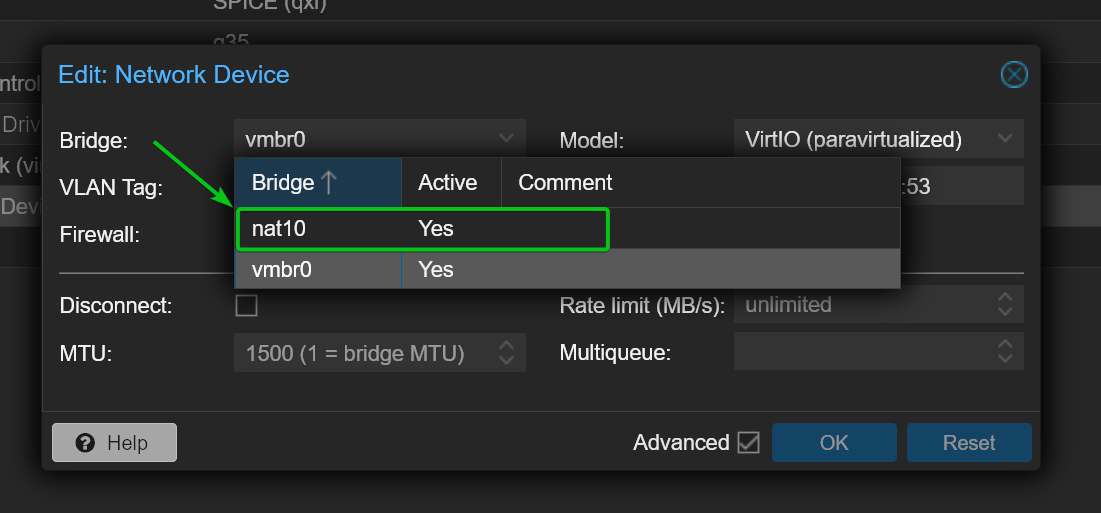
You can also edit the Network hardware of an existing Proxmox VE virtual machine or LXC container and select the private NAT network nat10.
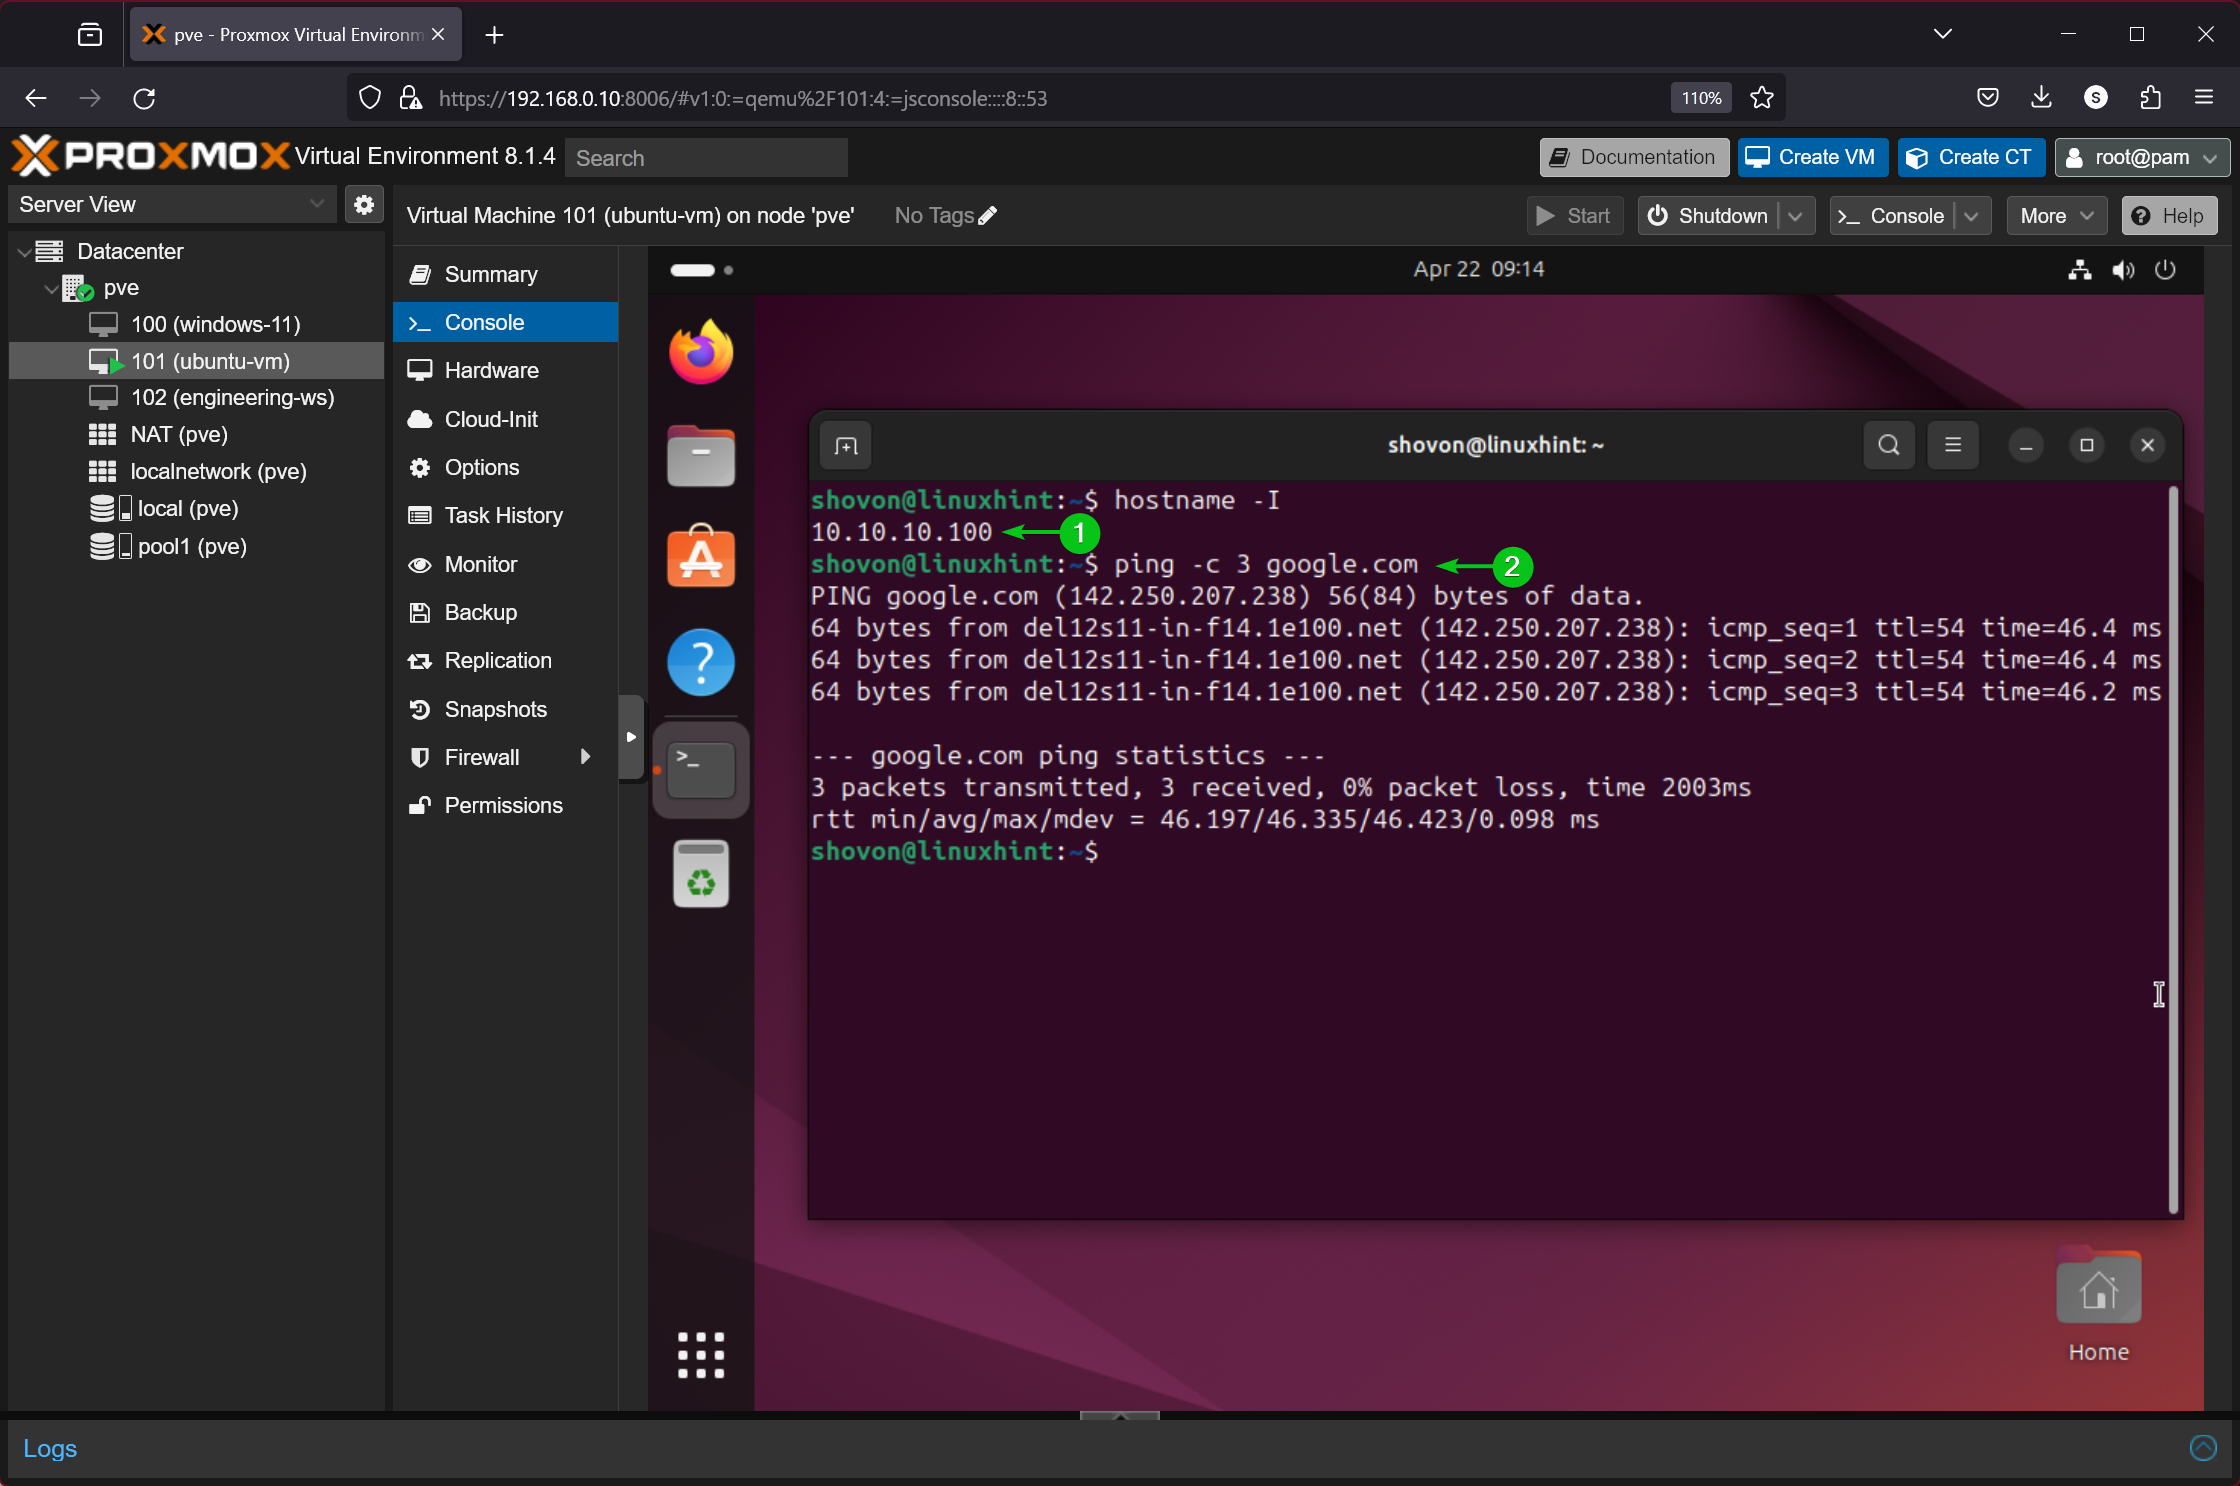
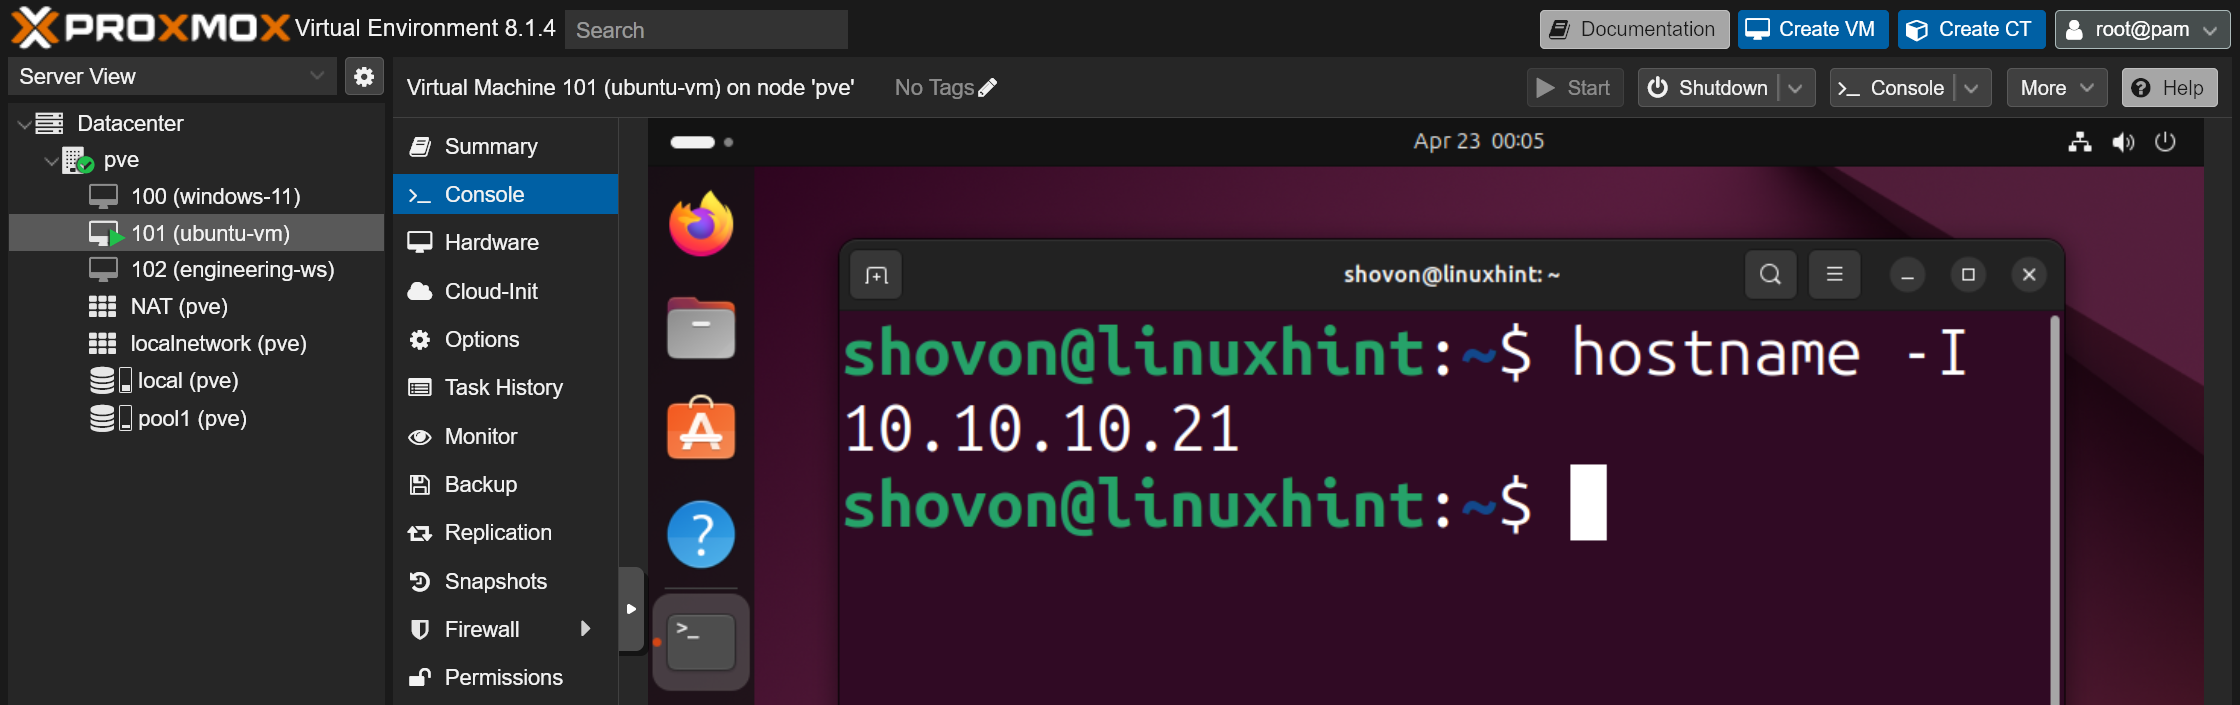
Once you’ve configured the private NAT network nat10 on a Proxmox VE virtual machine or LXC container, you should see an IP address assigned to the VM/container via DHCP from the configured network subnet (10.10.10.1/24 in this case). Internet connectivity also works. So, the private NAT network nat10 is working as expected.
$ ping -c 3 google.com
Monitoring IP Addresses Assigned to Proxmox VE VMs/Containers using SDN IPAM
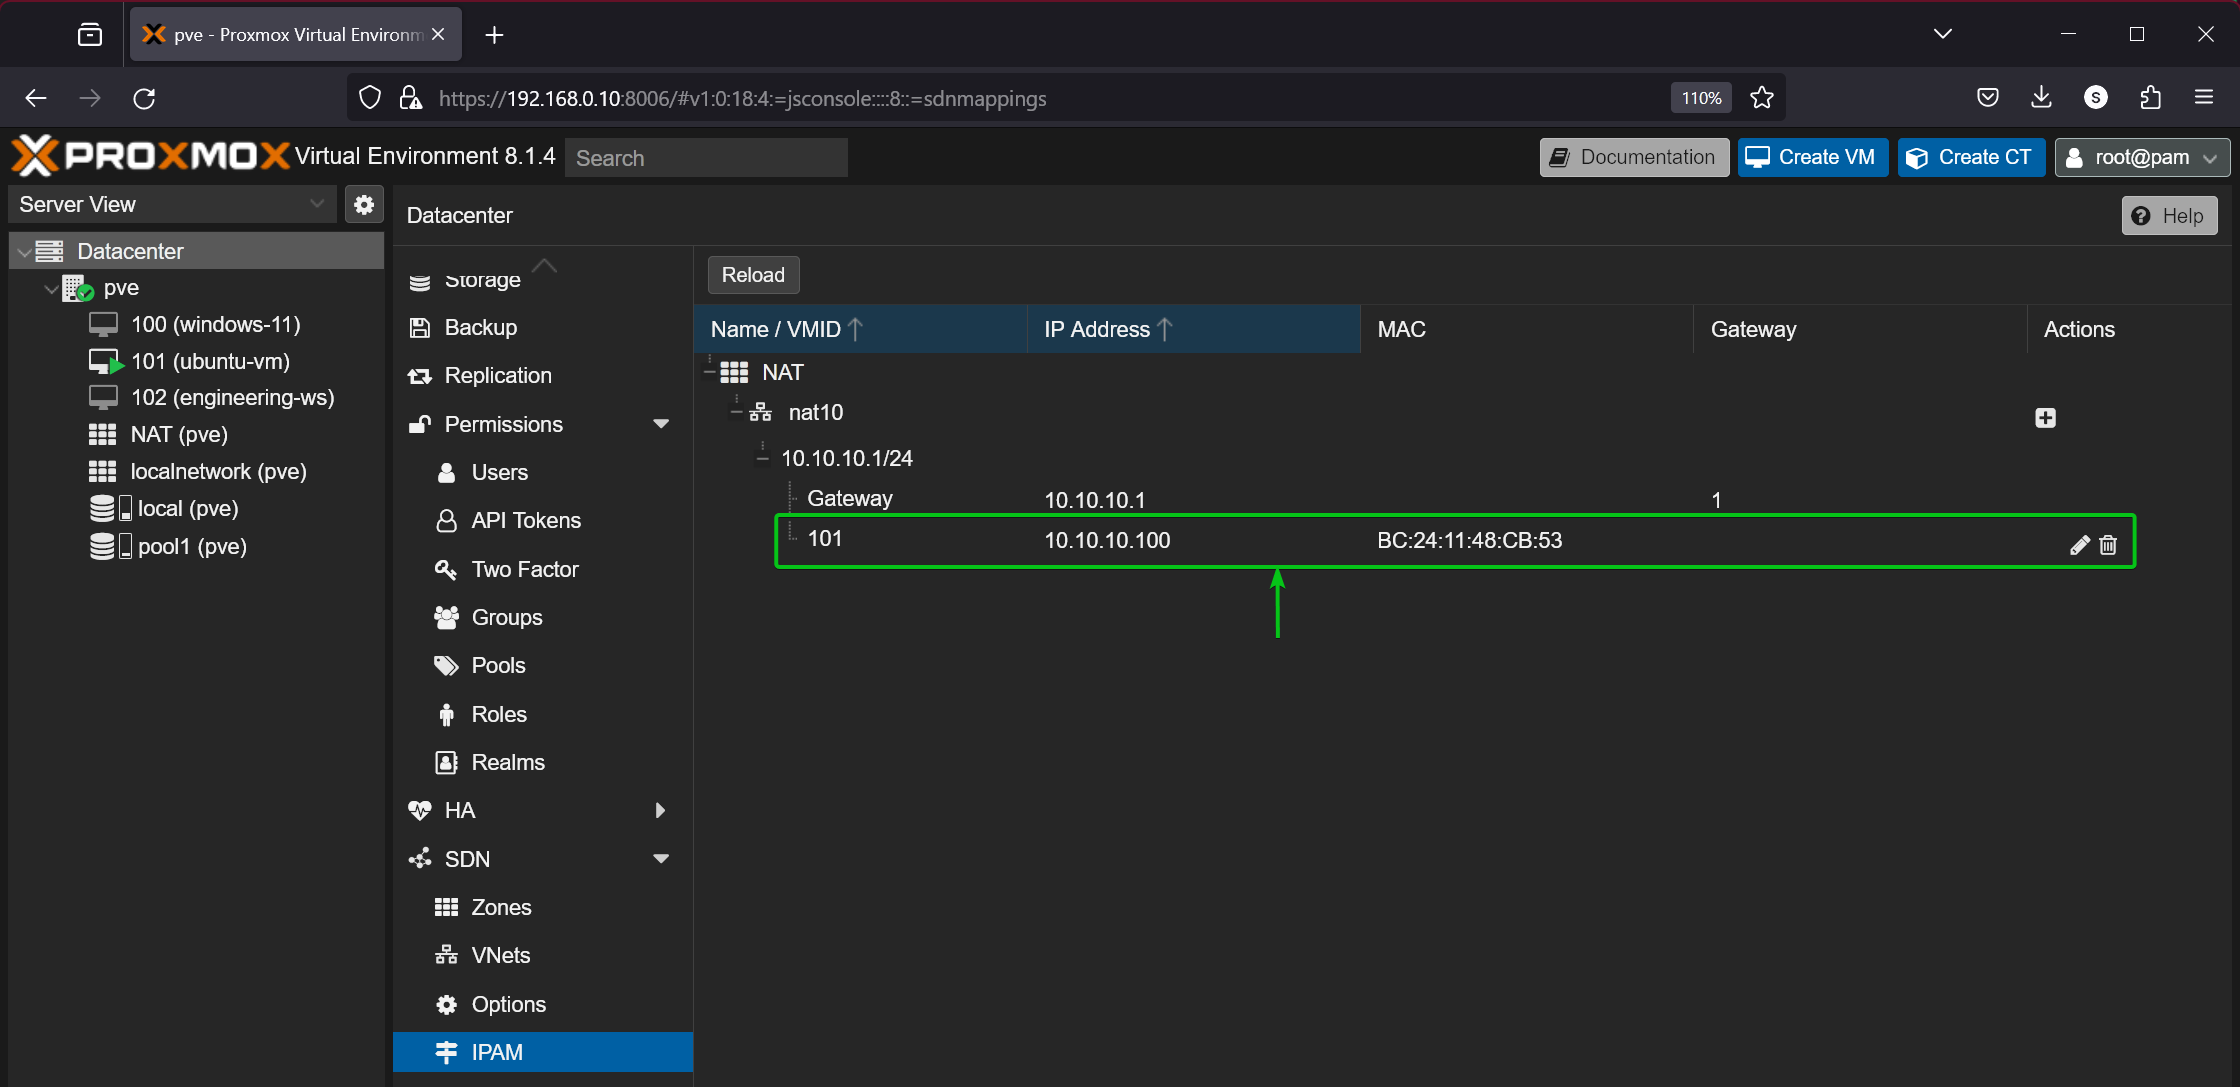
You can monitor the IP addresses assigned to Proxmox VE virtual machines and containers using the private NAT network nat10 from the Datacenter > SDN > IPAM section of your Proxmox VE web management UI.
In this example, Proxmox VE assigned the IP address 10.10.10.100 to the network interface with the MAC address BC:24:11:48:c9:53 of the virtual machine 101 (ubuntu-vm).
Setting Fixed IP Address to Proxmox VE Virtual Machines and Containers using SDN IPAM
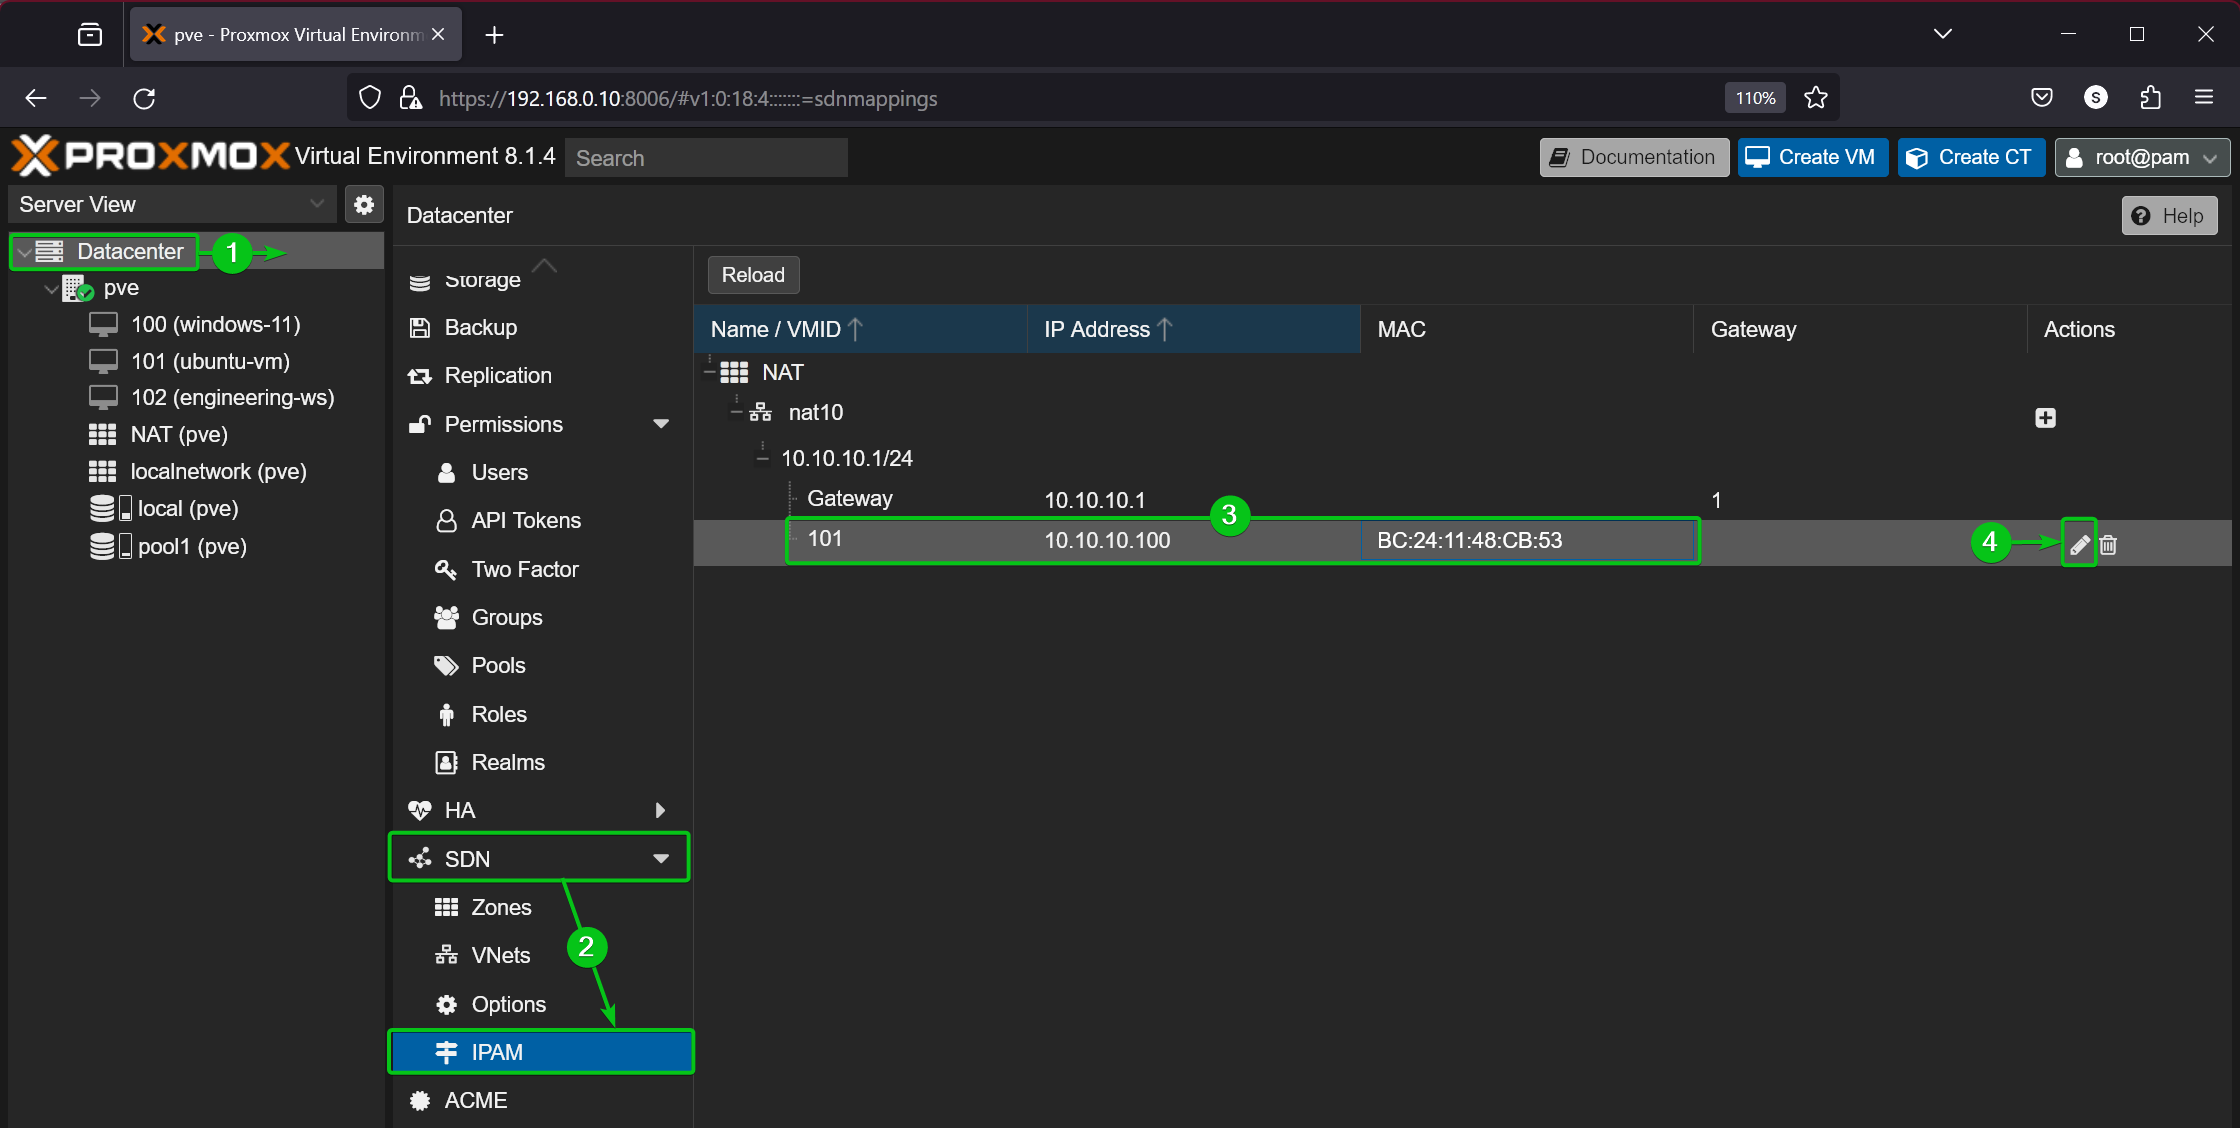
To set a fixed IP address to a Proxmox VE virtual machine or LXC container that uses the private NAT network, navigate to the Datacenter > SDN > IPAM[1][2] section of the Proxmox VE management UI, select your virtual machine/container from the list[3], and click on the edit icon[4].
Type in your desired IP address for the virtual machine or container[1] and click on OK[2].
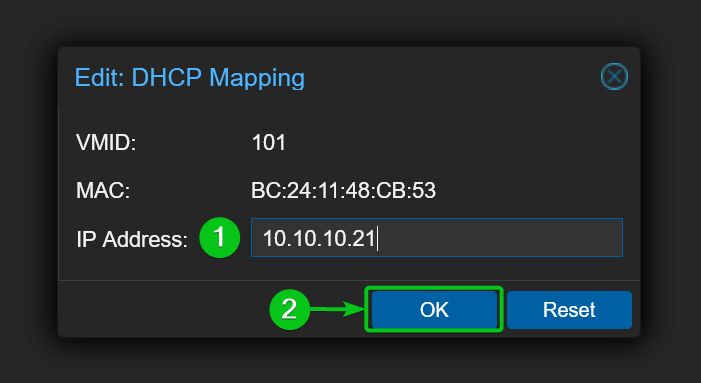
Your desired IP address should be set for the virtual machine or container using the Proxmox VE SDN network.

The next time you start the virtual machine or container, you will see that the configured IP address is set for the network interface of the virtual machine or container.
You can also bind an IP address to a MAC address from the Proxmox VE SDN IPAM settings. Once an IP address is bound to a MAC address, you can use the MAC address in any of your desired virtual machine or container to configure the virtual machine or container with a fixed IP address.
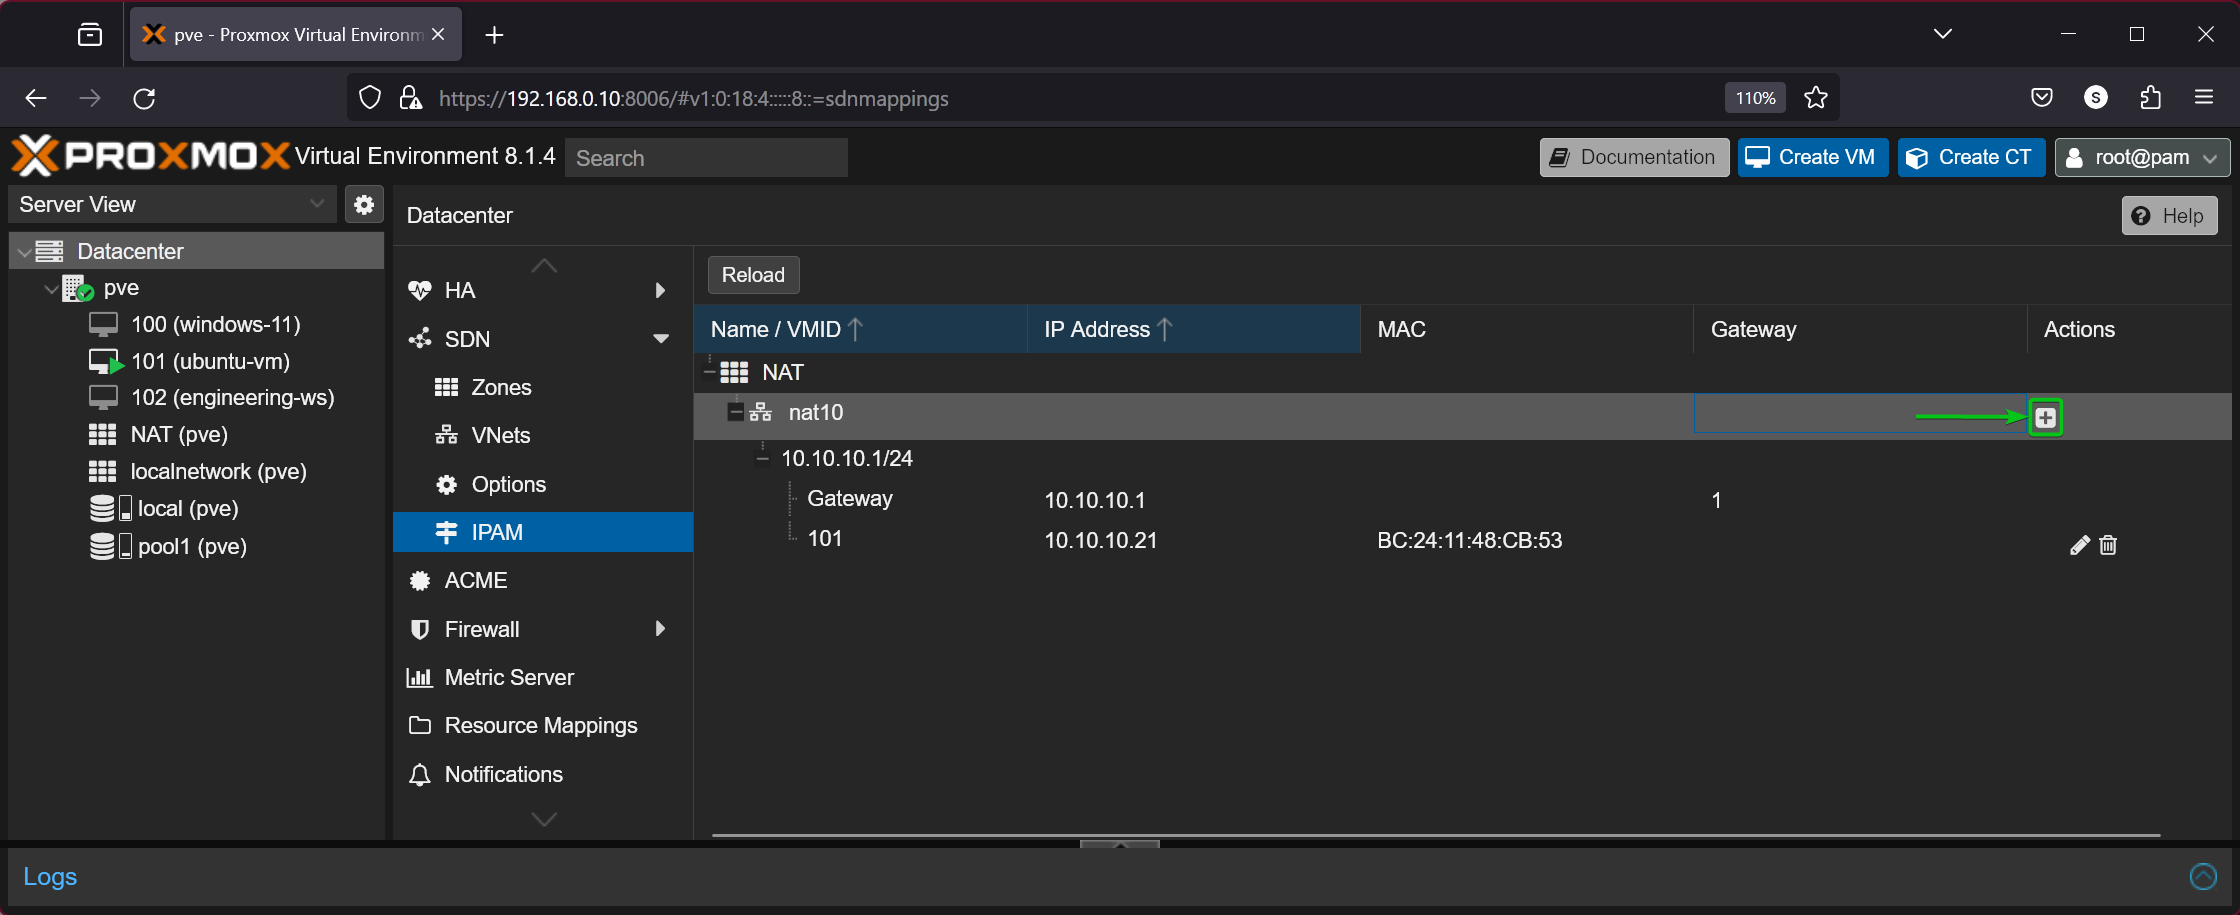
To bind an IP address to a MAC address, just select the SDN VNet (i.e. nat10) from the Datacenter > SDN > IPAM section and click on +.
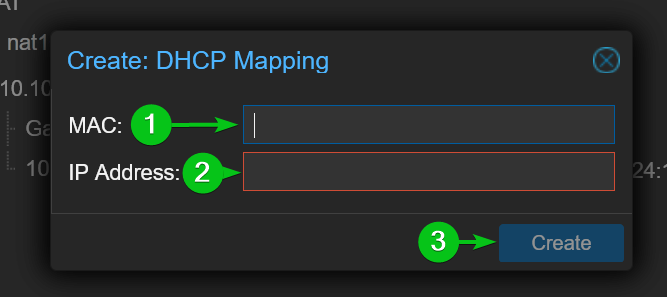
Type in your desired MAC address[1] and IP address[2] and click on Create[3].
The IP address should be bound for the MAC address for your selected Proxmox VE SDN VNet.
Conclusion
In this article, I have shown you how to install the required packages on Proxmox VE to enable Software-Defined Networking (SDN) on Proxmox VE. I have also shown you how to create a private NAT network on Proxmox VE using SDN. In the process, I have shown you how to create a SDN zone, create a VNet on the SDN zone, and create a Subnet on the VNet of your Proxmox VE server. I have shown you how to configure a Proxmox VE virtual machine and container to use the newly created private NAT network as well. Finally, I have shown you how to monitor Proxmox VE SDN IP assignments, set fixed IP addresses for VMs and containers. and configure IP address to MAC address binding from the Proxmox VE SDN IPAM settings.
References
Source: linuxhint.com