How to Rollout and Rollback Deployment in Kubernetes
Kubernetes is an open-source free container orchestration system that is used to develop, deploy, and manage containerized applications and software in the cluster. It offers different resources to deploy these containerized applications such as Kubernetes Deployment and Pods. Through Kubernetes resources, the developers can perform operation tasks easily such as rolling out and rolling back the updates, monitoring, and scaling of applications.
In this blog, we will explain:
- What is Kubernetes Deployment?
- What is Rollout and Rollback in Kubernetes Deployment?
- Prerequisite: Install Minikube, Kubectl, and Docker Desktop
- How to Create Deployment in Kubernetes?
- How to Rollout Updates in Kubernetes Deployment?
- How to Rollback Updates in Kubernetes Deployment?
- Conclusion
What is Kubernetes Deployment?
Deployment is a Kubernetes resource that is responsible for giving declarative instruction to its major objects such as ReplicaSet (Controller) and Pods (run containerized applications). The Kubernetes Deployment describes the application replicas, image, port, and number of pods used to deploy it.
Sometimes developers are required to update the application to introduce new features or to resolve bugs. With the help of Kubernetes Deployment, users can easily rollout and rollback the application updates.
What is Rollout and Rollback in Kubernetes Deployment?
In Kubernetes, usually, developers are required to create or update the Kubernetes Deployment to update the containerized application running in Kubernetes Pods. When the developer creates the Deployment for the first time, it will create a rollout history with a revision ID. Next time, when the developer makes changes in the application and implements them on Deployment, it will again create a rollout history with a new revision number. This process is called roll out in Kubernetes.
Sometimes new updates may not work properly and show downtime in the application. To handle such situations, the developer usually needs to revert the changes or deploy the previous version of the application to tackle application downtime and manage application traffic. In Kubernetes, the rollback is a technique through which developers can jump back to the previous version or any specific version.
Prerequisite: Install Minikube, Kubectl, and Docker Desktop
To get started with the Kubernetes cluster, users are required to have the following tools:
- Minikube: Kubernetes Cluster implementation system
- Kubectl: Kubernetes command line tool used to manage and operate Kubernetes clusters.
- Docker Desktop: Containerization tool used to containerize the application. It also provides support to the minikube Kubernetes cluster.
Note: To install and get started with the above-mentioned tools, go through our associated “Get Started With Kubernetes and Kubectl” and “Install Docker Desktop on Windows” articles.
How to Create Deployment in Kubernetes?
To create Kubernetes Deployment, go through the below instructions.
Step 1: Create deployment.yml File
First, create a file named “deployment.yml” file and paste the given instructions into the file:
kind: Deployment
metadata:
name: html-deployment
labels:
app: nginx
spec:
replicas: 1
selector:
matchLabels:
app: nginx
template:
metadata:
labels:
app: nginx
spec:
containers:
- name: html
image: rafia098/html-img:1.0
ports:
- containerPort: 80
Following is the description of the above snippet:
- The “kind” key specifies the Kubernetes resource type. We have set its value as “Deployment” to create a Deployment.
- The “name” key sets the name of the Deployment.
- The “labels” key is utilized to label the Deployment object.
- The “replicas” key is used to specify the number of replicas in Deployment.
- Under the “containers” key, the “name” is used to set the container name, the “image” key specifies the image name (it provides the instruction to containerize the application), and the “ports” key is utilized to set the port where the container can be exposed.
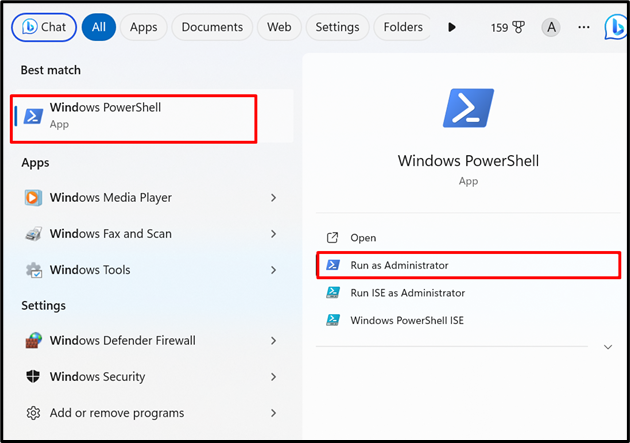
Step 2: Launch PowerShell
Launch the Windows PowerShell with administrative privileges via the Start menu. The administrative rights are required to run the minikube kubernetes cluster on Windows built-in HyperV:
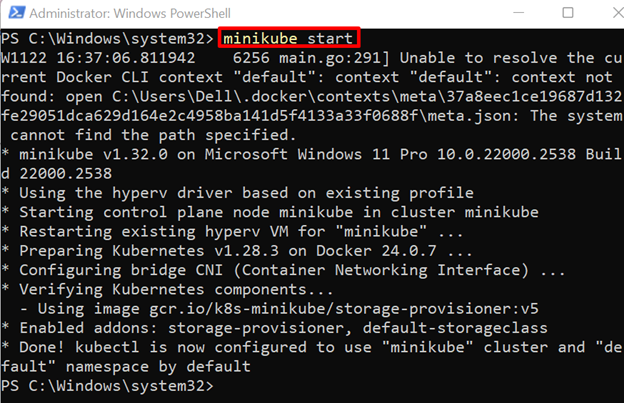
Step 3: Start Kubernetes Cluster
Start the Kubernetes cluster by utilizing the “minikube start” command:
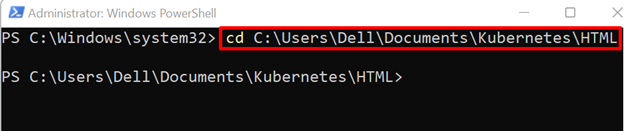
Step 4: Create Deployment
Navigate to the directory where the “deployment.yml” file exists through the “cd” command:
Create the Kubernetes cluster by reading the build context from the Yaml file. For this purpose, utilize the “kubectl create -f <filename.yml>” command:

Step 5: Verification
For verification, access the Kubernetes Deployment and its objects. For this purpose, use the “kubectl get deployment” command to access Deployment:

To access the Kubernetes ReplicaSet, use the “kubectl get rs” command:

To get the pods running in Kubernetes Deployment, use the “kubectl get pod” command:
Note the name of the pod to access the application outside the cluster on the local system:

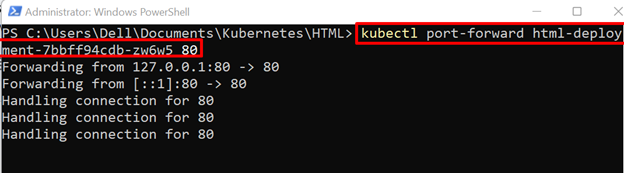
Step 6: Access Application
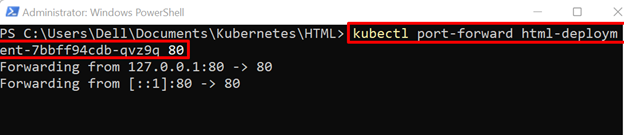
To access the application, users are required to forward the container port. To do so, use the “kubectl port-forward <pod-name> <container port>” command:
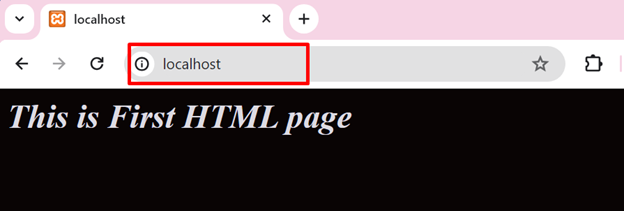
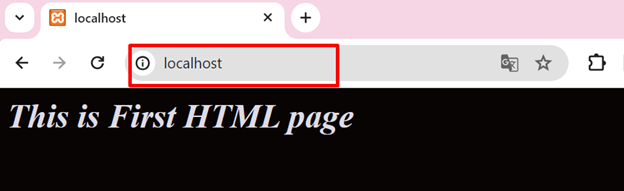
Navigate to the “http://localhost:80” on the browser and access the live application:
How to Rollout Updates in Kubernetes Deployment?
To roll out the updates in Kubernetes Deployment, check out the listed instructions.
Step 1: View Rollout History
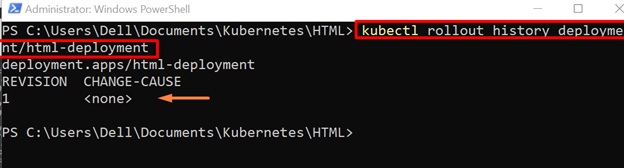
First, check the rollout history by using the “kubectl rollout history deployment/<deployment-name>” command:
Here, the revision is generated when the Kubernetes Deployment is created for the first time:
Step 2: Rollout Updates in Deployment
Now, roll out the changes, and update the container image. For this purpose, use the “kubectl set image deployment <deployment-name> <container-name>=<updated-image>” command. For demonstration, we have used “rafia098/html-img:2.0”:

Step 3: Verification
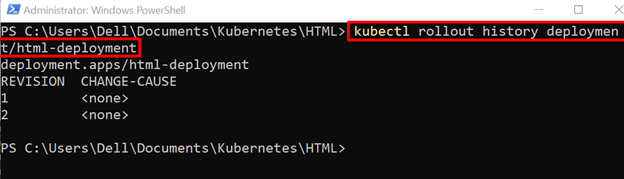
For verification, again check out the rollout history using the below command:
The “2” revision is a new rollout revision in which “html-img:2.0” is used:
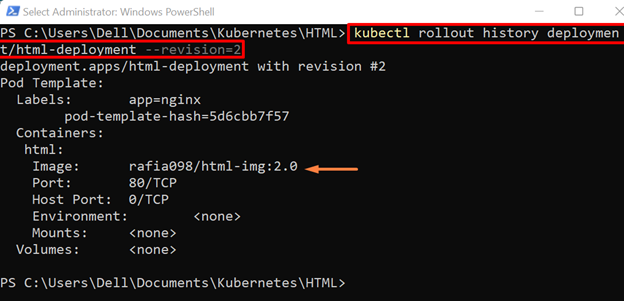
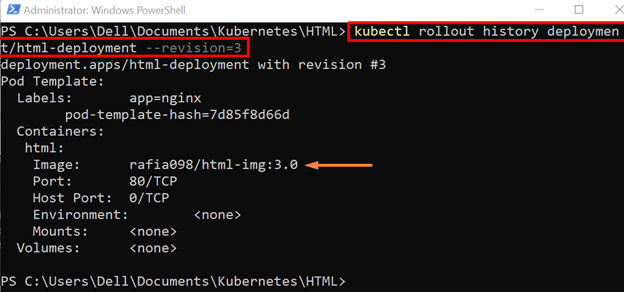
To view the detailed information about specific rollout history, utilize the “–revision=<revision-id>” option:
Step 4: Access Updated Application
To access the updated application, again access the pods:

Use the “kubectl port-forward” command to access the application outside the cluster from user system:

The below output is the updated version of Kubernetes Deployment:
Note: For a better understanding of how rollout and rollback work, the user must have at least three rollout revisions.
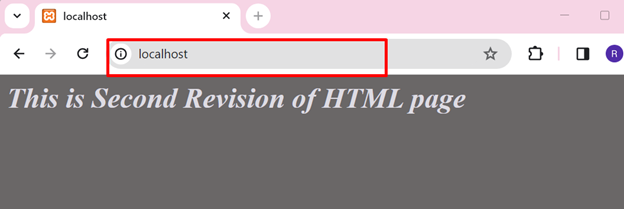
Rollout Third Update on Kubernetes Deployment
Again, set the new image to update the Kubernetes Deployment. For illustration, we have used “rafia098/html-img:3.0” image:

View Rollout History
Check the rollout history for third revision using given command:
Access Application
To access the application, first access the running pod, and note the name of the pod. Every time, when the Deployment is updated, the previous pod is terminated, and the newer pod is generated:

Forward the Pod port to the user system using the below command:

Here, the output of the new update of Kubernetes Deployment is showing an error message that will also down our application and may affect the application traffic:

To tackle such kinds of issues, users can revert back to the previous version quickly through the Kubernetes Rollback technique.
How to Rollback Updates in Kubernetes Deployment?
To roll back to the previous version or a specific version of Deployment, follow the below instructions.
Rollback to Previous Revision
To roll back to the previous revision of Kubernetes Deployment, utilize the “kubectl rollout undo deployment <deployment-name>” command:
By default, this command will roll back the Kubernetes Deployment to second last or previous revision:

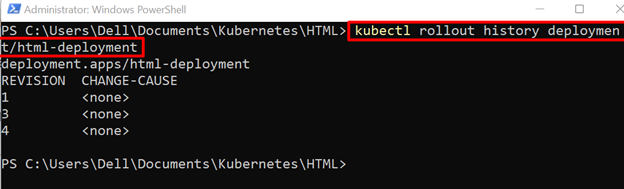
For verification, check the rollout history using below command:
Here, revision number “4” is a current revision of Kubernetes Deployment:
To view the details about last revision, utilize the “–revision=<revision-no>” option along with below command:
Here, you can see we have revert back to second revision in which we are using “rafia098/html-img:2.0”:

Rollback to Specific Revision
In order to roll back to a specific revision, use the “kubectl rollout undo deployment <deployment-name> –to-revision=<revision-no>” command:
For demonstration, we have moved back to the first version of Deployment:
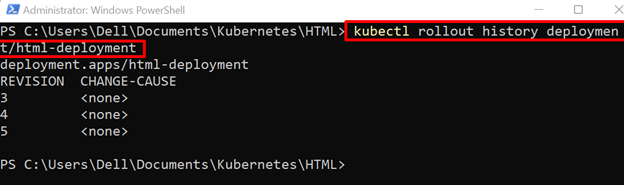
For verification, again check the Deployment rollout history using given command:
Currently, we are following revision “5”:

View the detailed information about the current rollout revision using the below command:
Here, you can see now we are currently using the first version of Deployment:

For verification, again access the pods and note the pod name:
Forward the Pod port to user system:
Access the application from the browser. Here you can see we are again using the first version of Kubernetes Deployment:
That is all about rollout and rollback Deployments in Kubernetes.
Conclusion
The rollout is a history of Deployment, it will generate the revisions whenever Deployment is created or updated. To rollout updates in Kubernetes deployment, use the “kubectl set image deployment <deployment-name> <container-name>=<updated-image>” command. To view the rollout history, use the “kubectl rollout history deployment/<deployment-name>” command. To roll back to the previous version or to a specific version of Deployment, utilize the “kubectl rollout undo deployment <deployment-name>” command. This post has demonstrated how to roll out and roll back Deployments in Kubernetes.
Source: linuxhint.com