How to Create Ingress in Kubernetes
This blog will demonstrate:
- What is Ingress in Kubernetes?
- Prerequisite: Deploy Ingress Controller in Kubernetes
- How to Create Kubernetes Ingress?
- Conclusion
What is Ingress in Kubernetes?
Ingress is a Kubernetes API object that is utilized to expose the http and https routes from outside the Kubernetes cluster. It is also used for the management of path-based and host-based routing. Traffic management rules are defined in the Ingress resource (yaml file). The Ingress can also be configured to provide services to external URLs, load balance traffic, and define SSL termination. It is basically responsible for defining how outside users or entities will communicate with an application that is running within a Kubernetes network or cluster.
Prerequisite: Deploy Ingress Controller in Kubernetes
Kubernetes provides different controllers for the management of Kubernetes resources and the ingress controller is one of them. The Ingress controller is considered as a brain of ingress that acts as a bridge between an external entity and a kubernetes service. Basically, when the request comes from an external source, it first hits the controller. Then, the controller reads the instructions from the ingress resource on how to transfer the traffic and transfers the traffic accordingly.
To start working with the ingress API object, users are required to deploy the required ingress controller inside the Kubernetes cluster. To deploy the Ingress controller in the Kubernetes cluster, go through our associated “Deploy Ingress Controller” article.
How to Create Kubernetes Ingress?
To create a Kubernetes ingress to manage the application traffic, go through the below instructions.
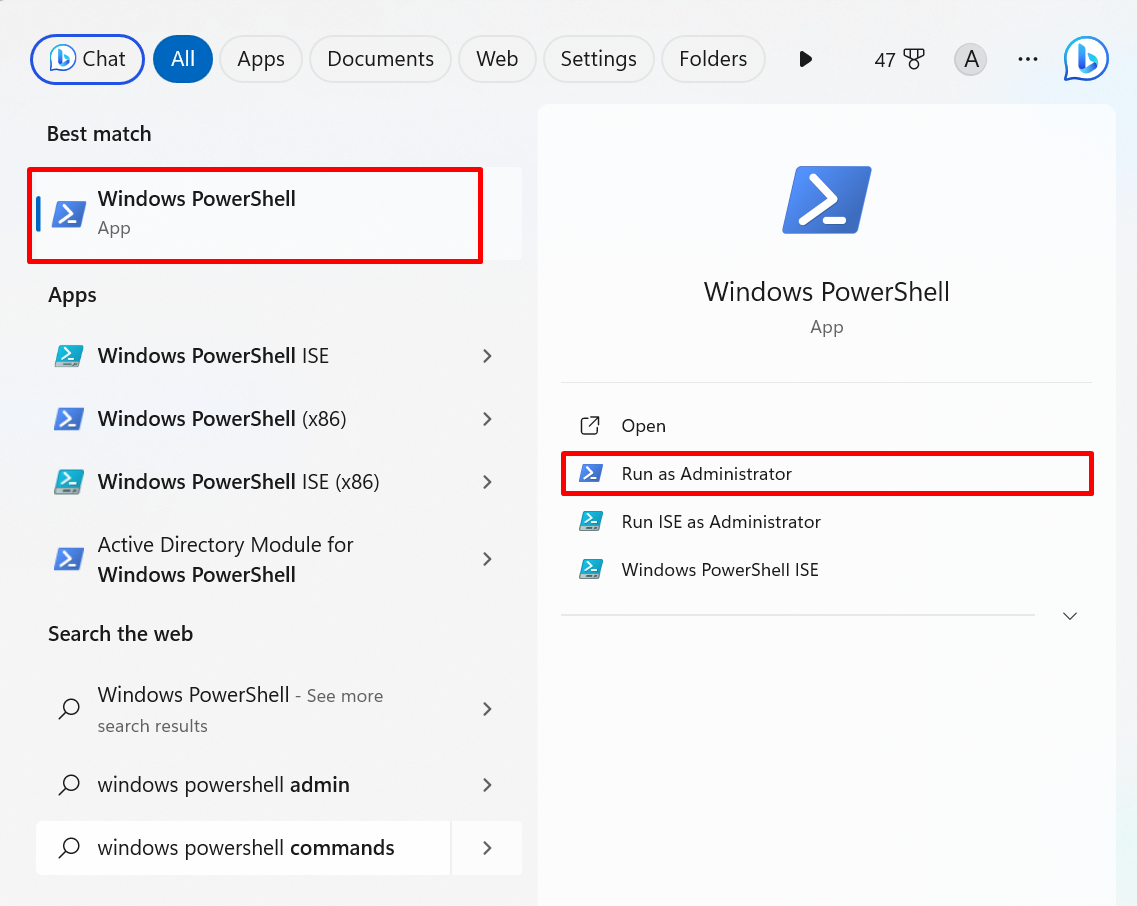
Step 1: Launch PowerShell
Launch PowerShell with administrator rights via the Start menu:
Step 2: Start Kubernetes Cluster
Start the minikube Kubernetes cluster:

At that point, the user may get an error. To resolve the error, completely delete the cluster using the “minikube delete” command and start it again with the help of the above-given command.
For verification, access the Kubernetes nodes:
minikube can run only one node cluster. The below output indicates the minikube node is executed and it is the control plane node:

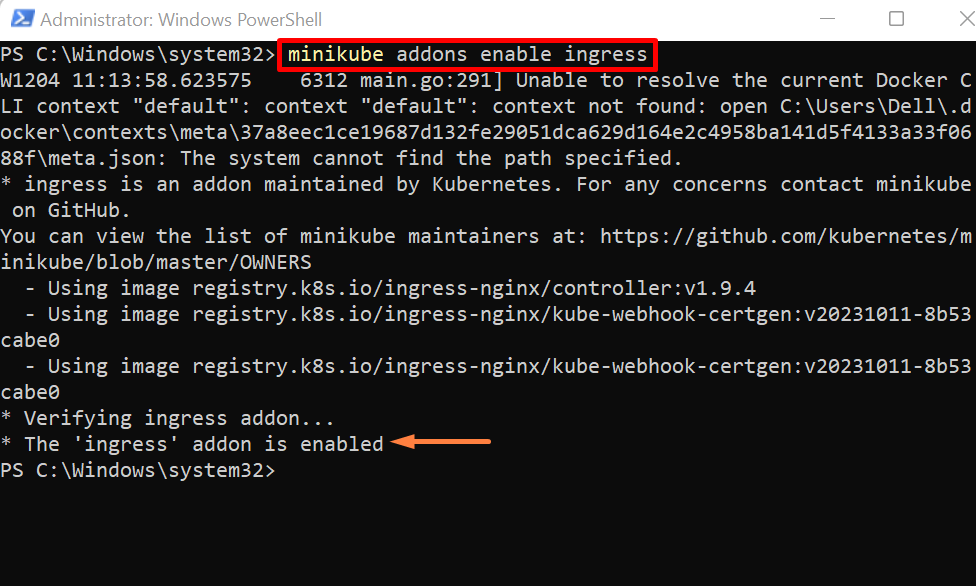
Step 3: Enable Kubernetes Controller
To enable the minikube built-in ingress controller, utilize the given command:
Step 4: Access Kubernetes Namespace
For confirmation, check the Kubernetes namespace using the “kubectl get namespace” command:
The below result shows that the “ingress-nginx” ingress controller is active:

Step 5: Create First Deployment
Let’s create a first deployment to run the first version or page of our application. For this purpose, use “kubectl create deployment <deployment-name> –image=<application-image>” command:

Step 6: Create Service For First Deployment
Service in Kubernetes exposes the application in pod and also outside the cluster. For the first deployment “app1”, run the service. Here, “–type” specifies the service type. We have set it as “Nodeport” to access the application on Nodeport and outside the cluster. The “–port” option is utilized to specify the exposing port for the application:

Step 7: Create Second Deployment
Similarly, create a second deployment to deploy a second page or version of the application:

Step 8: Create Service For Second Deployment
Now, run a service for the second deployment “app2”:

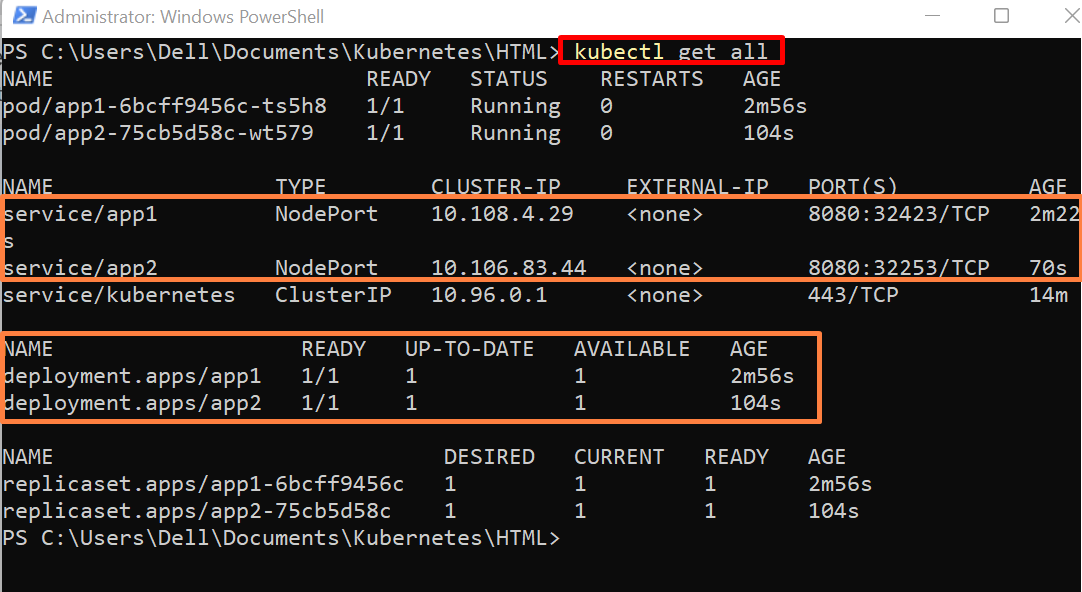
For confirmation, access the Kubernetes resources such as Kubernetes pods, deployment, and services. For this purpose, utilize the “kubectl get all” command:
Here, you can see two services and two deployments are created. These deployments created two pods as well as ReplicaSet to manage these pods:
Step 9: Create “Ingress Resource” File
The ingress resource file control and define the traffic routing rules. To create the Ingress resource file, first create a file named “ingress.yml” and add the following instructions to the file:
kind: Ingress
metadata:
name: demo-ingress
annotations:
nginx.ingress.kubernetes.io/rewrite-target: /$1
spec:
rules:
- host: hello-world.info
http:
paths:
- path: /
pathType: Prefix
backend:
service:
name: app1
port:
number: 8080
- path: /v2
pathType: Prefix
backend:
service:
name: app2
port:
number: 8080
In the above code:
- The “kind” key specifies the Kubernetes resource. We are configuring Ingress, therefore we have set its value as “Ingress”.
- The “metadata” key specifies the metadata about Ingress. Here, we have set the ingress name using the “name” key.
- Under the “rules” key, the user needs to specify the traffic routing rules.
- The “hosts” key sets the hosting of your application or website.
- Further, users can set the path where they want to move the traffic. For instance, we will use the “<hostname>/” path to open “app1”. In order to open the second page “app2”, the path will be “<hostname>/v2”.
- Under the “service” key, set the deployment service name and associated ports that are specified in step 6 and step 8.
Step 10: Create Kubernetes Ingress
After creating the file, apply the changes using the “kubectl apply -f <filename.yml>” command:

To check whether we have created the Ingress or not, use the “kubectl get ingress” command:

Step 11: Describe the Ingress
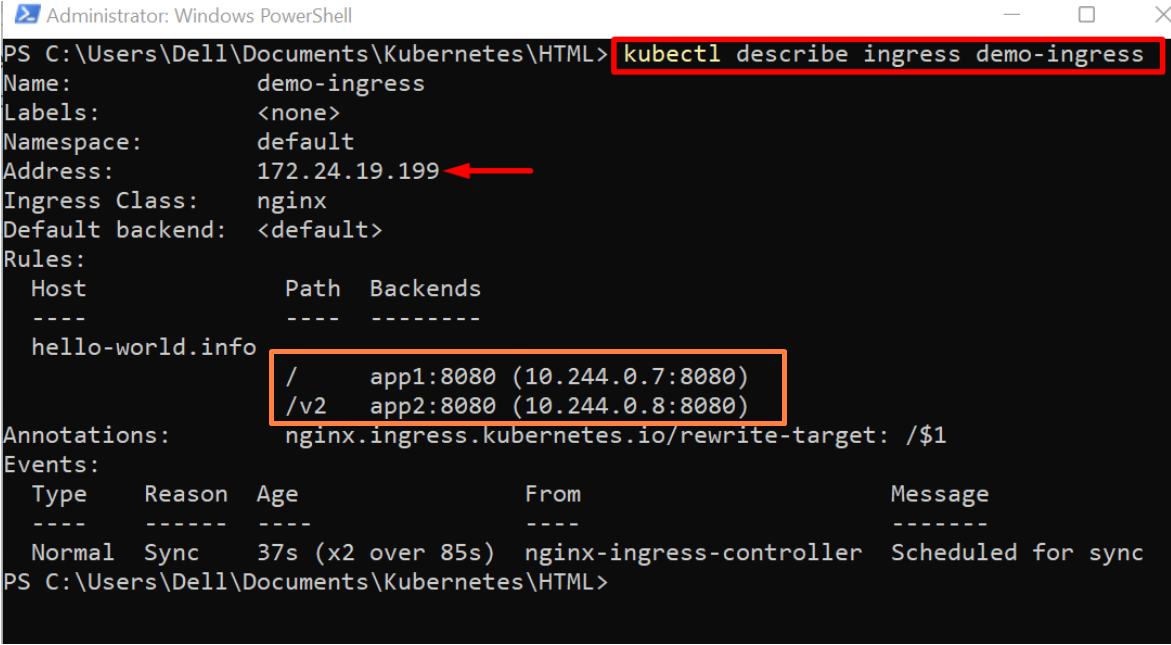
To inspect the newly created Ingress, describe the Ingress using the “kubectl describe ingress <ingress-name>” command:
From the below output, you can see the cluster IP address, under the “Rules” key, users can check the running applications or web pages with an IP address. These IP addresses can be used to access the application inside the cluster:
Step 12: Access the Minikube Cluster
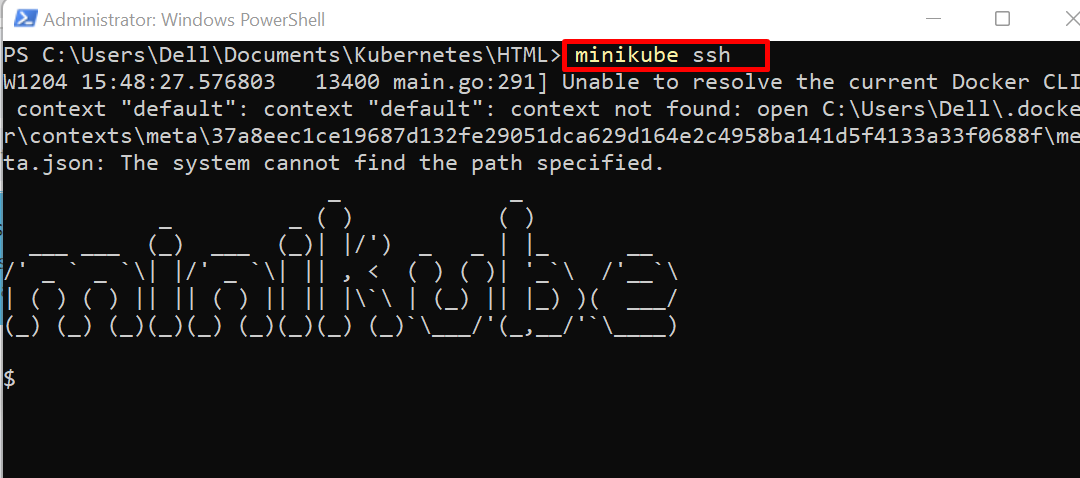
To access the application, first log in to the Kubernetes cluster using the “minikube ssh” command:
Step 13: Access Deployment Pages
Use the curl command along with the assigned “IP” address of the first webpage:
Here, we have accessed the running application inside the minikube cluster:

Similarly, to access the second web page or application, use the “curl” command along with the associated IP address:

Error: Accessing Pages from Browser
However, we have set out the application service as “Nodeport” which means we can access our application outside the cluster on a specified host. While accessing the application, the user will face an error as shown below:
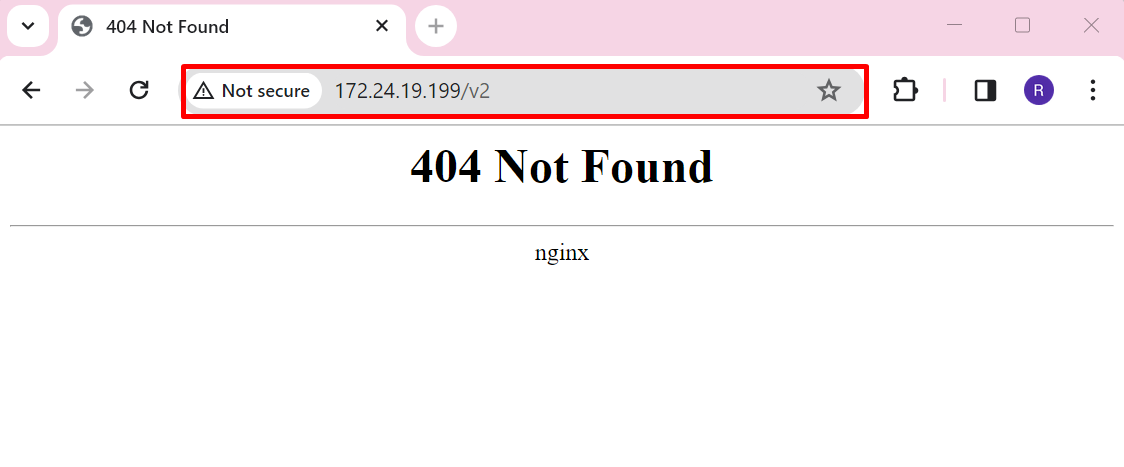
To fix the specified error, do the below-provided modifications.
Step 1: Find Cluster IP Address
First, check the minikube cluster IP address using the below command:
Note the IP address of the cluster in which your application is deployed:

Step 2: Modify “etc/hosts” File
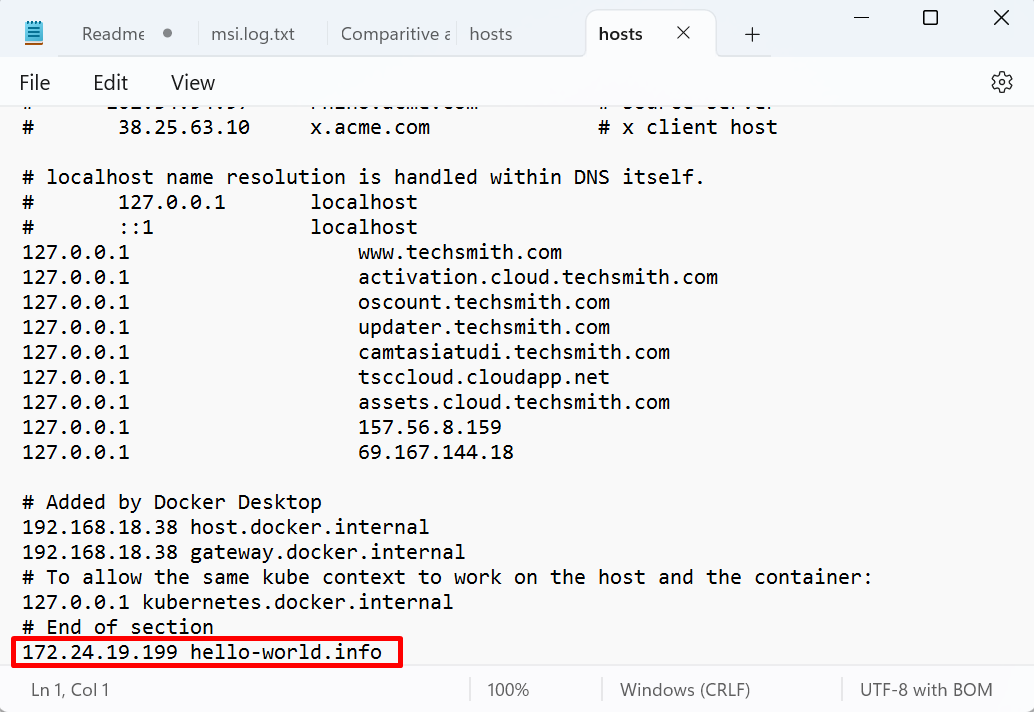
Next, the user needs to make changes in the “etc/hosts” system file. For this purpose, navigate to the “C:\Windows\System32\drivers\etc” directory, and open the “hosts” file in any text editor. After that, add the “<cluster IP Address> <hostname/website-url>” into the file where your application will be accessible. Save the changes using the “CTRL+S” key:
Step 3: Access Hosting Application From Browser
Now, launch the browser and navigate to the “app1” path which is “<hostname>/” and verify if the application is accessible or not:

Similarly, the user can navigate to a second web page or application with the specified path “<hostname>/v2”. These paths are set while creating the Ingress:

That is all about creating ingress and deploying the application on the host.
Conclusion
To create the Ingress in Kubernetes, first, deploy the required Ingress controller in the Kubernetes cluster. After that, create an Ingress resource file (Yaml) and specify the traffic routing rules in the file. After that, apply the Ingress resource file using the “kubectl apply” command. This will create the new Ingress in the Kubernetes cluster. This blog has illustrated how to create Ingress and how to deploy applications with host and path routing.
Source: linuxhint.com
