15 Examples of kubectl Command
Kubernetes hosts different resources for deploying the containerized application in the Kubernetes cluster. To control, manage, and communicate with these resources, kubectl is used. The kubectl is a Kubernetes command line tool that enables us to deploy, monitor, and manage the containerized application inside the cluster. To use and operate the Kubernetes resources, the “kubectl” tool is essential.
This article will demonstrate:
Prerequisite: Install the “kubectl” Tool
Kubernetes cluster requires some implementation system and management tools like minikube to start the Kubernetes cluster and kubectl command line tool to manage, operate, and communicate with the Kubernetes resources. To understand Kubernetes and to install the kubectl CLI tool on Windows, follow our associated “Get started with Kubernetes and Kubectl” article.
15 Examples of “kubectl” Command
kubectl tool provides several commands to create, manage, edit, and run the Kubernetes resources. To understand the working of Kubernetes and kubectl, follow the below given examples.
Example 1: Config Kubernetes Context
The Kubernetes config command is utilized to find which cluster and namespace are currently used. It can also be used to switch between different contexts when the user is using multiple Kubernetes clusters.
Start Cluster
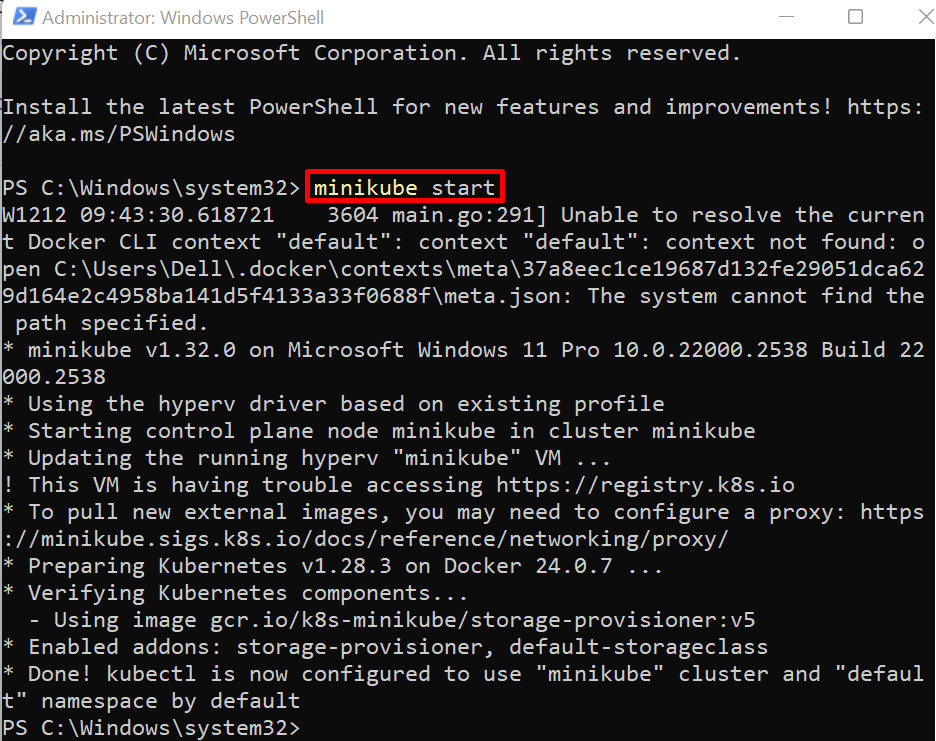
First, launch the Windows PowerShell with administrative rights. After that, run the “minikube start” command to start the Kubernetes cluster:
Configure Kubernetes Context
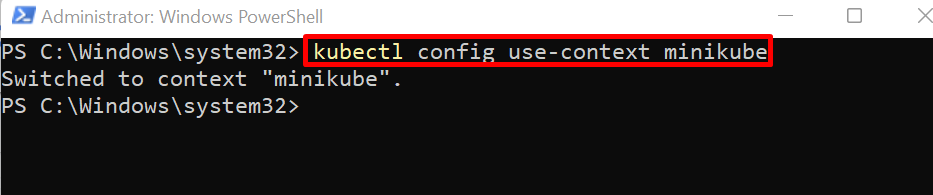
To configure or switch to a specific context if you are using multiple Kubernetes clusters, use the “kubectl config use-context <context-name>” command:
View Context
To view the currently used context, execute the given command:

Example 2: Kubernetes Namespace
Namespaces in Kubernetes are sub-clusters or modules of a single Kubernetes cluster. They can act as individual modules and can interact with other sub-cluster or modules when needed. These namespaces are used when users are required to deploy multi-module applications in the Kubernetes cluster. Basic kubectl commands used to manage Kubernetes namespace are listed below.
Create Namespace
To create a new namespace in the Kubernetes cluster, use the “kubectl create namespace <namespace-name>” command:

Get Namespace
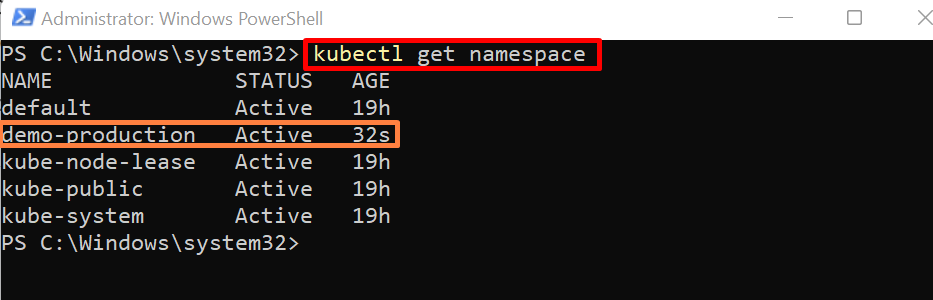
To get all the cluster namespaces, use “kubectl get” command:
Delete Namespace
To remove the namespace from Kubernetes cluster, use “kubectl delete namespace <namespace-name>” command:

Example 3: Kubernetes Pod
In Kubernetes, pods are essential and smaller units of the cluster that encapsulate and deploy the containerized applications. The kubernetes can execute and operate one or more than one container in a single pod. To deploy and use pods, go through the following kubectl commands.
Create Pod
To create and deploy the Kubernetes pod, use the “kubectl run <pod-name> –image=<container-img>” command. Here, the “–image” flag is used to define the snapshot of the containerized application, and the “–port” flag defines the port where the container will be exposed:

Get Pod
To access all Kubernetes pod or to check the pod state, use “kubectl get pod” command:

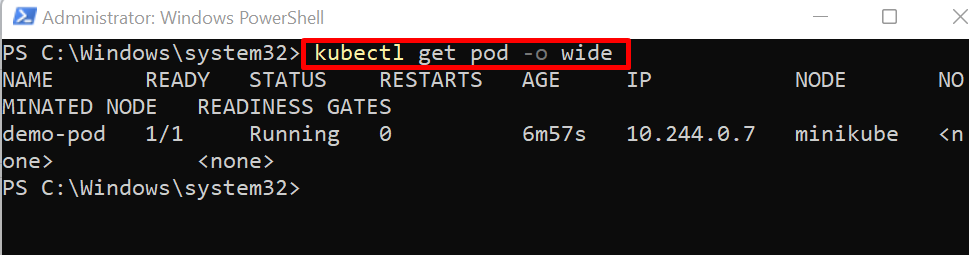
In order to view the IP Address of pod and node, use wide output format using “-o” option in “kubectl get” command:
Delete Pod
To delete any Kubernetes pod, run the “kubectl delete pod <pod-name>” command:

Example 4: Interaction With Pods
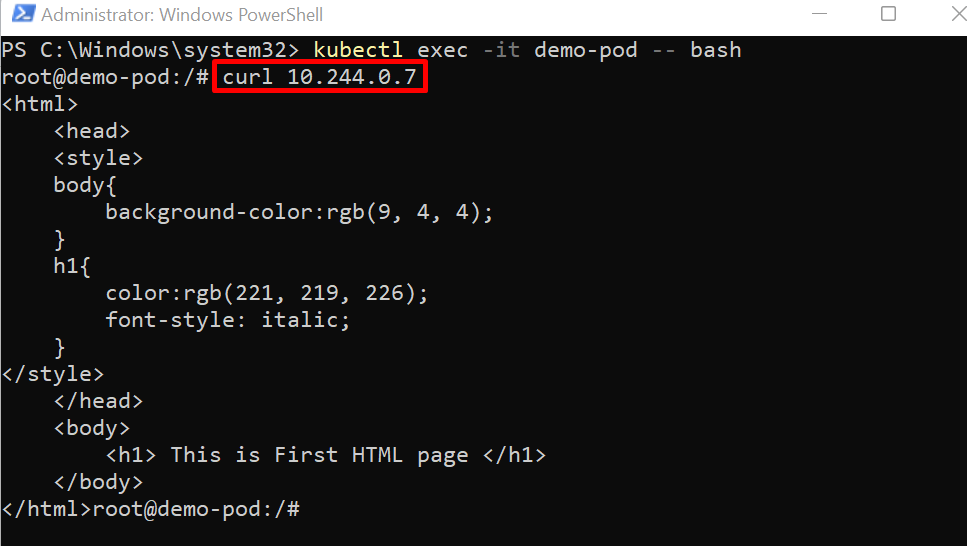
Sometimes, the user may be required to interact with the running container or may want to run any command inside the pod. To do so, the kubectl tool provides a “kubectl exec” command to access the pod bash terminal:
Here, the “-it” option is used to access the pod TTY pseudo terminal interactively:

To access the running application inside the pod, use “curl <pod-ip address>” command:
Example 5: Kubernetes Resource Port Forward
Sometimes, the user wants to access the pod application outside the cluster on the user system. To do so, they can forward a pod or service port using the “kubectl port-forward <pod-name/service-name> <port-no>” command:

Here, you can see we have effectively accessed the containerized application on system:

Example 6: Kubernetes Deployment
The deployment is one of the core resources of the Kubernetes cluster that gives instructions and updates to the pod, ReplicaSet, and containerized application. The developer can easily deploy the application in the Kubernetes pod with the help of deployment. To create and use Kubernetes deployment, go through the following kubectl commands.
Create Deployment
To create a deployment in Kubernetes, use the “kubectl create deployment <deployment-name> –image=<container-image>” command:

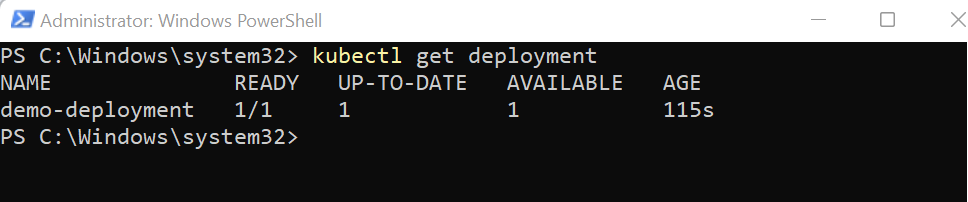
Get Deployment
To list down all deployments, use “kubectl get deployment” command:
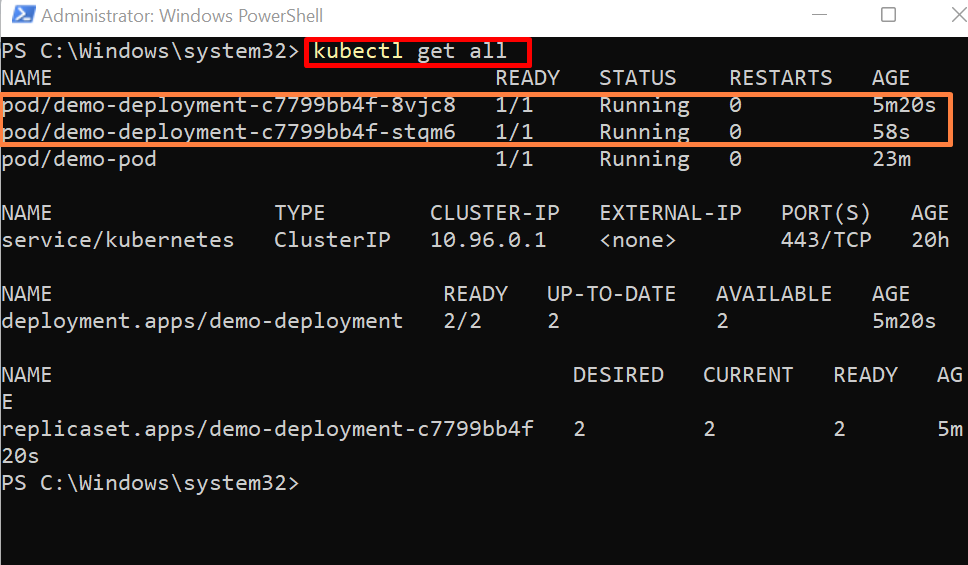
The deployment drives different Kubernetes resources such as Pod, ReplicaSet, and sometimes service. To get all deployment components or all Kubernetes resources, use the “kubectl get all” command:
The below-highlighted components are running within the newly created deployment:

Delete Deployment
To delete the Kubernetes deployment, use the below command. This will remove specified deployment along with ReplicaSet and all associated pods:

Example 7: Scale Deployment
Scaling of deployment means increasing or deleting the replicas of running pods. With the help of multiple replicas, the user can ensure the availability of the application and manage the increasing load.
To scale the deployment in Kubernetes, the user can use the “kubectl scale deployment <deployment-name> –replicas=<no of pod replicas>” command. For instance, we have scaled the deployment with 2 pod replicas:

For verification, again access all the Kubernetes resources using the “kubectl get all” command:
Here, you can see we have effectively run two replicas of pod within “demo-deployment”:
Example 8: Rollout Deployment
Whenever any change occurs in deployment or when the deployment is created for the first time, it fires or creates a rollout to manage the deployment history. To view the rollout history or to revert the deployment changes, the kubectl tool provides the following commands.
View Rollout History
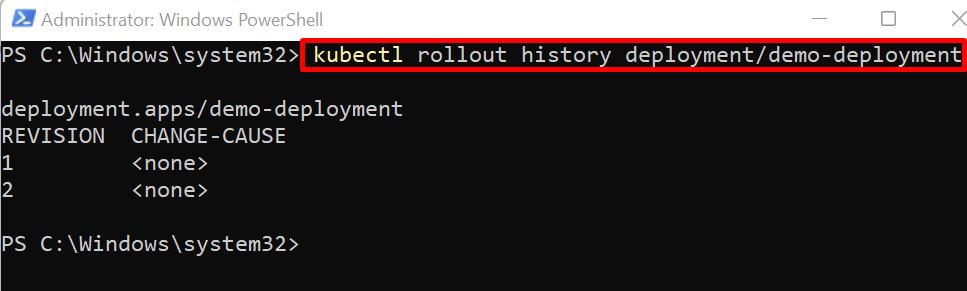
To view the rollout history of deployment, use the “kubectl rollout history deployment/<deployment-name>” command:
Currently we have two revisions of the “demo-deployment” deployment:
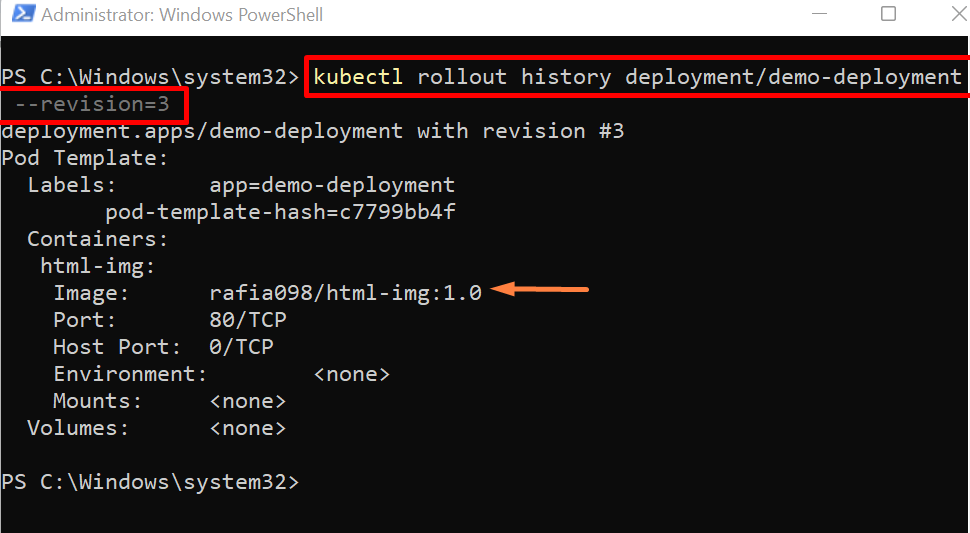
To view the specific revision of deployment, the user can use the “–revision” option along with the “kubectl rollout history” command:
Currently, this version of deployment is using the “html-img:2.0” image:

Rollback to Previous Deployment
To rollback to a previous revision, use the “kubectl rollout undo deployment/<deployment-name>” command:

This will create new rollout revision history in Kubernetes rollout:

To view the new revision history of deployment, use the given command:
Here, you can see we have successfully reverted to a previous revision and currently using the “html-img:1.0” image:
Example 9: Kubernetes Service
The Kubernetes service enables us to expose the containerized application within a cluster or outside the cluster. It can expose service on NodePort, ClusterIP, and LoadBalancer. To create and manage the Kubernetes services, use the following kubectl commands.
Create Service
To create the Kubernetes service for deployment, use the “kubectl expose deployment <name>” command. Here, the “–type” option is used to specify the expose type, and “–port” sets the exposing port for service:

The “kubectl expose” command can also be used to expose service for Replica controllers and pods.
Get Service
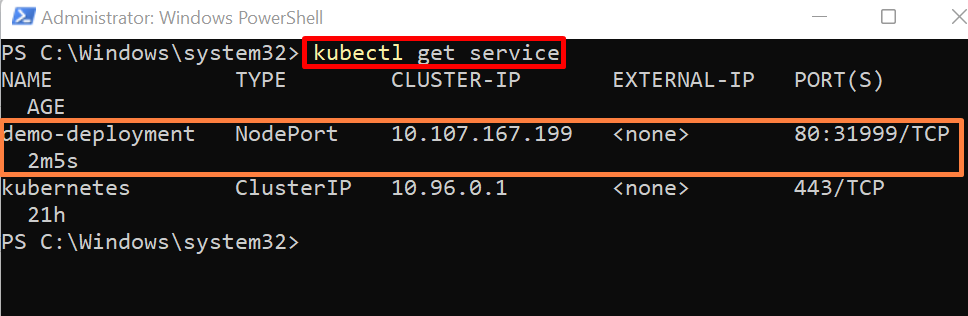
To access the Kubernetes service, use “kubectl get service” command:
Delete Service
To delete the Kubernetes service, utilize the “kubectl delete service <service-name>” command:

Example 10: Apply Manifest to Create and Update Kubernetes Resources
Applying changes on Kubernetes resources or creating resources using Manifest is the declarative approach. In which, the developer performs implementation by specifying all the instructions in Yaml or Json manifest. Then, these instructions can be applied to resources in Kubernetes using the “kubectl apply” command.
For demonstration, follow the below procedure.
Create Yaml File
First, create a file named “pod.yml” and add the below snippet into the file. The below snippet contains the instructions to create the pod and a pod service:
apiVersion: v1
metadata:
name: html
labels:
app: html-app
spec:
containers:
- name: html-cont
image: rafia098/html-img:1.0
---
kind: Service
apiVersion: v1
metadata:
name: html-service
spec:
selector:
app: html-app
ports:
- port: 80
Apply Yaml Manifest to Create a Pod and Service
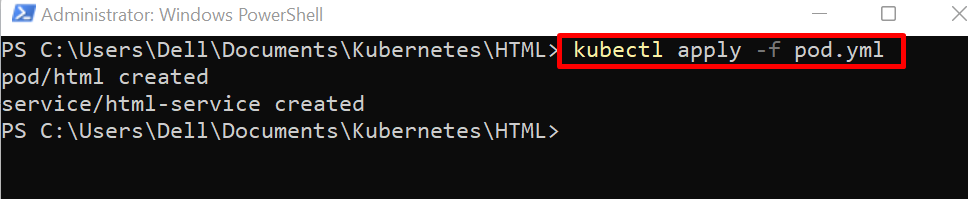
After creating the Yaml manifest, apply the instructions using the “kubectl apply -f <filename.yml>” command:
Here, the output shows that we have successfully created the “html” pod and “html-service” service:
Example 11: Kubernetes Nodes
All the Kubernetes processing is done within Kubernetes nodes. However, minikube can execute the one-node cluster. To run a multi-node cluster using minikube, the user needs to run minikube on a Docker driver. For this purpose, first, install and start Docker. After that, run the multi-node minikube cluster.
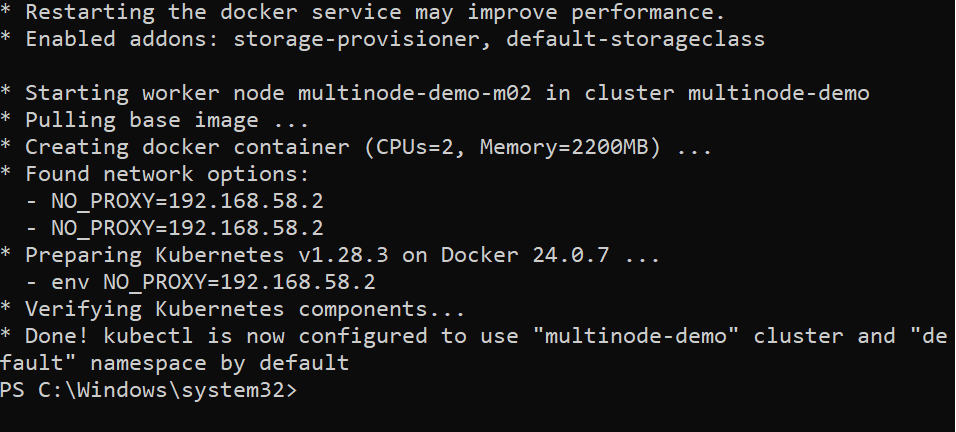
Start Multi-Node Kubernetes Cluster
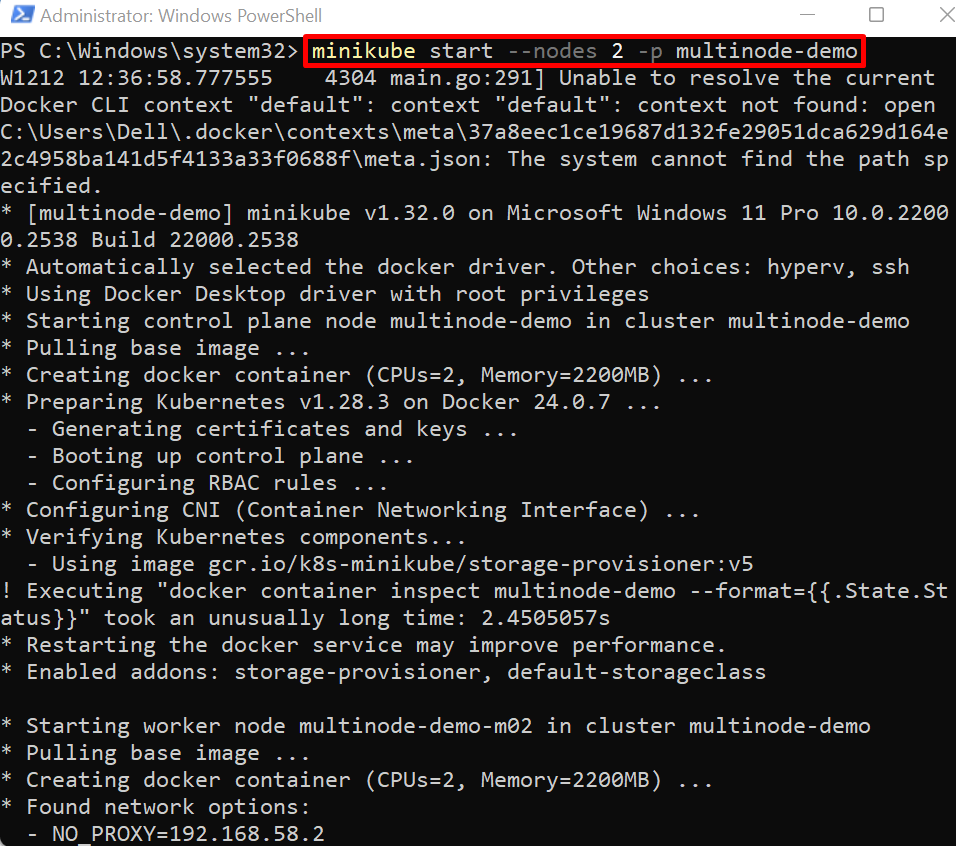
To start the multi-node minikube cluster, use the below command. This will automatically choose the “Docker” driver if the Docker engine is running on the system:
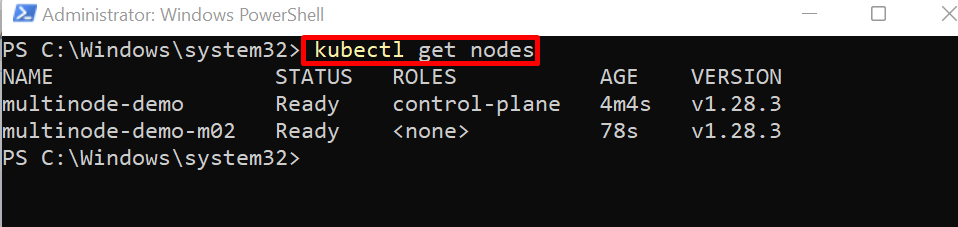
Get Nodes
To get the Kubernetes node, use the “kubectl get nodes” command:
Here, you can see currently our cluster has two nodes:
Un-schedule the Node
All the working nodes of Kubernetes are managed through the API scheduler of the control plane node. The unscheduling of a node may be performed to stop the running application, to gracefully drain the node, or to reschedule the node.
To set any Kubernetes node as unschedulable, use the “kubectl cordon <node-name>” command:

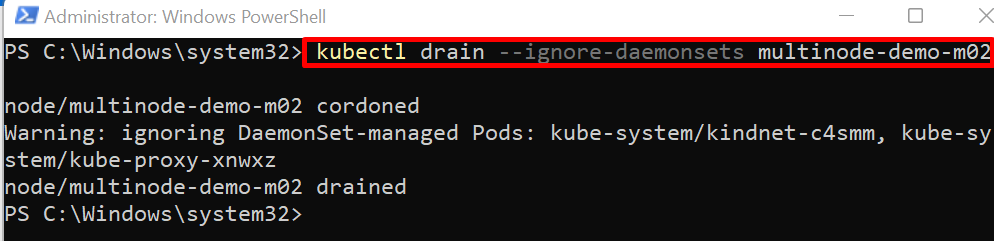
Drain Node
Draining the node means terminating and removing all running pods specified node. To drain any node, utilize the below command. Here “–ignore-daemonsets” option is used to ignore the pods of other nodes:
Schedule or Restart the Node
To schedule or restart the unschedulable node in Kubernetes, use the “kubectl uncordon <node-name>” command:

Example 12: Kubernetes ConfigMap
ConfigMap is a Kubernetes API object also known as a configuration settings dictionary. It stores the pod configurations, environment variables, and nonconfidential information of Pods in the form of a key-value pair. Some basic kubectl commands are stated below that can be used to create and manage the Kubernetes ConfigMap.
Create ConfigMap
To create the Kubernetes Configmap, first, create a file that contains data, environment variables, or any non-confidential information. After that, use the below command:
In the above command, “demo-cm” is the name of ConfigMap and the “–from-file” option is used to specify the file from which data will be read and saved in ConfigMap:

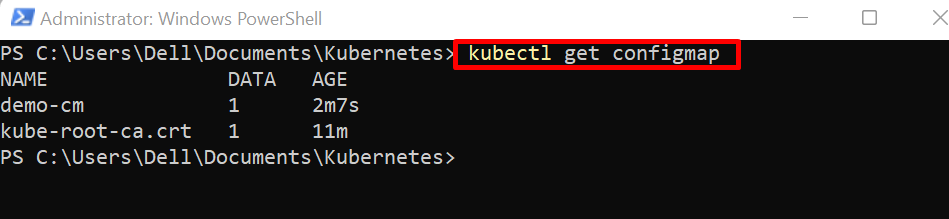
Get ConfigMap
To access the Kubernetes ConfigMaps, use “kubectl get configmap” command:
Delete ConfigMap
To delete the ConfigMap from the Kubernetes cluster, use the “kubectl delete configmap <configmap-name>” command:

Example 13: Kubernetes Secret
Kubernetes Secrets is a separate Kubernetes resource that can be used or required by the Pod application to provide or save critical information or credentials such as certificates, tokens, and username/password. To create and manage secrets, the following kubectl commands are used.
Create Secret
To create a secret in Kubernetes, first, create a file that contains user confidential data. For demonstration, we have created two files “username.txt” and “password.txt” to store the username and password, respectively.
After that, create a secret using the “kubectl create secret” command. Here, the “generic” is a type of secret, and the “–from-file” option is used to specify the filename from where data will be read and stored in secret:

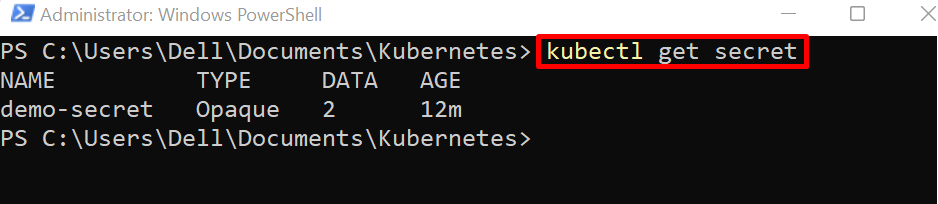
Get Secret
To get a secret in Kubernetes, use the “kubectl get secret” command:
Delete Secret
To delete the secret from the cluster, run the “kubectl delete secret <secret-name>” command:

Example 14: Kubernetes Role
Kubernetes roles define the action that the user can perform. To create and manage the role, use the below-given kubectl commands.
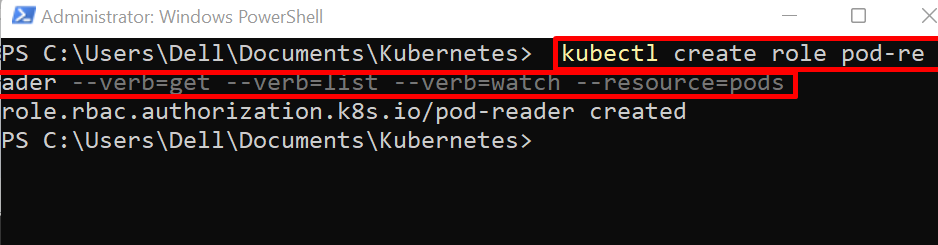
Create Role
To create a role in Kubernetes, use the “kubectl role <role-name>” –verb=<value> –resource=<resource-name>” command.
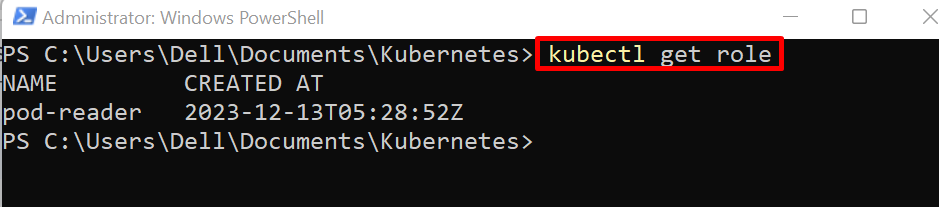
Get Role
Access all Kubernetes roles using the “kubectl get role” command:
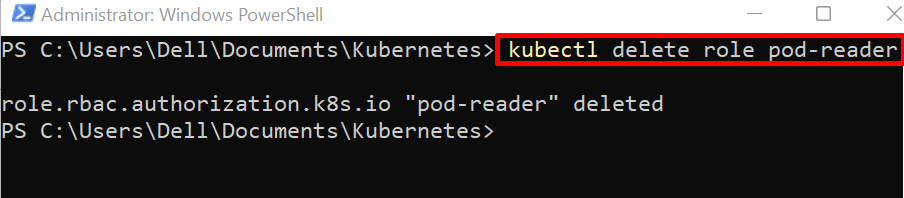
Delete Role
To delete the Kubernetes role, utilize the “kubectl delete role <role-name>” command:
Example 15: Kubernetes Logs
The logs are the information about what is happening in the currently executing application and what is going wrong. In Kubernetes, the logs are used to interact with running applications in a pod and to debug the application. To view Kubernetes logs, use the below given kubectl commands.
View Pod Logs
To view the logs of the executing pod, use the “kubectl logs <pod-name>” command:

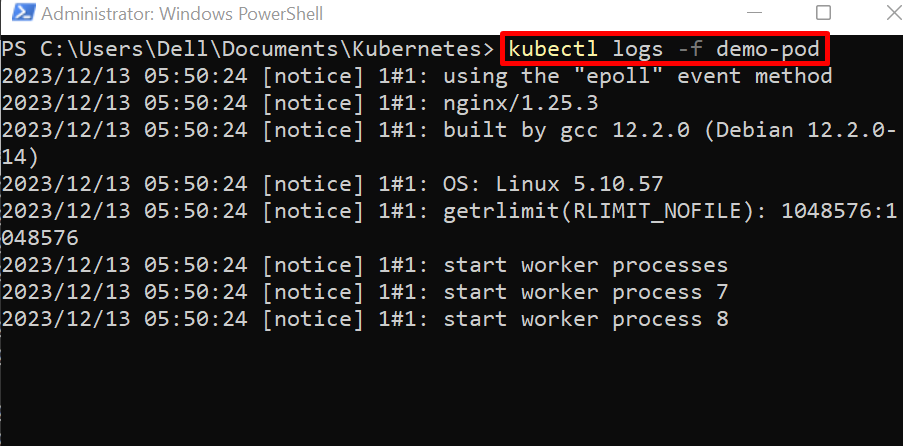
Sometimes, the user wants to view the log in real-time while running the pod. For this purpose, use the “kubectl logs -f <pod-name>” command. Here the “-f” option is used to follow the pod logs live:
View Deployment Logs
To view the log of Kubernetes deployment, use “kubectl logs deployment/<deployment-name>” command:

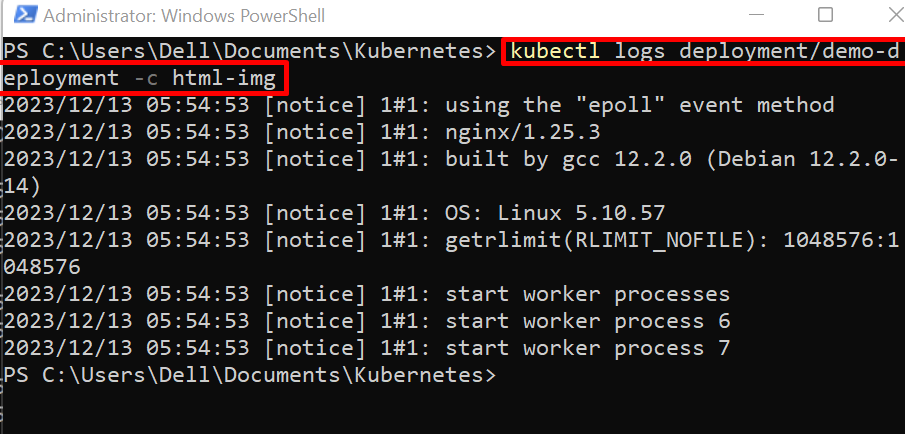
The deployment can run multiple pods and a single pod can execute multiple containers. To view the log of a specific container, use the “kubectl log deployment/<deployment-name> -c <container-name>” command:
Example 16: Describe Kubernetes Resource
Sometimes, Kubernetes users want to inspect the Kubernetes resources or find the details about API calls. To show the description of Kubernetes resources, the “kubectl describe” command is utilized. This command combines the API calls and displays a detailed description of resources in Kubernetes.
Describe Pod
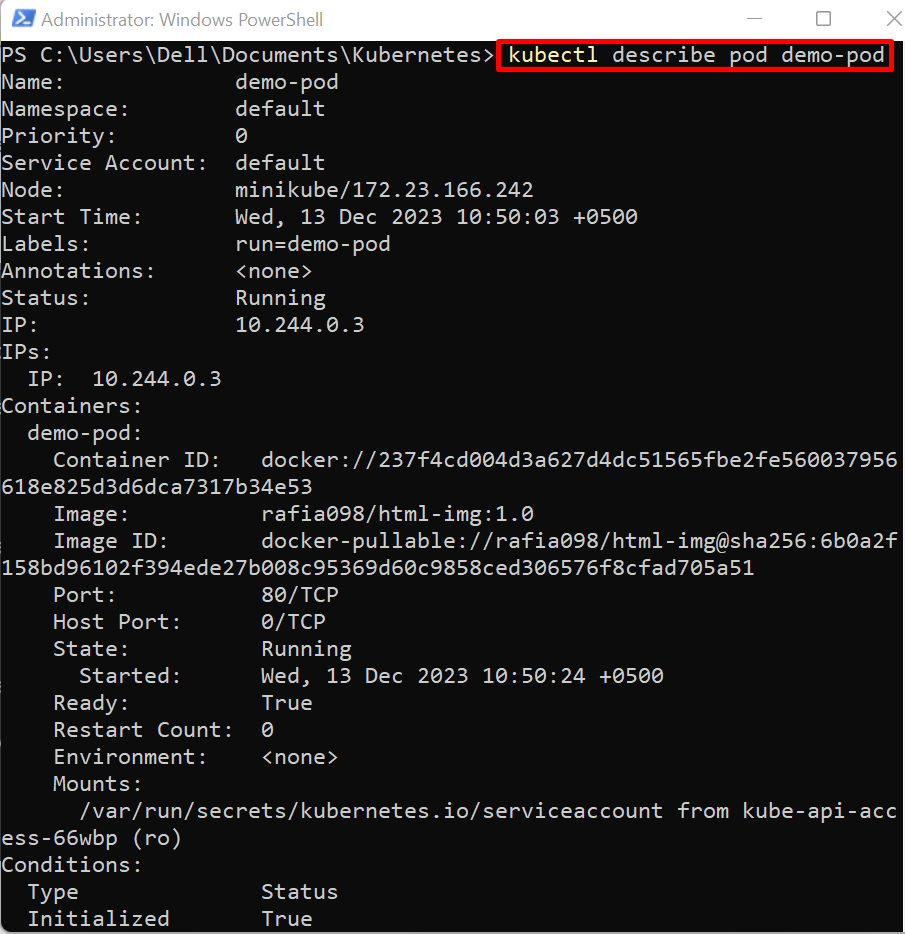
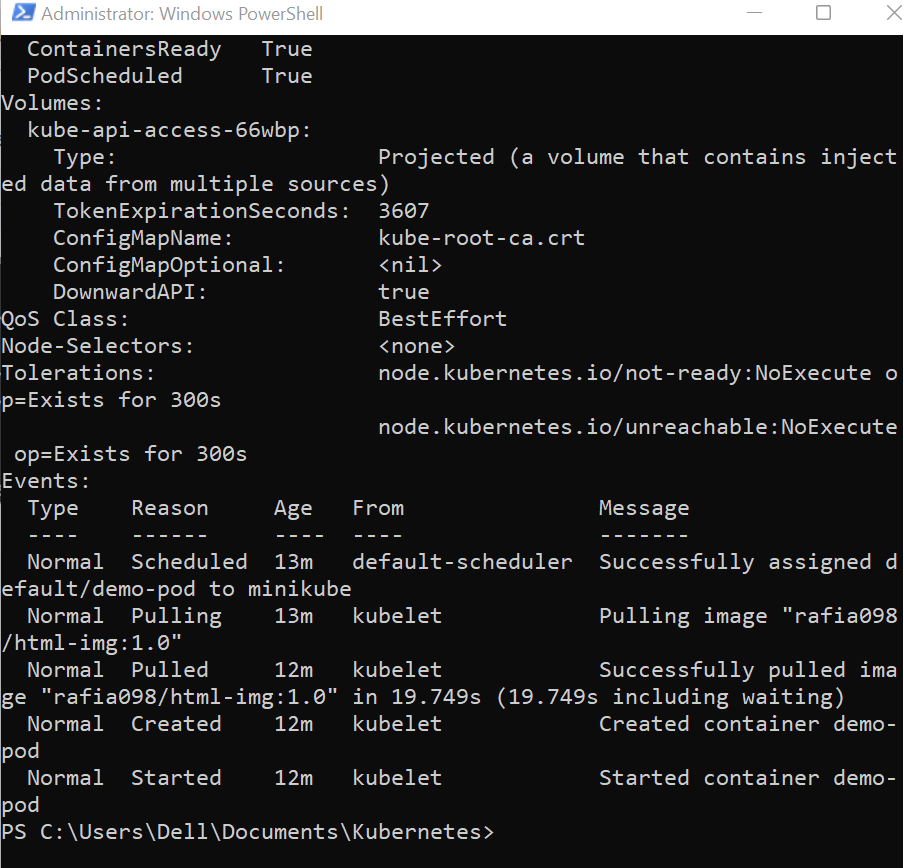
Inspect the pod using the “kubectl describe pod <pod-name>” command:
Describe Deployment
To describe the Kubernetes deployment, run the given command:

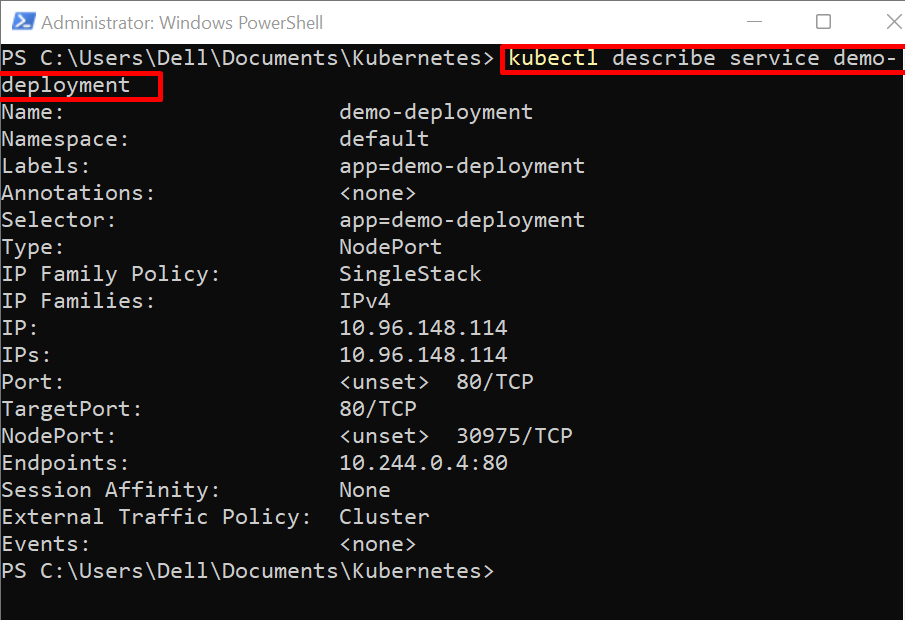
Describe Service
To view the detailed description of the exposing service, use the “kubectl describe service <service-name>” command:
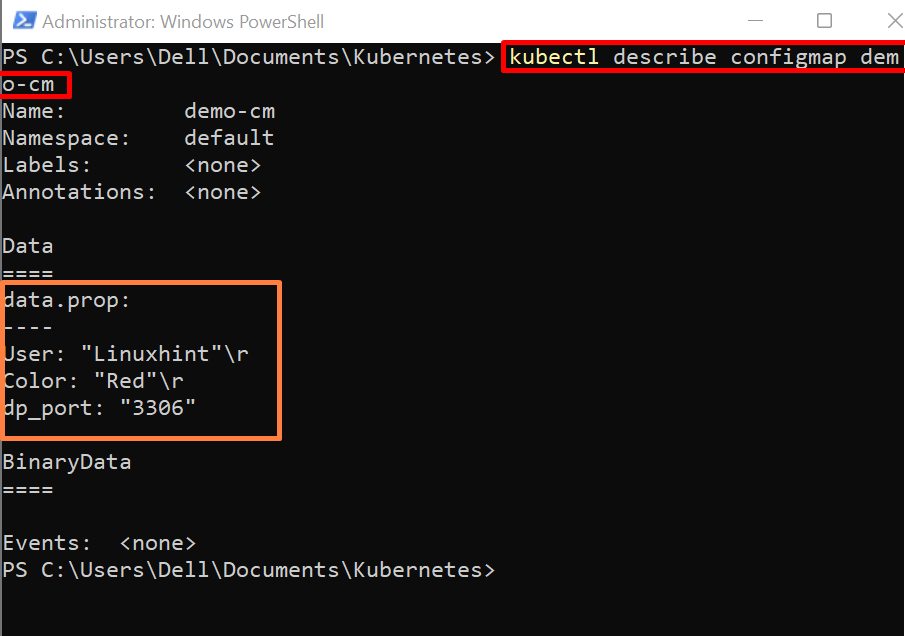
Describe ConfigMap
To view the data stored in ConfigMap, describe it using the “kubectl describe configmap <configmap-name>” command:
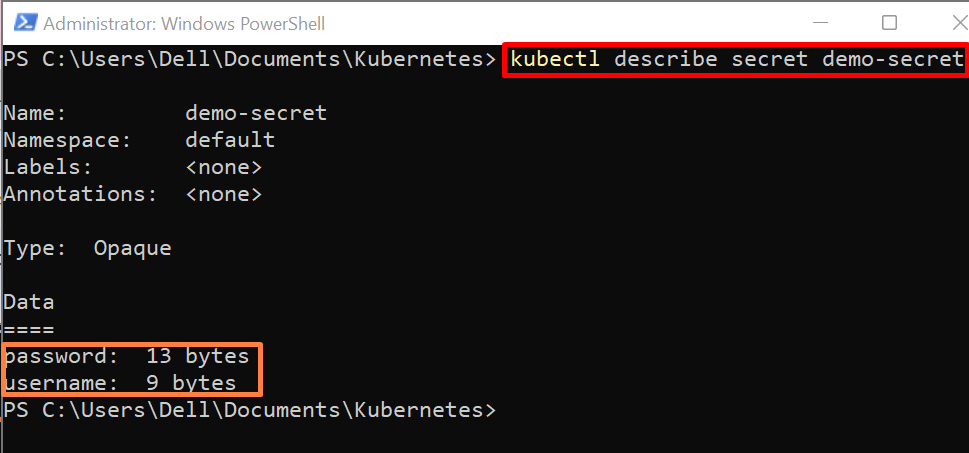
Describe Secret
When the user describes the kubectl secret, this will never show the original value or confidential information. This will only describe the data size in bytes. To describe the secret, use the “kubectl describe secret <secret-name>” command:
That is all about Kubernetes or kubectl commands.
Conclusion
The kubectl is a Kubernetes command line tool utilized to manage and operate the kubernetes cluster and its components. It offers various commands to create, get, update, and delete Kubernetes resources. It also provides kubectl commands to monitor, interact, and debug the containerized application running in the Kubernetes cluster. This blog has provided the different kubectl command examples with proper illustrations.
Source: linuxhint.com