How to Create and Manage Tasks Using Windows Task Scheduler
Quick Outline:
- Brief Details About Windows Task Scheduler
- How to Create and Manage Tasks Using Windows Task Scheduler
- Summary
Brief Details About Windows Task Scheduler
It is a Windows tool that allows users to perform certain tasks automatically on the specified computer. It was developed using C++ programming language, by Microsoft in 1995. For instance, if you wish to open the Calendar application at 9 am every day then the Task Scheduler application can help you achieve this feat.
How to Create and Manage Tasks Using Windows Task Scheduler?
Tasks can be scheduled with the use of the Task Scheduler application. Two types of tasks can be scheduled, one is a basic task that can be created without having prior knowledge of the Task Scheduler. While the other task creation requires advanced knowledge of the Task Scheduler application.
Create a Basic Scheduled Task Using Task Scheduler
The basic scheduled task consists of the predefined steps to create a task. A standard Windows user can easily create it with the help of some clicks.
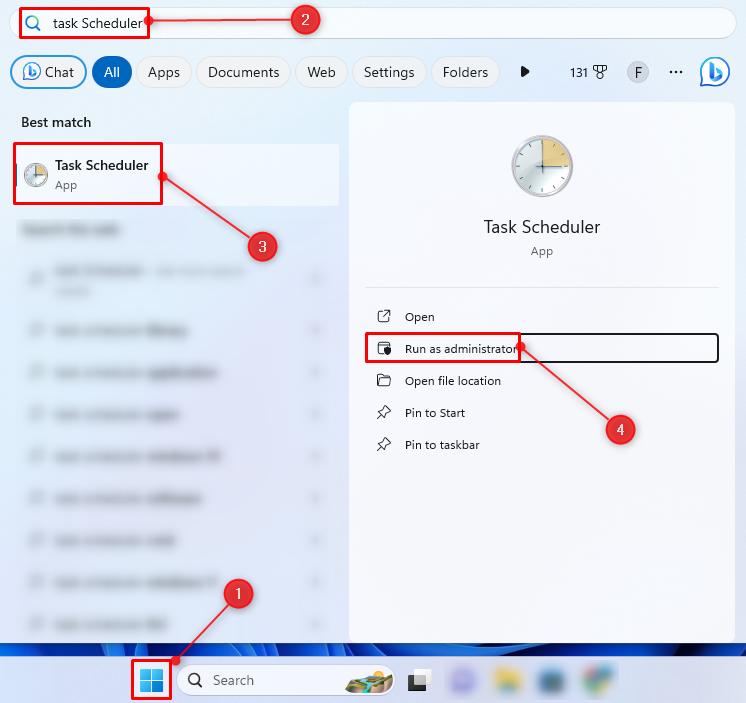
Step 1: Open Task Scheduler from the Start menu:
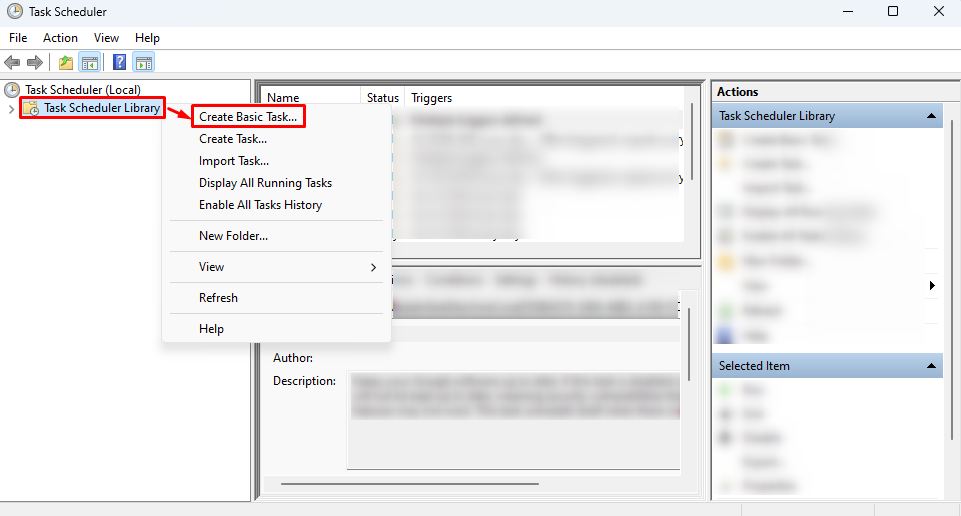
Step 2: Right-click on the Task Scheduler Library and select Create Basic Task:
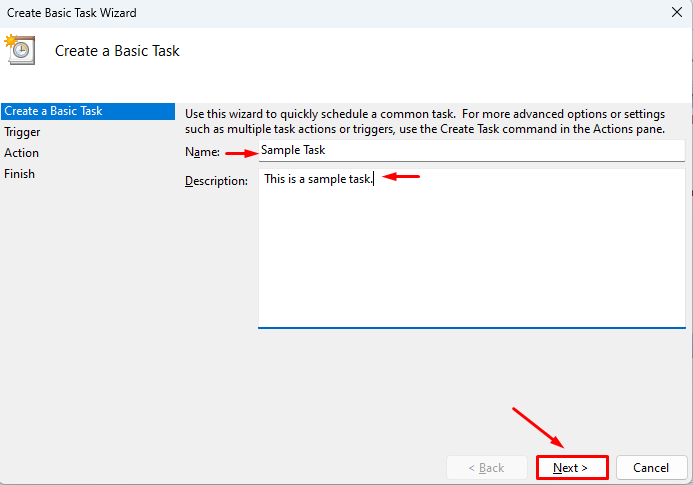
Step 3: Type the task name, and description in the corresponding fields.
Step 4: Click the Next button:
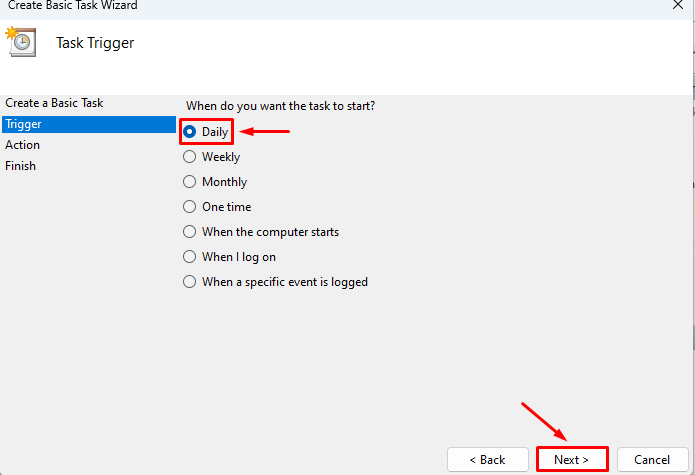
Step 5: Switch to the Trigger tab, select daily, and click Next:
Select the start time of the task, select recurring days, and click Next:

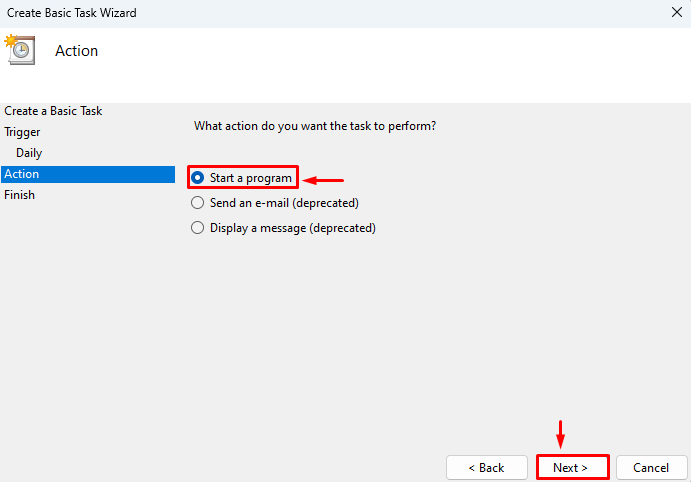
Step 6: Move to the Action tab select Start a program and click Next:
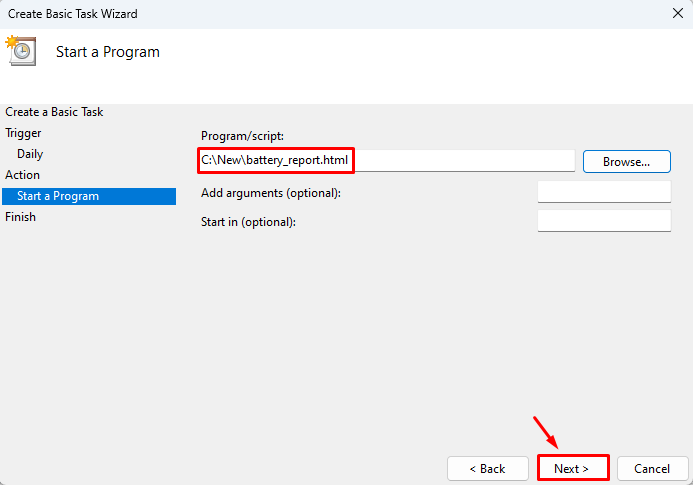
Step 7: Specify the task path or click Browse to select the task path and click Next:
Step 8: Lastly, click the Finish button to create the task:

Create An Advanced Scheduled Task Using Windows Task Scheduler
The creation of an advanced task involves a complex procedure. This does not involve the simple wizard to create a task.
Step 1: Launch Task Scheduler as an administrator.
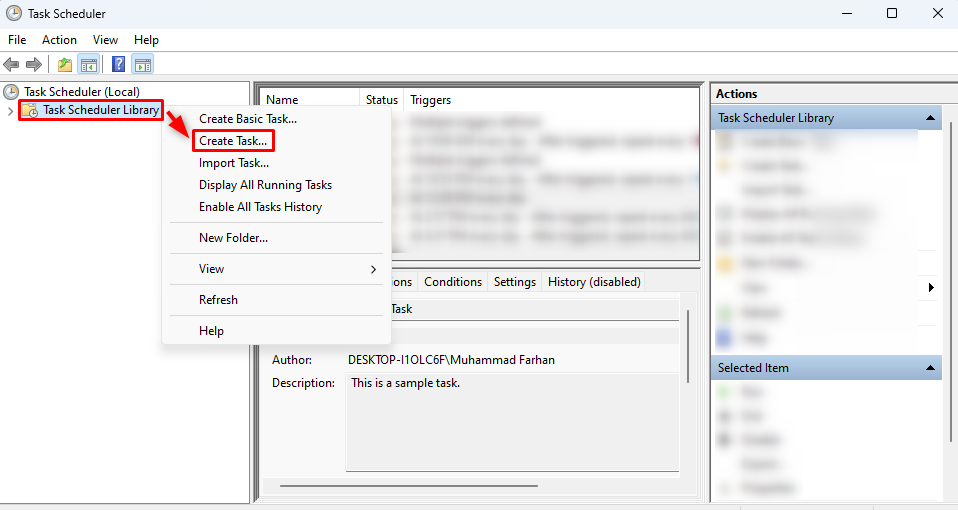
Step 2: Right-click on the Task Scheduler Library and select Create Task:
Step 3: Type the task name in the Name section:
Step 4: Add task description in the Description section (Optional):
Step 5: In the Security Options, select the desired user account. Then, select Run only when user is logged on (Run task with Administrative Privileges), or select Run whether user is logged on or not (Run task without administrator Privileges) and select OK:
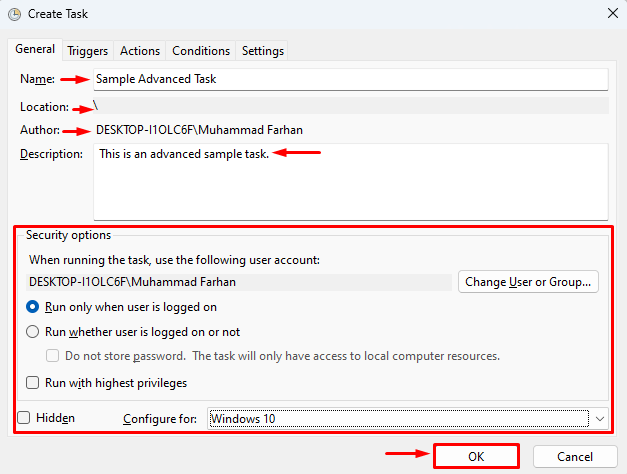
Optional: Mark check the Run with highest privileges to always run the task as an administrator.
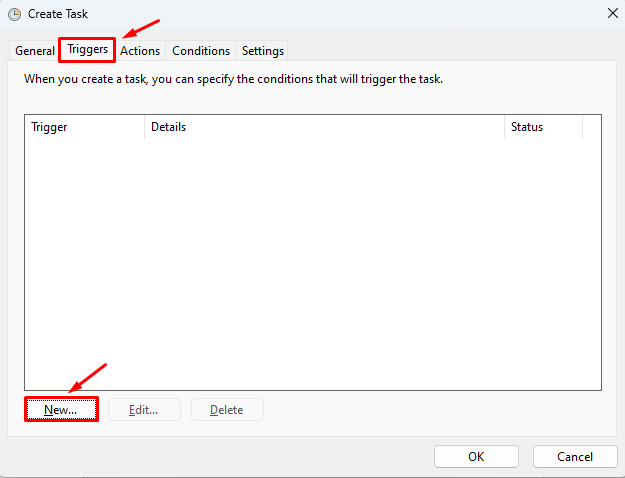
Step 6: Move to the Triggers tab and select New:
Step 7: In the Begin the task drop down, select any of the options according to your preferences, I selected On a schedule. In the Settings section, select the frequency, I selected Daily, then select a start time. In the Advanced settings, mark check Enabled and click OK:
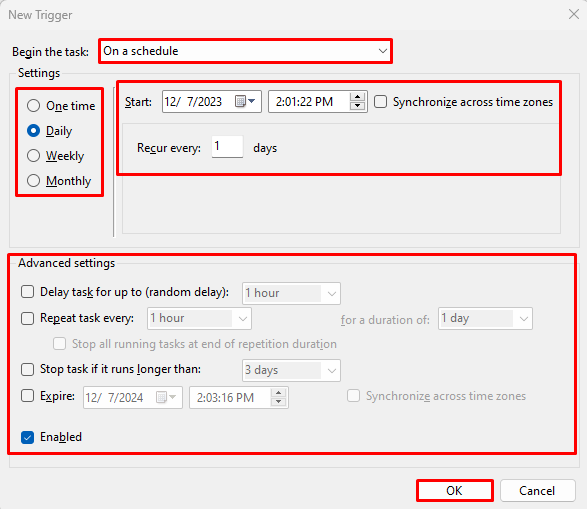
Optional: in the Advanced settings, other options can be used according to the user preferences.
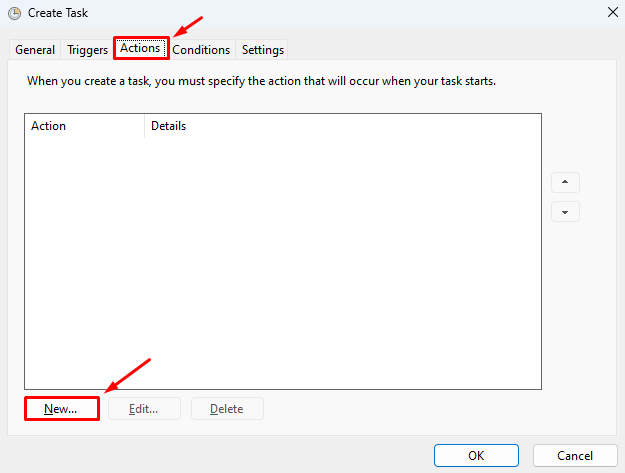
Step 8: Move to the Actions tab and select New:
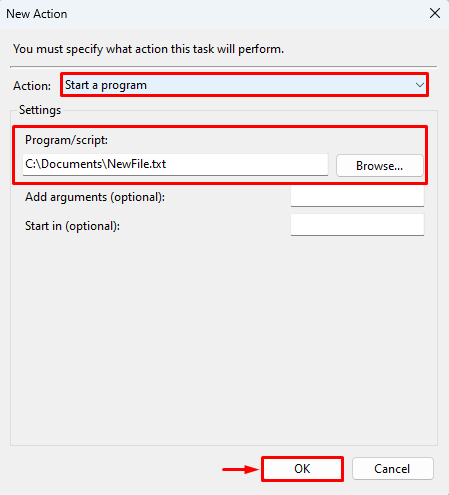
Step 9: In the Action section, click Start a program. Then, specify the location of the file/program or browse it and click OK:
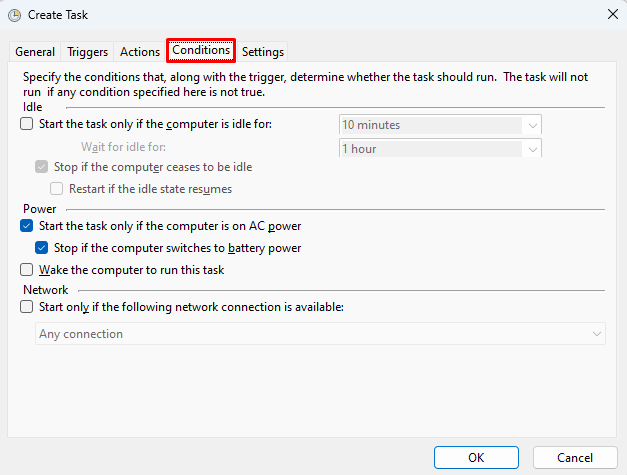
Step 10: Move to the Conditions tab, and leave it as it is:
Step 11: Finally, switch to the Settings tab, leave it as it is, and click OK:
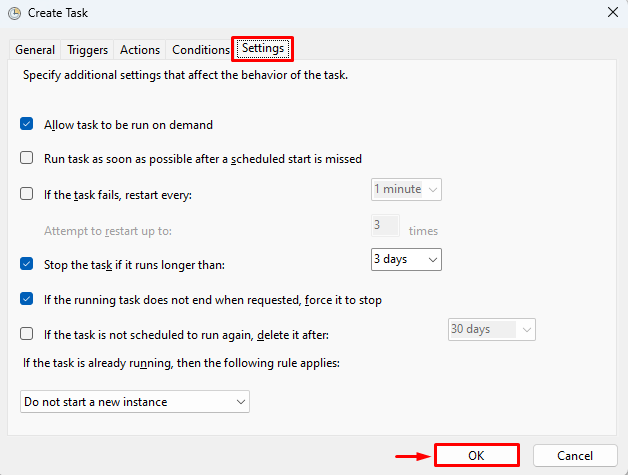
Note: You can make changes according to your preferences in the given window.
How to Manage Scheduled Tasks Using Windows Task Scheduler?
The management of scheduled tasks includes running, ending, exporting, disabling, or deleting of the scheduled task. Here are the steps mentioned to manage the scheduled task on Windows.
Step 1: Launch Task Scheduler.
Step 2: Locate the task you want to manage.
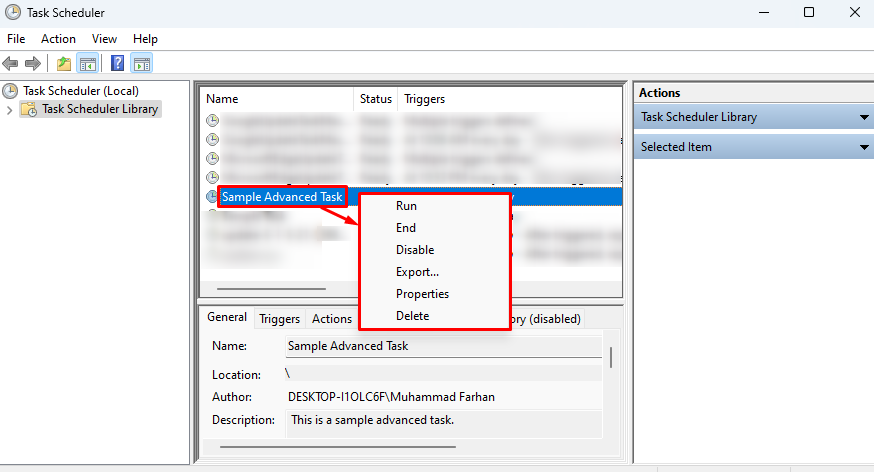
Step 3: Right-click on it to open the context menu.
Step 4: To run the task, select Run; to end the task, select End; to disable the task select Disable; to export the task, select Export; to get properties of the task, select Properties; and to delete the task select Delete:
Summary
A task is simply a piece of work that needs to be done. Tasks in Windows can be created using the Task Scheduler application. To create a task using Windows Task Scheduler, first, launch the Task Scheduler program. Right-click on the Task Scheduler Library, select Create Basic Task and follow the steps to create a simple task. Or select Create a Task to create an advanced task with more advanced options. For task management, move to the scheduled task, right click on it, and select any of the given options to manage the task.
Source: linuxhint.com