How to Set up and Program the ESP32 to Communicate with an Android Smartphone via Bluetooth
In this article, we will connect an ESP32 board with an Android phone and communicate data over Bluetooth. Further, we will control an LED connected with the GPIO pins of ESP32 directly through the Android smartphone.
Contents:
- What is ESP32 Bluetooth LE
- How to Program ESP32 To Communicate over Bluetooth with Android Smartphone
- Steps for Connecting ESP32 Bluetooth with Android Phone
- Circuit Diagram
- Hardware
- Output
- Conclusion
What is ESP32 Bluetooth LE
ESP32 is a microcontroller board that supports both Bluetooth Classic and Bluetooth Low energy also known as smart Bluetooth. The BLE or smart Bluetooth is specific for energy-efficient communication or designed for short-range communication or small data transfers.
The ESP32’s BLE functionality enables it to act as a server or a client in Bluetooth communications. It can handle tasks like reading and writing services. It can also encrypt connections and establish the Serial Port Profile (SPP) connections for data transmission in UART-BLE pass-through mode. The ESP32 Bluetooth supports the 4.2 protocols, which means it is compatible with different layers like the Physical Layer (PHY) and Link Layer (LL). It also has support for Host Controller Interface (HCI), among others.
Check the difference table for ESP32 Classic and BLE Bluetooth.
| Feature | Classic Bluetooth | Low Energy Bluetooth (BLE) |
| Communication Type | Sustained, two-way communication | Intermittent, primarily one-way data bursts |
| Operational Range | Can reach up to 100 meters | Typically operates under 100 meters |
| Power Usage | Consumes up to 1 Watt | Ranges from 10 milliwatts to 500 milliwatts |
| Transfer Speed | Data transfer rates vary from 1 to 3 Megabits per second | Supports 125 Kilobits per second to 2 Megabits per second |
| Response Time | Latency around 100 milliseconds | Quick response with 6 milliseconds latency |
| Voice Support | Equipped with voice transmission | Lacks voice transmission functionality |
Check out these ESP32 Bluetooth articles to get more inside of it.
How to Program ESP32 To Communicate over Bluetooth with Android Smartphone
To program ESP32 so it can communicate with an Android phone using the Bluetooth protocol, you have to set up the ESP32 Bluetooth serial library. For that, you must have an Arduino IDE setup with an ESP32 board installed.
After setting the ESP32 Bluetooth, you have to install the Bluetooth serial Android application. This will let you send instructions from an Android phone to ESP32 using Bluetooth Serial communication.
Let’s take a closer look at each of these steps:
Steps for Connecting ESP32 Bluetooth with Android Phone
To program the ESP32 board for Bluetooth communication, follow these given steps:
Step 1: Installing the ESP32 Board in Arduino IDE
To install the ESP32 on the Arduino IDE, simply follow the guide provided in this article.
Installing the ESP32 Board in Arduino IDE
After installation, the ESP32 board can be connected and programmed using Arduino IDE.
Step 2: Upload the ESP32 Bluetooth Code
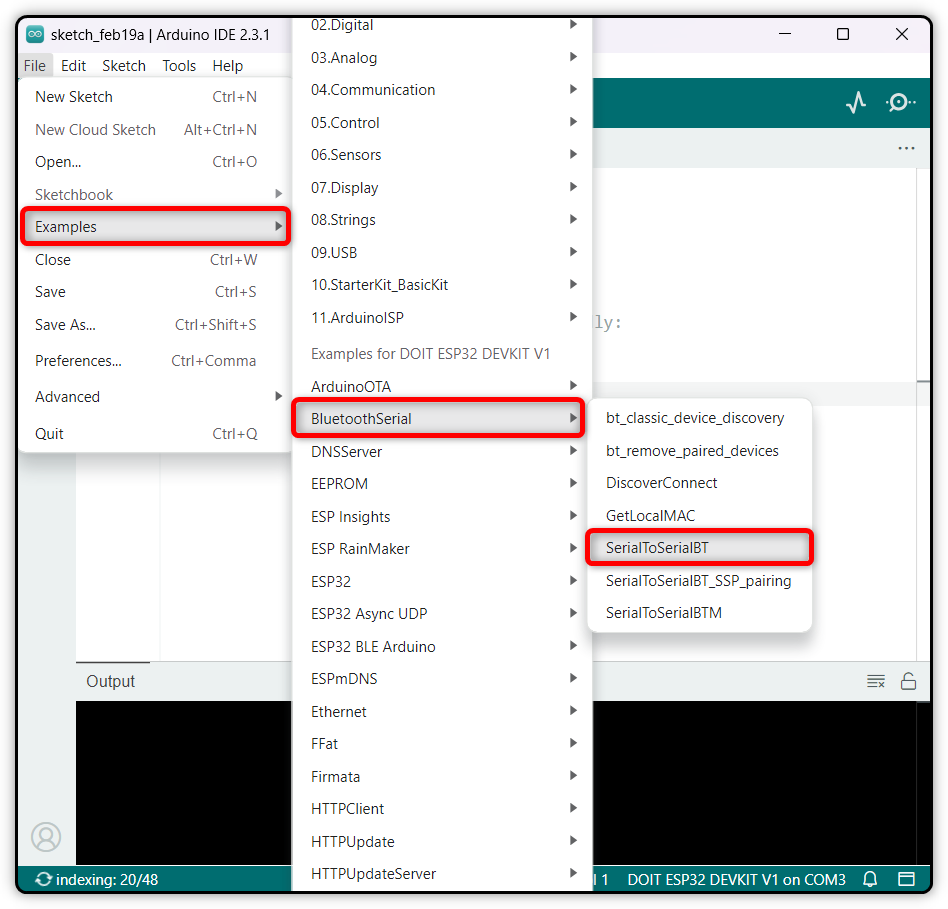
Once the ESP32 board is installed, you will see different pre-installed libraries and their examples in Arduino IDE. All these libraries are related to the ESP32 board. For Bluetooth serial communication, we are going to use the ESP32 BluetoothSerial.h library example code.
To open the example code, open Arduino IDE and go to: File > Examples > BluetoothSerial > SerialtoSerialBT
To open this example code, make sure the ESP32 board is selected.
After opening the example code, you will see the following code in your Arduino IDE window:
#include "BluetoothSerial.h"
//#define USE_PIN // Uncomment this if you want PIN during pairing
const char *pin = "1234"; // Define a custom pairing PIN
String device_name = "ESP32";
#if !defined(CONFIG_BT_ENABLED) || !defined(CONFIG_BLUEDROID_ENABLED)
#error Bluetooth is not enabled! Run `make menuconfig` to enable it
#endif
#if !defined(CONFIG_BT_SPP_ENABLED)
#error Serial Bluetooth missing or not enabled. It is only available for the ESP32 chip.
#endif
BluetoothSerial SerialBT;
void setup() {
Serial.begin(115200);
SerialBT.begin(device_name); //Bluetooth device name
Serial.printf("The device "%s" is started.\nStart pairing your device!\n", device_name.c_str());
//Serial.printf("The device "%s" with MAC address %s is started.\nStart pairing it with Bluetooth!\n", device_name.c_str(), SerialBT.getMacString());
#ifdef USE_PIN
SerialBT.setPin(pin);
Serial.println("Using PIN");
#endif
}
void loop() {
if (Serial.available()) {
SerialBT.write(Serial.read());
}
if (SerialBT.available()) {
Serial.write(SerialBT.read());
}
delay(20);
}
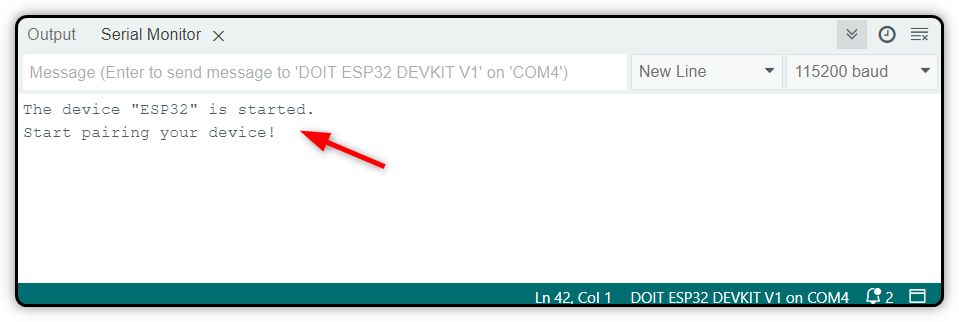
After uploading the code, you will see the following message on the screen. This message describes that your ESP32 board is ready for pairing.
Step 3: Code Explanation
The code started with including the necessary libraries and checking for Bluetooth availability. It also sets up variables for the Bluetooth device name and PIN.
In the setup() function, the serial baud communication is defined and the Bluetooth device is initialized with its name. A custom PIN can be set for authentication during pairing.
The loop() function continuously checks for the data on the serial and Bluetooth connections. This allows it to establish two-way communication between the ESP32 and a paired Bluetooth device.
Step 4: Install the Android Application
Once the code is uploaded, the next step is to install and configure the Android application for Bluetooth connection.
Open the Play Store and install the Serial Bluetooth Terminal application.

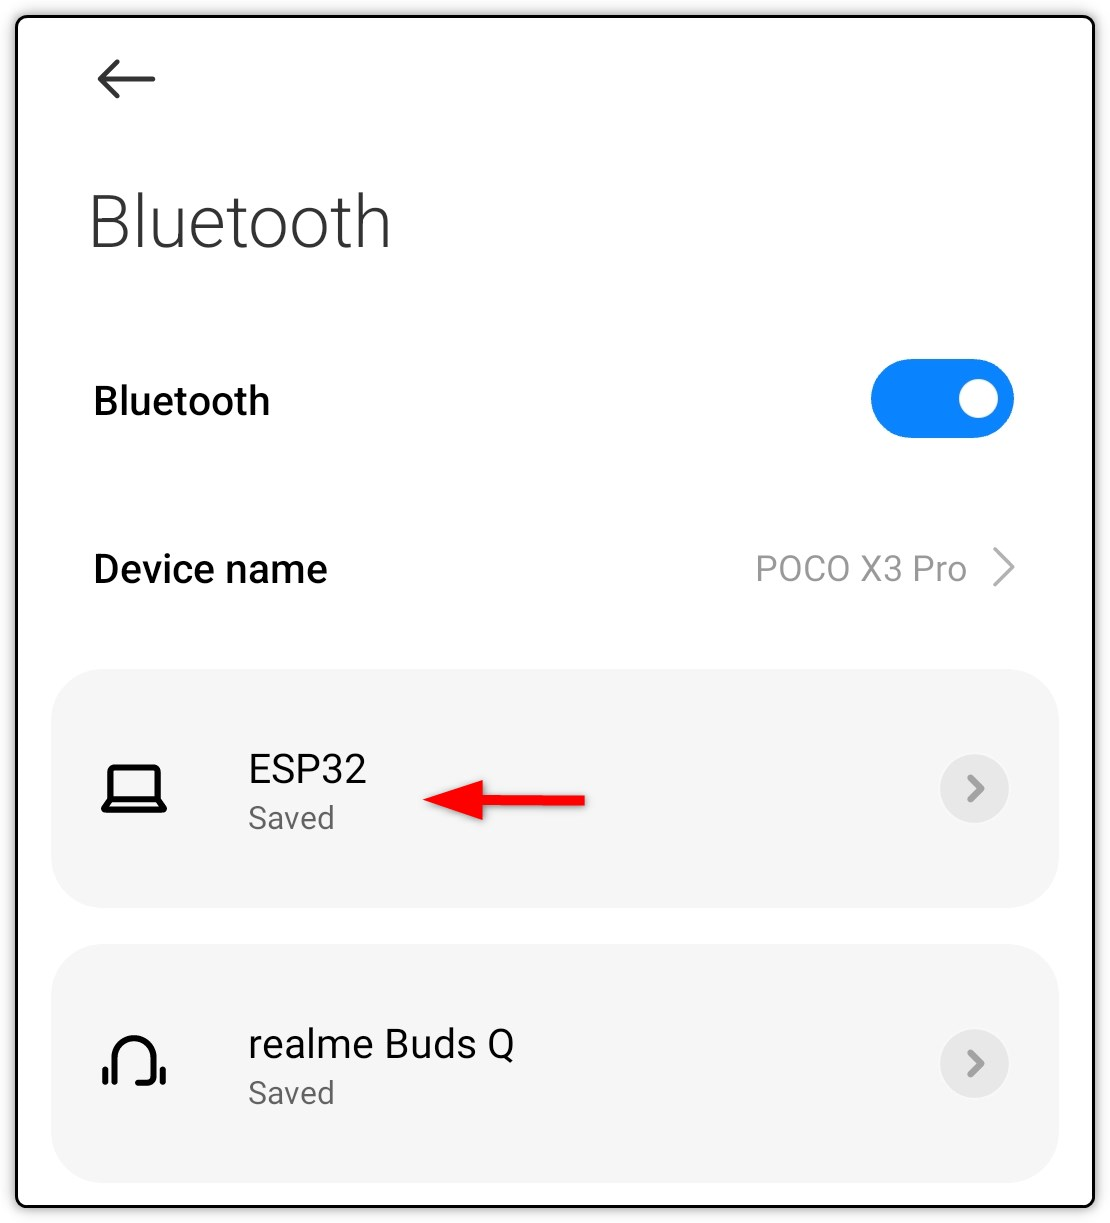
After installation, open the smartphone Bluetooth settings and connect your phone with ESP32 Bluetooth. If you have defined a PIN in the Arduino IDE code you have to enter the PIN else it will connect directly.
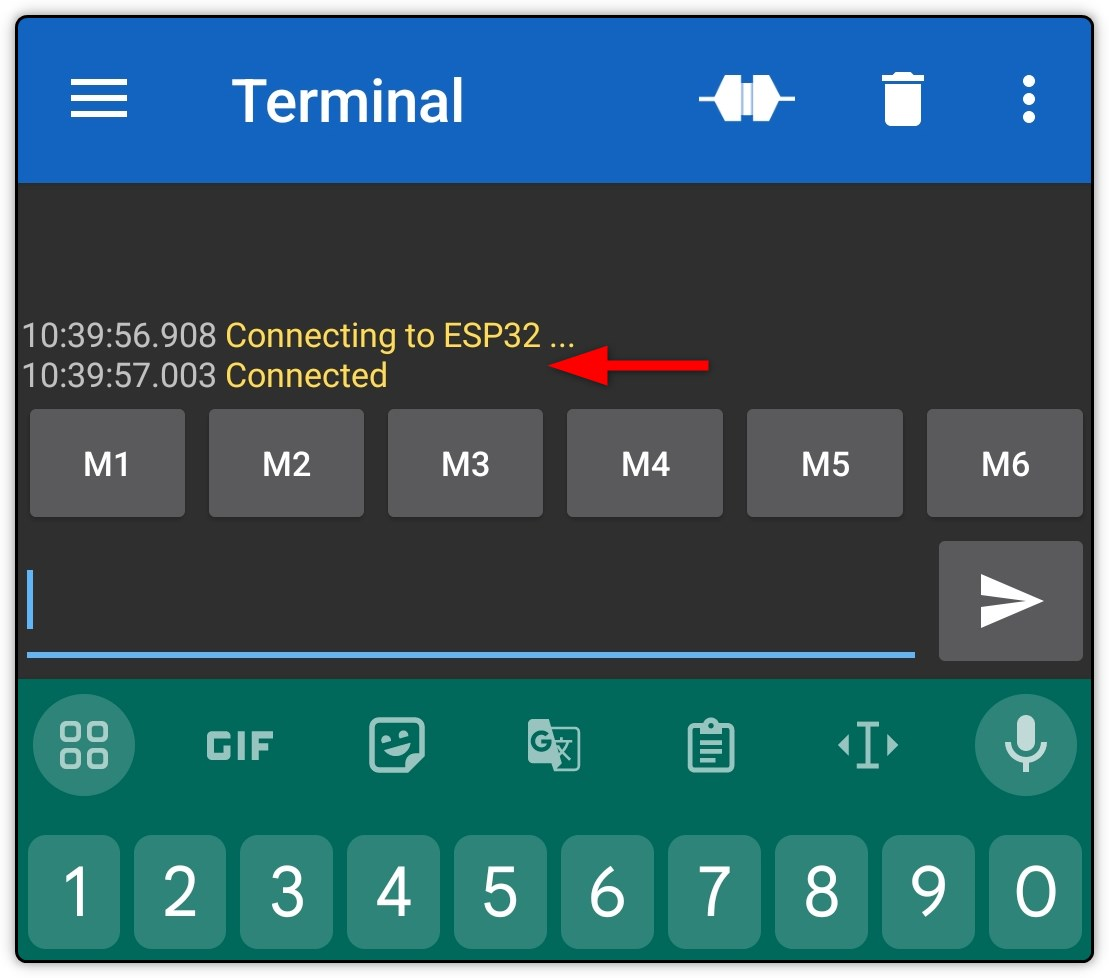
Now open the Serial Bluetooth application and select the Devices option.
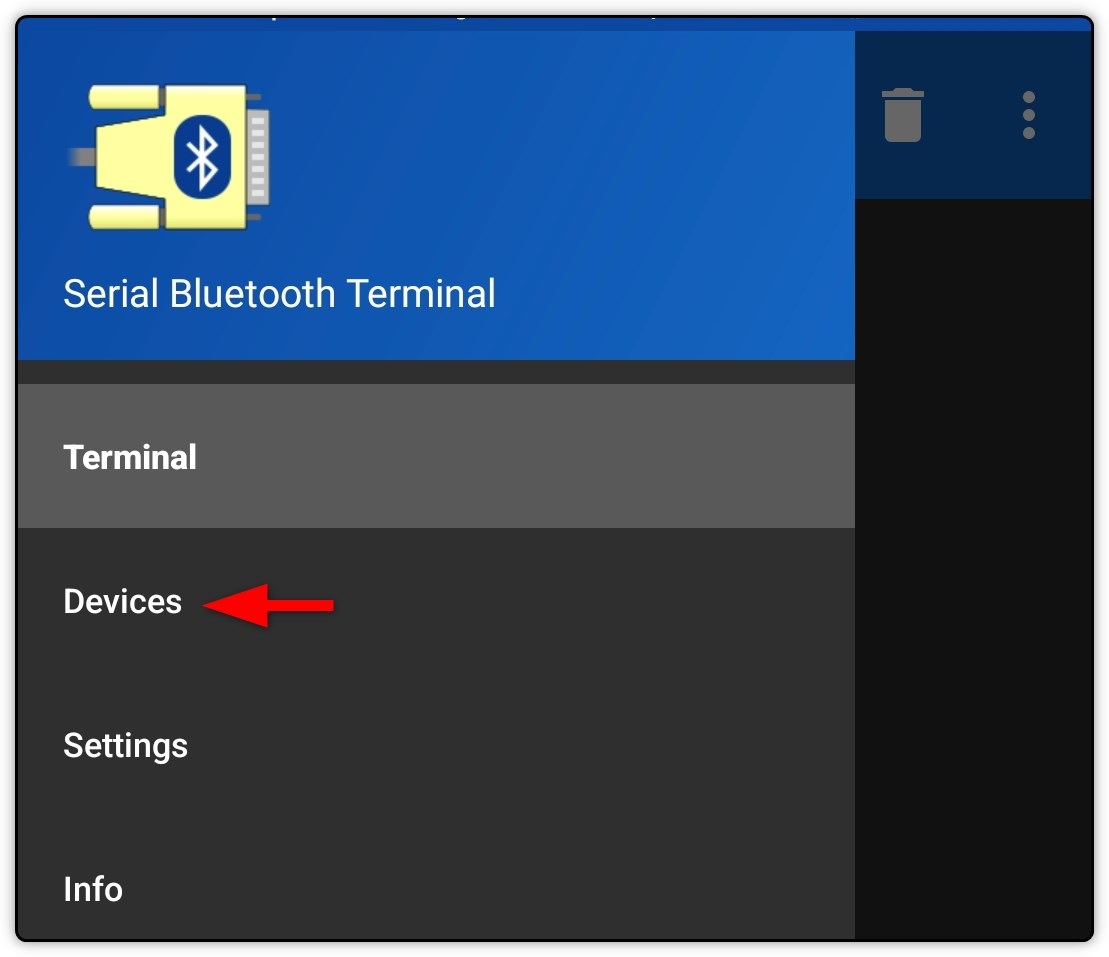
From the newly opened menu, select the ESP32 device. This list shows all the currently active Bluetooth devices.
As you can see, the ESP32 Bluetooth is connected to your Android smartphone.
To test the connection, we are going to send a string. Here I have sent two different strings.
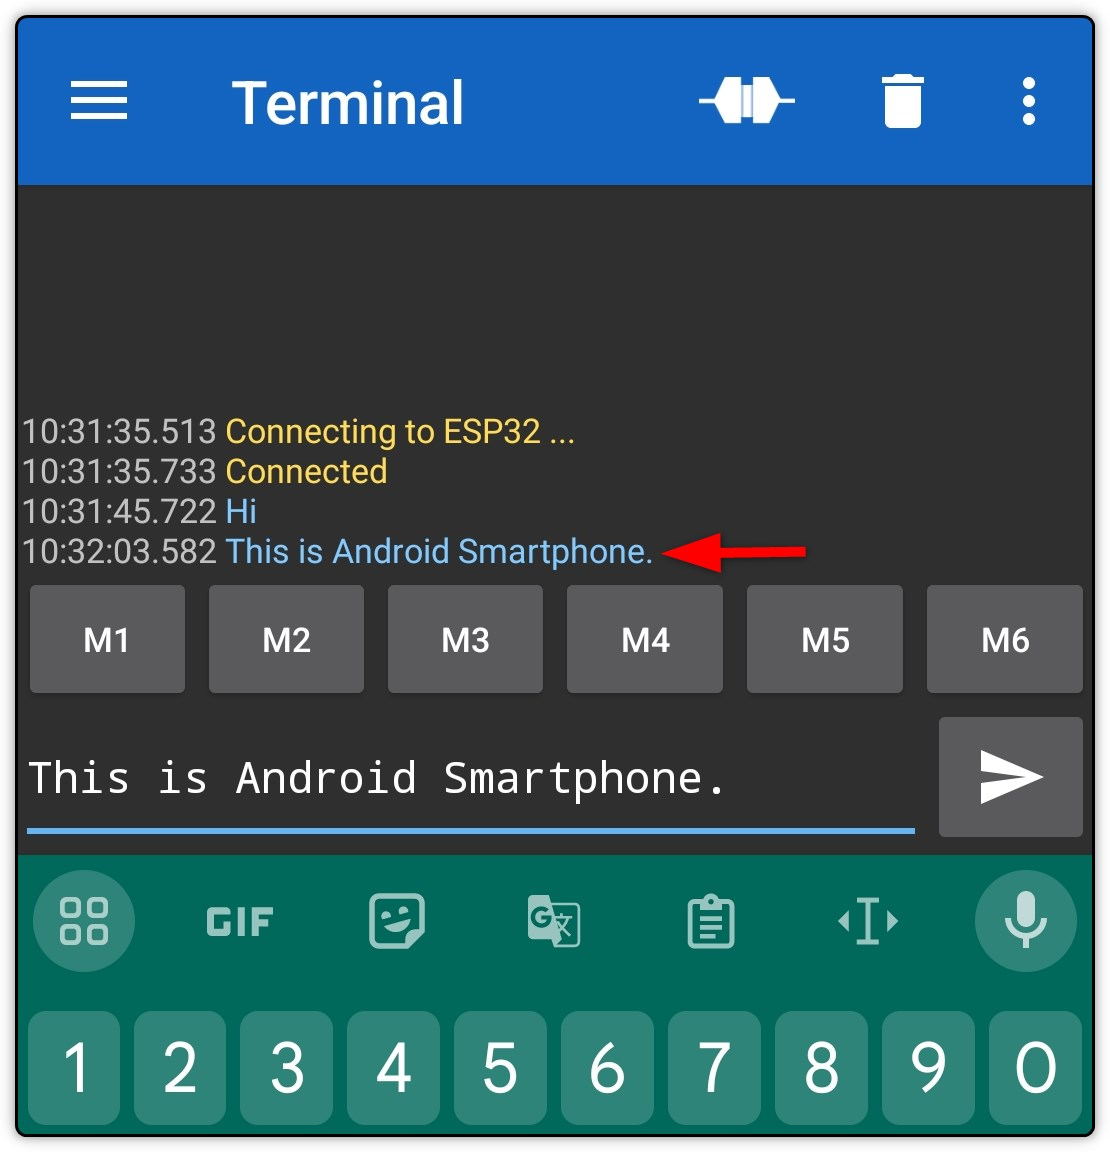
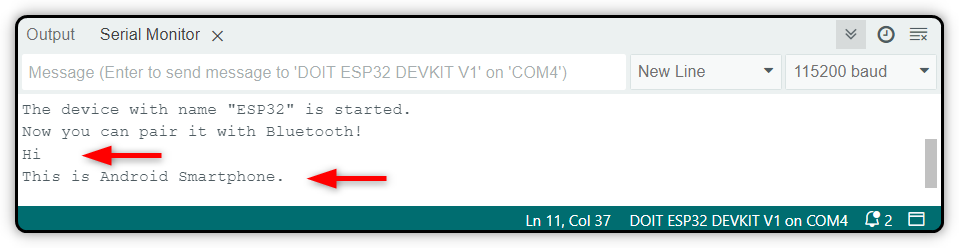
You will notice the same two strings will also be displayed on the Arduino IDE terminal.
Now let’s move one step further and control an external peripheral like an LED using ESP32 Bluetooth through the Android smartphone.
Step 5: Control an LED Using an Android Phone via Bluetooth
To control an LED using the ESP32 and Android Bluetooth, first modify the above code and define a GPIO pin for the LED. After that, you must set the values for turning ON and OFF the LED.
Upload the code below to proceed further.
#define LED_PIN 15 // Define the LED pin
BluetoothSerial SerialBT; // Create a BluetoothSerial object
byte BT_INP; // Variable to store Bluetooth input
// Check if Bluetooth and Bluedroid are enabled in the SDK configuration
#if !defined(CONFIG_BT_ENABLED) || !defined(CONFIG_BLUEDROID_ENABLED)
#error Bluetooth is not enabled. Run `make menuconfig` to enable it.
#endif
void setup() {
pinMode(LED_PIN, OUTPUT); // Set the LED pin as an output
Serial.begin(115200);
SerialBT.begin("ESP32"); // Initialize Bluetooth with the name "ESP32"
Serial.println("Bluetooth device is ready to pair."); // Indicate that Bluetooth is ready
}
void loop() {
// Check if there is any data available to read from Bluetooth
if (SerialBT.available()) {
BT_INP = SerialBT.read(); // Read the incoming byte from Bluetooth
Serial.write(BT_INP); // Echo the read byte to the serial monitor
}
// Check the received Bluetooth data and set the LED state
if (BT_INP == ‘1’) {
digitalWrite(LED_PIN, HIGH); // Turn on the LED if ‘1’ is received
} else if (BT_INP == ‘0’) {
digitalWrite(LED_PIN, LOW); // Turn off the LED if ‘0’ is received
}
}
This code is for an ESP32 microcontroller to control an LED using Bluetooth. It includes a library for Bluetooth communication. Next, it defines the LED pin and sets up Bluetooth with a device named ESP32. The main loop reads Bluetooth data and turns the LED ON or OFF based on the received command (1 for ON, 0 for OFF).
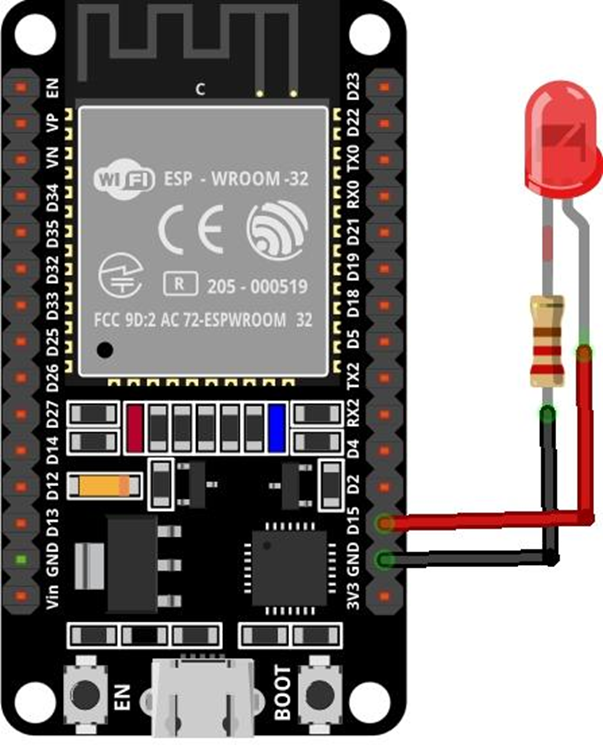
Circuit Diagram
The circuit diagram is simple, with an LED connected at pin D15 of the ESP32. You can define any other GPIO for LED control.
Related: ESP32 Pinout Reference–Ultimate Guide
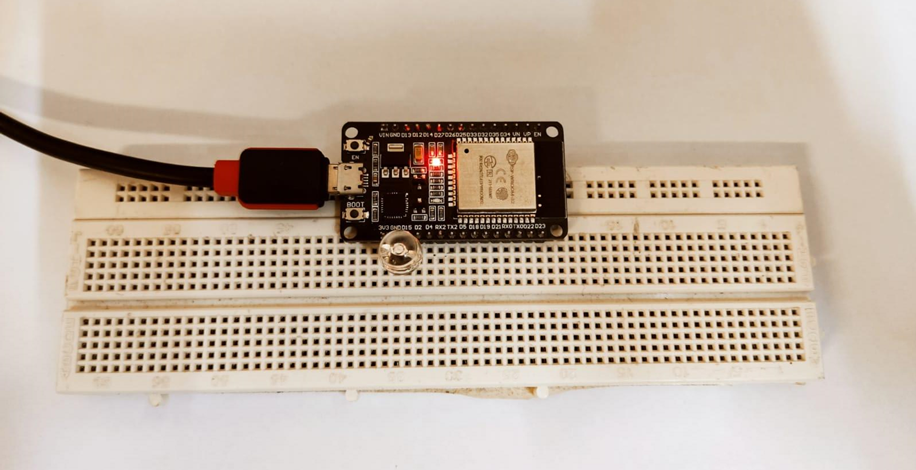
Hardware
In hardware, you will need a breadboard, an ESP32 board, and an LED. Connect the ESP32 with the system and upload the program to it.
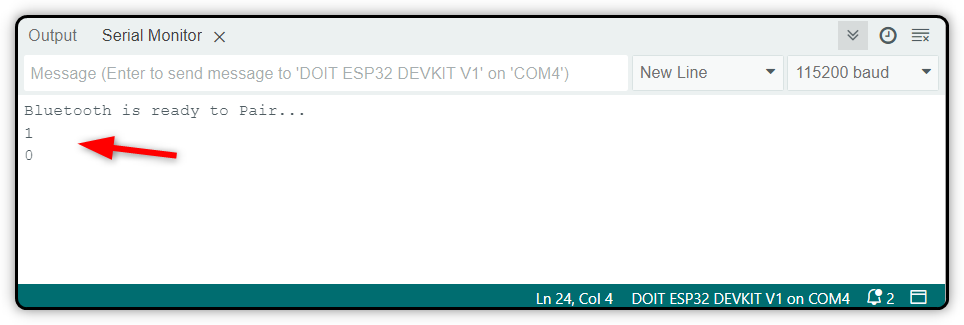
Now send 1 and 0 from the Android phone Bluetooth Serial communications application.
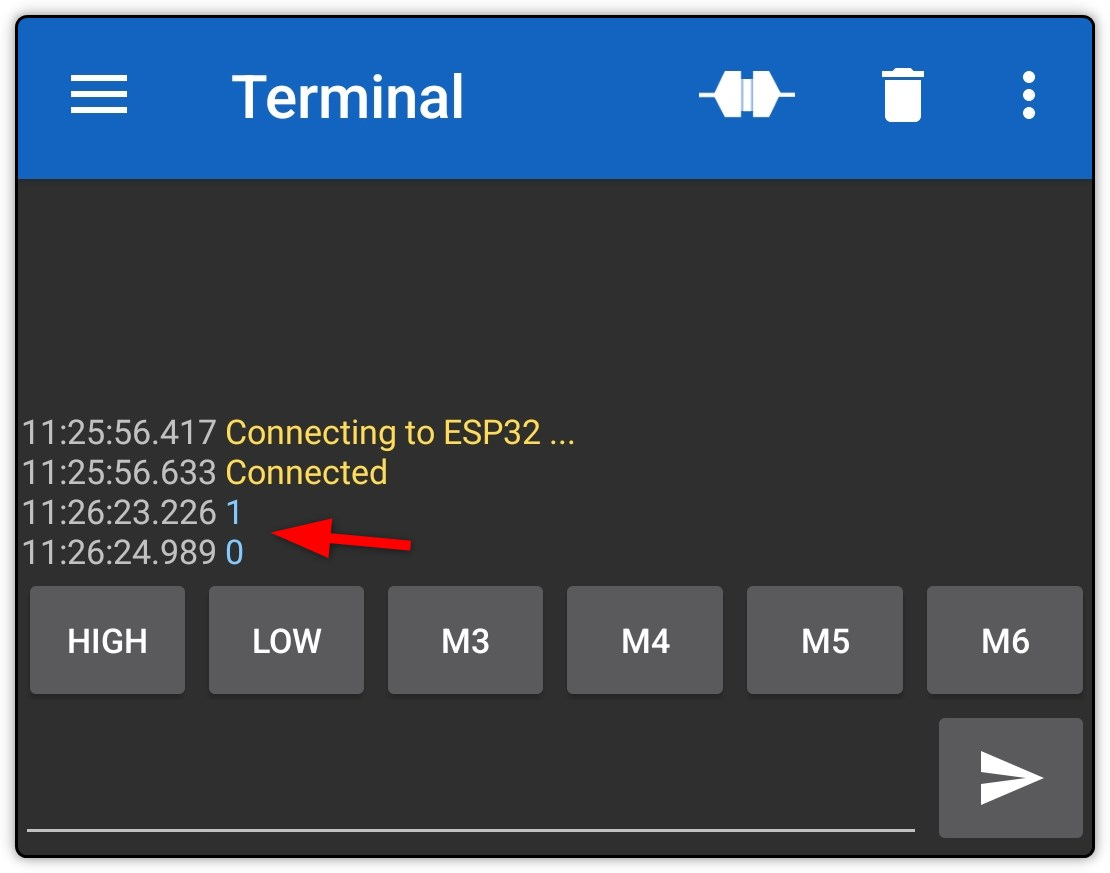
You will see the same input on the Arduino IDE terminal received from the Android phone.
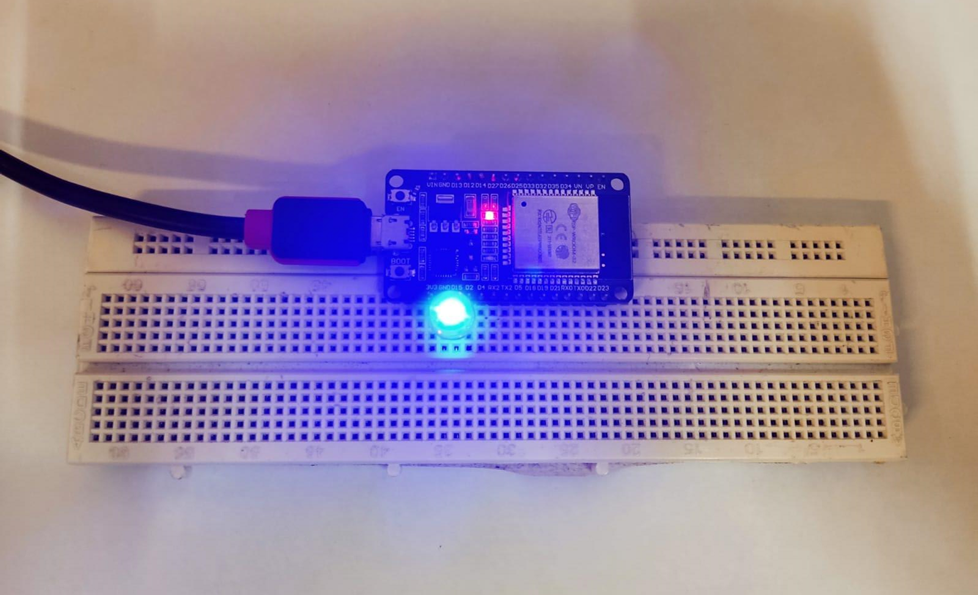
Output
Once you send the High or 1 value the LED will turn ON, similarly when you send the Low value the LED will turn OFF.
Set a Custom Button
You can also set a custom button inside the Serial Bluetooth application. For example, a HIGH and LOW values button can be created. This way, you don’t have to manually type the values. Instead, you just have to press the shortcut button, and it will execute the instruction you set.
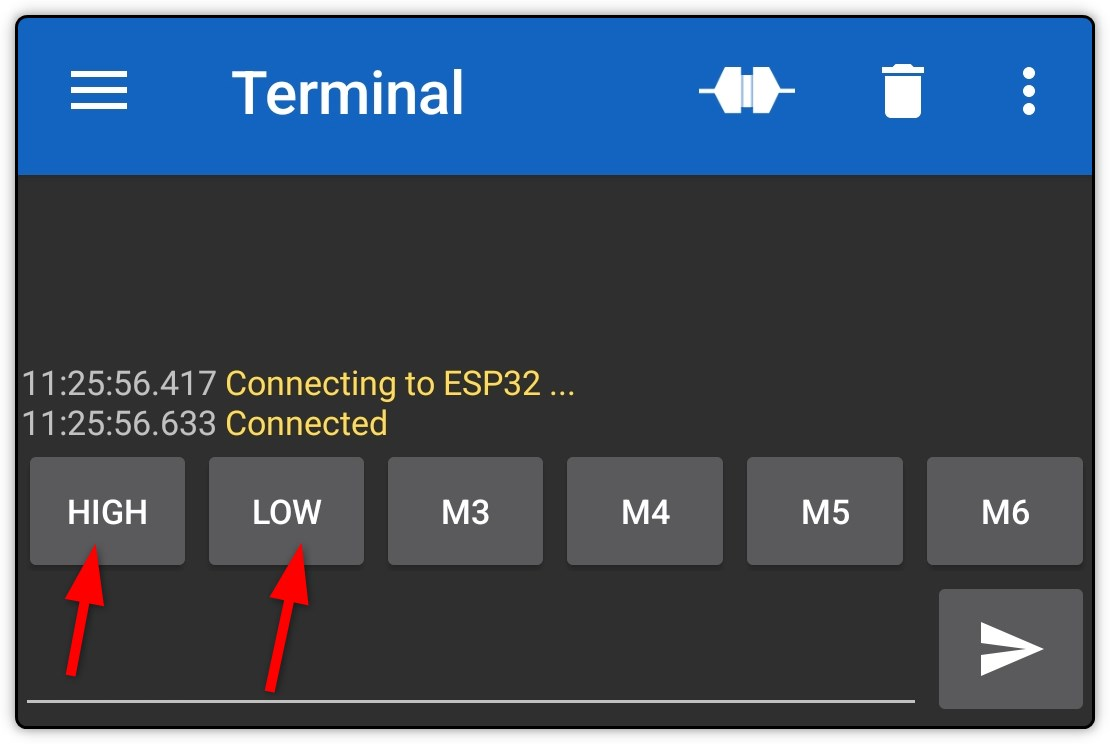
Note: To open the button settings, long press over the button.
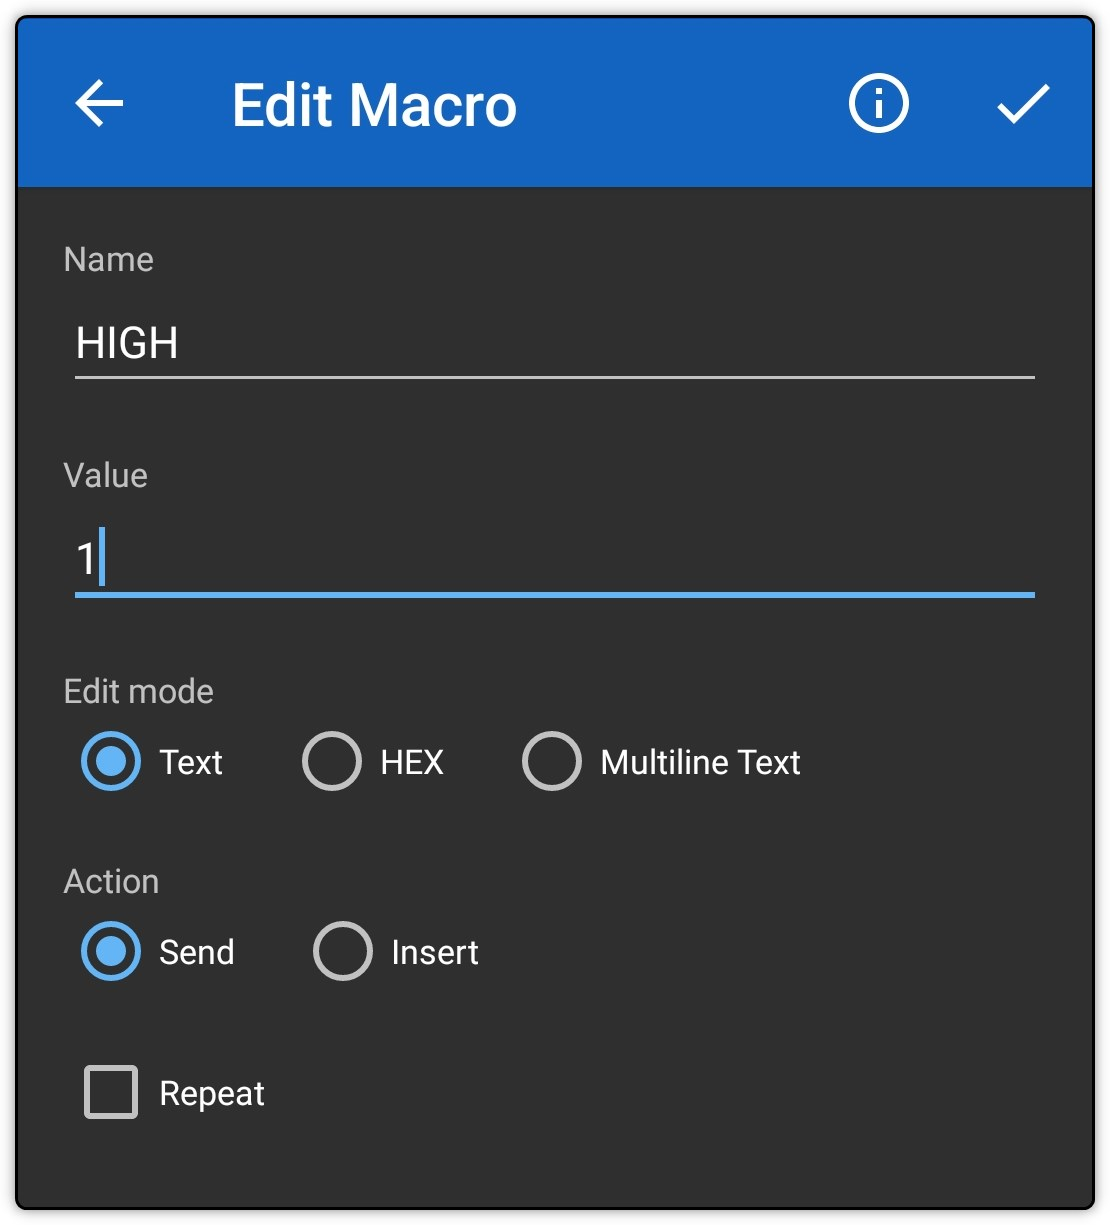
To set the HIGH button value, define the following settings.
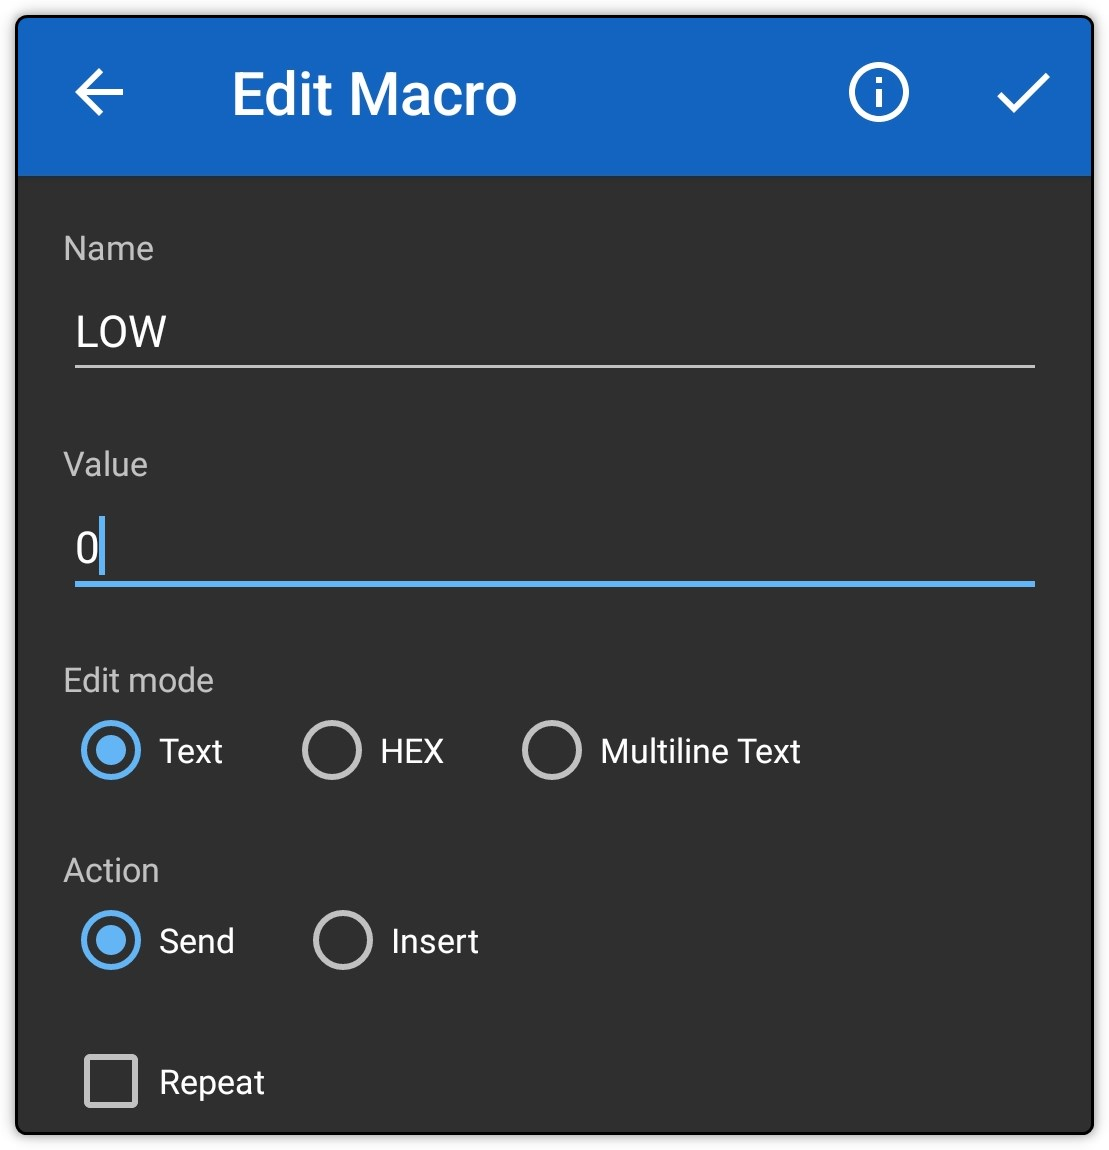
Similarity for the LOW button value, you need to define the below settings.
We have successfully connected the ESP32 board with an Android phone using Bluetooth. Now you can create many projects using it. Like, you can control your home appliances using the ESP32 Bluetooth through a relay circuit.
Related: Relay with ESP32 Using Arduino IDE
Conclusion
ESP32 is an advanced microcontroller board with Wi-Fi and Bluetooth capabilities. Both these built-in modules help you to design advanced projects and control the peripherals wirelessly. Similarly, you can connect ESP32 with an Android phone and perform different operations. For that, you will need to install the Bluetooth Serial Android application. Once installed, open the example code for ESP32 Bluetooth and upload it to your board. Once the code is uploaded, you can pair it with your board through an Android phone.
Source: linuxhint.com