How to Connect ESP32 Board to Raspberry Pi Using Arduino IDE
This guide will show you how you can connect an ESP32 board to Raspberry Pi using the Arduino IDE, and will cover the following outline:
- Why it is Useful to Connect ESP32 Board to Raspberry Pi
- What is Arduino IDE
- Prerequisites to Connect ESP32 Board to Raspberry Pi
- How to Connect ESP32 Board to Raspberry Pi Using Arduino IDE
- Conclusion
Why it is Useful to Connect ESP32 Board to Raspberry Pi
Connecting ESP32 to Raspberry Pi is useful due to several reasons:
- You can use ESP32 as a co-processor for Raspberry Pi to handle low-level tasks.
- You can connect multiple ESP32 boards to Raspberry Pi to create a distributed computing system.
- Connecting multiple ESP32 boards to Raspberry Pi also reduces the Raspberry Pi device power consumption.
What is Arduino IDE
Arduino IDE is a cross platform tool used for writing and uploading code to an Arduino board. It provides an easy and simple way to connect several boards to your system including ESP32 board as well without requiring complex setup.
Prerequisites to Connect ESP32 Board to Raspberry Pi
To connect ESP32 board to Raspberry Pi, you will need:
- ESP32 Board
- Type A to Micro-USB Cable for Connecting ESP32 to System
- Raspberry Pi Device
- Raspberry Pi Operating System
- Complete Desktop Setup
How to Connect ESP32 Board to Raspberry Pi Using Arduino IDE
To connect ESP32 board to Raspberry Pi using Arduino IDE, follow the below-given instructions:
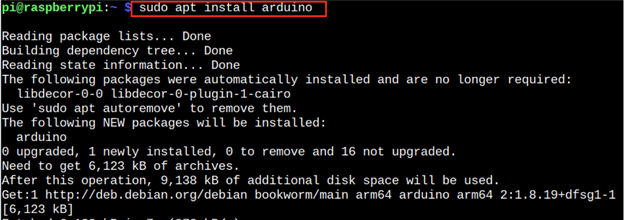
Step 1: Install Arduino IDE on Raspberry Pi
Arduino IDE can be installed directly from the Raspberry Pi source repository using the following command:
You can also install Arduino IDE on Raspberry Pi from the Snap Store as well by first installing Snap Store from the following apt command:

Then use the command given below to install Arduino IDE from the Snap Store:

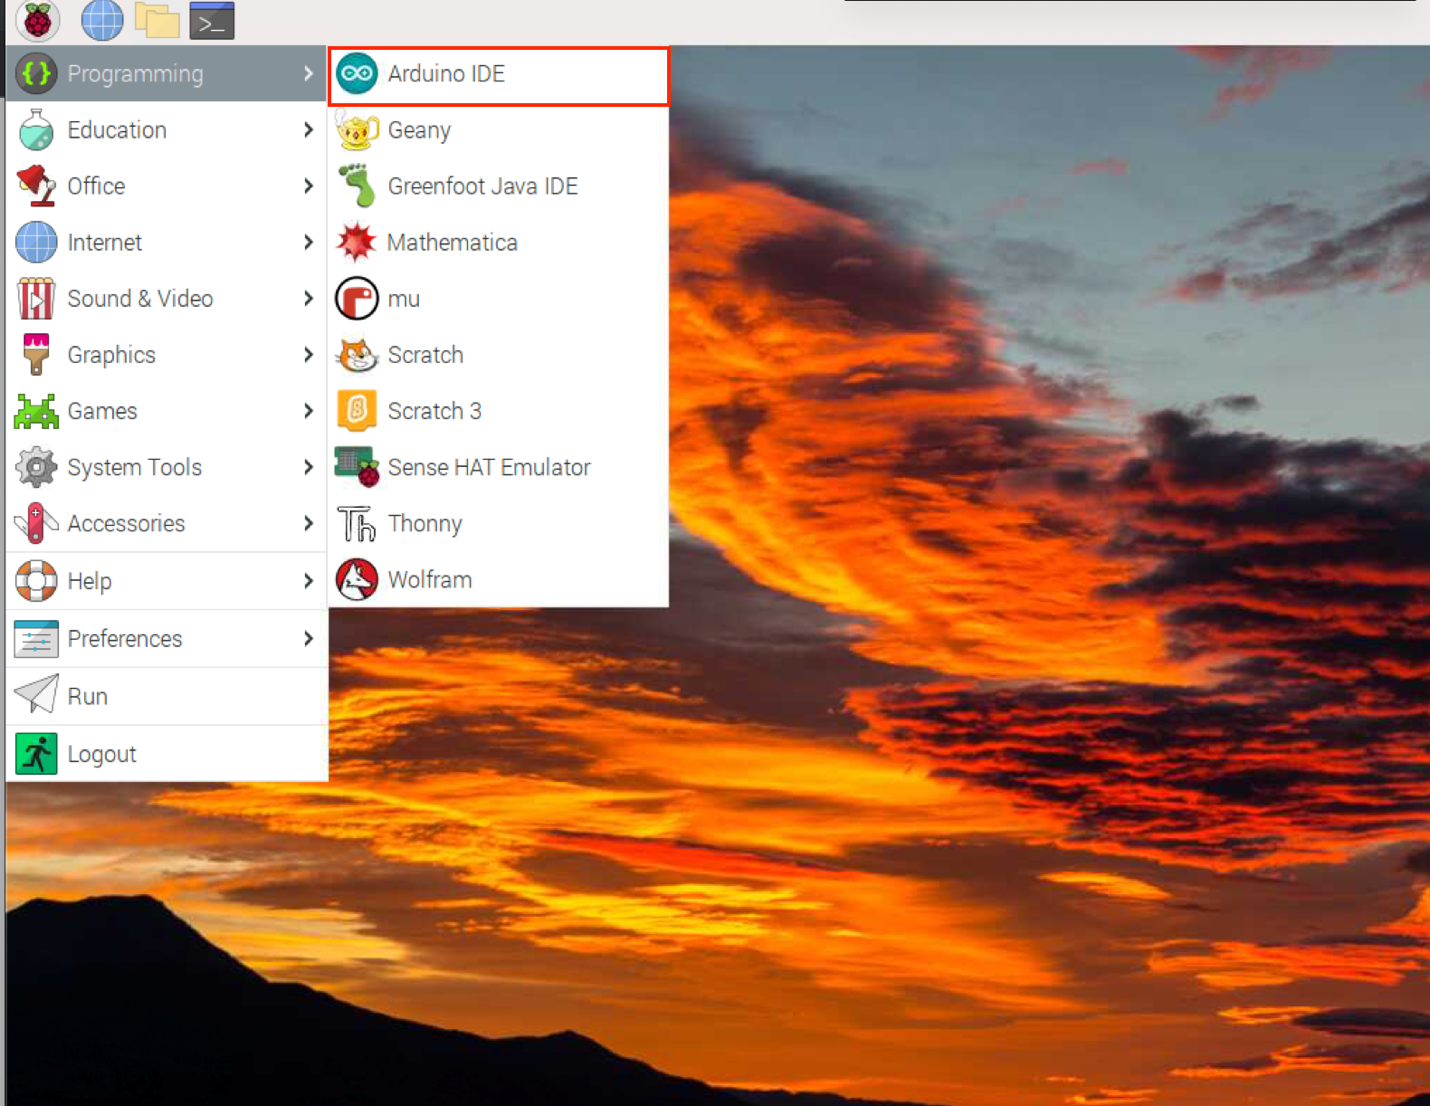
Step 2: Open Arduino IDE on Raspberry Pi
You can now open Arduino IDE on Raspberry Pi either from the “arduino” command or use the application menu to launch the IDE on the desktop.
While running the Arduino IDE on Raspberry Pi, you may experience permission denied error. Because of security, Raspberry Pi does not provide permission to access USB board.
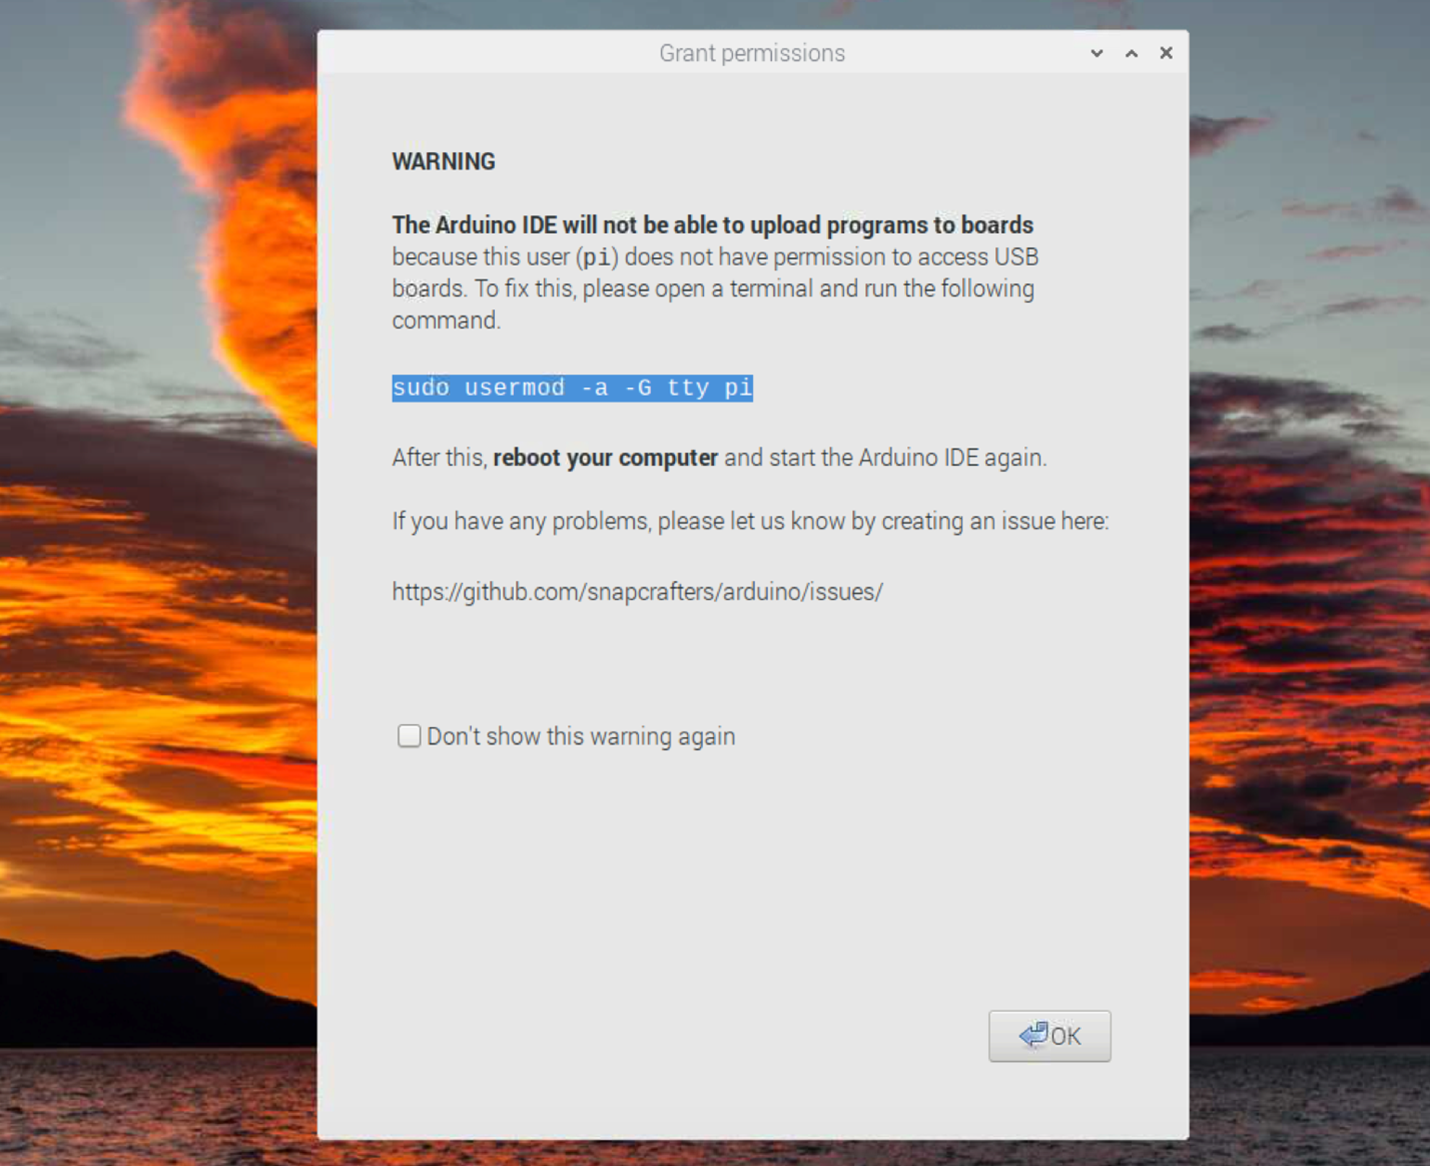
It this case, occur, you can fix it by running the following command:

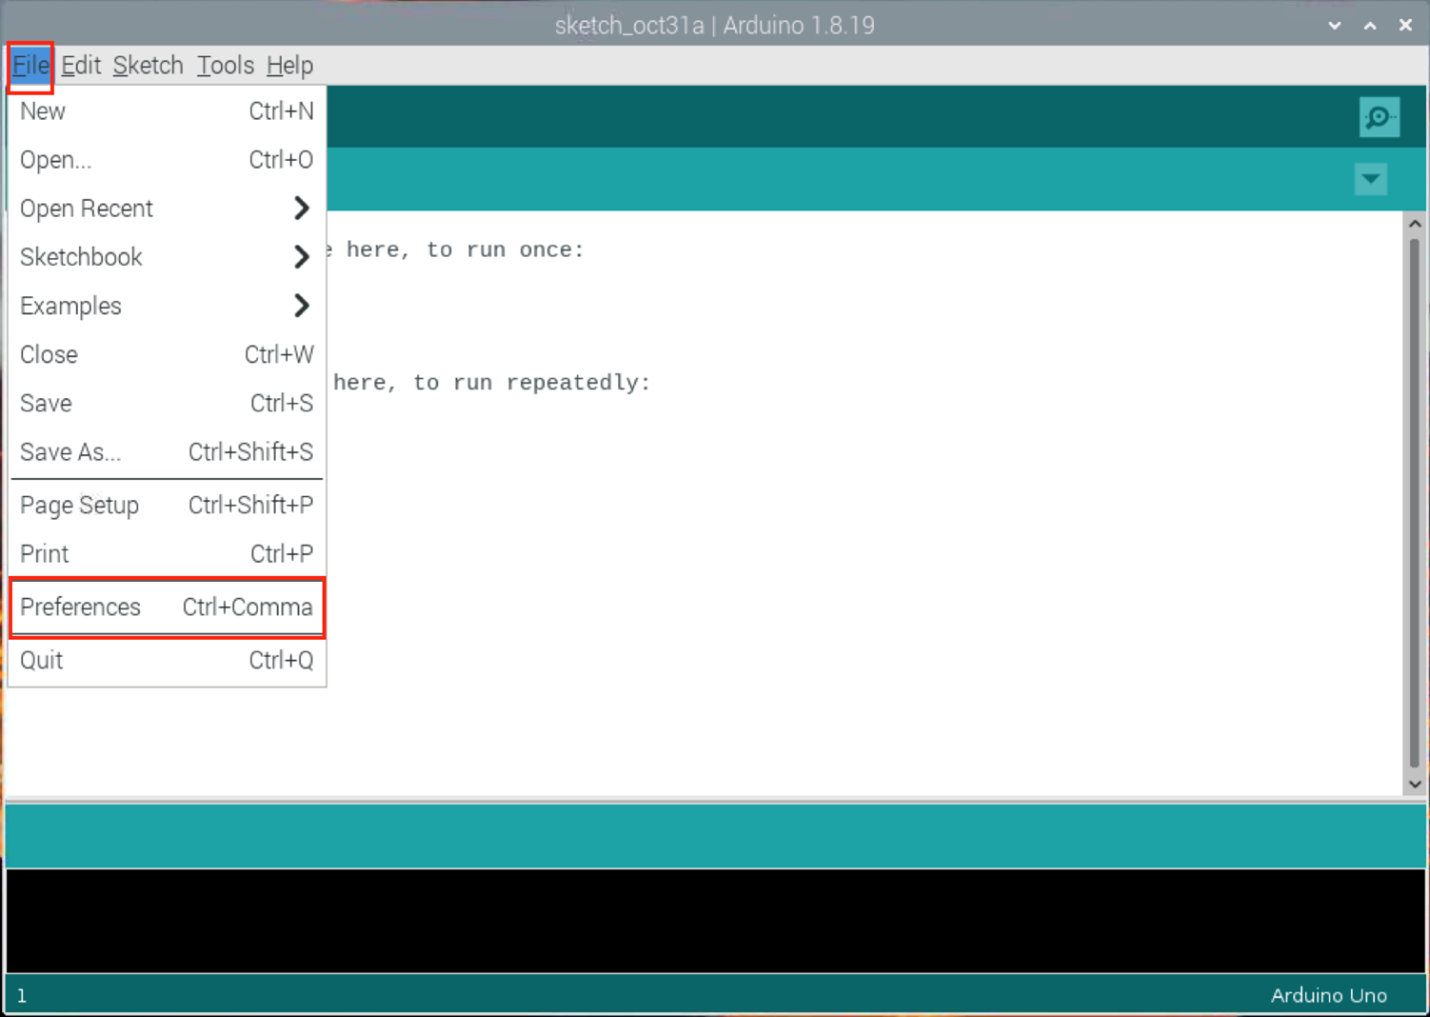
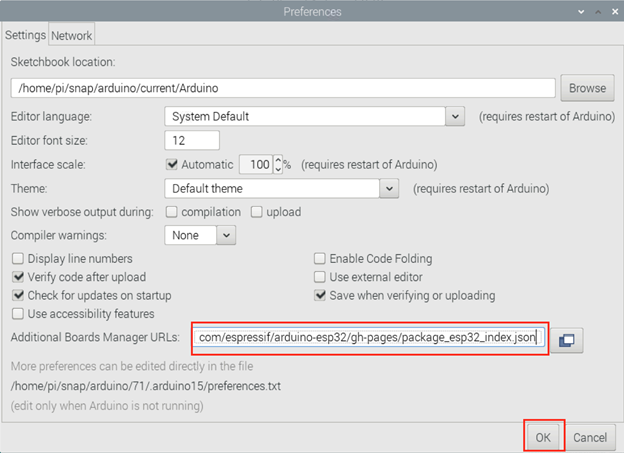
Step 3: Add Additional Boards Manager URL
Go to “Preferences” option from the “File” section:
Scroll down and in the “Additional Boards Manager” column, add the following URL:
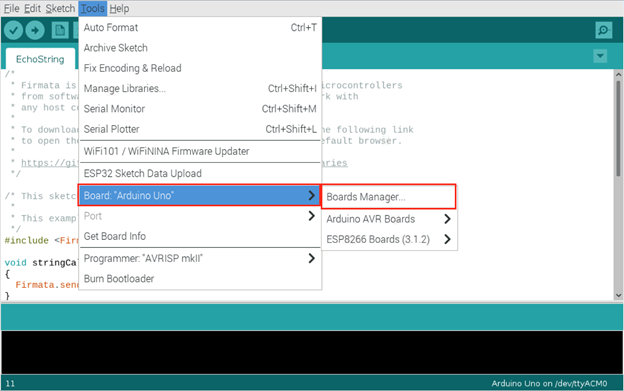
Step 4: Open Board Manager
Go to “Tool” section, select the “Board” option and navigate to the “Board Manager”:
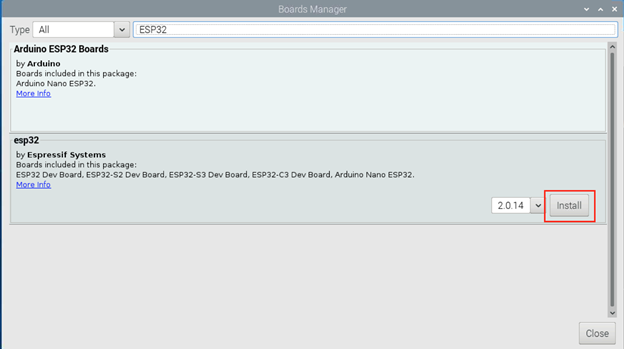
Step 5: Install ESP32 Packages on Arduino IDE
Search ESP32, choose the one introduced by the Espressif Systems and click on the Install button:
Step 6: Connect ESP32 with Raspberry Pi
Now connect the ESP32 Board with your Raspberry Pi through the USB port. You will need a micro-USB cable whose micro-USB end is inserted into the ESP32, while the Type A USB end is inserted into the Raspberry Pi USB port.
Step 7: Select ESP32 Board
Navigate to “Tools>Board Uno>ESP32 Arduino”, then choose the ESP32 board, which is DOIT ESP32 DEVKIT V1 in my case:

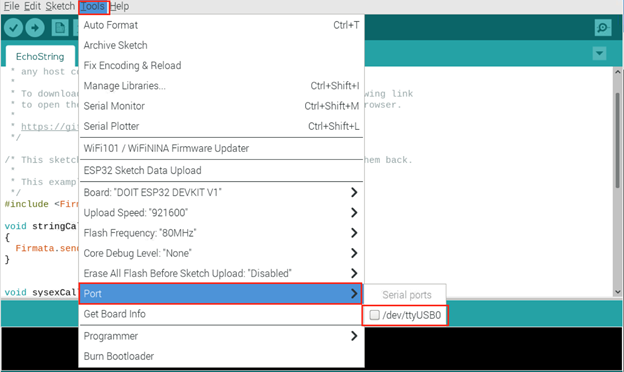
Step 8: Select Port
You have to select the port on which your ESP32 board is connected to Raspberry Pi. Ensure the ESP32 cable is inserted into the Raspberry Pi, and if it is done, you will see the port option in the menu.
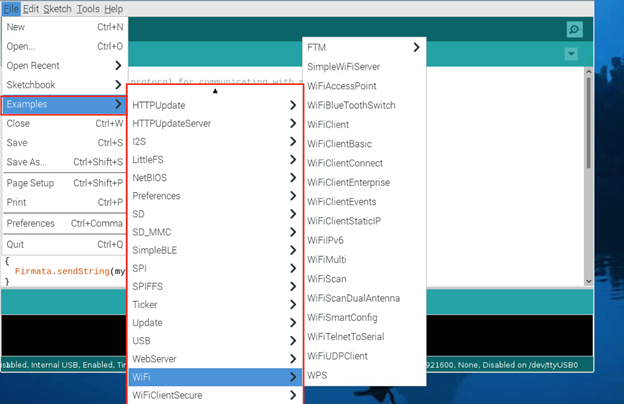
Step 9: Verify ESP32 Board is Connected to Raspberry Pi
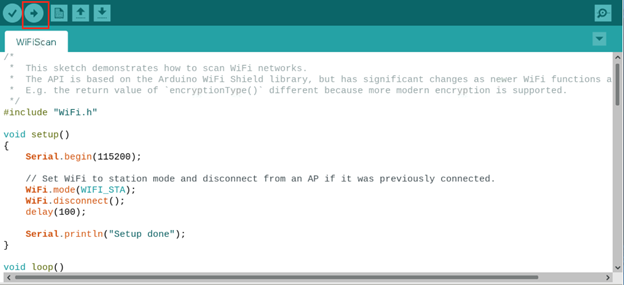
To verify the ESP32 board is connected to Raspberry Pi, you will need to upload a code. You can manually write a code to select it from the Examples section from the File menu:
Step 10: Upload the Code
To upload the code in Arduino IDE, you will need to click on the “Upload” button:
Once the uploading the done successfully, you will be able to see the following output:

The above output ensures that the ESP32 board is successfully connected to your Raspberry Pi device using the Arduino IDE.
Note: If you receive an error while uploading the code, the reason might be the cable you are using to connect the ESP32 board with the Raspberry Pi device. Replace the cable to fix the error.
Conclusion
Connecting an ESP32 board to Raspberry Pi is a straightforward task and can be done easily by installing Arduino IDE on your system. After installing the IDE, connect the ESP32 to Raspberry Pi, open the IDE, select the board and port, then upload the code for successful connection. If you encounter an error, you must change the cable connecting the ESP32 board to Raspberry Pi device.
Source: linuxhint.com