How to Resolve “Unknown USB Device, Set Address Failed” Error on Windows
To connect external devices such as keyboards, mouse, scanners, and printers, normally the USB connection is used. Not only that, BUT the USB ports are also a viable solution for sending and receiving data from external devices. Sometimes, we get an error while connecting the USB device to the computer, such as a Set address failure or an Unknown USB Device.
How to Fix USB Failed Connecting Errors on Windows
When you find an error on Windows saying Unknown USB Device or Set Address Failed, there might not be a problem with the USB you are trying to connect to the computer. There are some settings you need to configure on your Windows desktop. Below are a few methods to resolve USB errors in the computer:
Method 1: Modify Advanced Power Settings
There are some USB settings you need to modify in the advanced power settings. To access and modify them, follow the following steps:
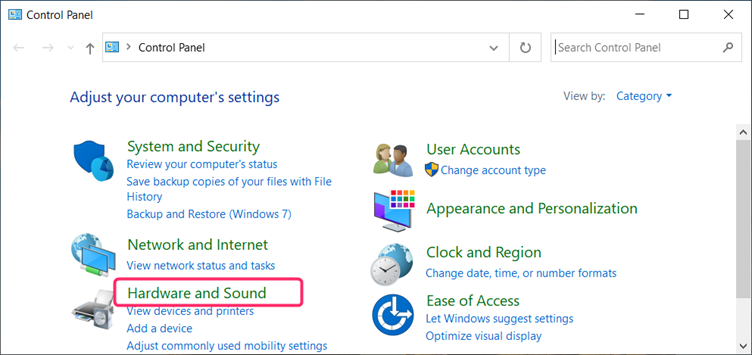
Step 1: Open the control panel from the Start menu and click Hardware and Sound from the homepage:
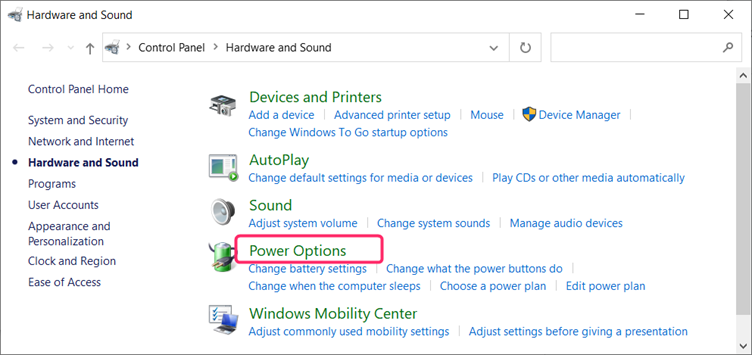
Step 2: Click on Power Options in the Hardware and Sound panel:
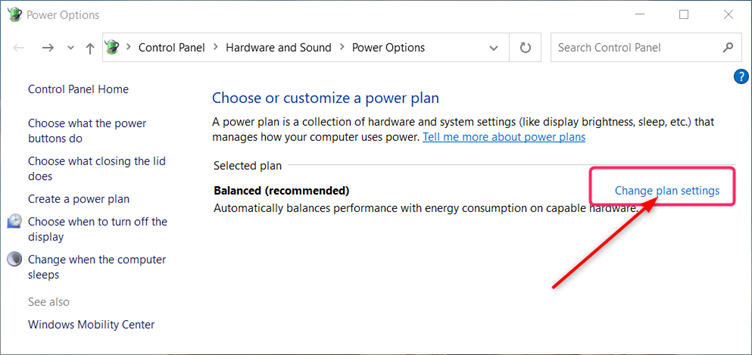
Step 3: Click on Change plan settings at right in front of the balanced recommended power plan:
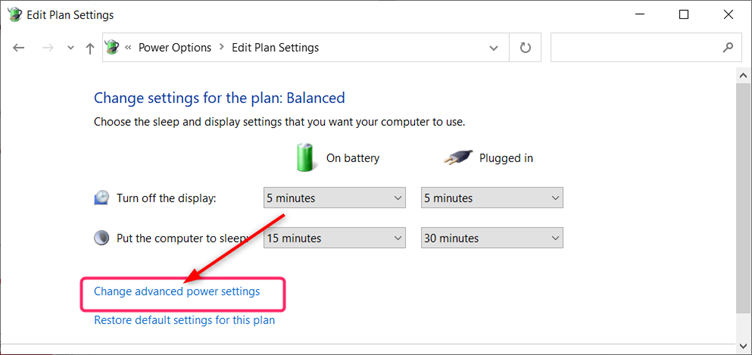
Step 4: Next to navigate to additional or advanced settings, click on Change advanced power settings:
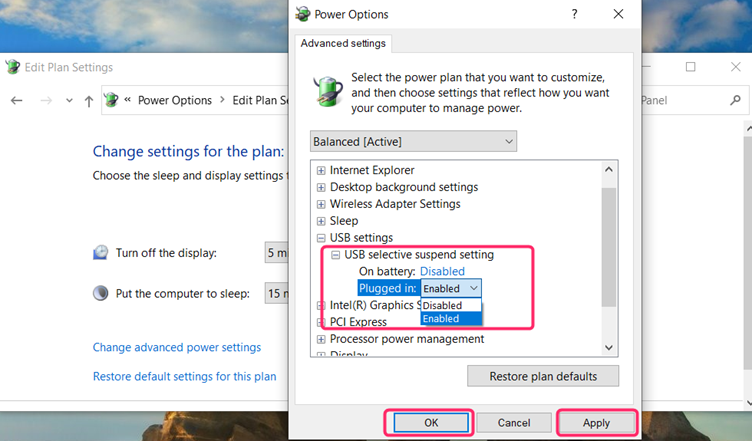
Step 5: Now navigate to USB selective suspend settings by expanding the USB settings, from there Disable it for both the plugged-in and on battery:
Method 2: Update the Device Driver
You can get USB errors while connecting it to your computer if the device driver is not updated. To update the USB device driver on your Windows desktop, below are a few steps to follow:
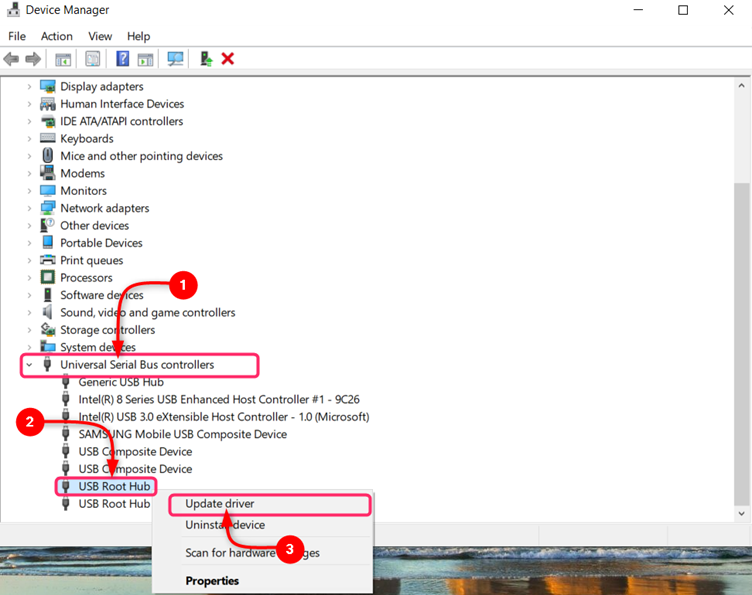
Step 1: Navigate to the Device Manager in the Start menu or by pressing Windows + X key from the keyboard. Expand the Universal Serial Bus controllers menu, then right-click to USB Boot Hub and click on Update driver:
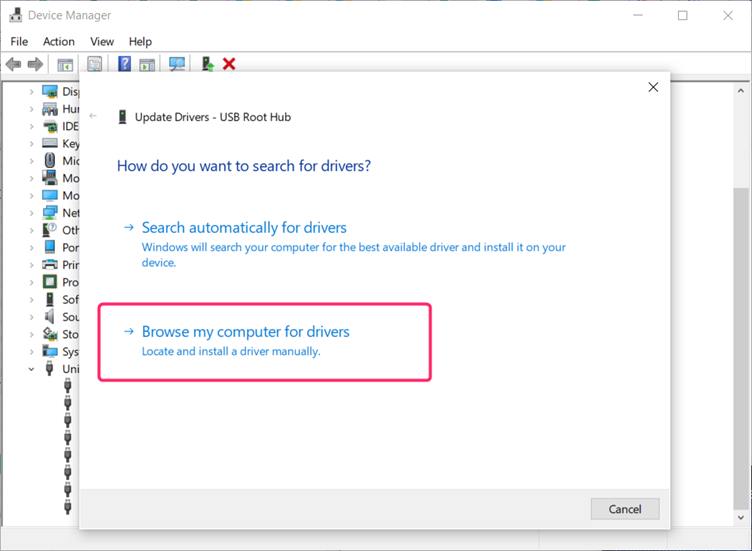
Step 2: Click on Browse my computer for drivers:
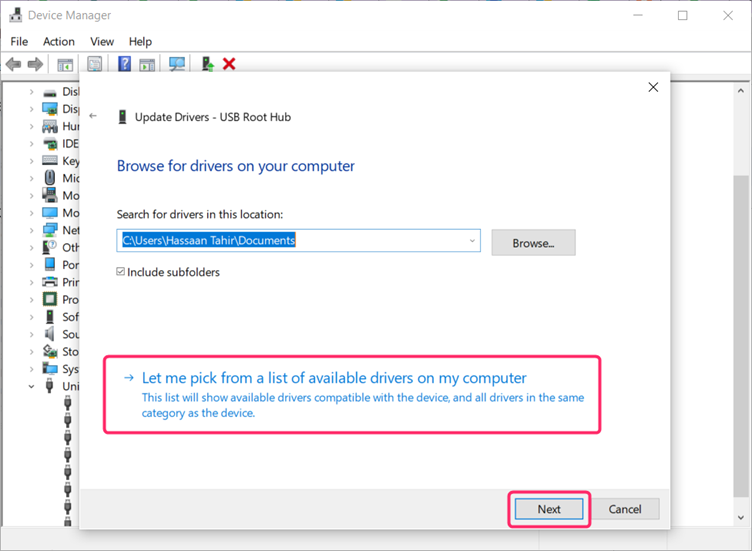
Step 3: Click on Let me pick from a list of available drivers, then click on Next:
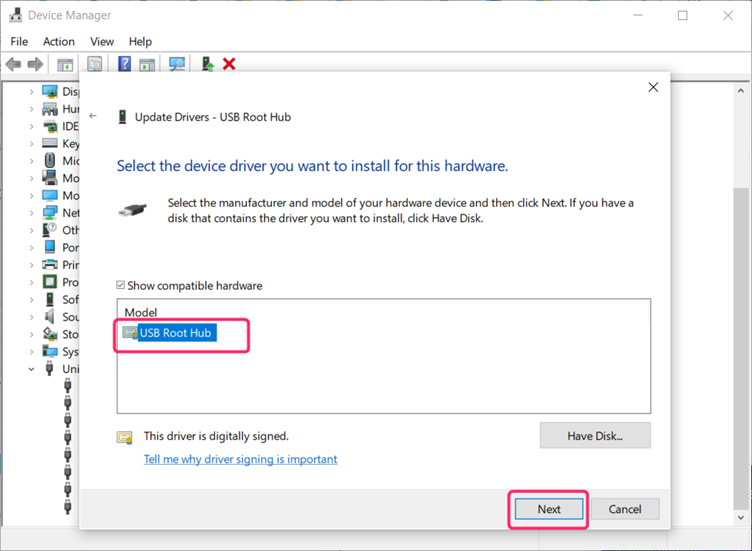
Step 4: Click on USB Root Hub, then click on Next:
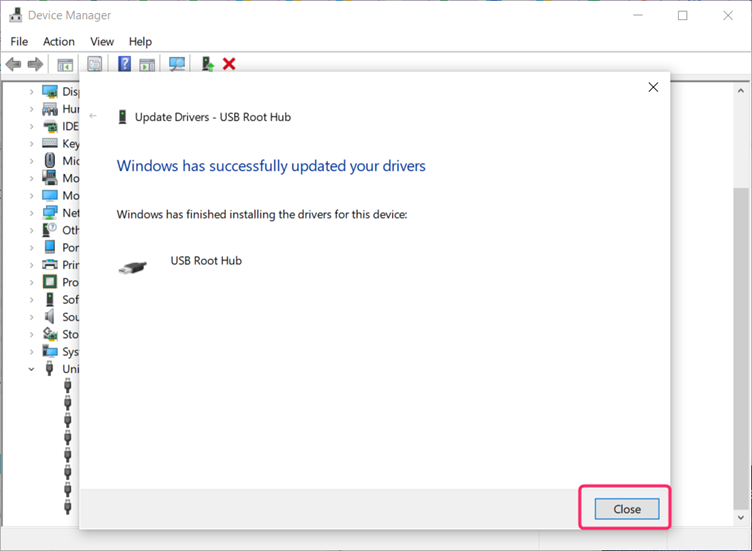
Step 5: Click on Close after completing the installation of driver updates:
Method 3: Turning Off Fast Startup
Turn off the fast startup option in your computer if you are continuously getting errors while connecting a USB device to your computer. There are some simple steps to follow to turn off fast startup on your Windows desktop.
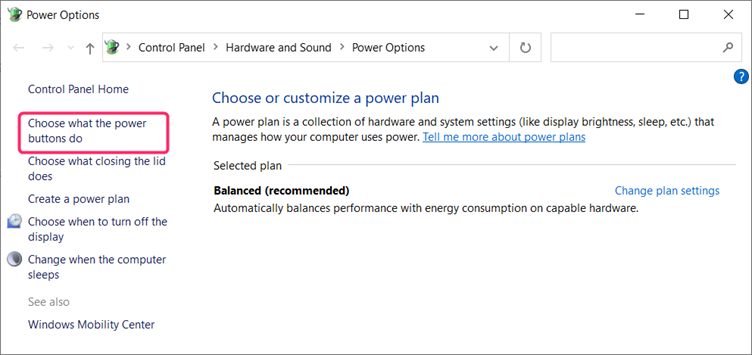
Step 1: Navigate to Power Options in the control panel as mentioned previously and from there navigate to the power buttons configuration click from the option on the left:
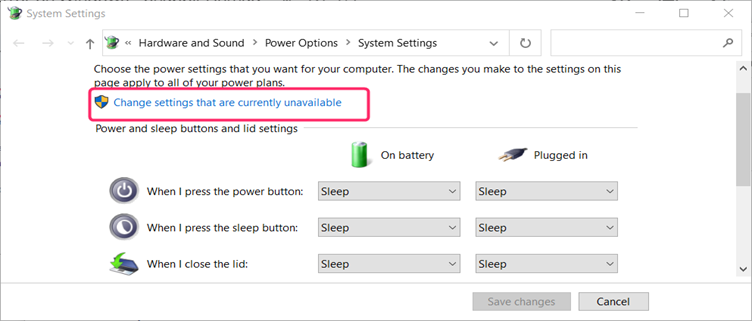
Step 2: Now navigate to the inactive options by clicking on the Change settings that are currently unavailable option with administrator privileges:
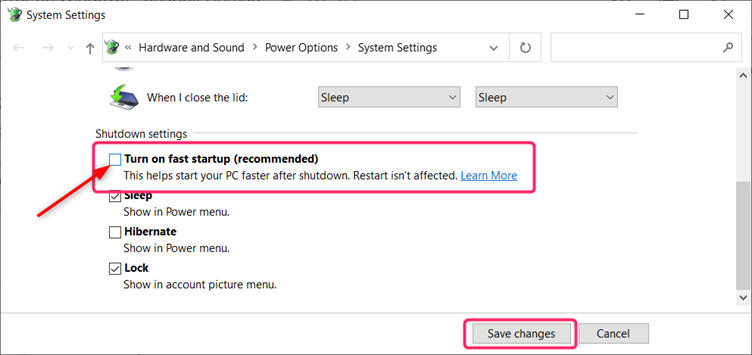
Step 3: Deselect the fast startup option by unchecking the Turn on fast startup (recommended) then apply the changes:
Conclusion
USB not connecting errors can be solved by updating USB drivers and for that Open the device manager and under the universal serial bus controller check for driver updates. Another way is to modify the advanced power option and disable USB selective suspend settings for both during plugged-in and on battery. Lastly, turn off the fast startup option under the power options.
Source: linuxhint.com