How to Install Kubectl on Ubuntu
Update the Ubuntu Packages
Before installing Kubectl on Ubuntu, we need to update all the packages of the Ubuntu system. For an update, we have to utilize the “Apt” utility of Ubuntu within the “update” command as follows:

Set Up Docker
The first prerequisite to properly install Kubernetes on Ubuntu is to set up Docker. To install Docker, we utilize the “apt” utility of Ubuntu within the installation command. The Docker package should be mentioned as “docker.io” followed by the “-y” option to force the “apt” utility to install Docker. The Docker will be installed in a while, and you can start using it after enabling it.

To enable Docker on the Ubuntu system, we utilize the “systemctl” utility. The two separate commands are utilized with the “enable” and “status” keywords to enable the Docker service and check its status after enabling it. The output of the status query displays that the Docker service is running perfectly fine.
$ sudo systemctl status docker

After enabling the docker utility, you have to start using the same “systemctl” utility followed by the “Start” keyword and service name as “docker”.
Install Kubernetes
Before installaing Kubernetes, it’s necessary to install the “curl” utility in your system so that you can add the key of Kubernetes in your system. The “Snap” package is utilized to install the “curl” utility. The utility will be installed successfully.

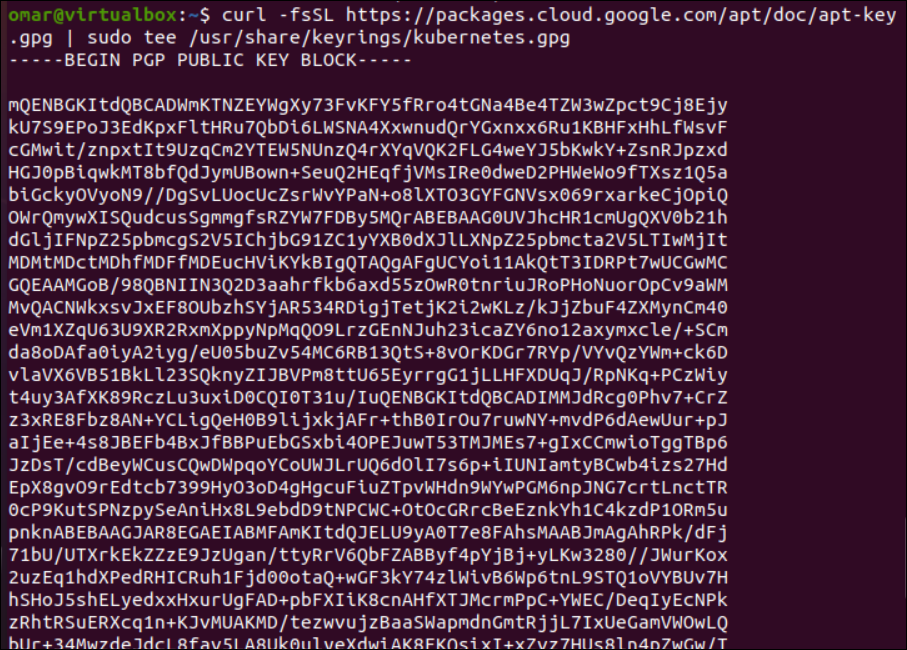
After the installation of the “curl” utility, we utilize it within the command followed by the “fsSL” option to get the GPG key of Kubernetes from its official cloud repository. This command gets the signing key as depicted in the output image:
Now, to add the Kubernetes repository within the default repositories of our system, we have to use the “echo” command followed by the “deb” instruction. Ensure that your other Ubuntu node has the Docker installed and you have to execute the following instruction on other nodes, i.e., for smooth communication:

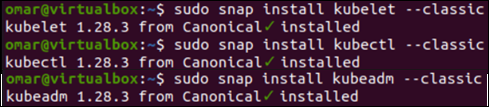
A utility called Kubeadm, or Kubernetes Administrator, aids with cluster initialization. Utilizing the community-sourced standards expedites setup. The work bundle that launches the containers on each node is called Kubelet. You may access the clusters via the command line with the program. Run the following instructions on every server node to install the Kubernetes installation tools via the “snap” utility for each instruction followed by the “—classic” keyword:
$ sudo snap install kubectl --classic
$ sudo snap install kubeadm --classic
After the successful installation of Kubernetes tools, we utilize the version instructions for each tool to look for the installed version as follows:
$ kubelet version
$ kubectl version

Configure Kubernetes
It’s time to configure the installed tools of Kubernetes on our system. In this section, you may learn how to get the servers ready for a Kubernetes deployment. Perform the following commands on each Linux machine that you used as a node. First of all, turn off the swap storage first. Run the “swapoff” command with the “-a” option to carry out this operation. The “swapoff” command should be followed by the “sed” command as follows:
$ sudo sed -I ‘/ swap / s/^\(.*\)$/#\1/g’ /etc/fstab
It’s time to load the modules of “containerd”. To load those modules, we open the “containerd” configuration file using the GNU nano editor. This file is in the “etc” folder per the following command:
Upon opening the configuration file, we load the “overlay” and “br_netfilter” modules by adding the following two keywords:
br_netfilter
After mentioning the modules in the files, we have to utilize the “modprobe” instruction followed by the names of modules to load them finally.
$ sudo modprobe br_netfilter
It’s high time to configure the network of Kubernetes by utilizing its configuration file located in the “etc” folder. The GNU nano editor is utilized to open the file.
We need to set the following shown variables for Kubernetes to enable the networking. This configuration sets up the iptables for Kubernetes. Now, make sure to save the file before exiting.
net.bridge-bridge-nf-call-iptables = 1
net.ipv4.ip_forward = 1
Now, we reload the system services and configurations once and for all. The “sysctl” utility is utilized here with the “—system” option. You will see that the new configurations are added and reloaded, i.e. displayed in the output.

After successfully loading the Kubernetes modules and reloading the services, we have to assign a unique name to each node in your Kubernetes network. For instance, we want to set the current node as the master node of the Kubernetes network. Therefore, we try the “hostnamectl” utility in the command to set the hostname as “master-node”.

The worker node is also set using the same instruction with a different node name; this command needs to be performed at the worker server.
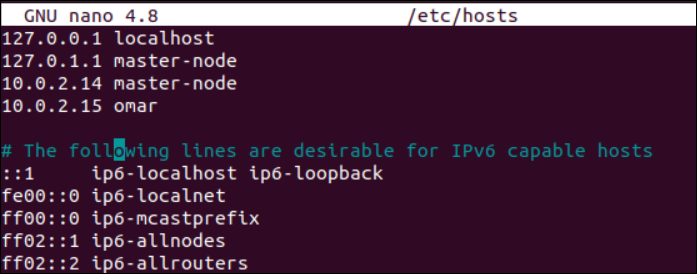
Open the host configuration files on every node within our Kubernetes network and add the IP addresses of each node within the file. You need to mention the host names along with IP addresses to identify them uniquely.
The image depicts the IP addresses and their hostnames in the host configuration file that is opened via the nano editor.
Make sure that you are at the master node right now and open the Kubelet configuration file via the nano editor.
Make sure to write the following shown line into the file to set a KUBELET_EXTRA_ARGS variable for Kubernetes on the master node.
Now, you have to reload the just-set configuration within your master node and the worker nodes. The “systemctl” utility is utilized with the “daemon-reload” keyword. After providing the password, don’t forget to restart the Kubernetes service.
Conclusion
In the end, your Kubernetes service is successfully installed and configured. Make sure to reload the Docker service and perform the specified commands on the worker nodes as well.
Source: linuxhint.com