How To Install elementary OS 7
This tutorial will help you install elementary OS version 7 into your computer. OS 7 is released this year and based on the solid foundation, Ubuntu 22.04 LTS, made beautiful for your PCs and laptops. Please note that OS 7 installation has two sections thanks to its username creation step placed after booting (this way, it will help the raise of elementary OS branded computers). We confirmed it works on Lenovo ThinkPad laptop and we want to share it with you. Now let's begin the process and good luck!

Subscribe to UbuntuBuzz Telegram Channel to get article updates.
Installation Plan
To make the setup successful, we base our setup upon configuration below. This configuration is a basis example to make everything else easier for you later.
- Operating system: elementary OS 7
- Architecture: PC 64-bit (also known as amd64)
- Computer firmware: UEFI.
- Storage type: hard disk drive.
- Storage size: 32GB.
- Storage format: GPT.
- Partition: 3.
- First partition: 300MB FAT32.
- Second partition: 1000MB FAT32.
- Third partition: the remaining size FAT32. They will be formatted later.
- Mount point: SLASH ( / )
- Number of steps: 15 steps divided into 2 sessions.
- Time required: about less than 30 minutes.
As we have written for years, with our tutorial you can install elementary OS 7 into hard disk (HDD), solid state drive (SSD) or even a USB flash disk drive as you wish simply by applying the above basis example into the drive you want. You can also make OS 7 in dualboot mode alongside Microsoft Windows or Apple MacOS if you want to as long as you put it into the correct disk partition so your computer will run two operating systems you can choose every firing it up.
Preparations
1. Download OS 7.
2. Make an OS 7 bootable medium.
3. Prepare the disk storage. You can use either hard disk, or solid state drive, or even USB flash drive. Make sure you format it as (1) GPT partition table and then (2) make three partitions as explained above. With elementary OS you will need them prepared before proceeding to the installation steps.
4. Boot the bootable medium on your computer. Select Try or Install elementary OS from the options.

5. OS 7 installer graphical user interface will show on screen with the first page showing Language Selection.
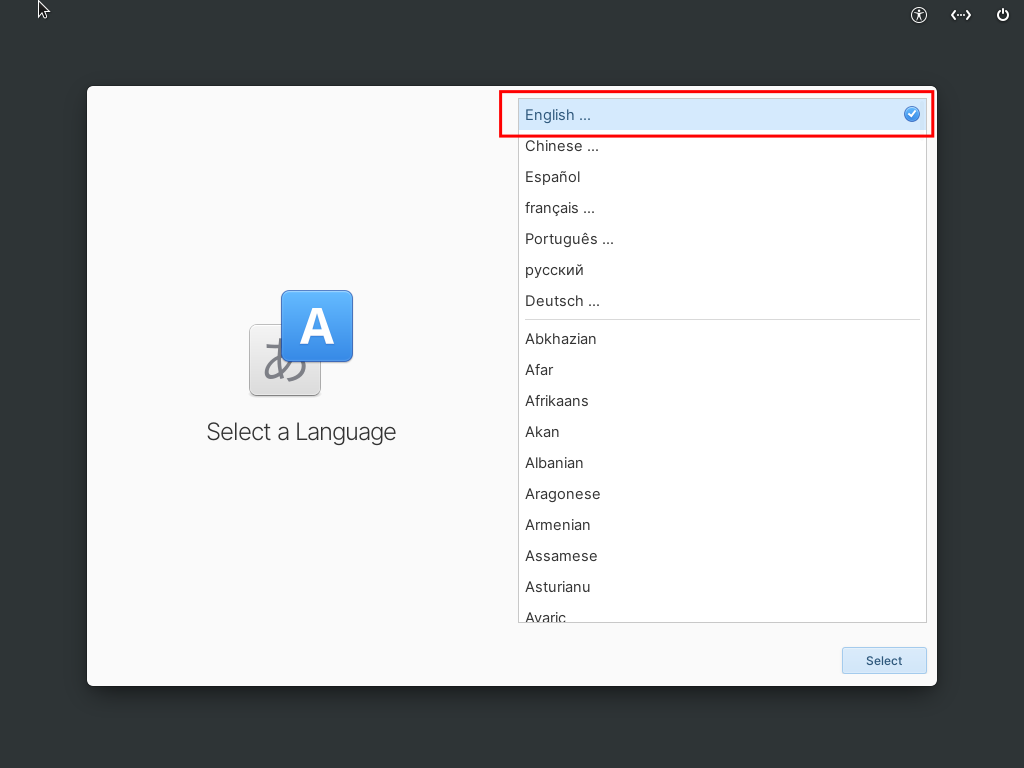
Step 1. Language Selection
Select English and United States. This can be switched again later.
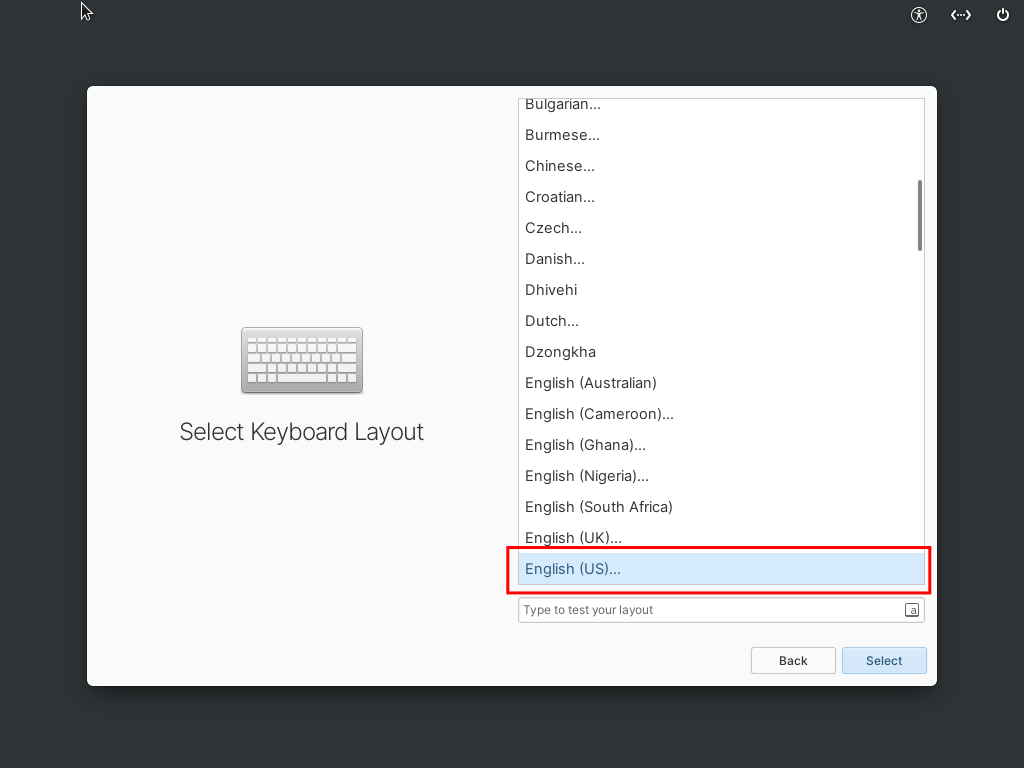
Step 2. Keyboard Layout Selection
Select keyboad layout English (US) then Default.
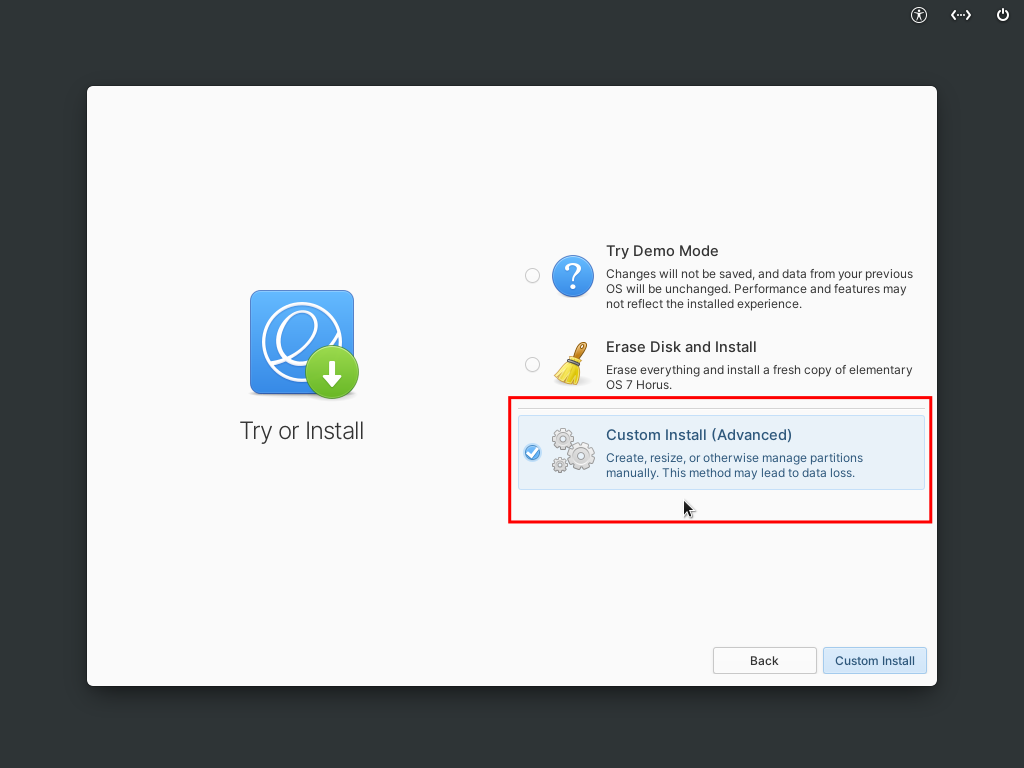
Step 3. Activate Installation Mode
Select Custom Install (Advanced) mode. This will take you to the disk partitioning step.
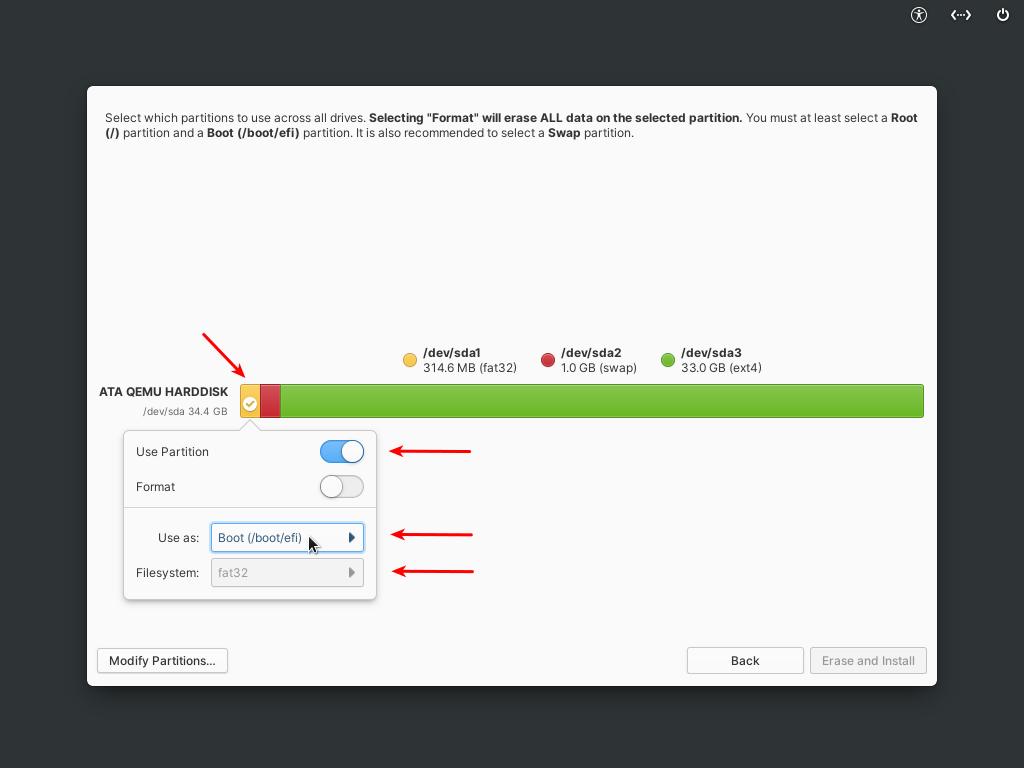
Step 4. Disk Partitioning
Because we already have a GPT hard disk drive prepared beforehand (see Plan), we now just need to format each of the three partitions as required by elementary OS. If you are new to elementary OS, if you observe pictures below carefully, you will know why we advise you to prepare the partitions beforehand.
4.1. Create EFI Partition
Select the first smallest partition to the left and format it as the plan:
- Use partition: yes
- Format partition: yes
- Use as: /boot/efi
- Filesystem: fat32
Continue to create swap.
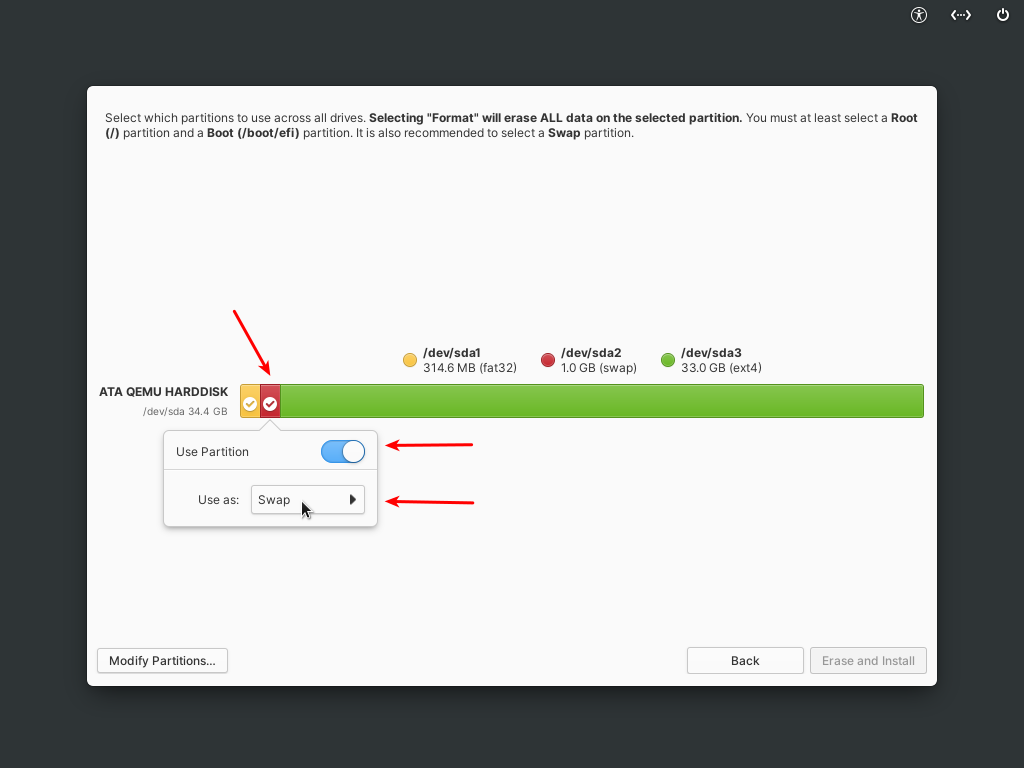
4.2. Create SWAP Partition
Once again, format the second small partition in the middle (yours might be different, but you will understand it anyway) as the plan:
- Use partition: yes
- Use as: swap
Continue to create root.
4.3. Create ROOT Partition
Lastly, select the longest partition to the left and format it as the plan:
- Use partition: yes
- Format: yes
- Use as: Root (/)
- Filesystem: Default (ext4)
Continue to Erase and Install.
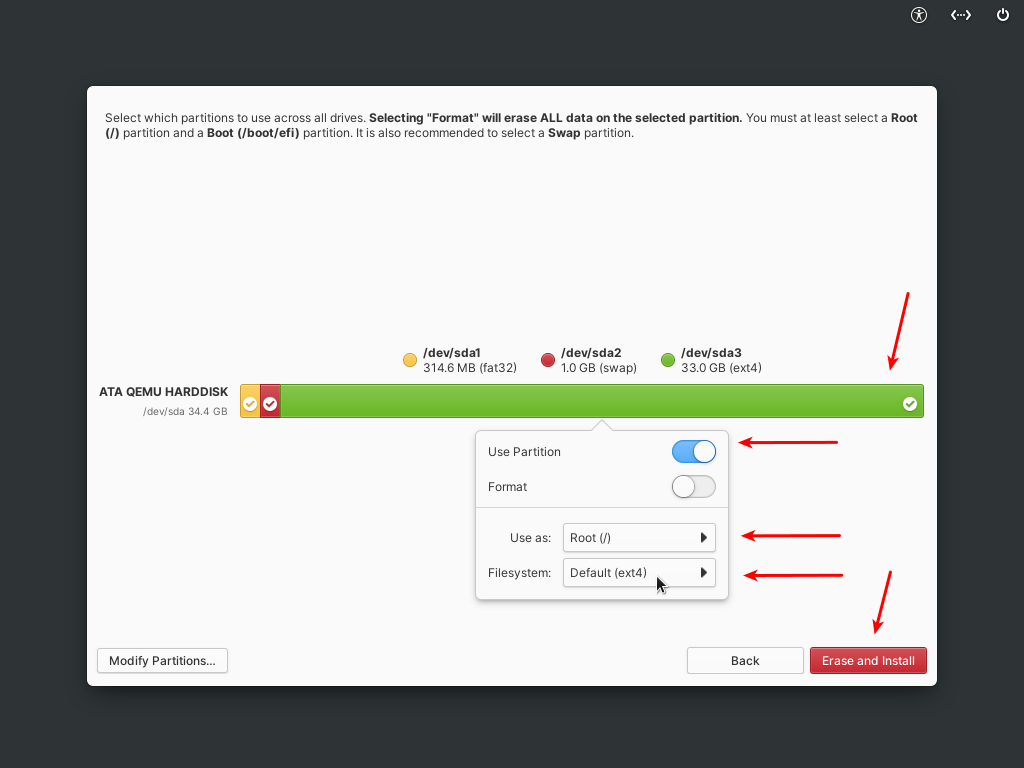
4.4. Click Erase and Install
Click the red button to the bottom of the disk partitioning (see picture above). This will take you to the actual installation process and you will wait for it.
Step 5
The actual installation process will take place. You can wait for this by drinking some coffee, reading a book or have a chat with your kids. We confirm this step is pretty quick and it took no more than 30 minutes.

Step 6
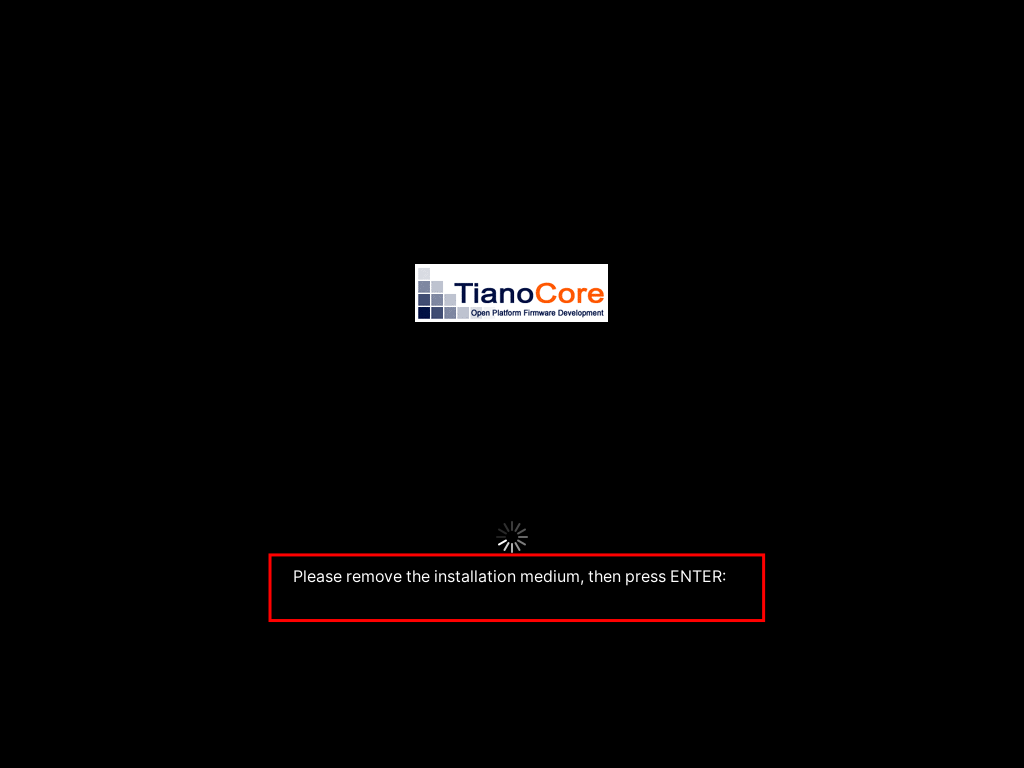
Once installation process finished, the installer will automatically try to reboot your computer by asking you to remove the installation medium (the USB flash drive you use as installer) and then press Enter. The computer will restart.
Step 7. Second Session of The Installation
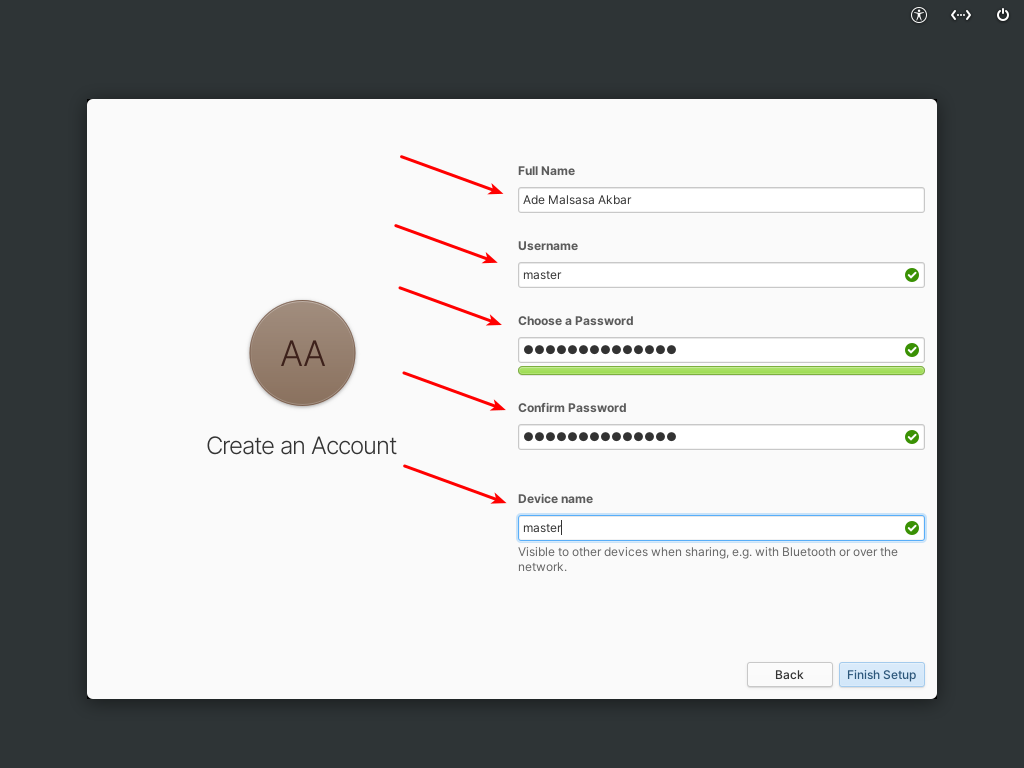
We said that OS 7 has two sessions of installation and this is it. Once restarted, here you repeat step number 1-3 exactly the same: select language English (United States) and keyboard layout English (US) Default and then you create your own username and password. Finally, click Finish Setup.
Step 8
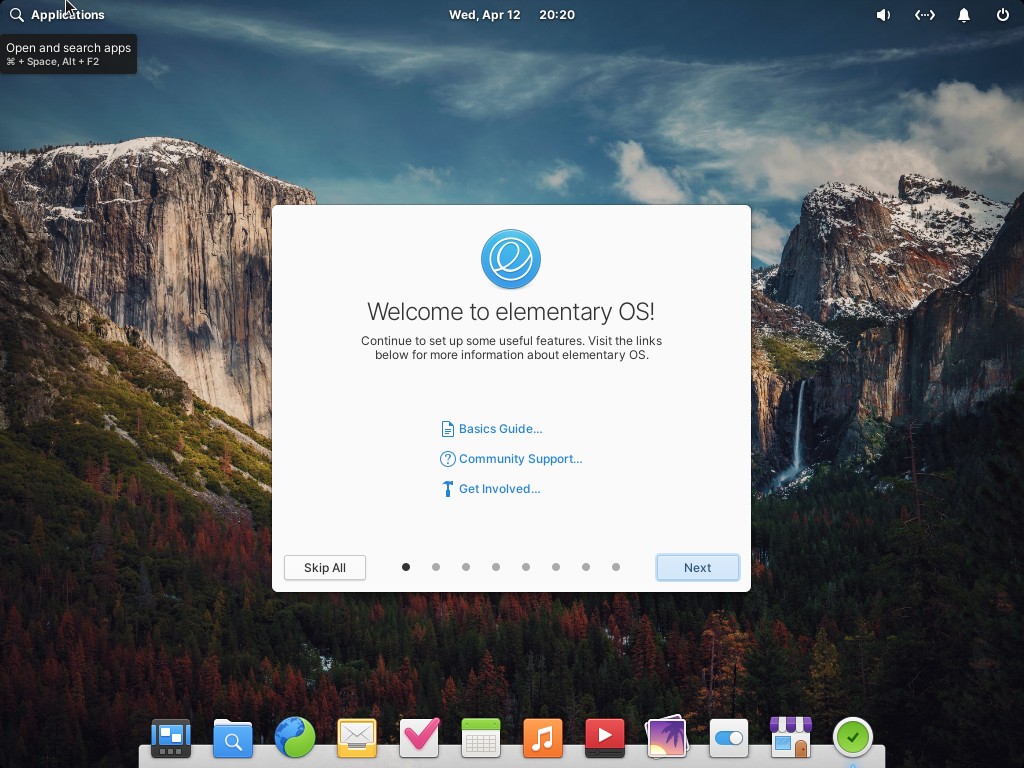
After logging in, elementary OS 7 desktop is ready to use and the installation is finished. Congratulations! We wish you the best for your installation.
This article is licensed under CC BY-SA 3.0.
Source: Ubuntu Buzz !