How to Generate Battery Report on Windows 11
While working with Windows 11, you just need to inspect the battery’s health. Over time, battery life shortens depending upon the usage of the system. So, the best way to protect the system from battery loss is to create battery reports on a regular basis and examine them. This helps to monitor detailed battery usage, identify high power-consuming applications, and prevent battery damage.
- How to Generate Battery Report on Windows 11
- How to Open a Battery File in Windows 11
- How to Read the Battery Report on Windows 11
- How to Identify Which Applications Consume More Battery in Windows 11
- How to Stop Draining Battery in Windows 11
- Conclusion
How to Generate Battery Report on Windows 11
There are multiple ways to generate a battery report on Windows 11, but the Command Prompt is considered one of the easiest. So, let’s move forward with this:
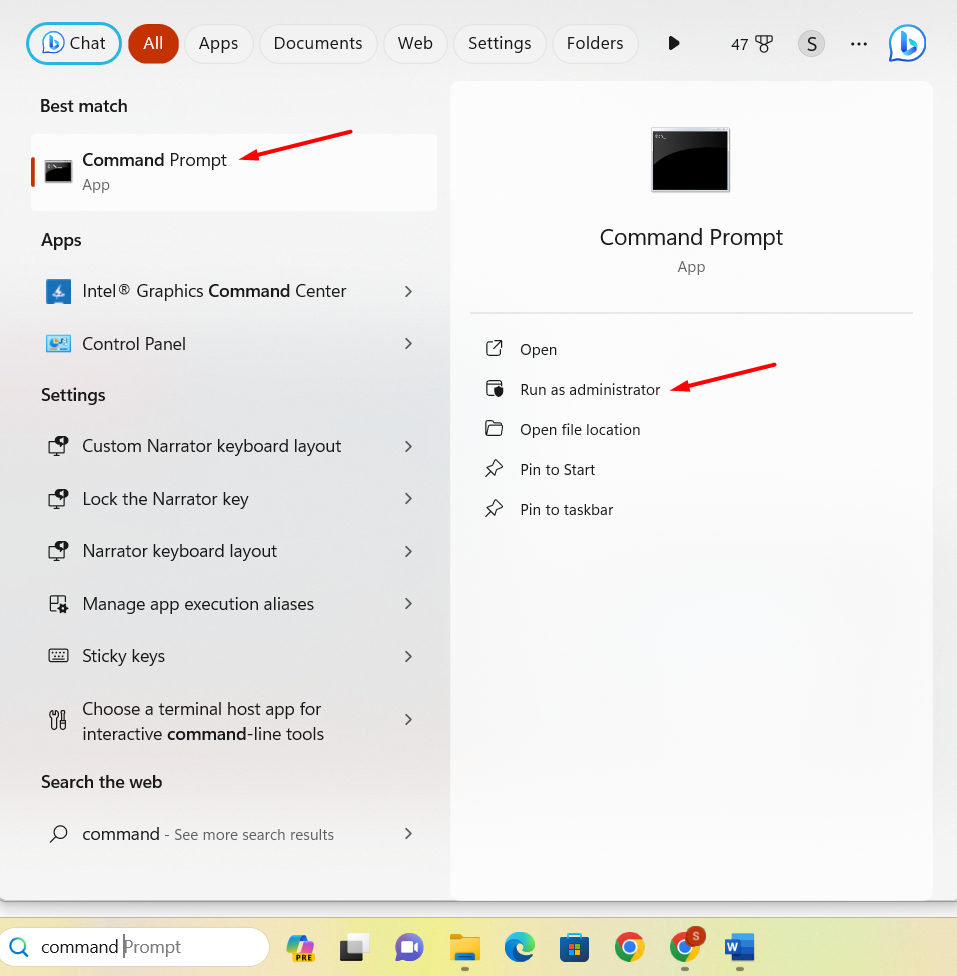
Step 1: Open the Command Prompt by using the taskbar search box; type cmd in it and click to run as administrator:
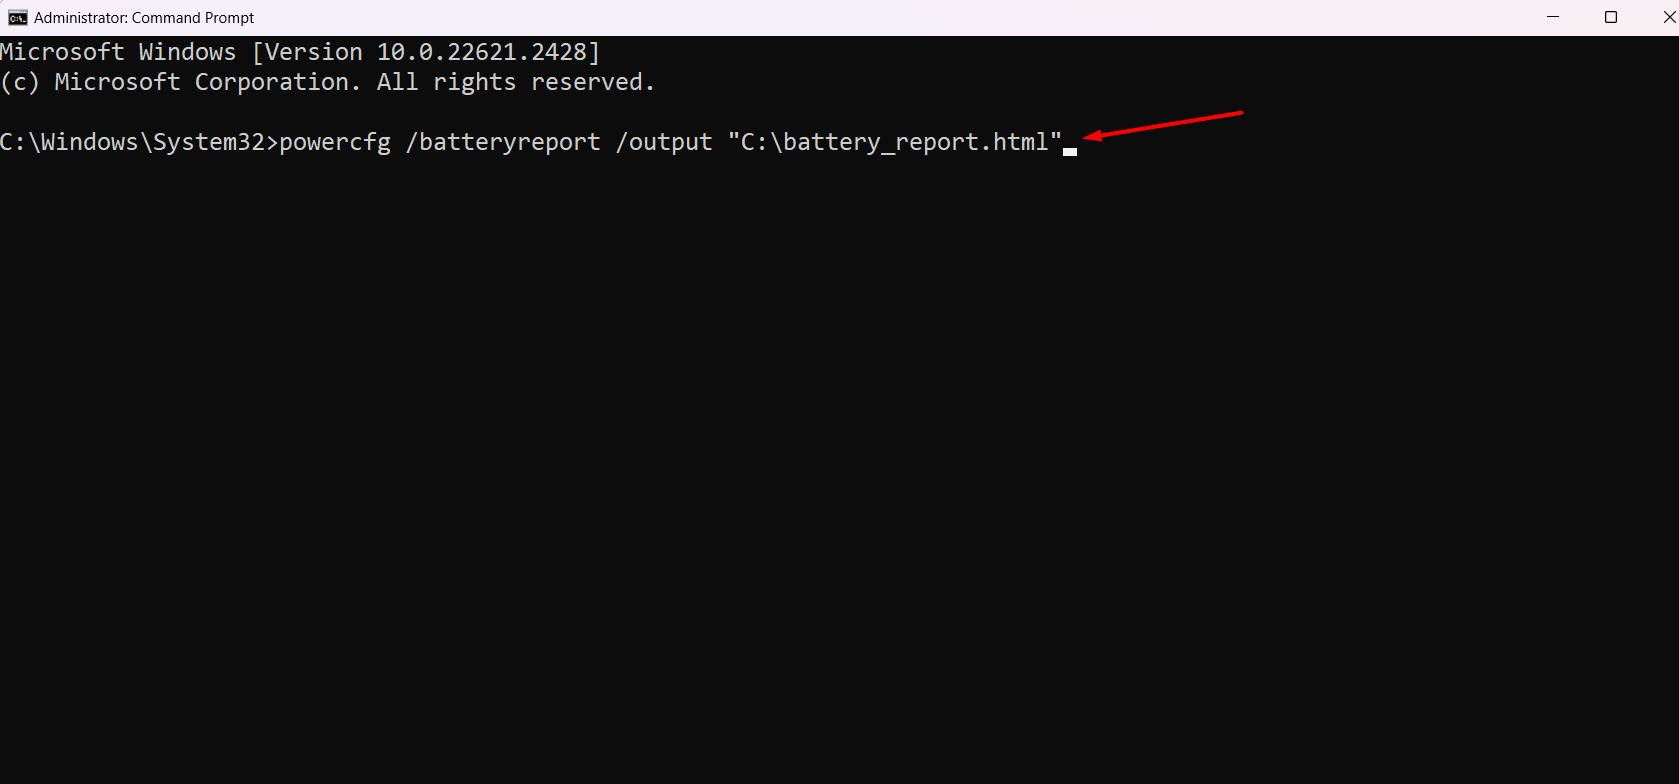
Step 2: In the Command Prompt, execute the command mentioned below to generate a battery report in the C drive and hit the Enter button:
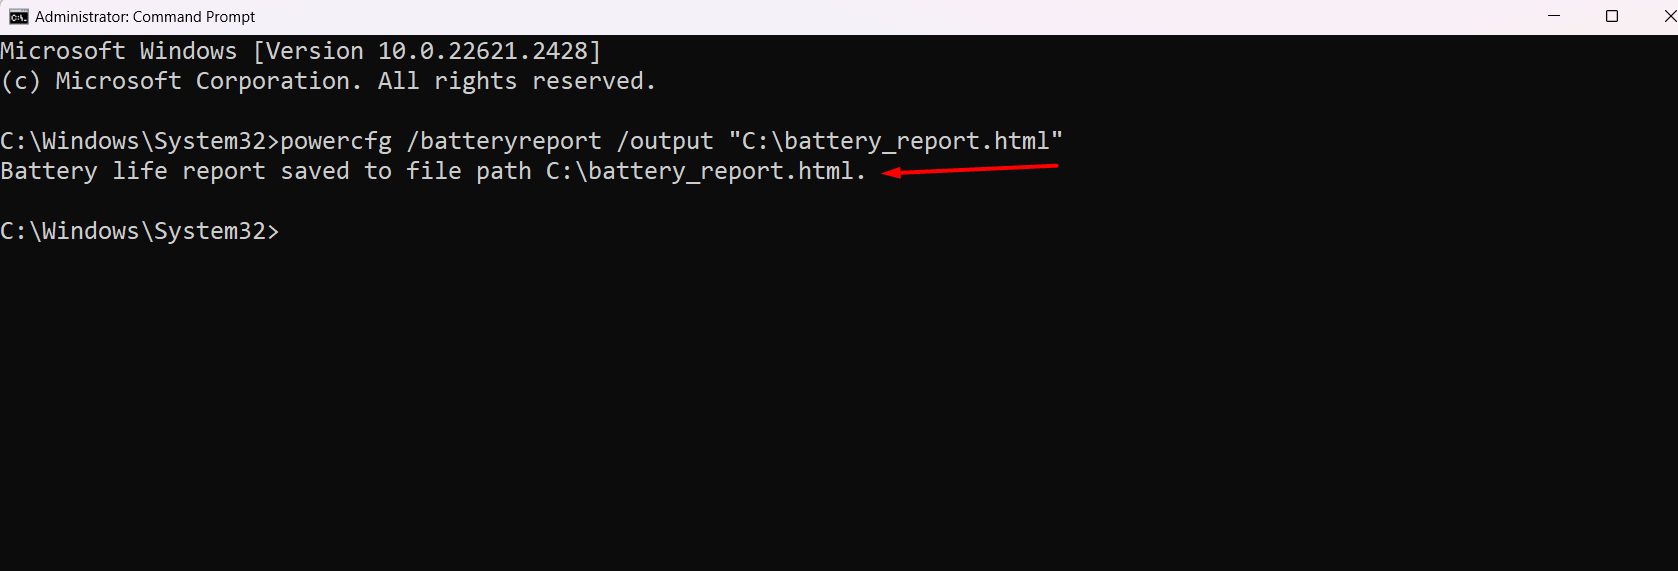
Once the command is successfully executed, you will receive a message in the prompt that a file report is saved in the C drive:
How to Open a Battery File in Windows 11
Read the below-given instructions to open the battery file:
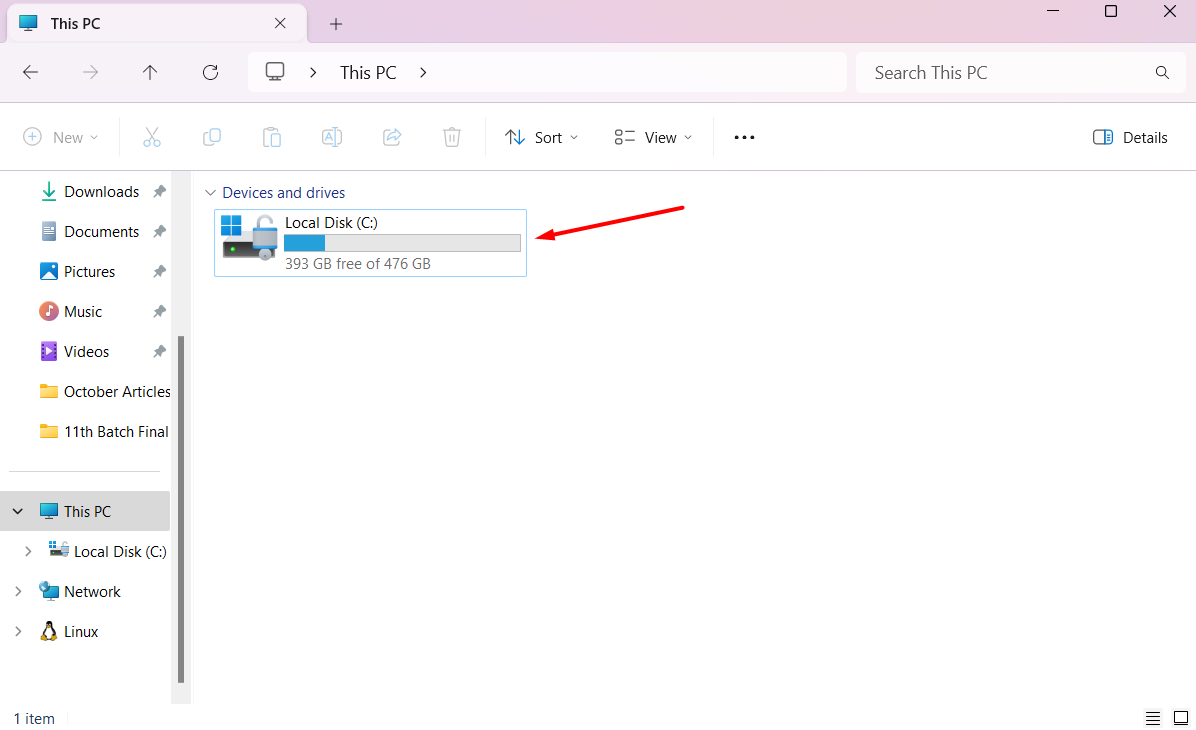
Step 1: To open a generated file, open This PC by clicking on File Explorer:
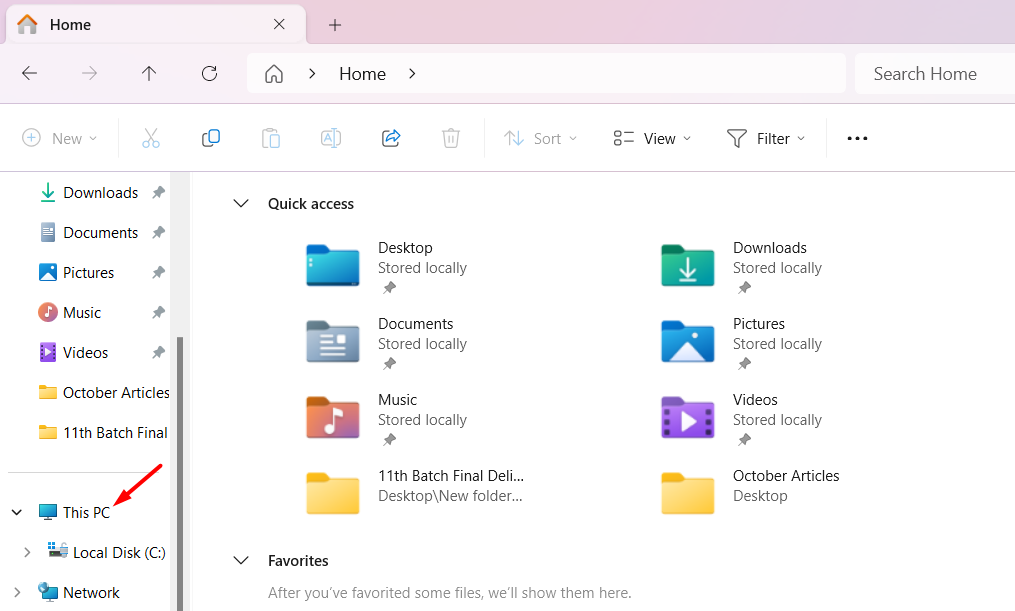
Step 2: In the This PC screen, select the Local Disk (C:) drive from the Devices and drives section:
Step 3: In the C drive, you will see multiple file options along with the saved battery_report file:
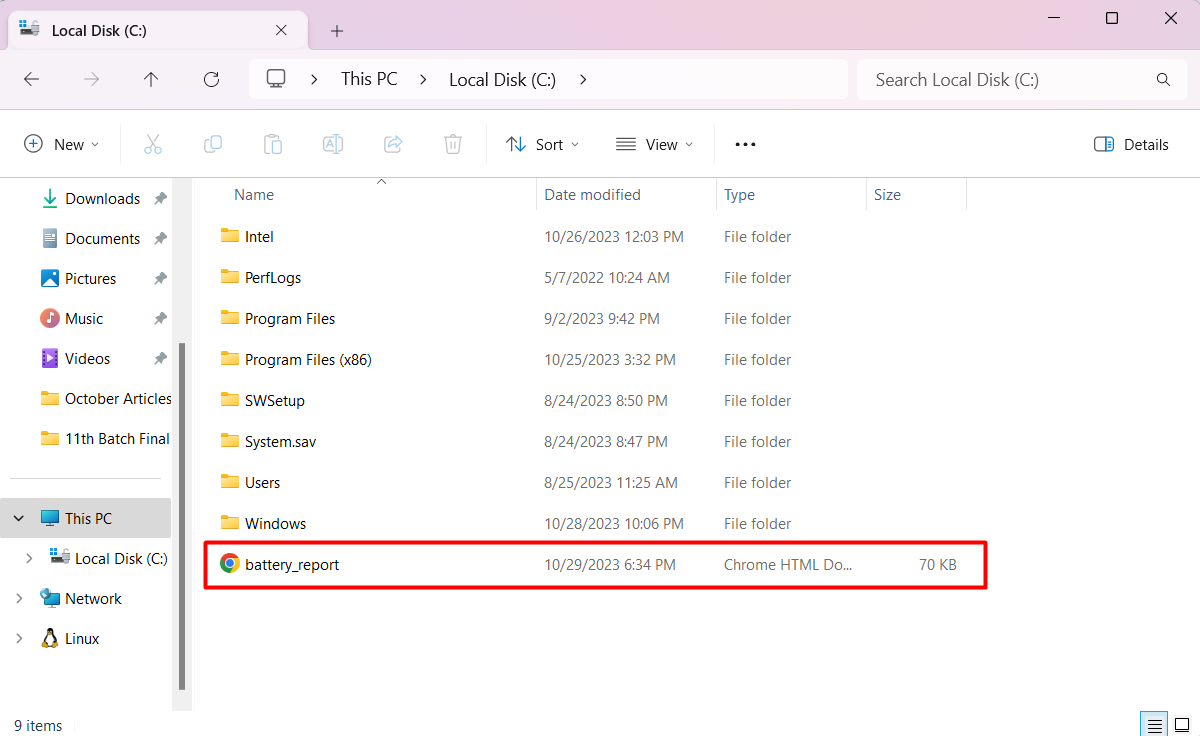
Click on it to get the report on the browser.
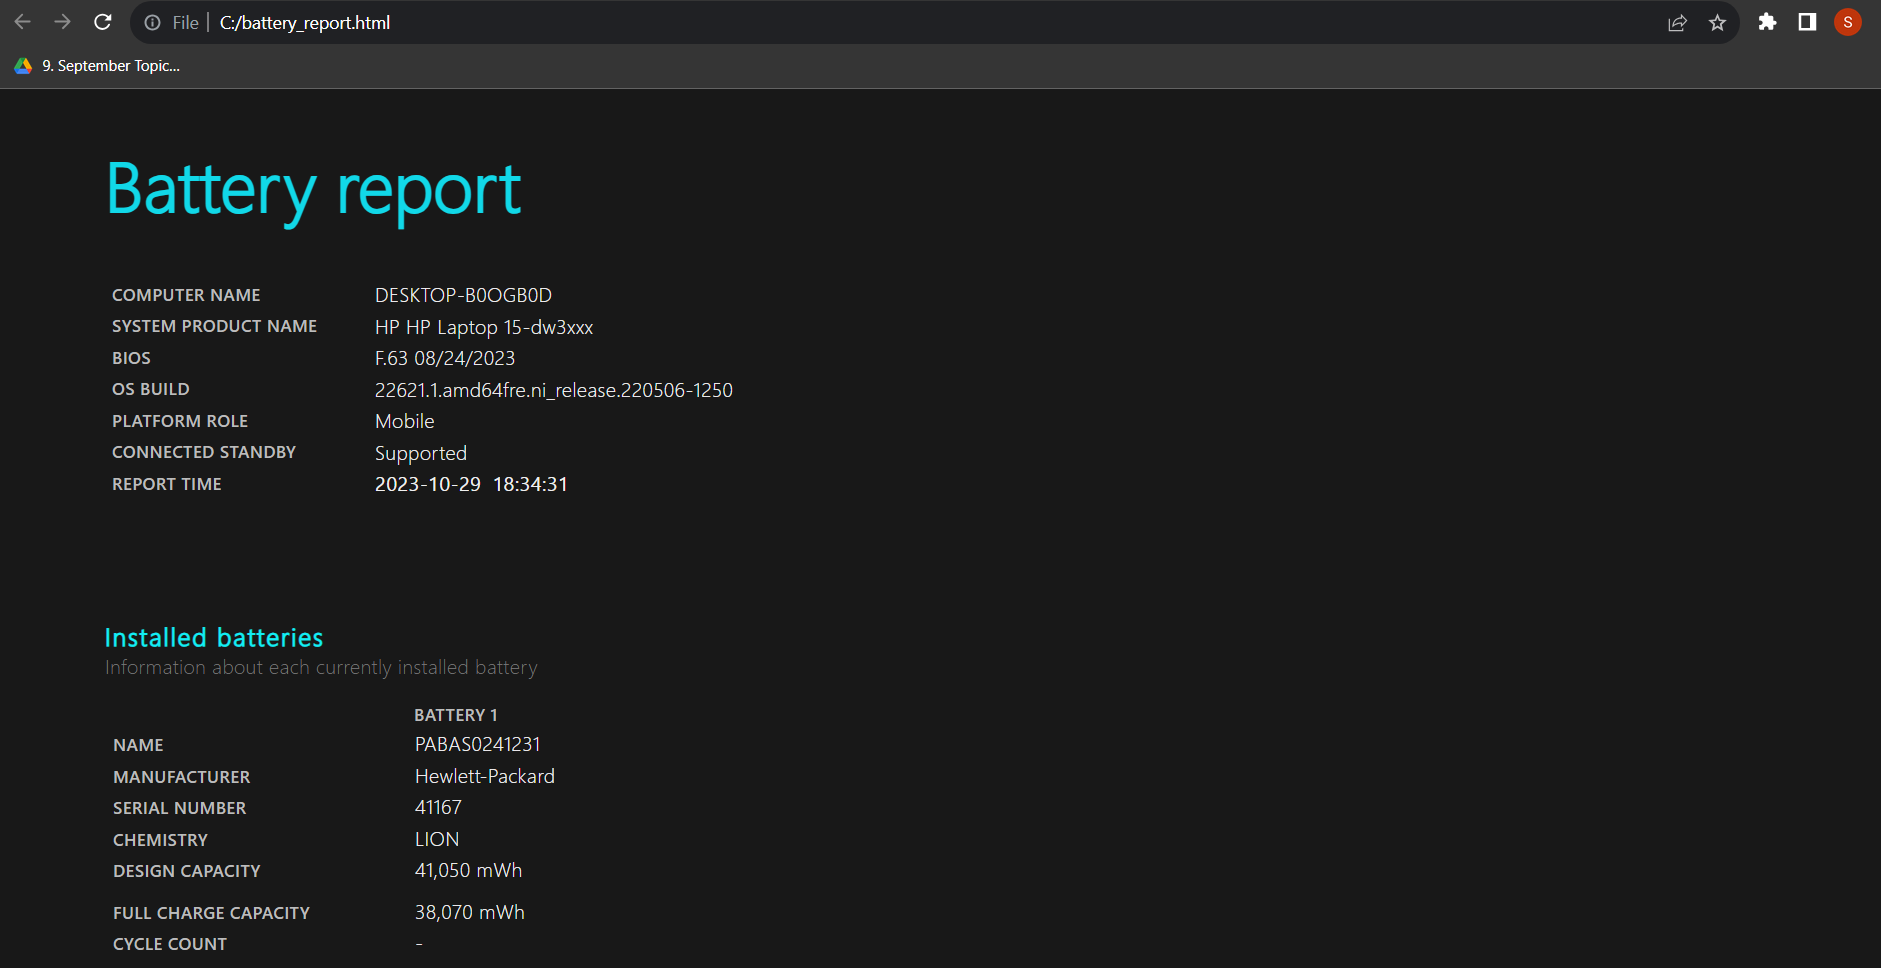
How to Read the Battery Report on Windows 11
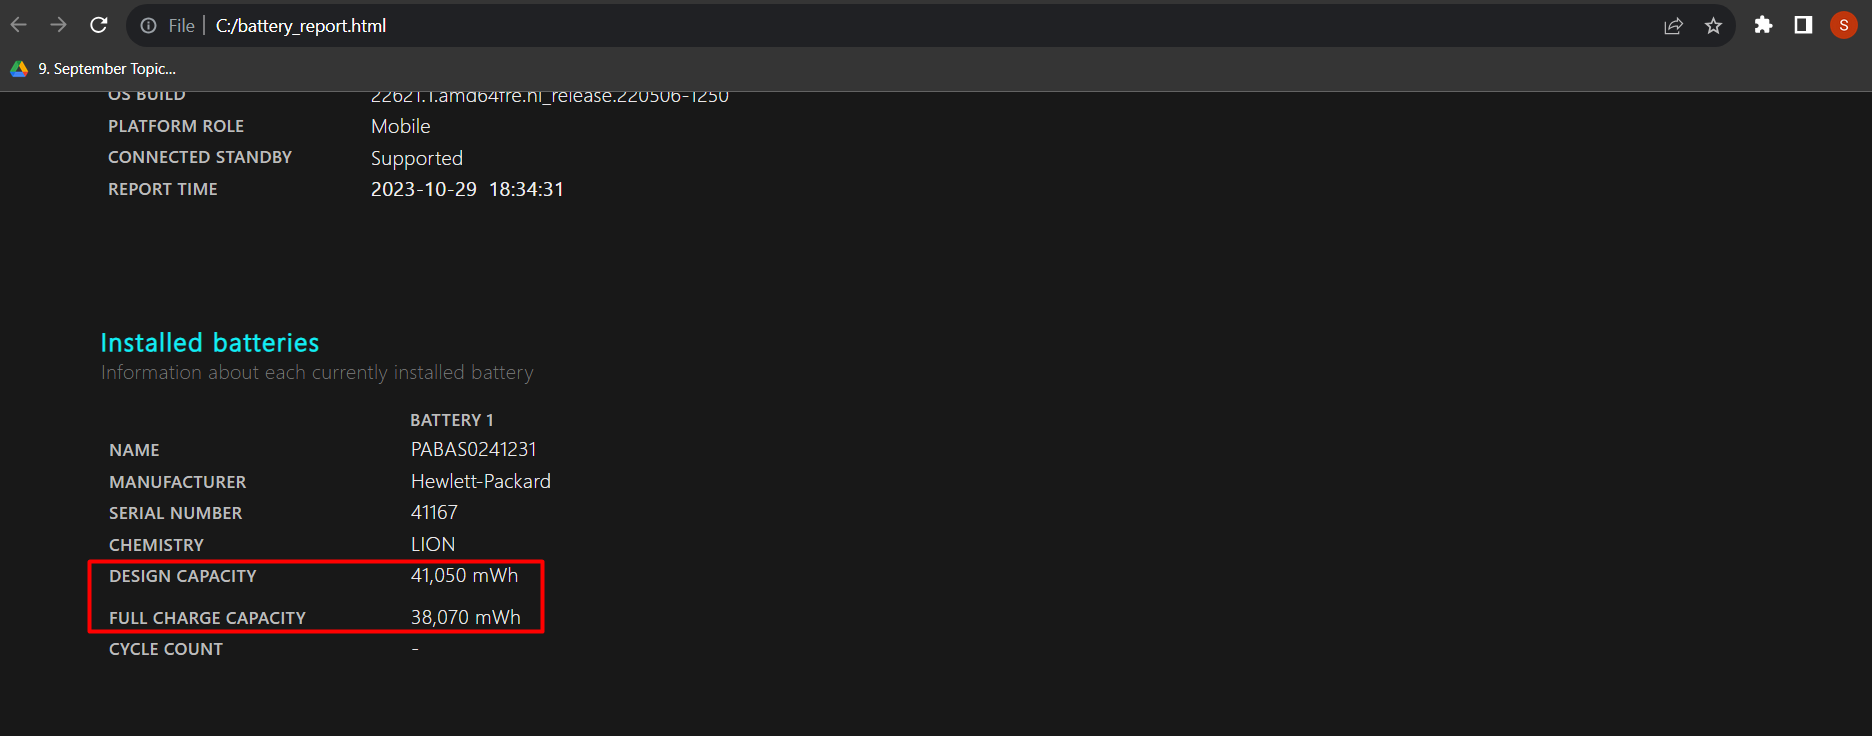
In the Installed batteries section, you can examine DESIGN CAPACITY and FULL CHARGE CAPACITY information that indicates how much the battery can hold and the capacity difference.
The Recent usage table displays a detailed record of system activity that includes sleep mode, active and charged status, and capacity in mWH. You can see the complete data in the form of time, state, source, and capacity remaining columns.

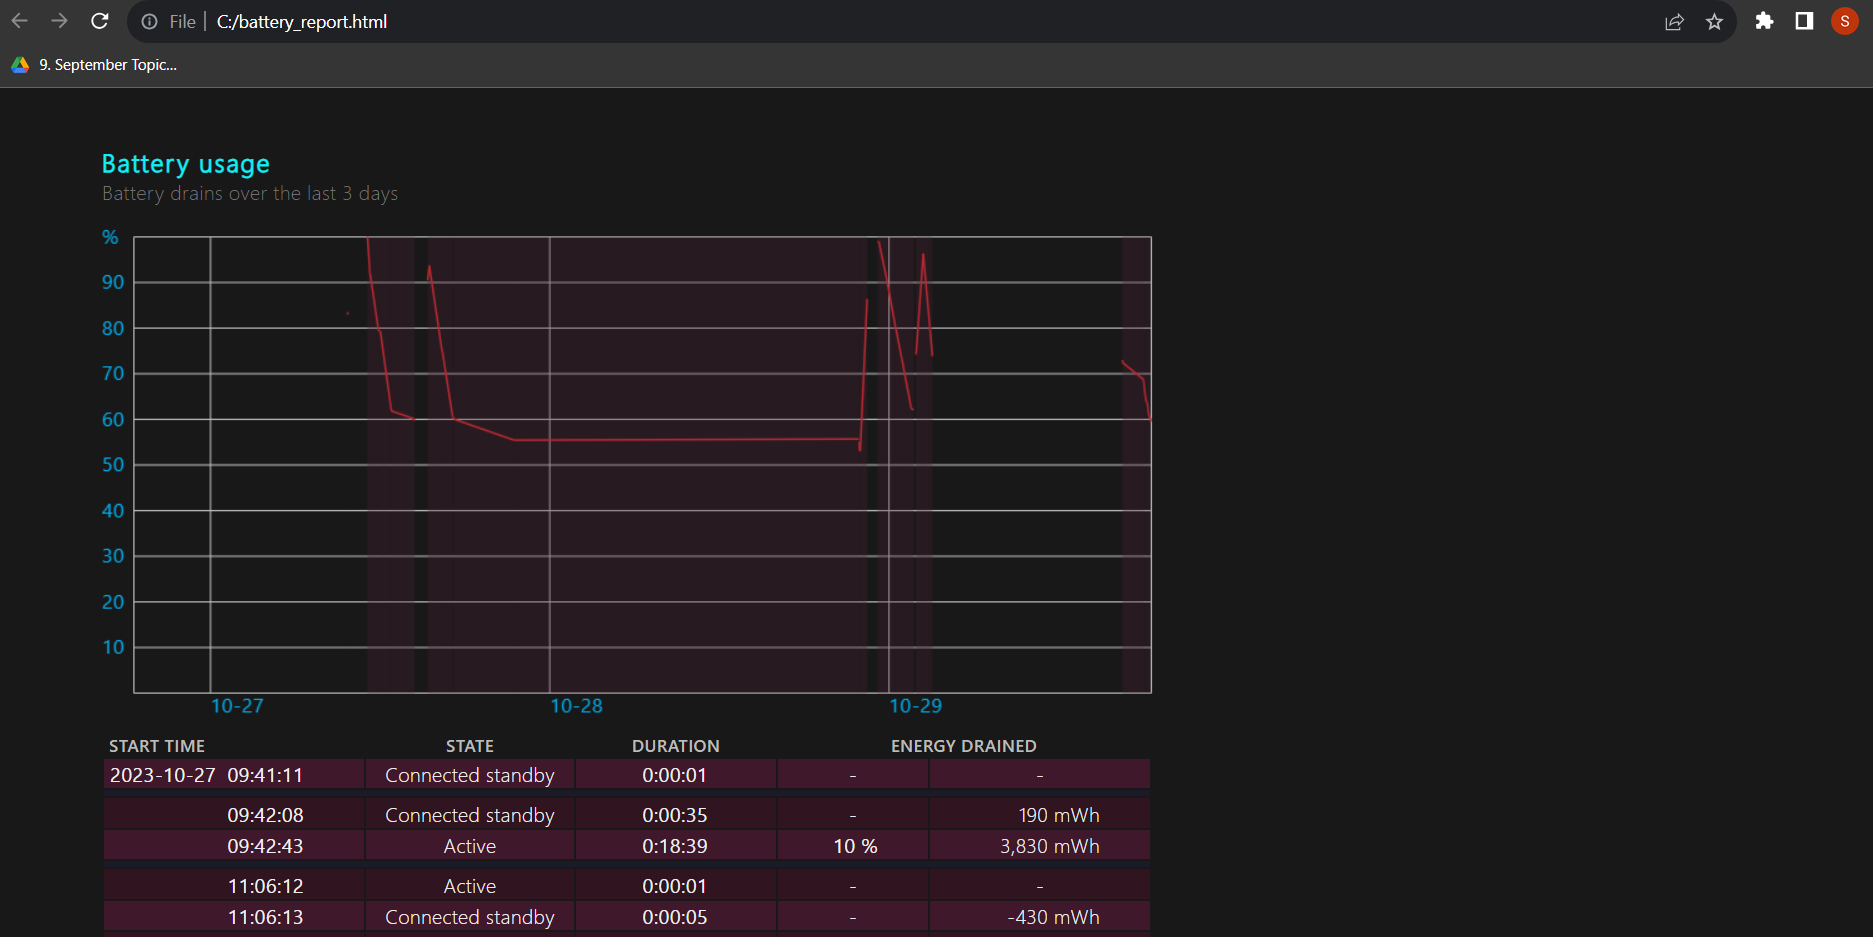
If scroll down more, you will also see a battery usage graph:
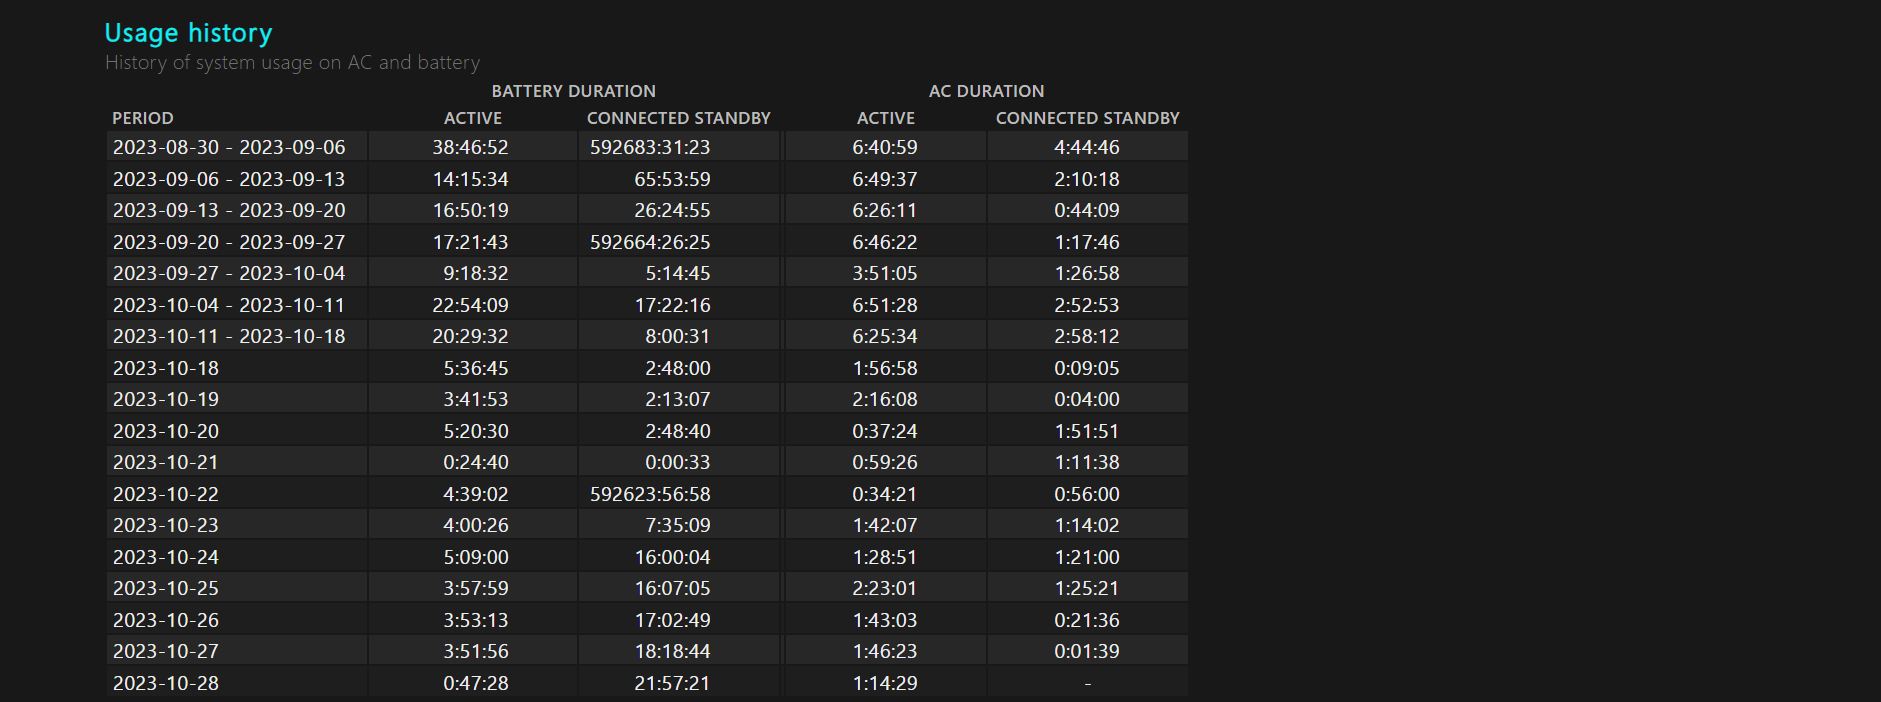
In the Usage History and Battery Capacity History table, you can check out the battery health in which you can check battery duration and AC duration:

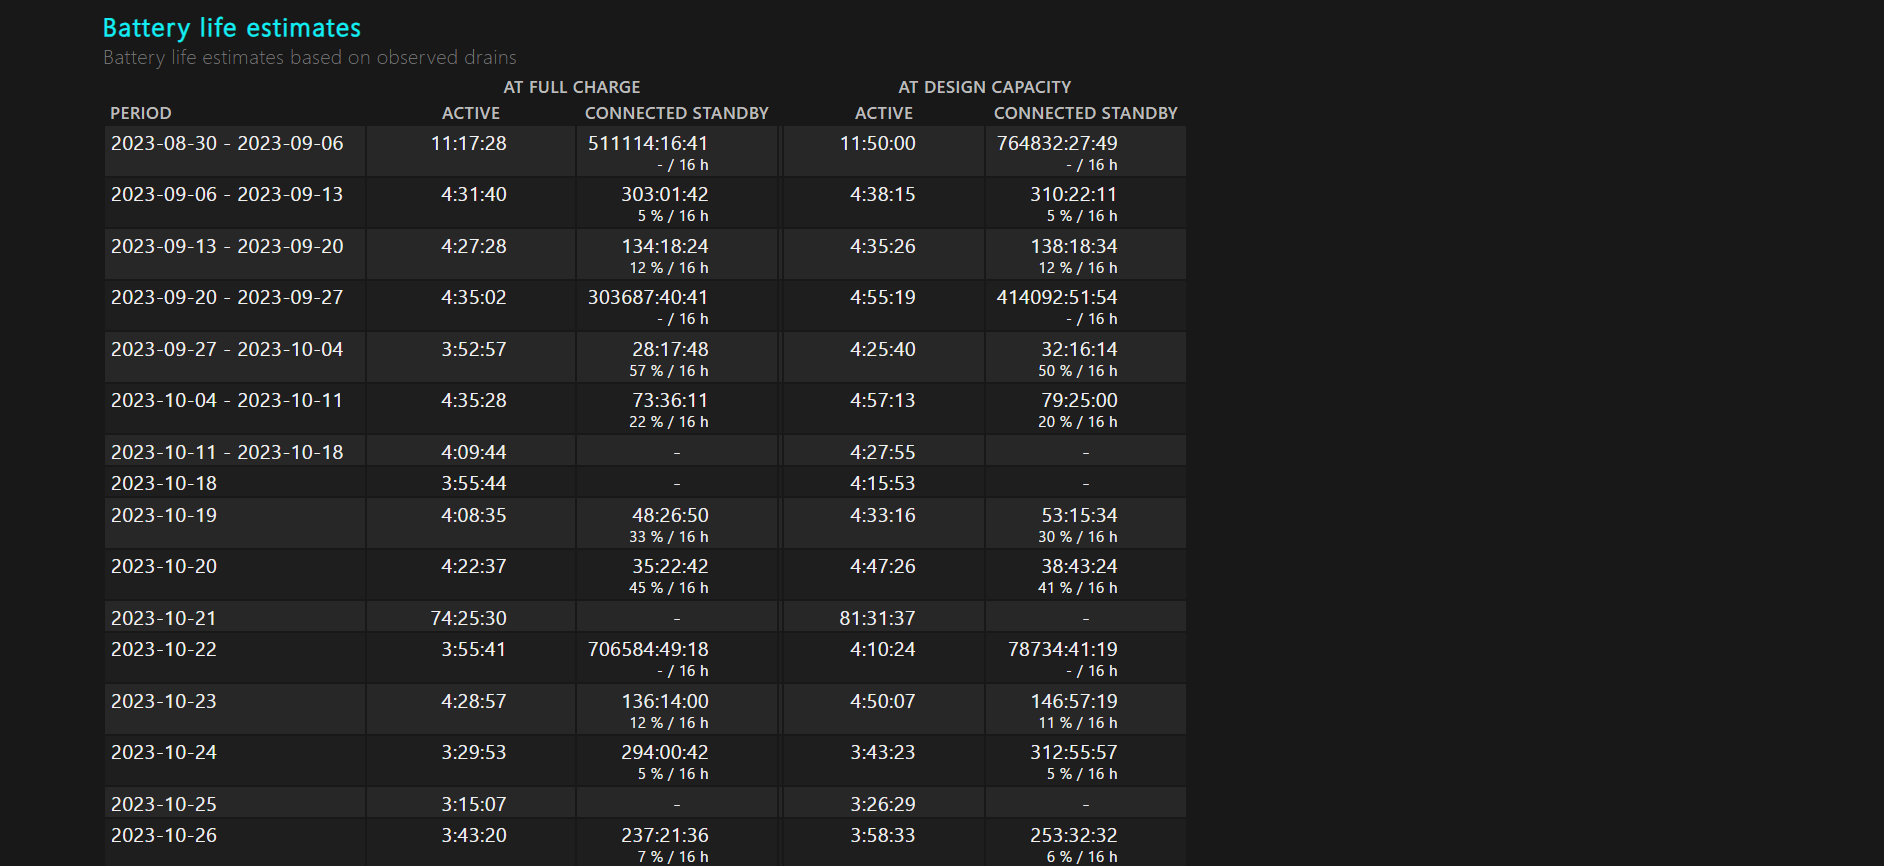
The last section, Battery Life Estimates, tells you about the OS prediction regarding battery in daily life usage:
How to Identify Which Applications Consume More Battery in Windows 11
If you want to identify which applications are using more battery, follow the steps:
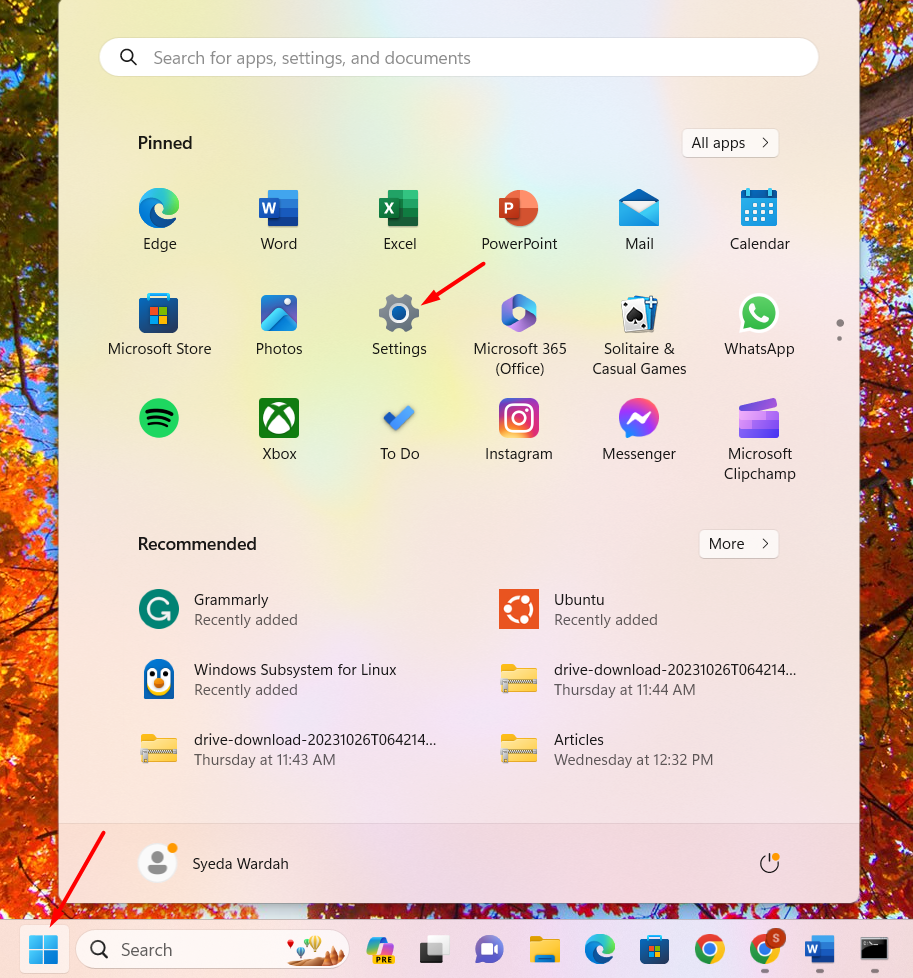
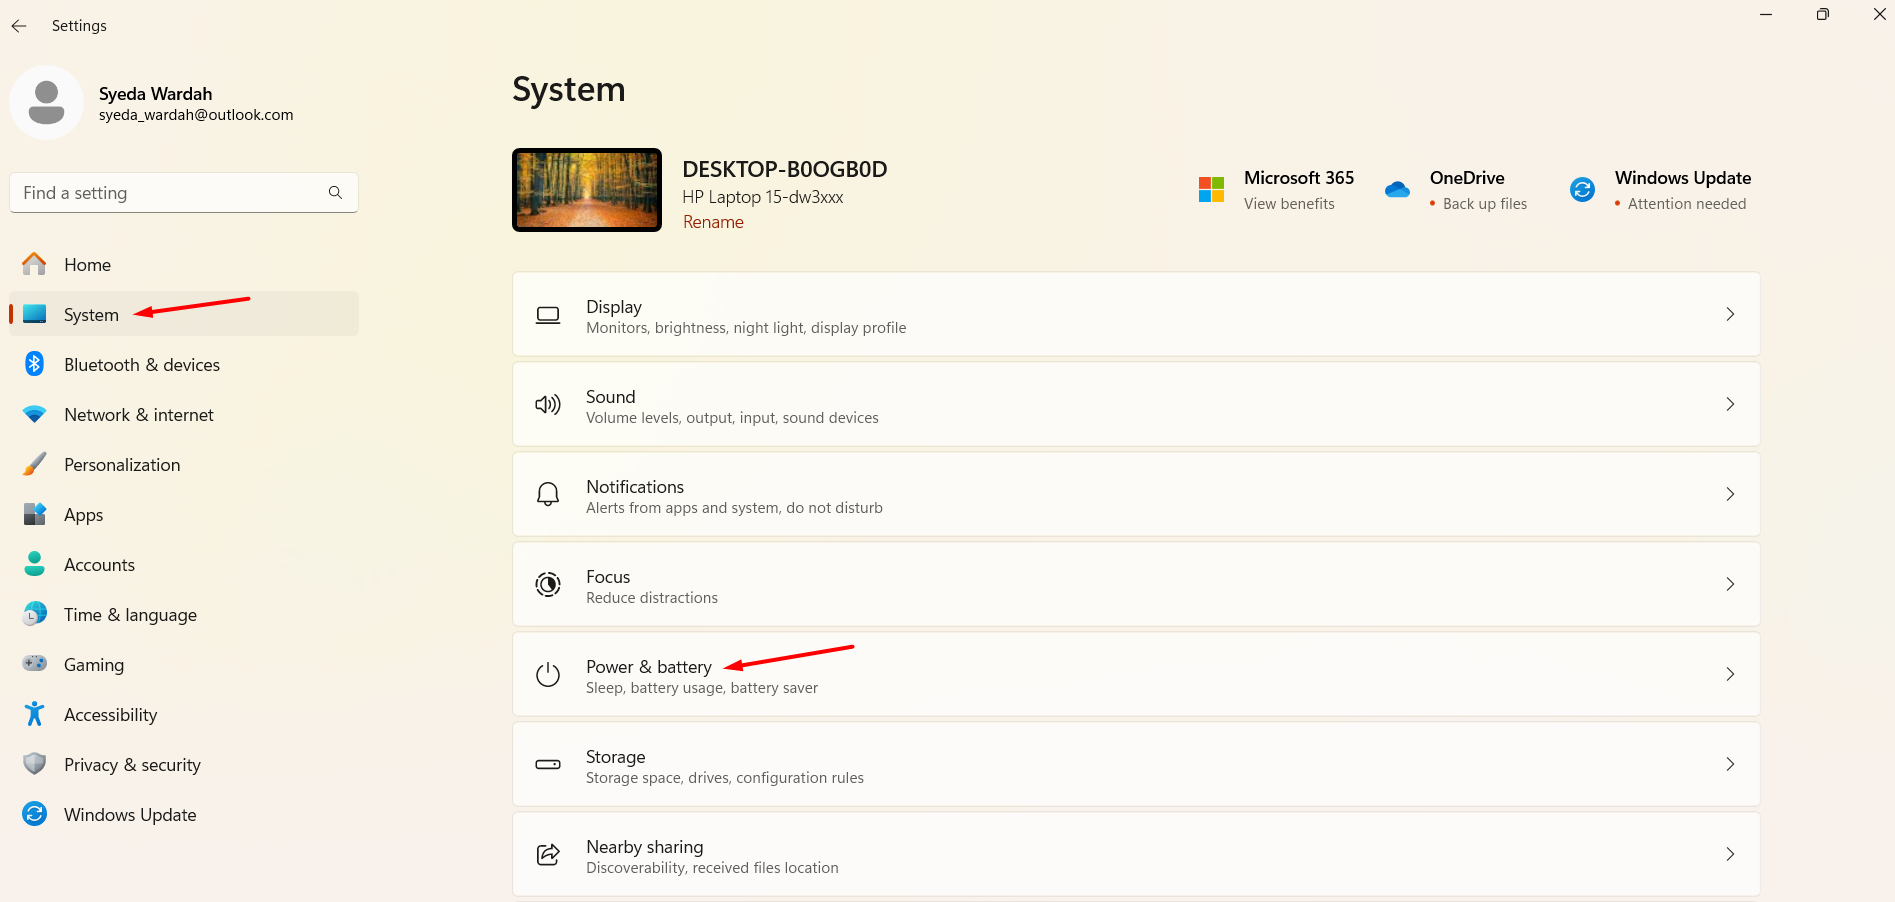
Step 1: Click on the Start button and select the Settings app:
Step 2: In the Settings screen, move to System and then Power & Battery:
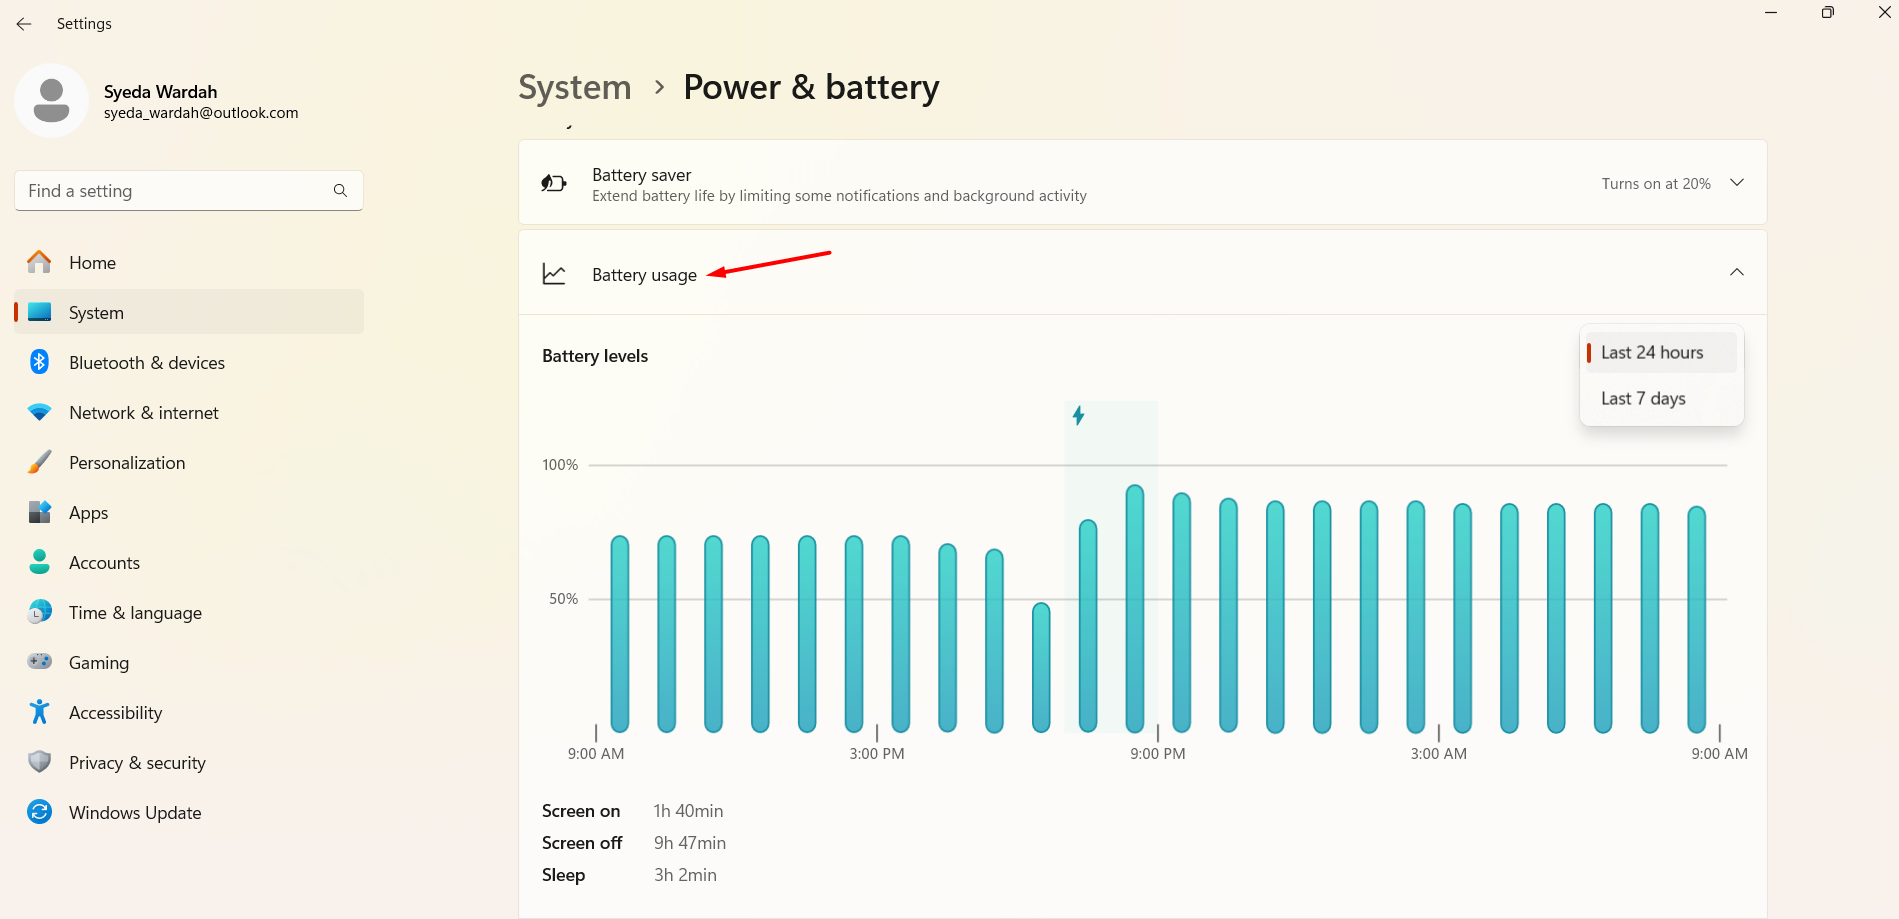
Step 3: There, move to the Battery Usage section to see the usage pattern of 24 hours, or a record of 7 days along with the Screen off and on duration:
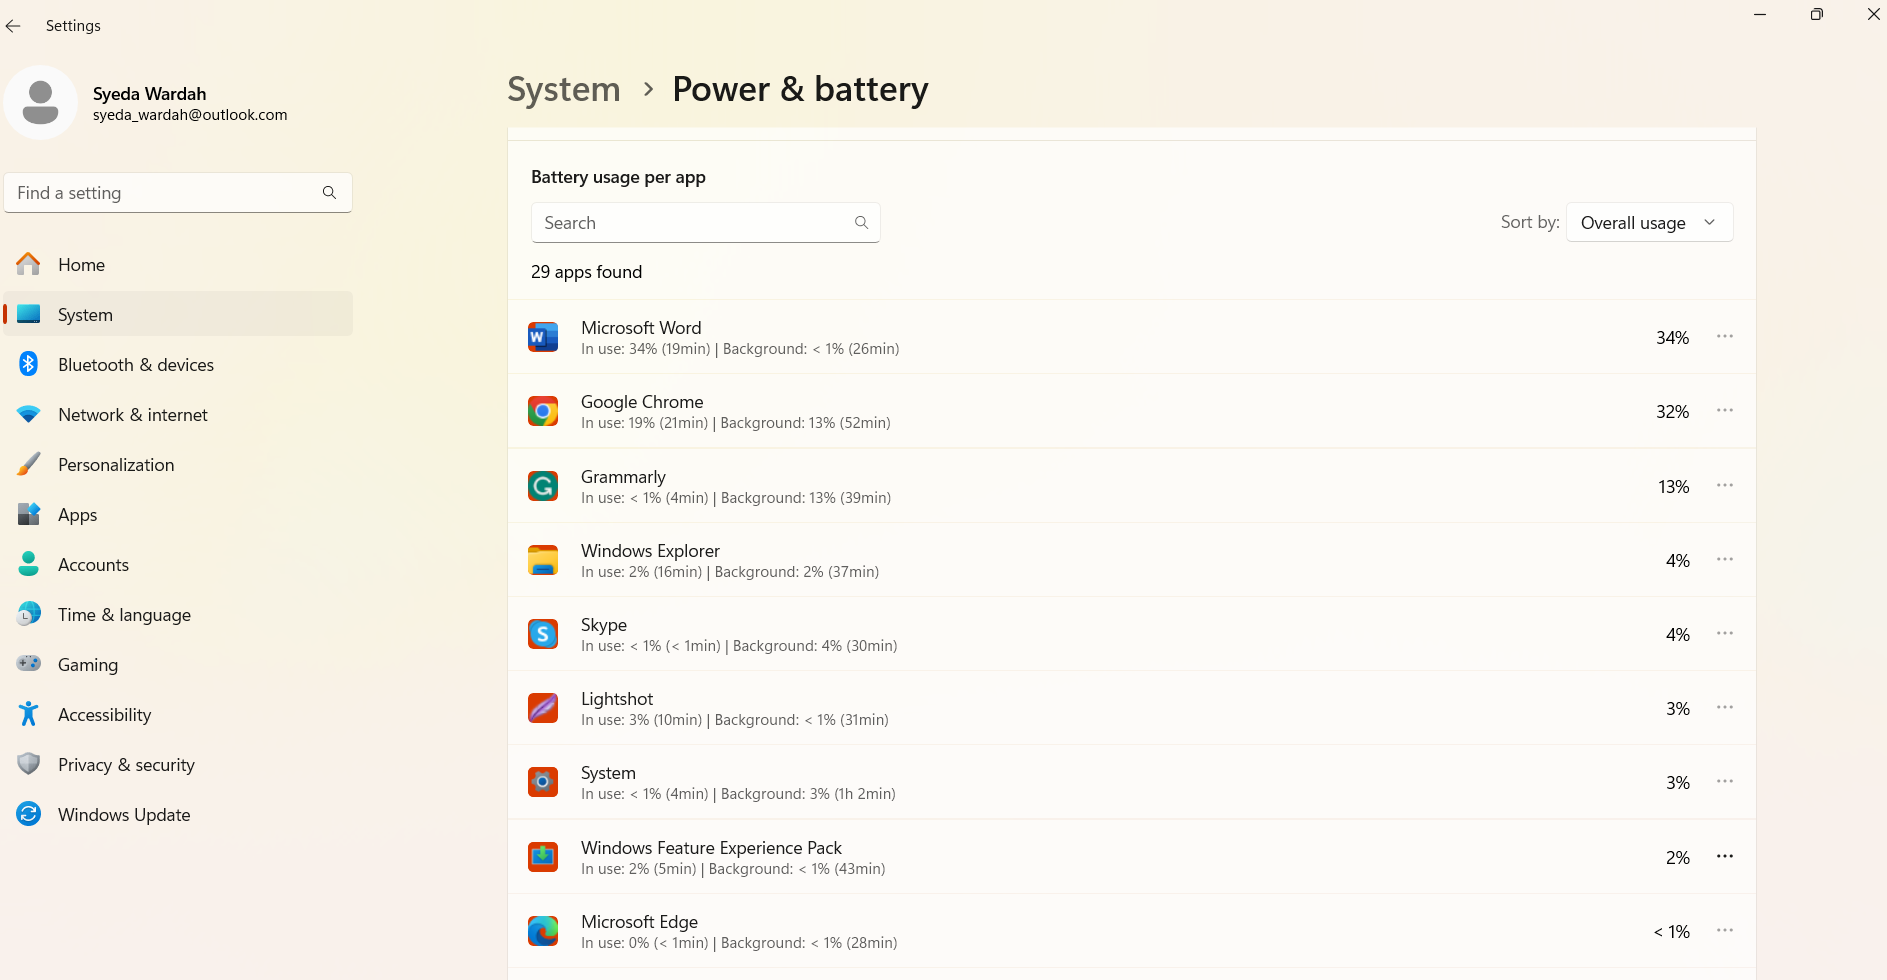
Step 4: Scroll down in the Battery usage per app to check which app is consuming more battery power in the background when they are in active state:
How to Stop Draining Battery in Windows 11
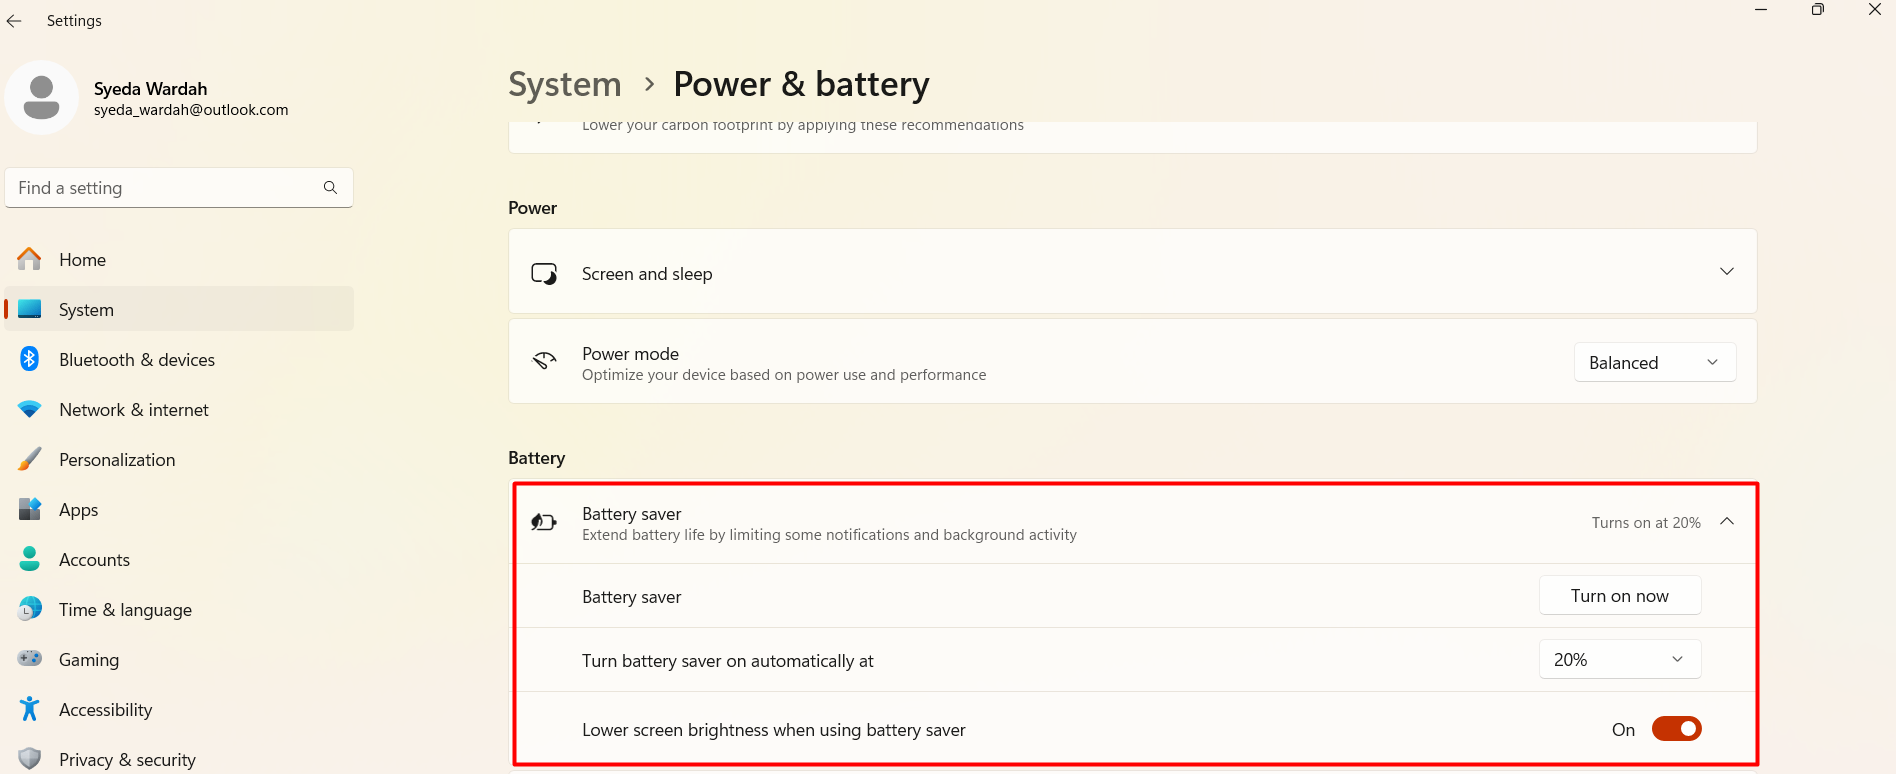
In the Power & Battery, you can see the Battery Saver option; this helps when the battery is running out. Enabling this feature will disable some of the Windows apps in the background to save energy and increase battery life.
To do that, move to Settings > System > Power & Battery:

Here, move to the Battery Saver section and click the dropdown arrow; select Turn on Now and set the battery percentage according to need:
Conclusion
To monitor the health of the battery of a PC you may need to check its usage regularly. This helps to identify the consuming battery in different states i-e, in sleep mode and active state. Moreover, you would be able to see which application consumes more battery power. This article has demonstrated the easiest way to get the battery report on Windows 11 along with the detailed sections of the generated report.
Source: linuxhint.com