How to Get Response From S3 getObject in Node.js?
This article covers below mentioned sections in detail to provide a brief guide on getting a response from S3 getObject in node.js:
- What is AWS “S3 getObject”?
- Important Terms
- Prerequisites
- How to Create an AWS S3 Bucket?
- Required Packages
- Method 1: Extracting a File From S3 Using the AWS getObject SDK V3
- Method 2: Retrieve Objects with AWS SDK v2 Via AWS S3 “getObject”
- Method 3: Get Response From S3 getObject Using Promises
- Method 4: Get Response From S3 getObject Using Minio Package
- Bonus Tip: How to Delete an Object From AWS S3 Bucket in Node.js?
- Conclusion
What is AWS “S3 getObject”?
The “getObject” is the operation in AWS S3 that helps retrieve stored objects in the selected S3 bucket. It is the fundamental and most popular operation when it comes to selecting the bucket data and it is mostly used in scenarios like data analysis, backup and restore, or content delivery. The “S3 getObject” operations offer various silent features which are stated below:
- The “S3 getObject” ensures “data consistency” which allows you to retrieve the most recently modified version of the bucket.
- Make the “fetching” process of S3 bucket objects easier and also make the fetched content available for processing or downloading.
- The “getObject” may return errors if the requested object doesn’t exist or if the user lacks the necessary permissions.
Important Terms
There are some important terms that must be understood for AWS S3 getObject:
- The “Bucket” is a container that contains multiple objects in AWS S3.
- The “Object” is a targeted file or folder that is uploaded inside the specified “Bucket”.
- The “Key” is a unique identification for each object residing inside the Bucket.
- The “Access Control List” or ACL is a list of permissions attached to a Bucket to enhance the security level.
This guide explains the process to get a response from S3 getObject in node.js.
Prerequisites
There are some prerequisites for the user that must be obtained or done by the user before diving into the real stuff of this article. These prerequisites are mentioned below:
- The user must have an active “AWS Account” to use S3 services and generate the required AWS access key.
- The user must contain the AWS “Access Key ID” and “Secret Access Key” to authenticate the specified application with S3.
- The AWS S3 “Bucket” and the corresponding “Object” that you want to be retrieved must exist.
- If you have no idea about the creation of a Bucket and the uploading of objects in the bucket then visit the below section.
How to Create an AWS S3 Bucket?
The AWS S3 Bucket is a container in which the files or folders can be uploaded according to requirements and these folders can be accessed by any member of the network containing authentic credentials. The credentials mostly include “Region”, “access Key”, and “secret access Key”. These credentials can be retrieved from your AWS account using the AWS IAM service. If you don’t have any idea about the creation of a bucket, then visit the below easy-written steps to get a full understanding of this topic:
- Step 1: AWS Management Console
- Step 2: Initial Interface of S3 Bucket
- Step 3:Create a S3 Bucket
- Step 4: Verifying the Creation of a Bucket
- Step 5: Object Interface
- Step 6: Uploading the Asset in Bucket
- Step 7: Confirming File to Upload
- Step 8: Confirmation of Object Upload
Step 1: AWS Management Console
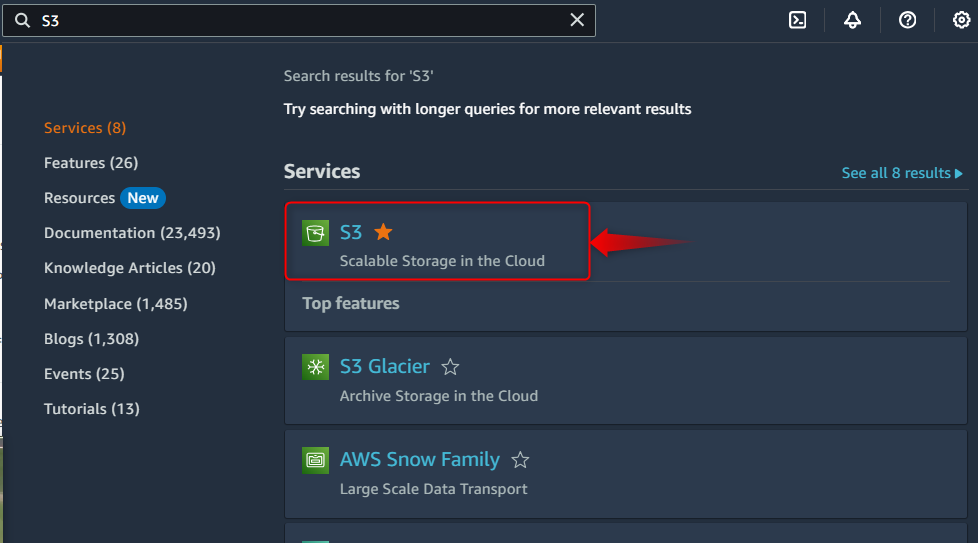
Traverse to the “AWS Management Console” and enter your account credentials after that search for the “S3” services and from the generated result select “S3”, as shown below:
Step 2: Initial Interface of S3 Bucket
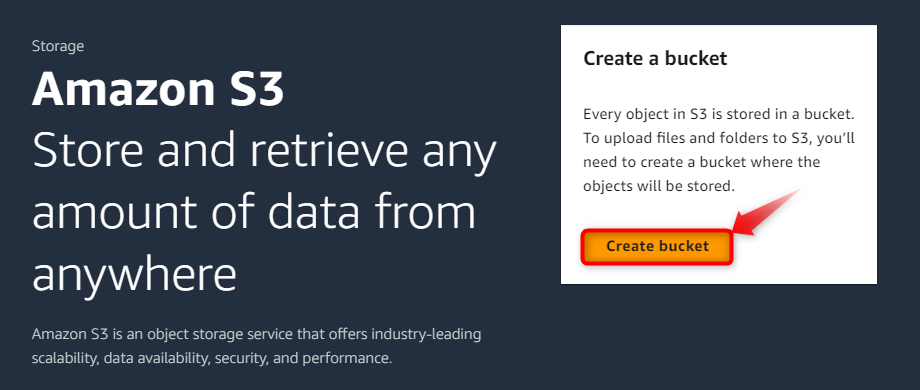
The initial interface for the “S3” bucket will appear, on which there is a button “Create bucket”. Hit this button to open a new window for the generation of the AWS S3 bucket:
Step 3:Create a S3 Bucket
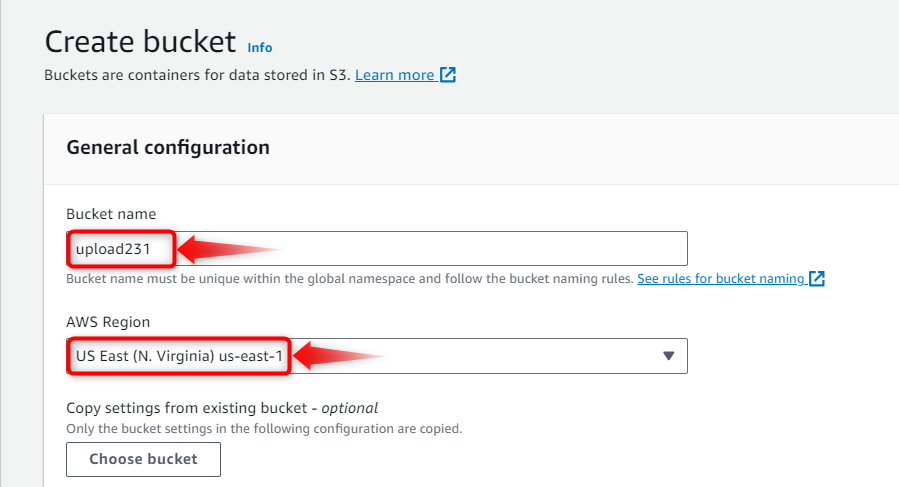
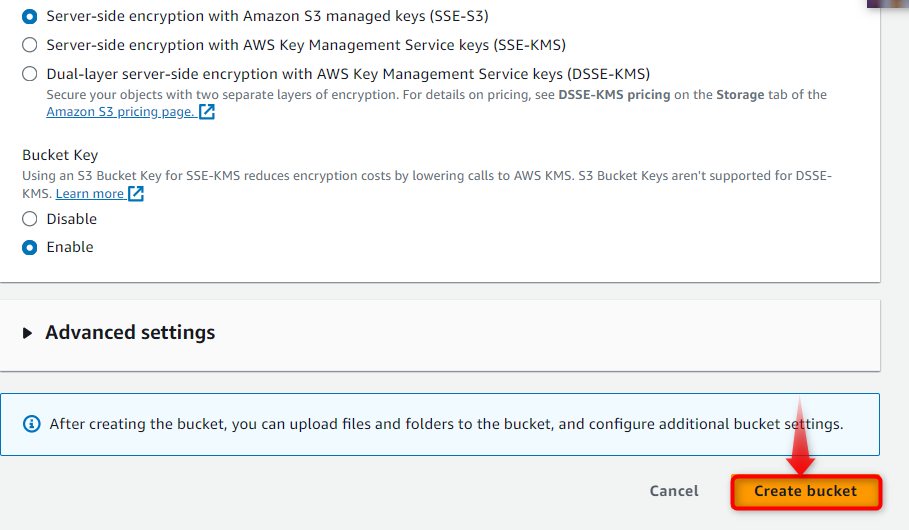
The new dialog box named “Create bucket” will pop up and inside its “General configuration” section provide the “Bucket name” and “AWS Region”. After that, scroll down the dialog box and select the desired encryption format, and enable the “Bucket key” from the radio options. Finally, hit the “Create bucket” button to create a bucket according to provided instructions, as illustrated below:
Step 4: Verifying the Creation of a Bucket
The created “Bucket” will become visible on the “Buckets” page with the assigned name:
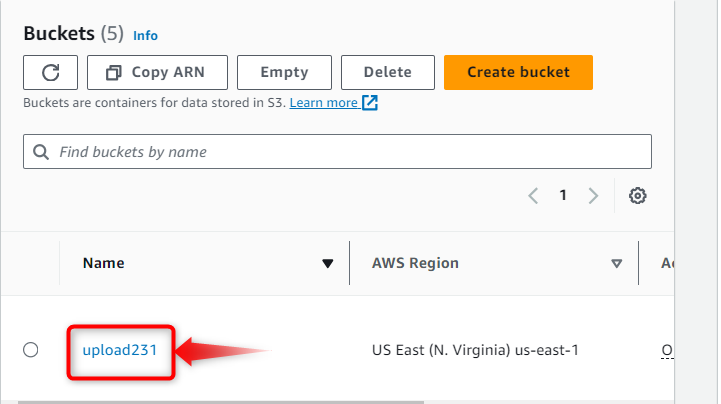
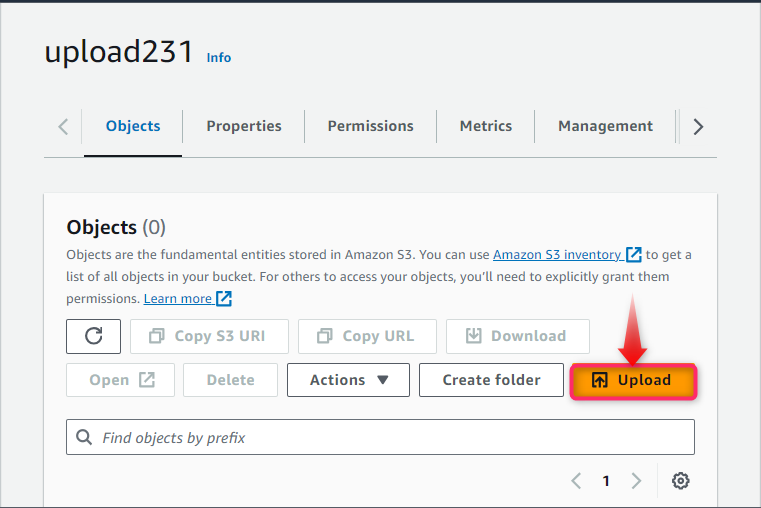
Step 5: Object Interface
Hit the created bucket “upload231” and traverse to the “Objects” tab to perform and press the “Upload” button residing at the bottom right corner to upload the required asset as an object:
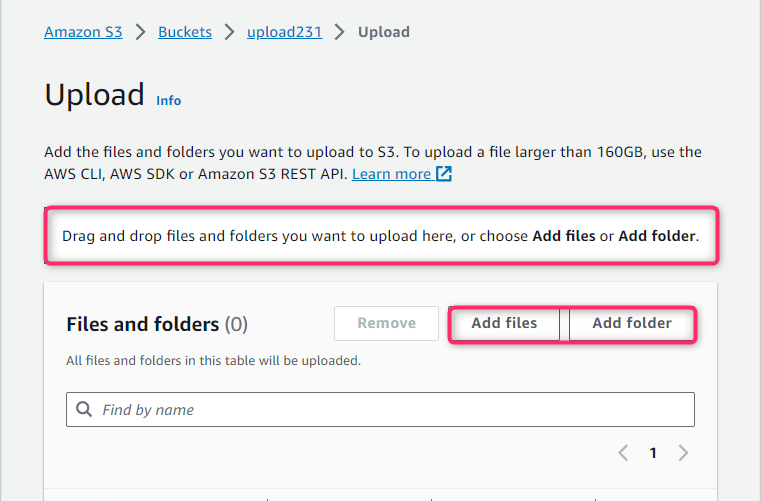
Step 6: Uploading the Asset in Bucket
The control moves to the next page named “Upload” from where you can either select the targeted folder or file to upload as an object or you can simply drag them as well:
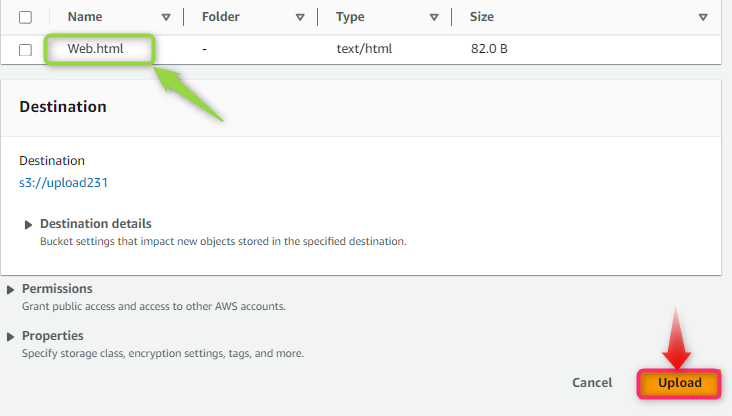
Step 7: Confirming File to Upload
The uploaded files or folders will appear at the top of the newly generated dialog box, from where you can select or deselect the desired folder that needs to be uploaded. Then, press the “Upload” button at the bottom right direction to upload the file or folder as an object inside the AWS S3 bucket.
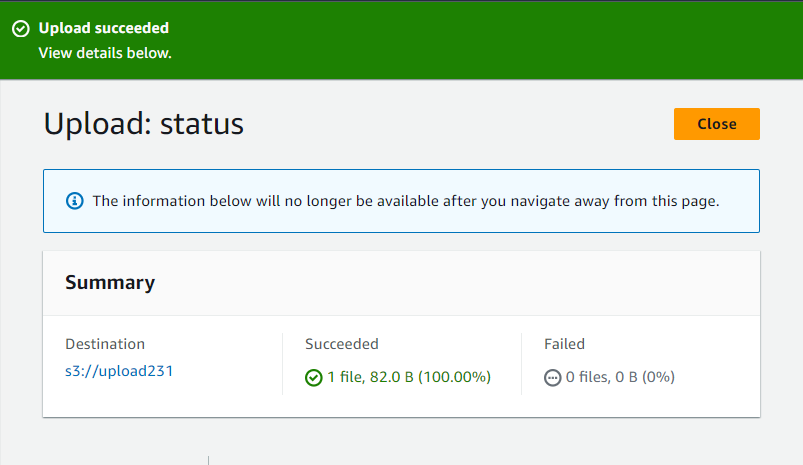
Step 8: Confirmation of Object Upload
Finally, the “success” message will appear in case of successful upload of the Object in the AWS S3 bucket. A summary is also provided showing the destination of the uploaded file and file size:
Note: If you are still confused about the creation of Bucket or want to explore more about it, then visit our dedicated article.
- There are some required packages provided by node.js that must be installed in the current node.js project to work with the AWS S3 bucket. These packages and their installation procedure are described in the below section.
Required Packages
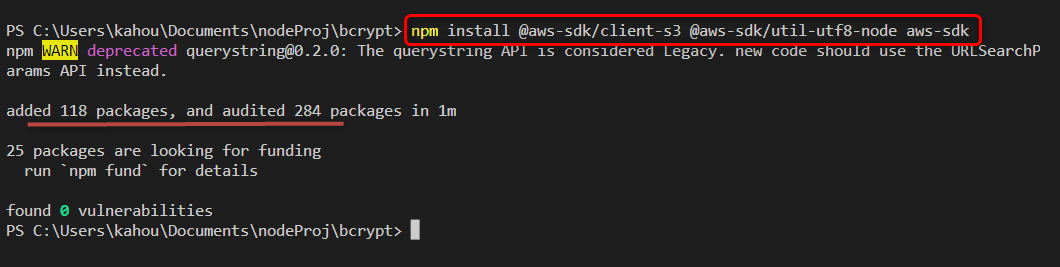
The node.js packages must be installed for smooth retrieval of objects from S3 getObkect are named “@aws-sdk/client-s3”, “@aws-sdk/util-utf8-node”, and “aws-sdk”. These packages are installed in your desired node.js project by executing the below-mentioned command:
The generated output shows the successful installation of the required packages.
After setting up the environment by installing the required packages and fulfilling the prerequisites. Let’s dive into the world of AWS S3 getObject in Node.js and explore the most effective methods for seamless data retrieval from the AWS S3 bucket.
Method 1: Extracting a File From S3 Using the AWS getObject SDK V3
This method uses the “AWS SDK v3” version which is new and recommended by the AWS community. It ensures the retrieval of entire data by the utilization of “async” and “await” functions or keywords. Let’s have a look over the practical demonstration:
const clientAccount = new S3Client({ region: 'us-east-1',
credentials: {
accessKeyId: 'XXXXXXXXXXXXXXXXXXXX',
secretAccessKey: 'XXXXXXXXXXXXXXXXXXXXXXXXXXXXXXXXXXXXXXXX',
}, });
const getObjectFunction = async () => {
const parameters = new GetObjectCommand({
Bucket: 'upload231',
Key: "Web.html",
});
try {
const queryResponse = await clientAccount.send(parameters);
const retrievedData = await queryResponse.Body.transformToString();
console.log(retrievedData);
} catch (genError) {
console.error(genError);
}
};
getObjectFunction();
The explanation of the above code is as follows:
- First, the “GetObjectCommand” and “S3Client” predefined methods are imported from the “@aws-sdk/client-s3” package via the “require()” method.
- Next, the new instance of “S3Client” named “clientAccount” is created and multiple key-value pairs containing the data about the bucket “Region”, “Access Key ID”, and “Secret Access Key” are passed as its parameters.
- The asynchronous “getObjectFunction()” is defined using the “async” keyword. Inside the function, a new instance of “parameters” is created for the “GetObjectCommand()” method.
- The name of the targeted “bucket” and the containing “object” name that needs to be retrieved are passed as the values for parametric keys named “Bucket” and “Key”. These key-value pairs are passed as parameters for the “GetObjectCommand()” method.
- After that, utilize the “try/catch” block and pass the “parameters” variable as an argument for the “send()” method invoked by the “clientAccount” object.
- The result is stored in a “queryResponse” variable on which the “body” property and “transformToString()” methods are applied to display the object data after converting it into the String format.
- The “catch” block is also attached to select any generated error and display them on the console. Finally, invoke the custom-built function “getObjectFunction()” to start the procedure to get the selected bucket object.
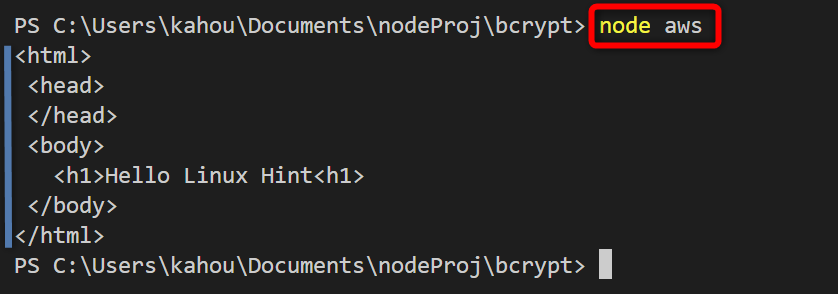
Now, place the above code in a random “.js” type file which is “aws.js” in our case, and run the below-stated command to start the execution cycle:
The below output shows that the object or data stored inside the S3 bucket has been retrieved and content is displayed on the console:
Method 2: Retrieve Objects with AWS SDK v2 Via AWS S3 “getObject”
The same functionality of retrieving the bucket object using S3 getObject can be done for SDK having a version of “v2”. However, the “v2” is an older version and not recommended by AWS creators to use this version but in case your application is built on SDK v2 then visit the below-stated code:
const s3Obj = new AWSObj.S3({
region: 'us-east-1',
credentials: {
accessKeyId: 'XXXXXXXXXXXXXXXXXXXX',
secretAccessKey: 'XXXXXXXXXXXXXXXXXXXXXXXXXXXXXXXXXXXXXXXX',
},
});
var getObject = async(userBucket, userObjectKey) => {
try {
const parameter = {
Bucket: userBucket,
Key: userObjectKey,
};
const content = await s3Obj.getObject(parameter).promise();
return content.Body.toString('utf-8');
} catch (genError) {
throw new Error(`Could not retrieve file from S3: ${genError.message}`);
}
}
getObject('upload231', 'Web.html')
.then((content) => {
console.log(content);
})
.catch((error) => {
console.error(error.message);
});
The explanation of the above code is as follows:
- First, import the “aws-sdk” package and create an instance of the “S3” method named “s3Obj”.
- The credentials of the AWS account and Bucket like “region”, “accessKeyId”, and “secretAccessKey” are passed as parameters for the “S3” method.
- The asynchronous function “getObject” accepting two parameters of “userBucket” and “userObjectKey” is defined. Inside the function, the “try” block is used which contains an array named “parameter”. This array stores the provided parametric values “userBucket” and “userObjectKey” as the values for keys “Bucket” and “key” respectively.
- This “parameter” array is passed to the “getObject()” method and the “promise” is also assigned to it, the result is stored in a “content” named variable.
- The “Body” property and “toString()” method are assigned with the “content” variable and the output is then returned by this function.
- Next, attach the “catch” block to grab and display any occured error.
- After that, invoke the “getObject()” function and pass the user “Bucket” name containing the “object” file name which is needed to be retrieved as arguments. The “then()” and “catch()” method is also utilized to display the retrieved content or generated error respectively.
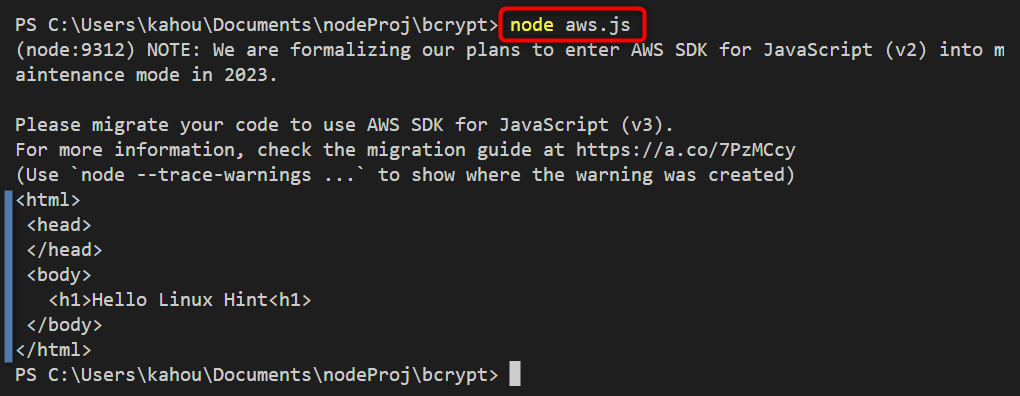
The output after executing the above code containing file shows that the required bucket content has been retrieved and displayed on the console:
Method 3: Get Response From S3 getObject Using Promises
The code described in the above section is going to be migrated into the “SDK v3” version to prevent any warning. The code is provided below and to make it work, the below-stated line of code needs to be inserted inside the current node.js project “package.json” file:
The code to retrieve the S3 bucket object is mentioned below:
const s3Oj = new S3Client({
region: 'us-east-1',
credentials: {
accessKeyId: 'XXXXXXXXXXXXXXXXXXXX',
secretAccessKey: 'XXXXXXXXXXXXXXXXXXXXXXXXXXXXXXXXXXXXXXXX',
},
});
var getObject = async(userBucket, userObjectKey)
{
const parameters= new GetObjectCommand({
Bucket: userBucket,
Key: userObjectKey,
});
try {
const content = await s3Obj.send(parameters);
return await content.Body.transformToString();
} catch (genError) {
throw Error(`Could not retrieve file from S3: ${genError.message}`);
}
}
getObject('upload231', 'Web.html')
.then((data) => {
console.log(data);
})
.catch((error) => {
console.error(error.message);
});
The description of the above code is as follows:
- First, the “import” method retrieves the “S3Client” and “GetObjectCommand” from the installed “@aws-sdk/client-s3” module.
- Then, a client instance “s3Obj” is created for the “S3Client()” method by passing the account “credentials” and “region” as the parameters.
- Now, define the “getObject()” asynchronous function “getObject” and it accepts two parameters. Inside the function, declare an instance of the “GetObjectCommand()” method named “parameters”. This method contains the targeted “Bucket” and corresponding “Key” as parameters.
- This “parameters” instance is then passed as an argument for the “send()” method invoked by “s3Obj” and the output is stored in a variable “content”.
- The “content” variable is then transformed into “string” using the “transformToString()” method and the final result is displayed on the console.
- Finally, just like the above method the required “bucket” and “object” to retrieve is passed to the “getObject()” function, and the content is displayed using the promise “then()” method.
The output generated after the compilation shows that the provided bucket data has been retrieved and displayed on the console:

Method 4: Get Response From S3 getObject Using Minio Package
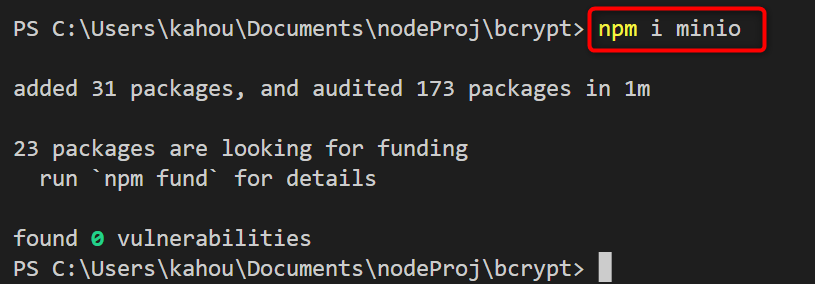
The “object” stored inside the AWS S3 bucket can be retrieved using the external “minio” package. This package is popular due to its easiness and scalability. The “minio” package is an external module of the node.js, so it needs to be installed separately by running the below-stated command:
The below figure shows the installation of the desired “minio” package in the current node.js project:
The practical code for demonstration is shown as:
var s3ClientObj = new minioObj.Client({
endPoint: 's3.amazonaws.com',
accessKey: 'XXXXXXXXXXXXXXXXXXXX',
secretKey: 'XXXXXXXXXXXXXXXXXXXXXXXXXXXXXXXXXXXXXXXX'
})
var sizeOfBucket = 0
var content = 0;
s3ClientObj.getObject('upload231', 'Web.html', (genError, contentReceived) =>
{
if (genError) {
return console.log(genError)
}
contentReceived.on('data', (data) => {
content = data;
sizeOfBucket += data.length
})
contentReceived.on('end', () => {
console.log("Total Size Of Object is: " + sizeOfBucket)
console.log("Data of Object Stored in Bucket = \n" + content)
})
contentReceived.on('error', (genError) => {
console.log(genError)
})
});
The description of the above code is as follows:
- First, import the installed “minio” and store its object in a variable named “minioObj”.
- In case no error is found, the “on()” method is attached to the “contentReceived” parameter. The “on()” method contains a callback function that prints the “object” data and the size of retrieved data is calculated using the “length” property.
- After installation, insert the below-mentioned code in the desired “.js” type file like “aws.js” in our case. This code will get the S3 object uploaded in the bucket and display the object length or size:
- Utilize the “Client()” method of the “minio” package to create an “S3” client named “s3ClientObj”. Pass the “endpoint”, “accessKey” and “secretKey” of the AWS account as parameters.
- Also, declare and assign the value of “0” to two variables named “sizeOfBucket” and “content”.
- Then, invoke the “getObject()” method using the “s3ClientObj” object and pass the “Bucket” and “Object” names as the first and second parameters.
- This method will retrieve the content of the provided object and store the content in the required callback function second parameter named “contentReceived”.
- The “if” statement is then used to abort the further processing in case of any error.
- The retrieved data and the length of data are stored in the “content” and “sizeOfBucket” variables respectively. These variables are displayed on the console when the “end” event is reached.
- Finally, for error handling, another “on()” method is used that displays errors whenever the “error” state appears.
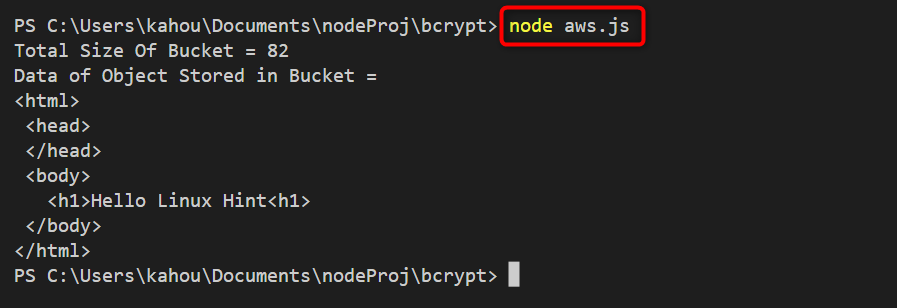
The output after the compilation of the above code shows that the size and data of the S3 object have been retrieved and displayed over the console:
Bonus Tip: How to Delete an Object From AWS S3 Bucket in Node.js?
Just like accessing an object from an AWS S3 bucket using the node.js modules and methods, the operation of deleting an object can also be performed. The prerequisite remains the same for deletion operation as well. In the below-mentioned codec example, the same object of the AWS S3 bucket that is being accessed in the above methods is going to be deleted:
const clientAccount = new S3Client({
region: 'us-east-1',
credentials: {
accessKeyId: 'XXXXXXXXXXXXXXXXXXXX',
secretAccessKey: 'XXXXXXXXXXXXXXXXXXXXXXXXXXXXXXXXXXXXXXXX',
},
});
export const deletion = async () => {
const params = new DeleteObjectCommand({
Bucket: 'upload231',
Key: 'Web.html',
});
try {
const deleted = await clientAccount.send(params);
console.log('The Selected Object from the Bucket is deleted');
console.log(deleted);
} catch (err) {
console.error(err);
}
};
deletion();
The above code works like this:
- First, the “DeleteObjectCommand” and “S3Client” methods are imported from the node.js external “@aws-sdk/client-s3” module.
- Next, create an “S3Client()” method instance and pass the AWS account credentials init as parameters in the key-value pair format.
- Define a new custom asynchronous function “deletion” and inside it, create an instance of the “DeleteObjectCommand()” method. The AWS S3 bucket name and the object that needs to be deleted are passed as the parameters for this method.
- The “try” block is utilized which contains the “send()” method that is invoked by “clientAccount” and the “params” is passed as an argument to perform the deletion operation. The result is stored in a new variable named “deleted” to confirm the deletion operation.
- To display the logs after the successful deletion, display the “deleted” variable on the console using the “console.log()” method.
- Finally, invoke the “deletion()” method to start the execution cycle.
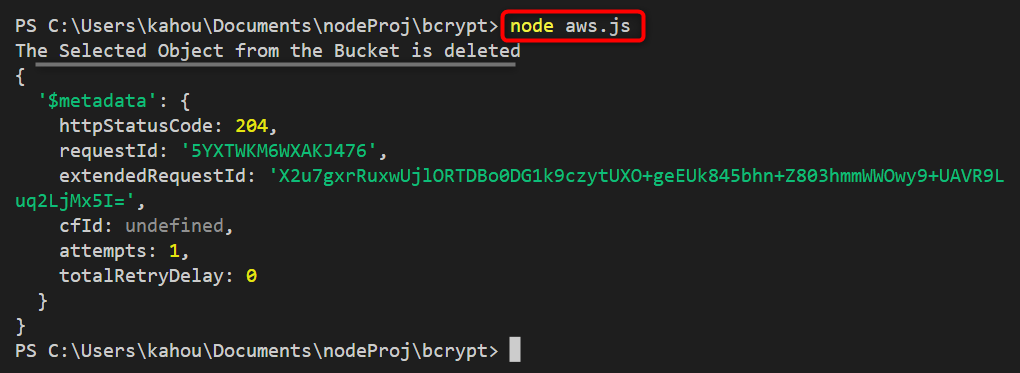
The logs generated after the compilation of the above code show that the targeted object has been deleted:
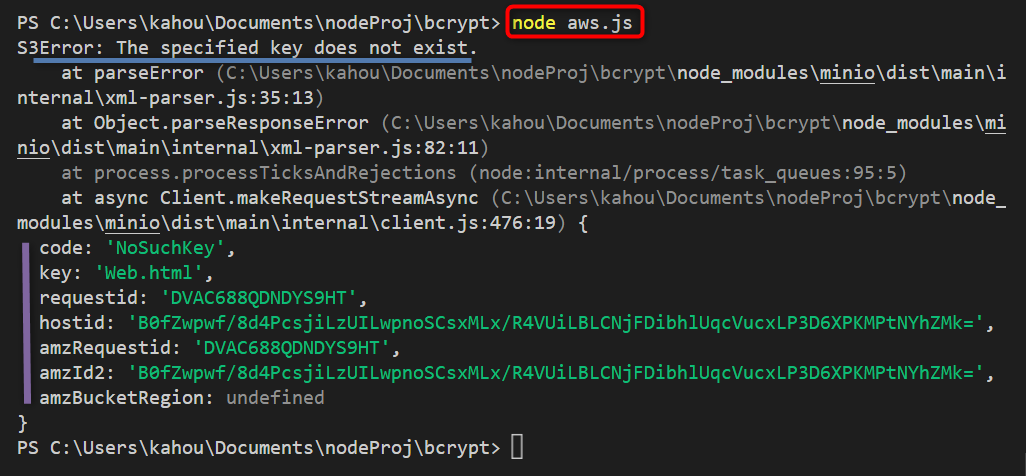
To perform verification run any discussed method to retrieve the same object “Web.html” and as a result, the below output will be displayed. That confirms the targeted object has been deleted and now it is not accessible:
That’s all about the retrieval of an object stored in the AWS S3 bucket using Node.js.
Conclusion
To get a response from S3 getObject in Node.js, create an S3 client using the AWS SDK in Node.js, and Specify the bucket name and object key in the “getObject” request. The “getObject” operation sends a request to the S3 service and S3 checks permissions and the existence of the object. If authorized, S3 retrieves the object’s data and metadata. The response is returned to your Node.js application, allowing you to process the object’s content. That’s all about getting a response from S3 getObject in Node.js.
Source: linuxhint.com