How to Fix the Microsoft Print to PDF Feature Not Working?
For most users, the Print to PDF feature was disabled from the Windows Features, but for some users, the driver using which the feature works was outdated. Let’s fix what brought you here!
Quick Outline:
How to Fix Microsoft Print to PDF Feature Not Working?
- Fix 1: Enable Print to PDF Feature
- Fix 2: Restart Print Spooler Service
- Fix 3: Update the Printer Drivers
- Fix 4: Clear the Printer Queue
- Fix 5: Run Troubleshooter
- Fix 6: Update Windows
How to Fix Microsoft Print to PDF Not Found?
How to Use the Microsoft Print to PDF Feature?
How to Fix Microsoft Print to PDF Feature Not Working?
The exact reason why the Print to PDF feature is not working isn’t specific, but the following fixes are proven to work for the users. So try them until it is resolved.
Fix 1: Enable Print to PDF Feature
The Print to PDF is enabled by default on Windows 10 & 11, but a few users had it disabled due to which it was not working. To enable the Print to PDF feature, execute the following steps:
Step 1: Open the “Turn Windows features on or off”
Step 2: Enable the Print to PDF Feature Using the Checkbox.
The illustration of the above steps is as follows:
Step 1: Open the “Turn Windows features on or off”
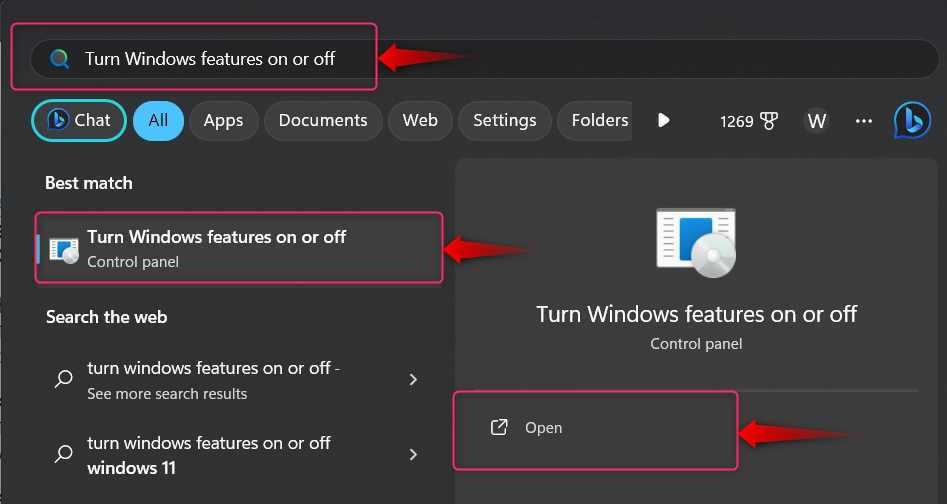
Most optional Windows features are enabled/disabled via the Windows Features settings. To open it, use the Windows Start menu, search for “Turn Windows features on or off” and hit the Open option:
Step 2: Enable the Print to PDF Feature
In the Windows Features window, scroll down, find and enable the Microsoft Print to PDF using the checkbox on its left:
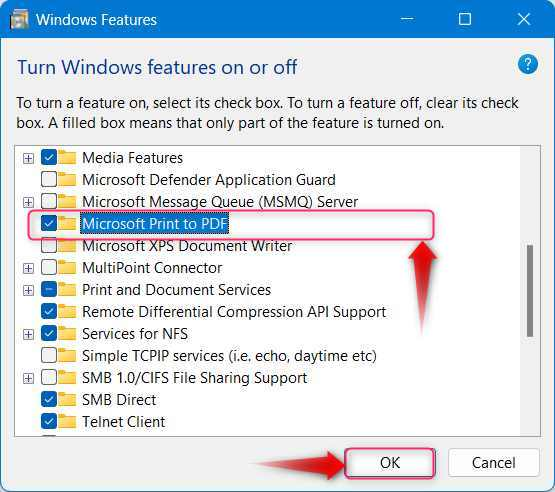
Note: If the Microsoft Print to PDF feature was already enabled, disable it, reboot the system, and then re-enable it. This worked for a few users who reported that the Print to PDF feature was not working.
Fix 2: Restart Print Spooler Service
The Print Spooler Service in Microsoft Windows manages the functions of the printer and the printer jobs. The Print to PDF feature will not work if there is an issue with the Print Spooler Service and issues with the service are fixed by restarting it. To restart/reset the Print Spooler Service, follow these steps:
Step 1: Open Windows Services Utility
Step 2: Right-Click on the Print Spooler Service and Trigger Restart
The illustration of the above steps is as follows:
Step 1: Open Windows Services Utility
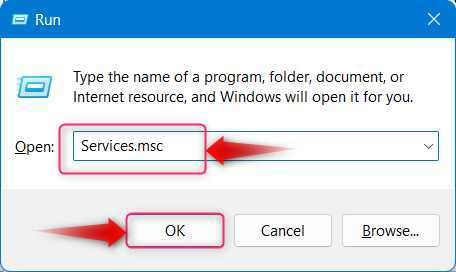
The Windows Services is a utility in Microsoft Windows that allows users to manage their system’s services that also includes the Print Spooler Service. To open the Windows Services, use the Windows + R keys to bring up Windows Run, type Services.msc, and hit the OK button:
Step 2: Restart/Reset the Print Spooler Service
In the Windows Services utility, find, right-click the Print Spooler and from the menu, hit the Restart option to reset or restart the Print Spooler Service:
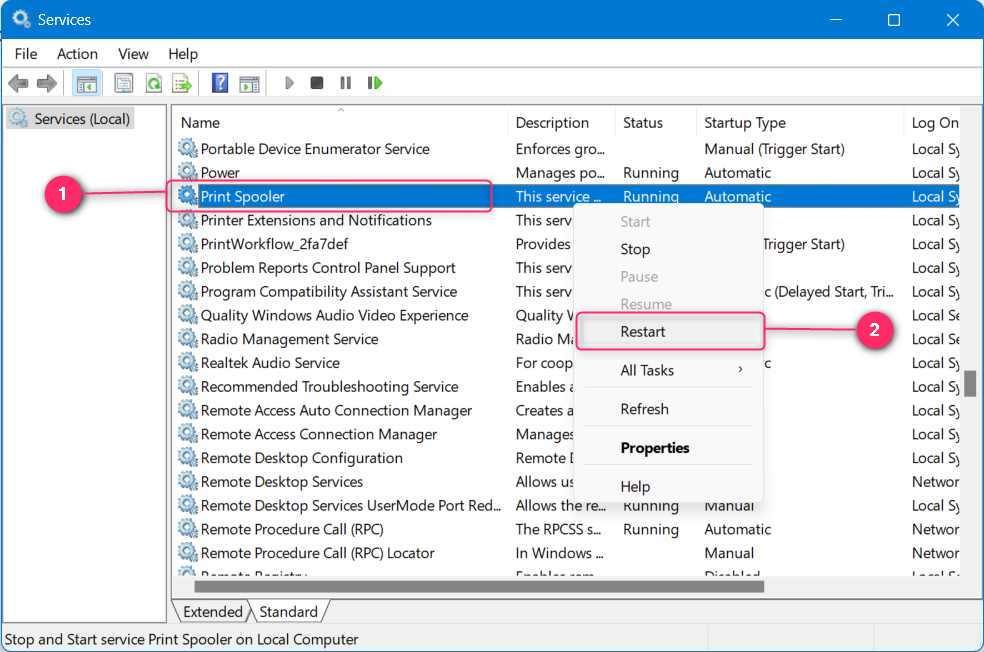
After restarting the Print Spooler service, the issue of Print to PDF not working was resolved for some users.
Fix 3: Update the Printer Drivers
If enabling the Print to PDF feature and restarting the Print Spooler service did not resolve the Print to PDF feature not working, the drivers could be causing issues. The outdated drivers often cause malfunctioning of devices and the Windows features. So, keeping the drivers updated is the best practice on all operating systems. To update the Printer Drivers and fix the Print to PDF feature not working, follow the below-stated steps:
Step 1: Open Device Manager
Step 2: Find and Update Microsoft Print to PDF
The explanation of the above steps is as follows:
Step 1: Open Device Manager
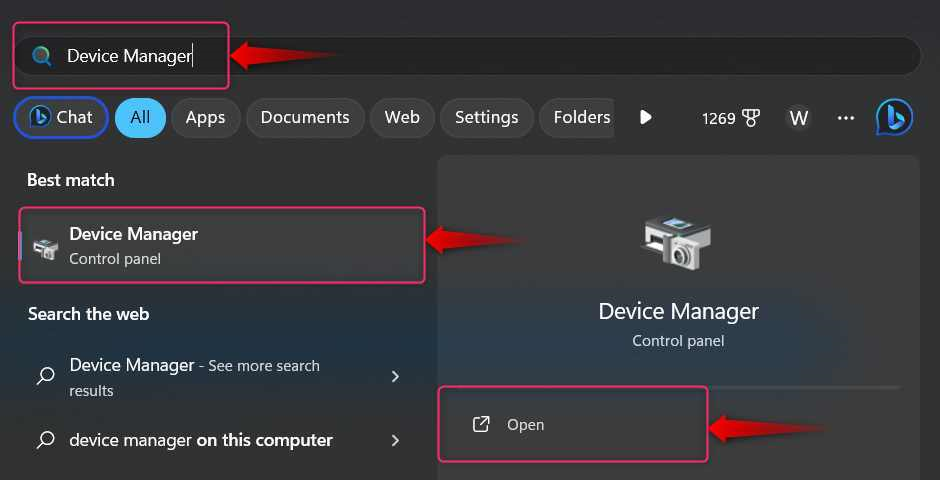
The Device Manager in Microsoft Windows aids the users in managing the devices and their drivers including the “Print queues” where the Microsoft Print to PDF is managed. To open the Device Manager, use the Windows Start menu, search for Device Manager, and use the Open option:
Step 2: Update Microsoft Print to PDF Drivers
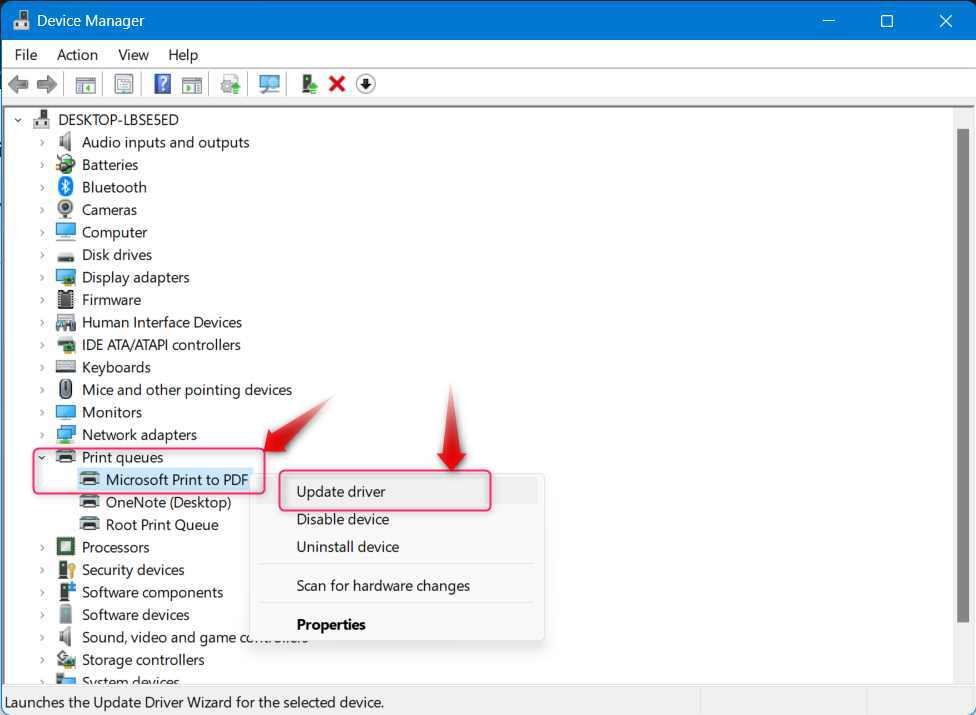
In the Device Manager, find & expand the “Print queues”. From here, right-click the Microsoft Print to PDF, and from the menu, select “Update driver”:
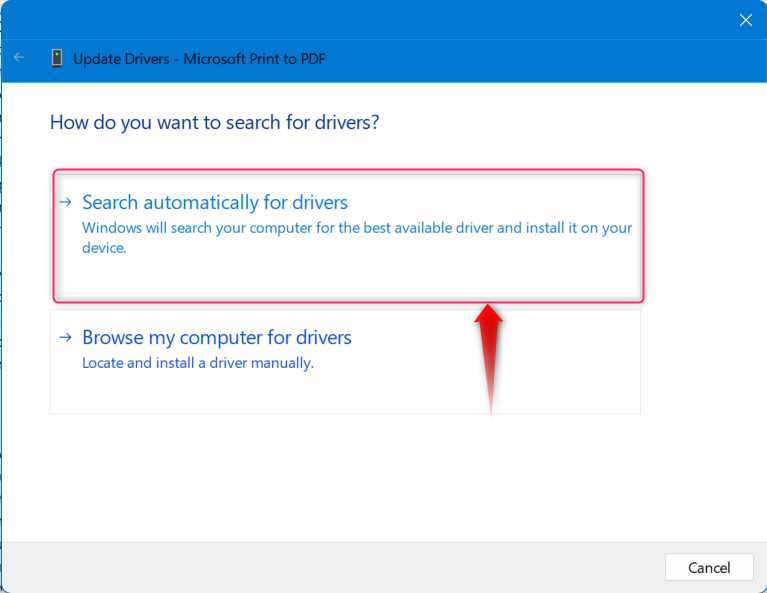
Next, choose the “Search automatically for drivers” option to trigger the process for automatic driver update:
Fix 4: Clear the Printer Queue
A full printer queue will halt the printer & its services from working. The printer queue is where all printer jobs are stored and managed. To clear the printer queue on Windows, follow these steps:
Step 1: Open Windows Services
Step 2: Stop Print Spooler Service
Step 3: Delete the Contents of the PRINTERS Directory
The above steps are illustrated as follows:
Step 1: Open Windows Services
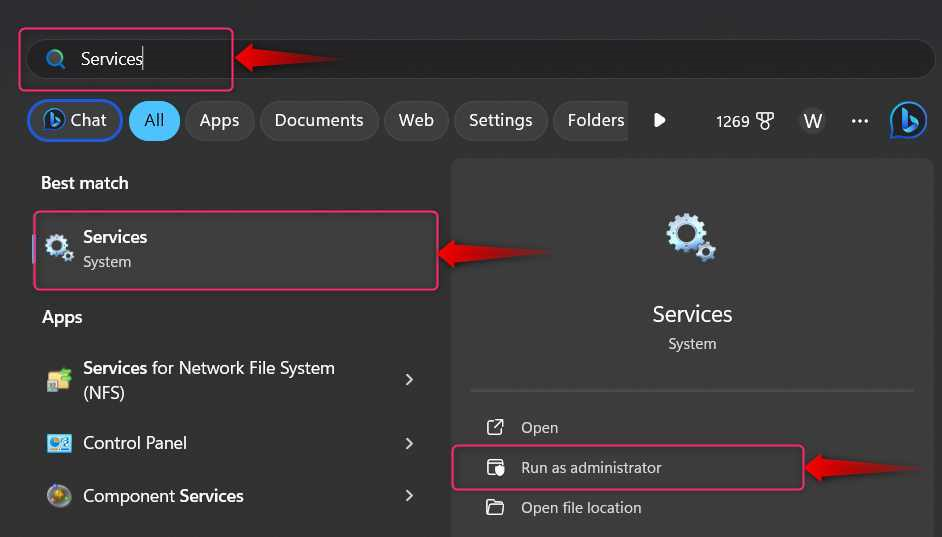
Before deleting the contents of the PRINTERS Directory (all the printer jobs are maintained here), users must stop the Print Spooler Service. It can be done via the Windows Services. To open the Windows Services utility, use the Windows Start menu to find and hit the Run as administrator option to launch it:
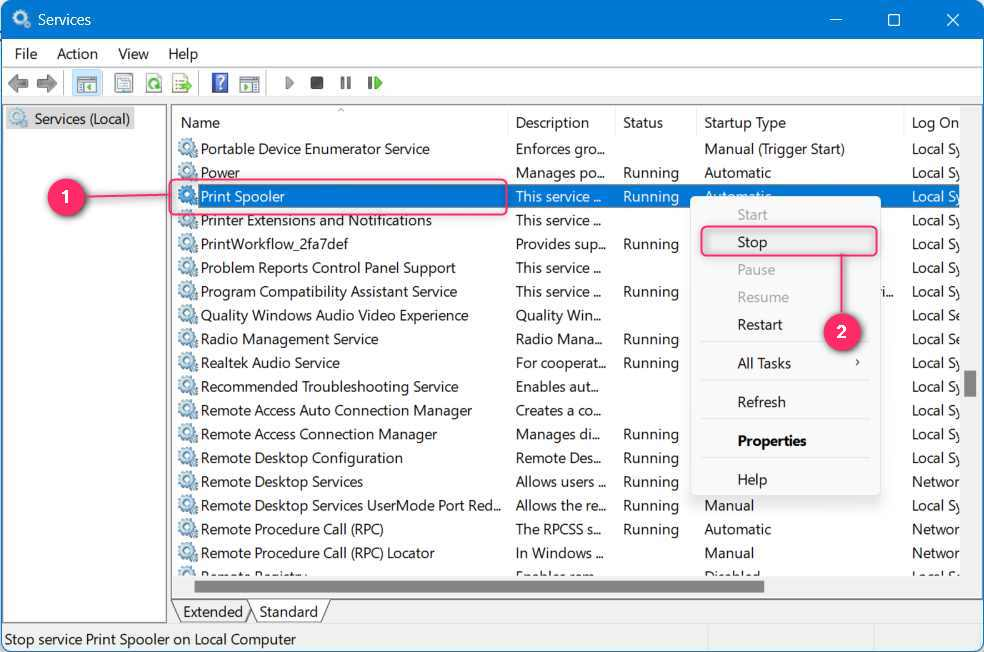
Step 2: Stop Print Spooler Service
To stop the Print Spooler service, find & right-click on the Print Spooler and from the menu, select Stop:
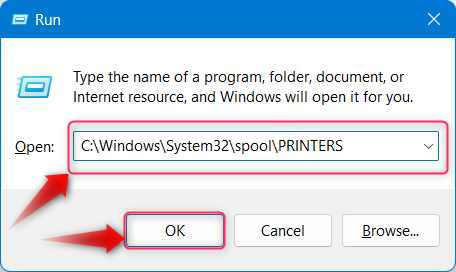
Step 3: Delete the Contents of the PRINTERS Directory
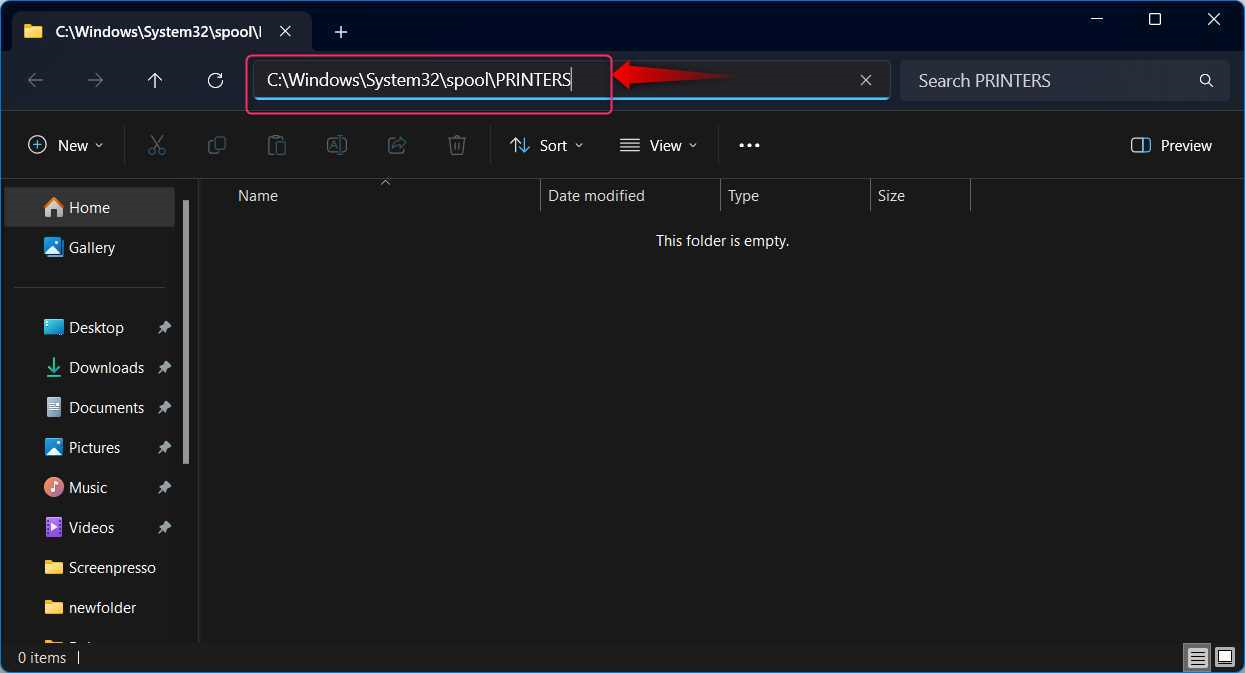
After the Print Spooler service is stopped, press the Windows + R keys to bring up the Windows Run, type in “C:\Windows\System32\spool\PRINTERS” and hit the OK button to open the PRINTERS directory:
After that, delete all contents of the PRINTERS directory:
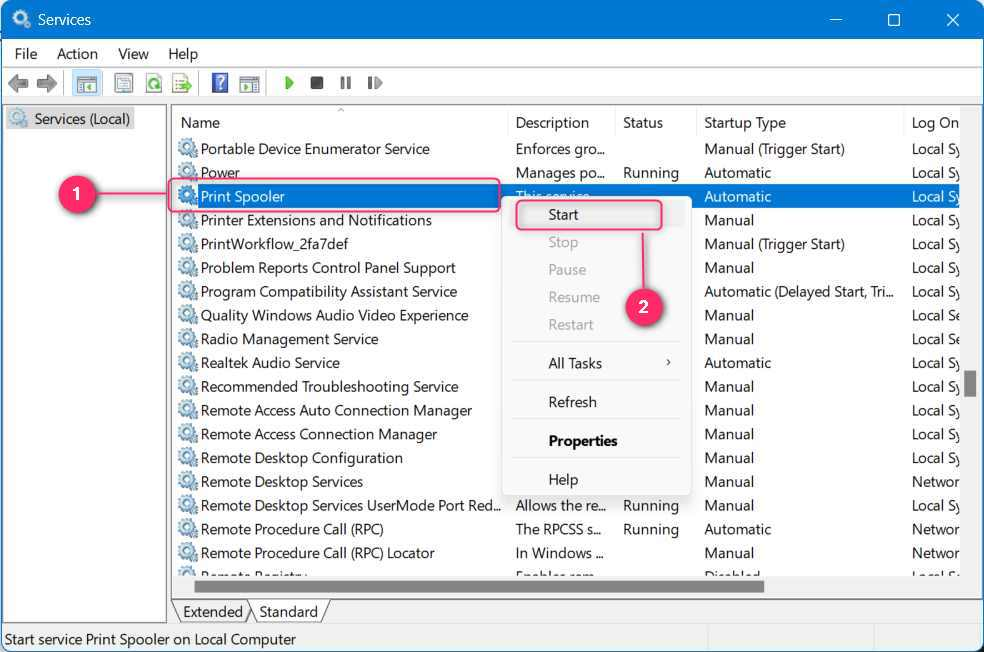
Once you have deleted the contents of the PRINTERS directory, start the Print Spooler service from the Windows Services:
Fix 5: Run Troubleshooter
Microsoft has loaded the Windows OS with all sorts of troubleshooters. The Print to PDF feature is no exception and it can be repaired using the troubleshooter. To troubleshoot the Microsoft Print to PDF feature, follow these steps:
Step 1: Open the Windows Settings App
Step 2: Navigate to Bluetooth & devices ⇒ Printers & scanners ⇒ Microsoft Print to PDF
Step 3: Run the Troubleshooter
The above steps are illustrated as follows:
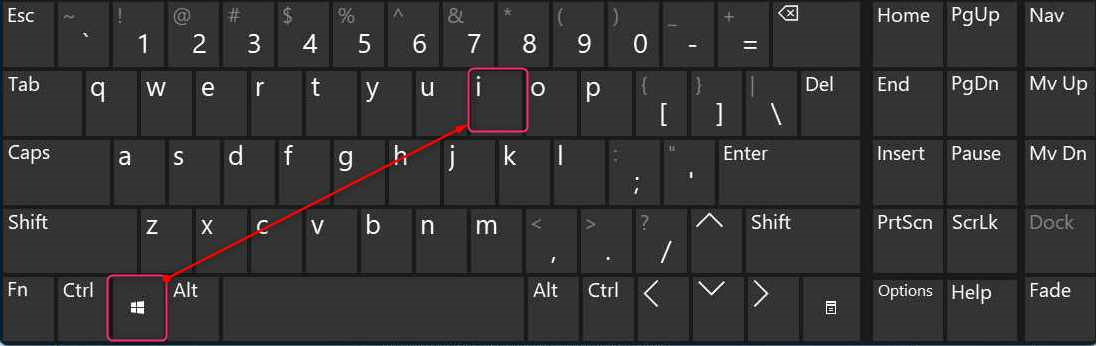
Step 1: Open the Windows Settings App
The Windows Settings app hosts numerous management settings and users can troubleshoot Microsoft Print to PDF feature. To open the Settings app, press the Windows + i keys:

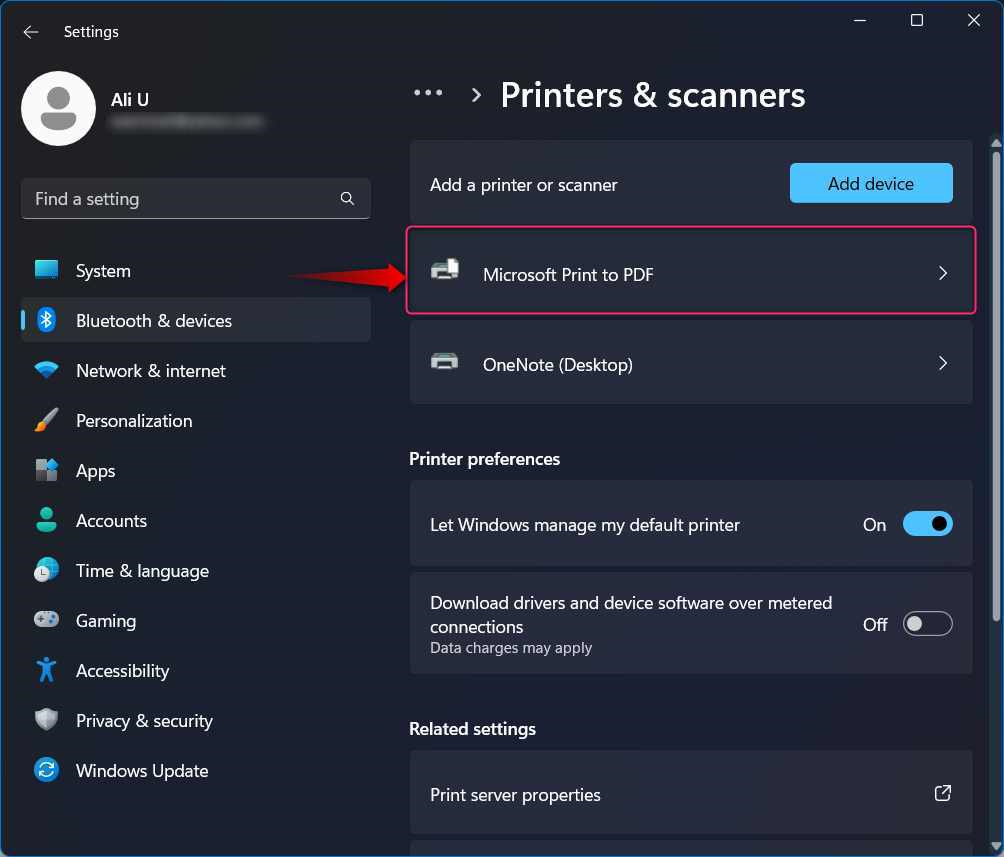
Step 2: Navigate to Microsoft Print to PDF
Follow the path Bluetooth & devices ⇒ Printers & scanners and click/tap on the Microsoft Print to PDF. From here, you can run the troubleshooter:
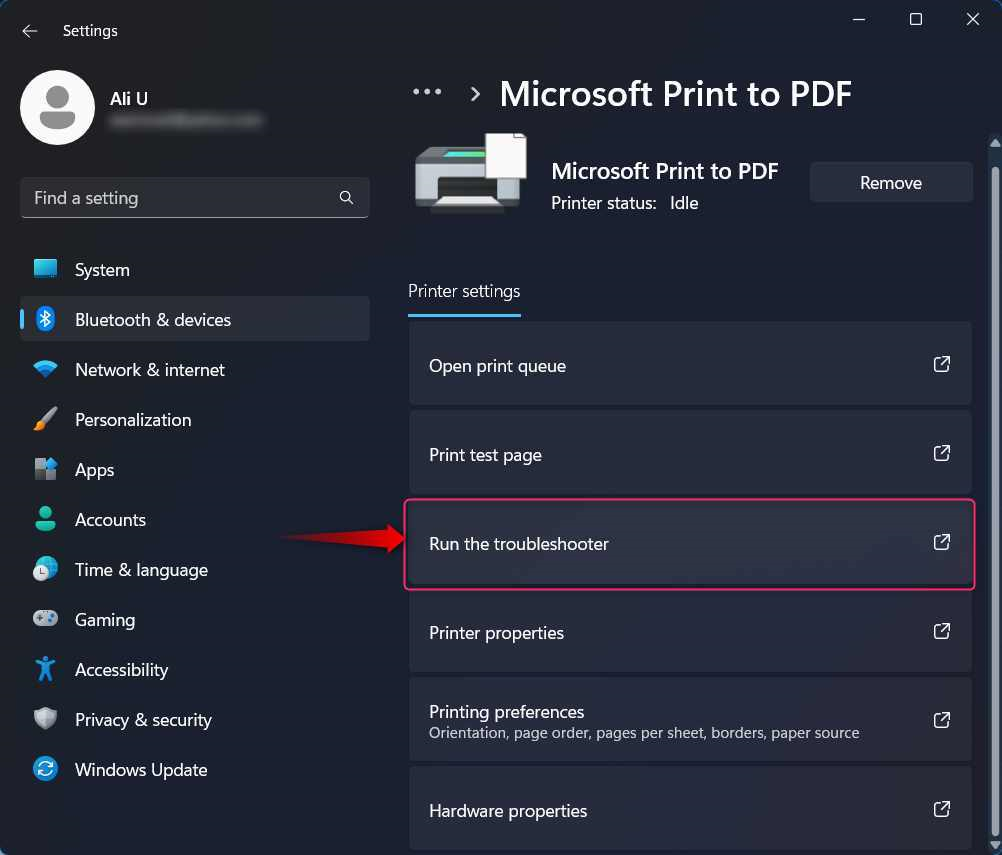
Step 3: Run the Troubleshooter
In the Microsoft Print to PDF settings, use the Run the troubleshooter option to launch the troubleshooter:
The troubleshooter will scan for the issues and fix them automatically:
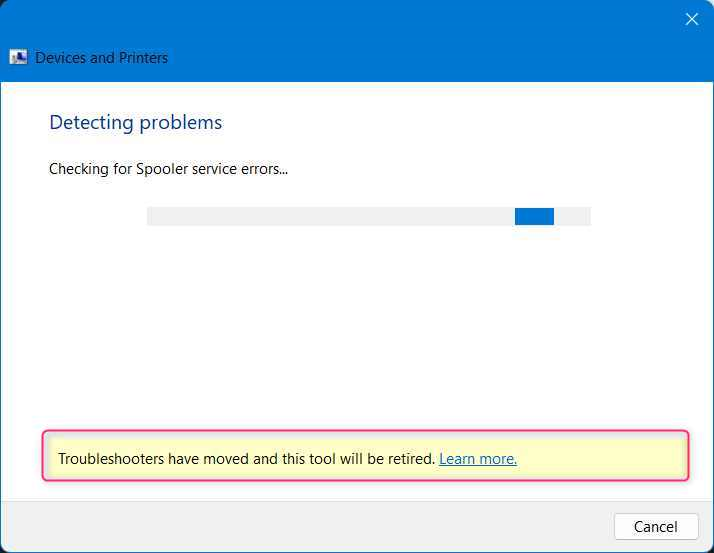
Note: The troubleshooters are being retired, and the online platform will replace them, as discussed in this detailed guide.
Fix 6: Update Windows
The last stop for fixing the Microsoft Print to PDF feature not working is to update Windows. A Windows Update brings several new features and bug fixes. To update Windows and fix the Microsoft Print to PDF, follow these steps:
Step 1: Open Windows Settings App
Step 2: Navigate to Windows Update and Check for Updates
The above steps are illustrated as follows:
Step 1: Open Windows Settings App
To open the Settings app, press the Windows + i keys:
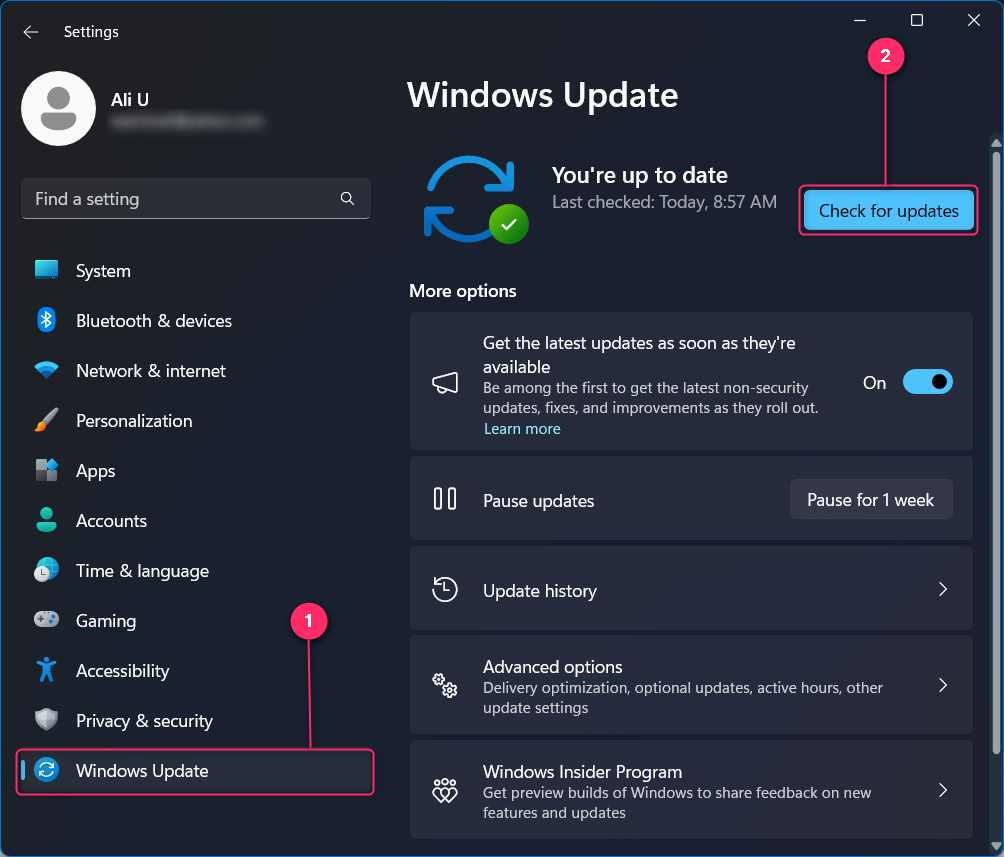
Step 2: Update Windows
Navigate to Windows Update and from the right pane, click/tap on the “Check for updates” button. It will now check for the updates and install them automatically:
How to Fix Microsoft Print to PDF Not Found?
If you cannot find the Microsoft Print to PDF option, you must run a few commands to enable it. This can be done using the Windows Features, but some users prefer the command line interface. It can be done using both: Command Prompt and Windows PowerShell, as explained below:
Fix 1: Using Command Prompt
The process to fix/resolve the Microsoft Print to PDF option not found using the Command Prompt includes the following steps:
Step 1: Open Command Prompt
Step 2: Stop Print Spooler Service
Step 3: Run the “dism /Online /Enable-Feature /FeatureName:”Printing-PrintToPDFServices-Features”” /NoRestart” Command to Enable Print to PDF Feature
Step 4: Start Print Spooler Service
The above steps are illustrated as follows:
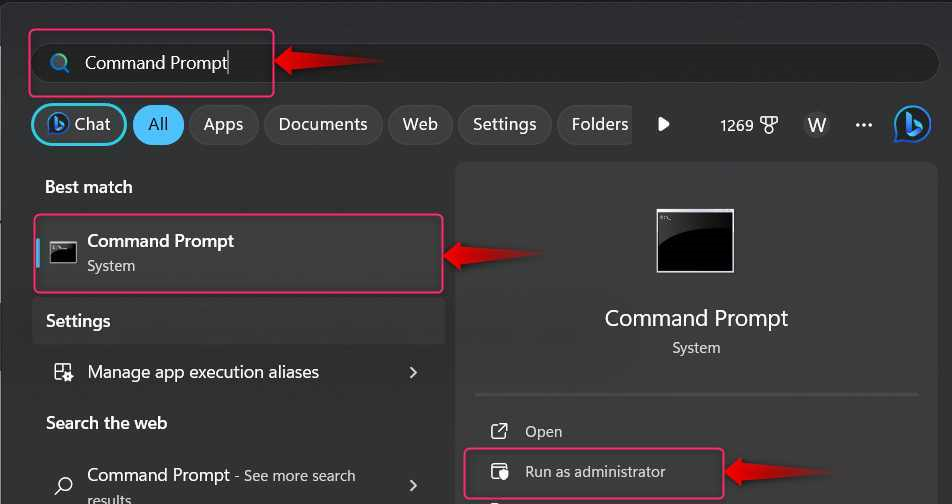
Step 1: Open Command Prompt
To open the Command Prompt, use the Windows Start menu to search and open it using the Run as administrator option:
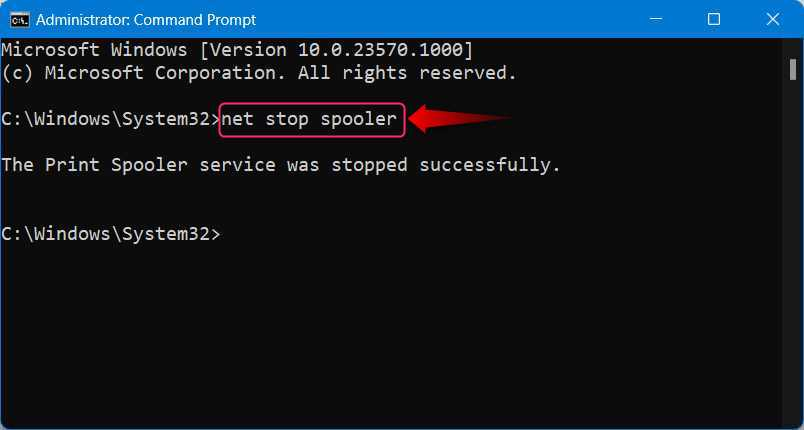
Step 2: Stop Print Spooler Service
The Print Spooler service must be stopped before you should enable the Print to PDF feature. To stop the Print Spooler service, use this command:
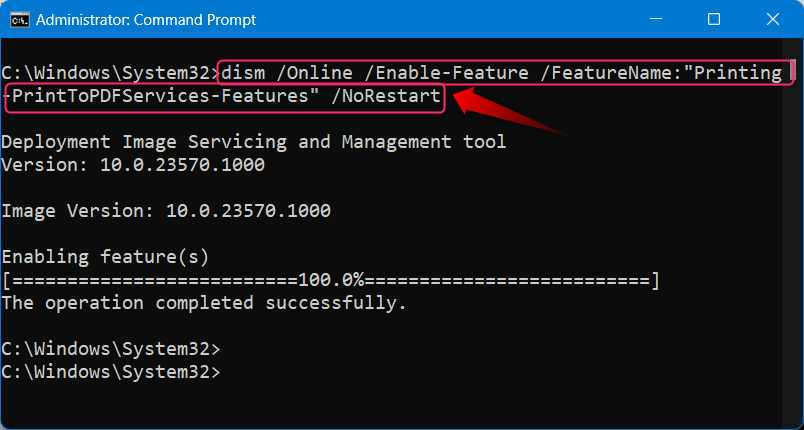
Step 3: Enable Print to PDF Feature
After stopping the Print Spooler service, run the following command to enable the Print to PDF feature:
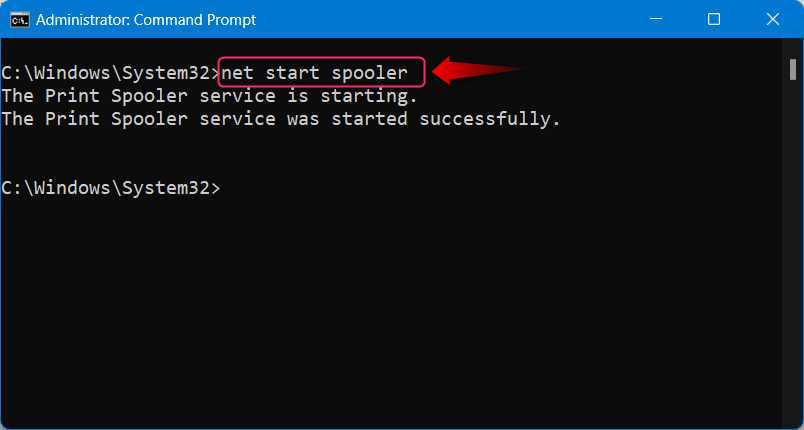
Step 4: Start Print Spooler Service
After enabling the Print to PDF feature, the Print Spooler service must be activated by running the following command:
Fix 2: Using Windows PowerShell
The process to fix the Microsoft Print to PDF option not found Windows PowerShell includes the following steps:
Step 1: Open Windows PowerShell
Step 2: Stop Print Spooler Service
Step 3: Run the “Enable-WindowsOptionalFeature -online -FeatureName Printing-PrintToPDFServices-Features” Command to Enable Print to PDF Feature
Step 4: Restart Print Spooler Service
The above steps are explained as follows:
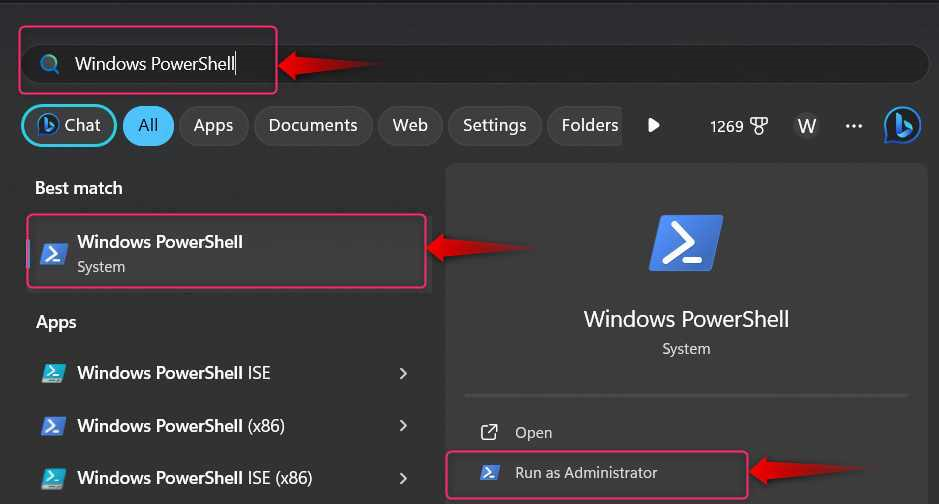
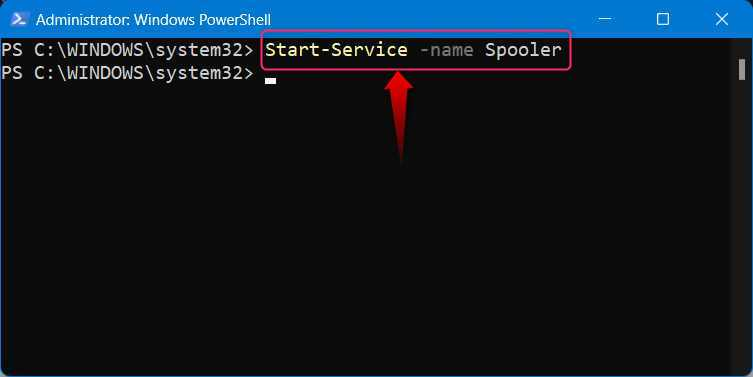
Step 1: Open Windows PowerShell
Use the Windows Start menu to search for Windows PowerShell, and use the Run as administrator option to run it:
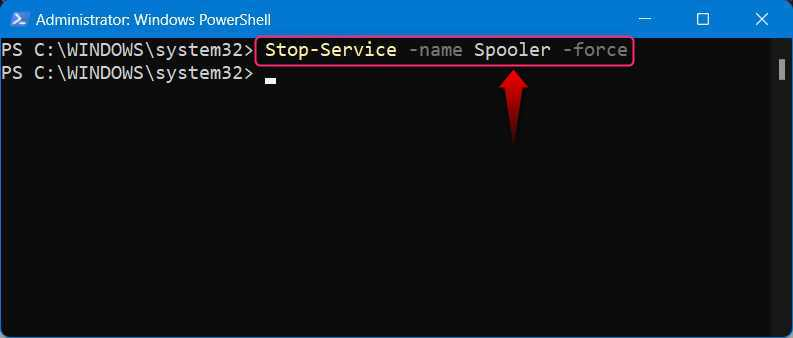
Step 2: Stop Print Spooler Service
To stop the Print Spooler service, run the below stated command:
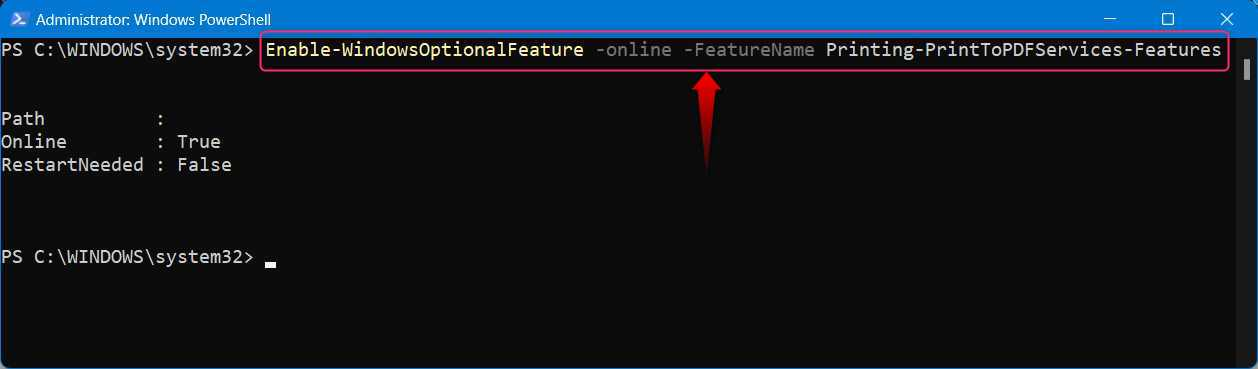
Step 3: Enable Microsoft Print to PDF
Using the following command in the Windows PowerShell, users can enable the Microsoft Print to PDF feature:
Step 4: Restart Print Spooler Service
After enabling the Print to PDF feature, the Print Spooler service must be activated by executing the following command:
How to Use the Microsoft Print to PDF Feature?
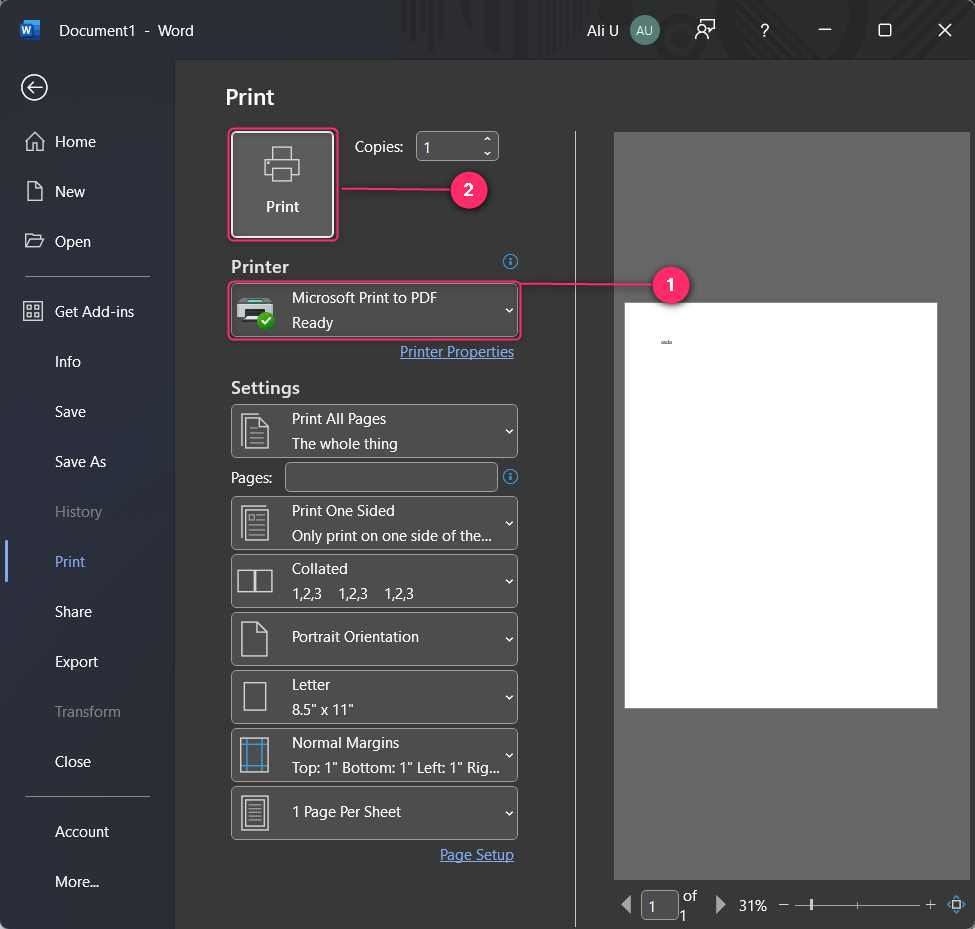
Microsoft Print to PDF feature is integrated into the Windows OS to convert a document, image, or webpage into a printable PDF file. To use it, press the Ctrl + P keys. On the Microsoft Office apps (Word, Excel, PowerPoint, etc), users will be prompted to select the printer (choose Microsoft Print to PDF). After selecting the printer, the printable file can be created using the Print button:
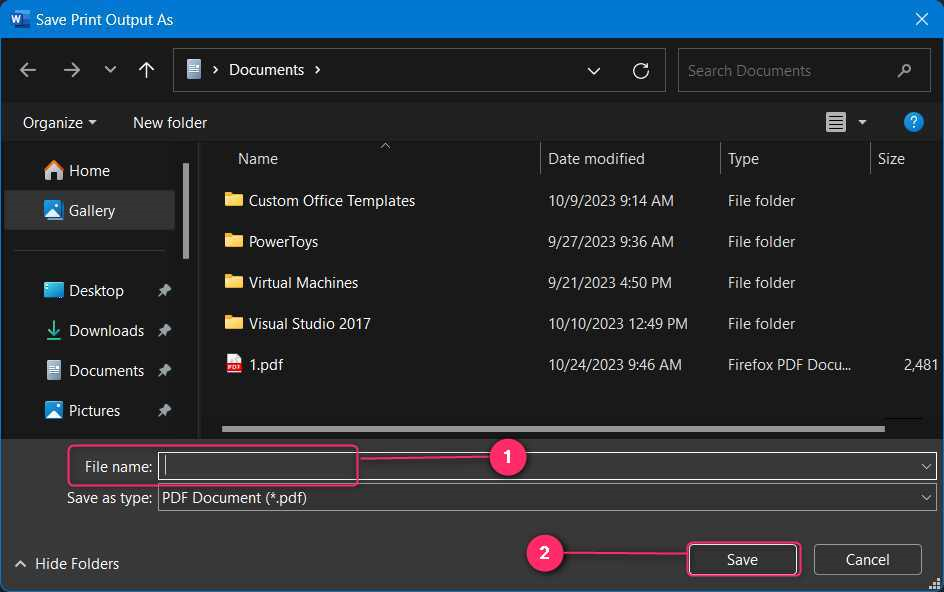
Next, type in the file name and use the Save button to save the printable PDF file:
Note: If you want to print a page from the internet, use the Ctrl + P keys. It will convert & download the printable PDF file and store it in the default Downloads folders.
Conclusion
To fix the issue of the Print to PDF feature not working, enable the Print to PDF feature from Windows Features, Restart the Print Spooler Service, and clear the Printer Queue. If these fixes don’t work, Update Printer Drivers, Run the Troubleshooter, and Update Windows. The Command Prompt or Windows PowerShell can also be used for enabling the Print to PDF feature.
The Print to PDF converts a document, image, or webpage into a printable PDF file.
Source: linuxhint.com