How to Configure Dnsmasq as a DHCP Relay Server
In this article, we will show you how to configure dnsmasq as a DHCP relay server.
Topic of Contents:
- Network Topology
- Configuring a Static IP Address on the DHCP Relay
- DHCP Configuration on the Centralized DHCP Server
- Configuring Dnsmasq as DHCP Relay
- Checking If DHCP Relay Is Working as Expected
- Conclusion
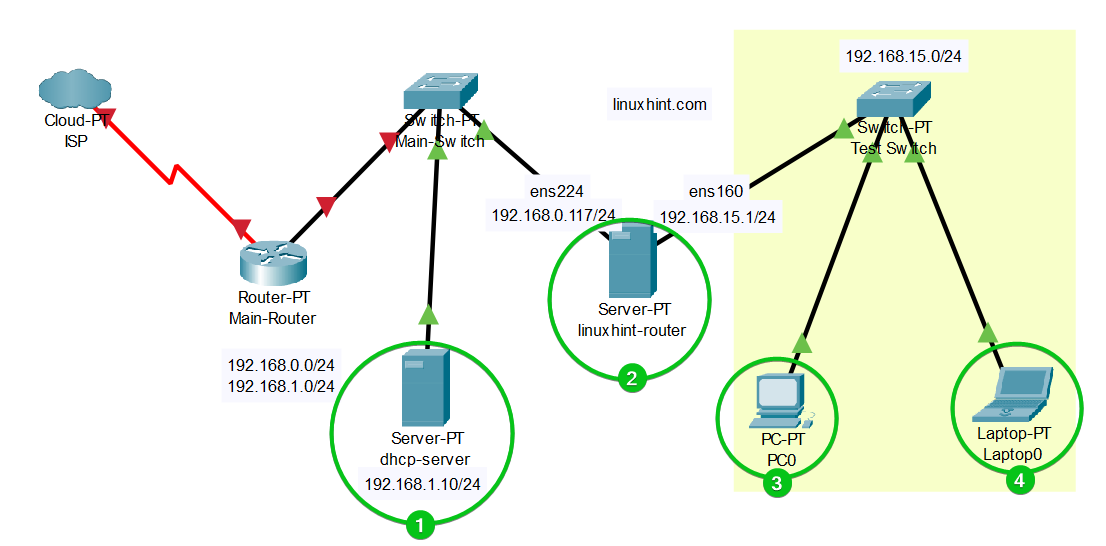
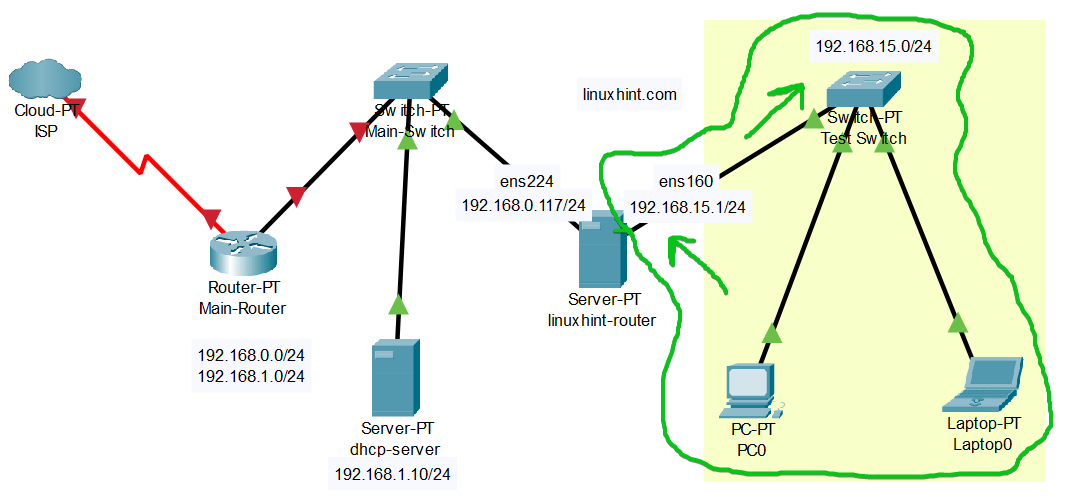
Network Topology
Here, we have a central DHCP server which is “dhcp-server” and it has the 192.168.1.10[1] IP address. We have a Fedora 39 server linuxhint-router configured as a Linux router[1]. The linuxhint-router is the gateway for the 192.168.15.0/24 network subnet. We installed dnsmasq on the linuxhint-router and we would like to configure dnsmasq as a DHCP relay to relay the DHCP packets from the 192.168.15.0/24 network to the dhcp-server (the centralized DHCP server) so that the IP addresses can be automatically assigned to computers 3 and 4 (let’s say).
Configuring a Static IP Address on the DHCP Relay
One of the requirements of DHCP relay is that you need to have the gateway IP address set on the network interface connected to the network subnet which you want to assign the IP addresses dynamically via DHCP relay.
In the network topology, we assign the gateway IP address of 192.168.15.1 on the network interface that is connected to the 192.168.15.0/24 subnet. If you don’t do this, the central DHCP server won’t know the IP addresses to offer.
If you need any assistance with setting a fixed IP address on your computer/server, please search our website. We have many articles written on that topic.
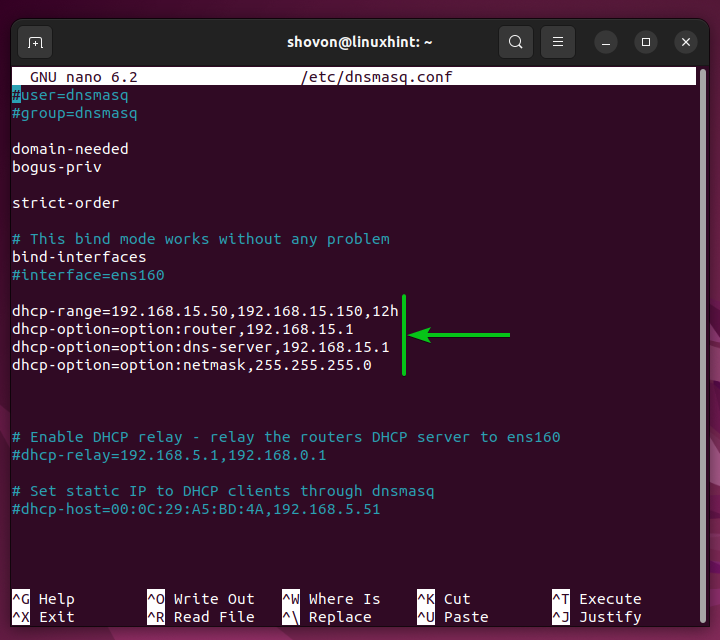
DHCP Configuration on the Centralized DHCP Server
The centralized DHCP server on the network topology uses dnsmasq as well. It’s configured to assign the IP addresses in the range of 192.168.15.50 to 192.168.15.150 to the computers on the 192.168.15.0/24 subnet.
NOTE: You don’t have to use dnsmasq on the central DHCP server. You can use the ISC DHCP server or any other DHCP server of your choice.
Configuring Dnsmasq as DHCP Relay
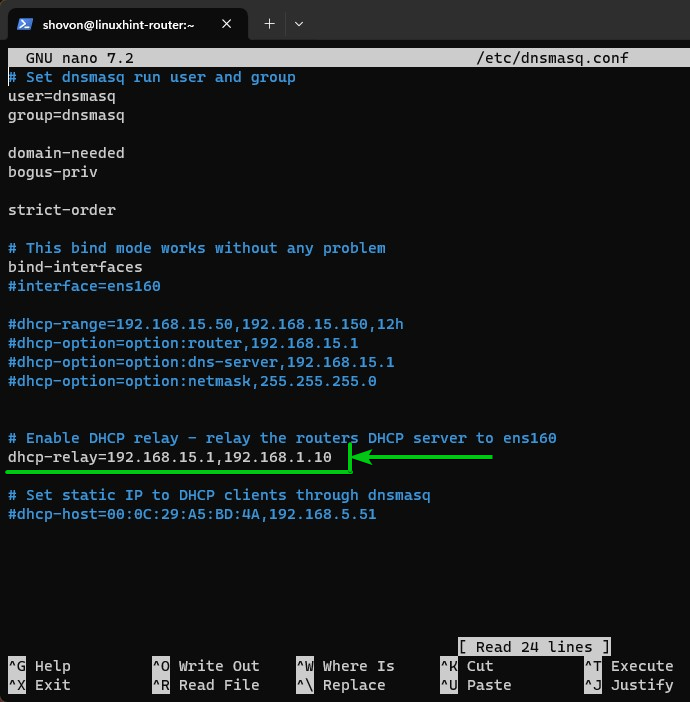
To configure dnsmasq on the linuxhint-router as a DHCP relay, open the dnsmasq configuration file which is “/etc/dnsmasq.conf” with the nano text editor as follows:
Add the following line in the “dnsmasq.conf” file:
Here, 192.168.15.1 is the IP address of the network interface that is directly connected to the 192.168.15.0/24 subnet, and 192.168.1.10 is the IP address of the centralized DHCP server.
In the dnsmasq documentation, the “dhcp-relay” option is documented in the following format:
According to the documentation, 192.168.15.1 is the <local address> and 192.168.1.10 is the <server address>.
Once you configured dnsmasq, press <Ctrl> + X followed by “Y” and <Enter> to save the /etc/dnsmasq.conf file.
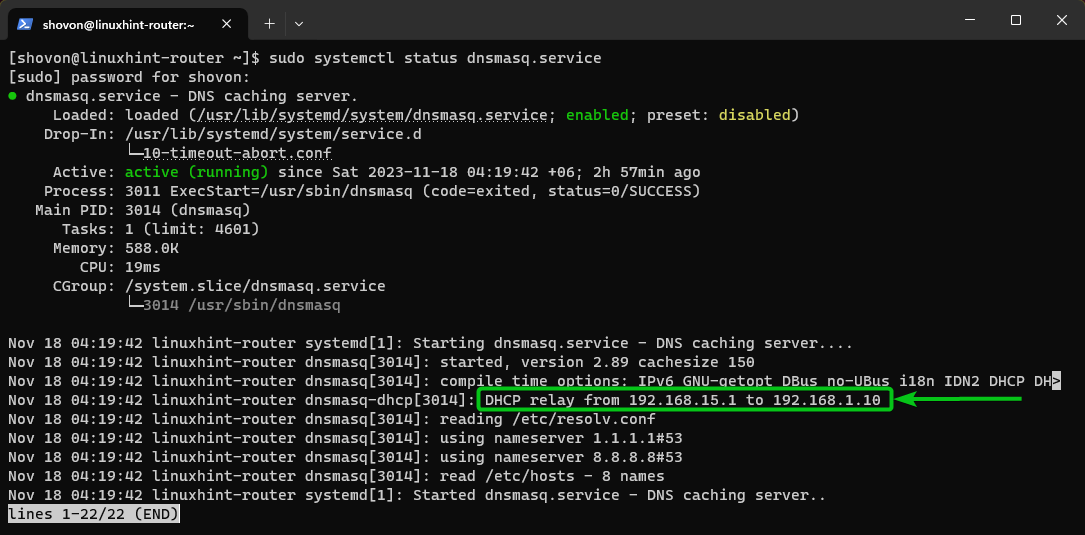
For the changes to take effect, restart the dnsmasq service with the following command:
As you can see, the DHCP relay is configured to relay the DHCP information from 192.168.15.1 (linuxhint-router) to 192.168.1.10 (central DHCP server).
Checking If DHCP Relay Is Working as Expected
To check whether the DHCP relay is working, let’s try and see if any computers on the 192.168.15.0/24 subnet can get the IP addresses that are assigned automatically via DHCP.
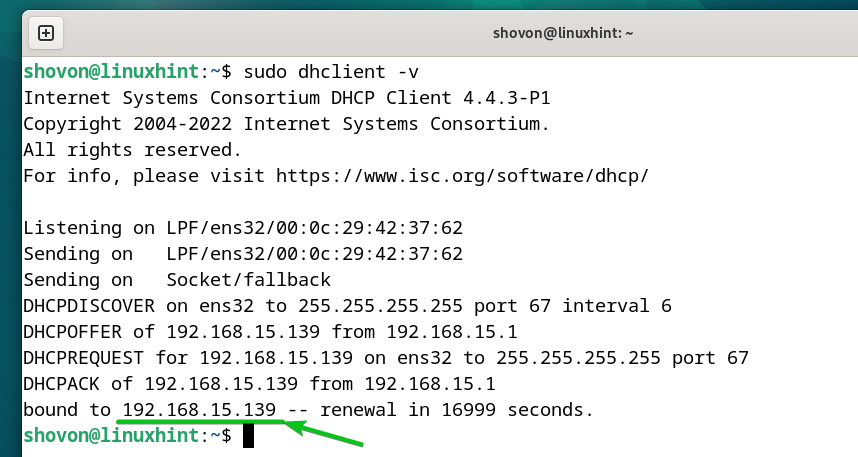
First, release the current DHCP-configured IP address on the client with the following command:
To receive the IP information via DHCP, run the following command:
As you can see, we got the IP address of 192.168.15.139 from the DHCP server.
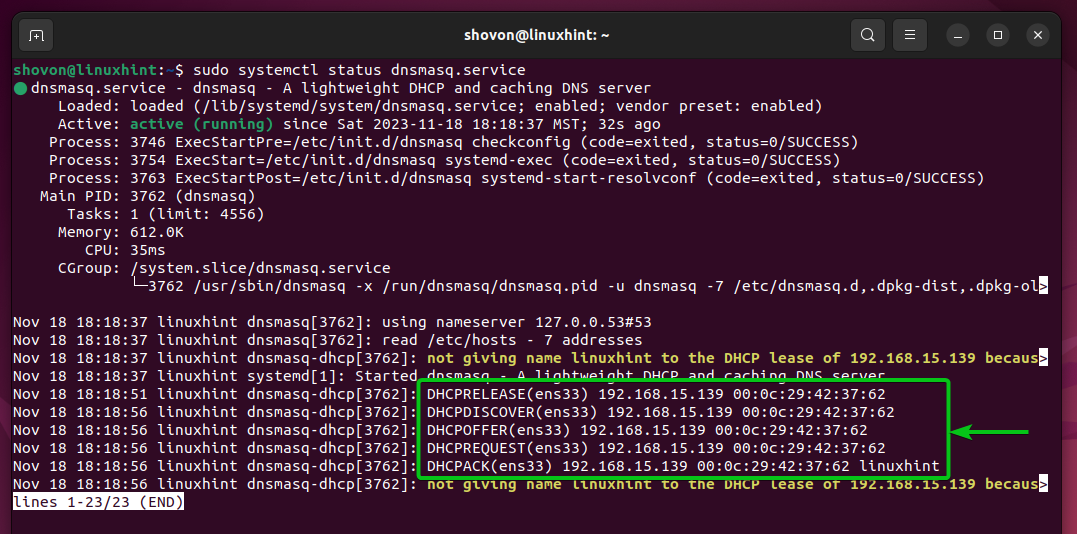
The central DHCP server received the DHCP request and replied to it correctly as you can see in the following screenshot:
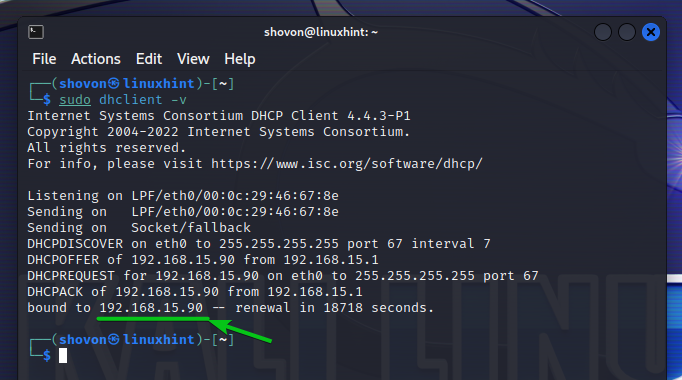
The other computer on the 192.168.15.0/24 subnet also received the correct IP information via DHCP as you can see in the following screenshot:
Conclusion
In this article, we showed you how to configure dnsmasq as a DHCP relay so that you can forward the DHCP packets to a centralized DHCP server for easier management.
Source: linuxhint.com