Turn your Raspberry Pi into a NAS using Samba (SMB) Server
Are you tired of the challenge posed by a crowded local storage, making file retrieval feel like a scavenger hunt?
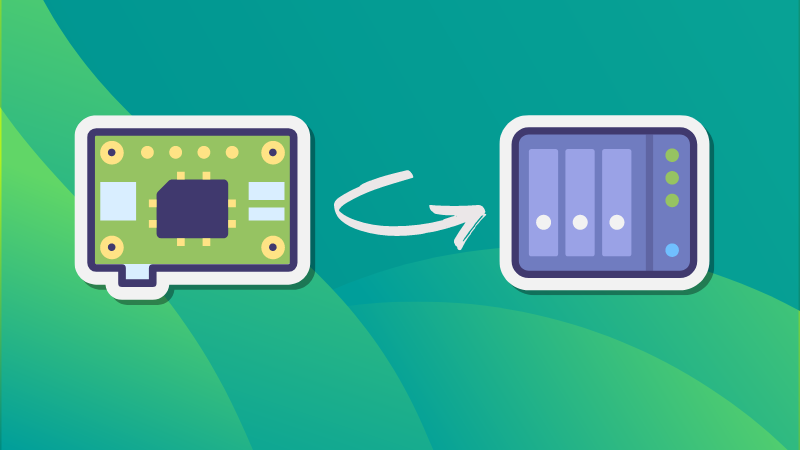
Worry not! Today, we embark on the transformation of your Raspberry Pi into a Network-Attached Storage (NAS) solution.
Say farewell to the complexities of an overloaded local storage. Instead, envision your Raspberry Pi, equipped with a Samba Server, seamlessly organizing files for efficient collaboration, simultaneous access, and reliable backups.
What is Samba?
Samba is a software suite that enables seamless file and print services interoperability using Server Message Block (SMB) / Common Internet File System (CIFS) file sharing standard which is widely supported by various operating systems like Windows, MacOS, Linux and even Android.
There are other NAS oriented solutions available for Raspberry Pi like Open Media Vault. I find SMB share to be the easiest to set up and if you are new to network storage, I think you should try this hassle-free method.
Requirements
- Raspberry Pi
- SD Card (8 GB+)
- Raspbian OS installed (commands mentioned here work on that)
- Ethernet Cable (Optional)
- Keyboard & Mouse (Optional)
- External HDD/ SSD
Installing Samba and it's dependencies
First, make sure to install Raspbian OS on your Raspberry Pi. I won't discuss those steps here.
The first order of business when start working on Linux is to ensure that you have all the latest packages installed.
sudo apt update && sudo apt upgrade -yTo install the Samba packages you just need to apt-get as they are available in the repository.
sudo apt-get install samba samba-common-binThe work is not done here since you need to create a folder which will be shared. This folder can be located even on external drive mounted to Pi.
Creating a shared folder
For this tutorial, I am mounting an external drive and creating a new folder inside /media directory.
I am going to give this folder all the permission i.e. read/write/execute (rwx) so that anyone on my sub-network with the access to my server can share files easily.
sudo mkdir -m 1777 /media/hdd/sharedEditing the SMB Config file
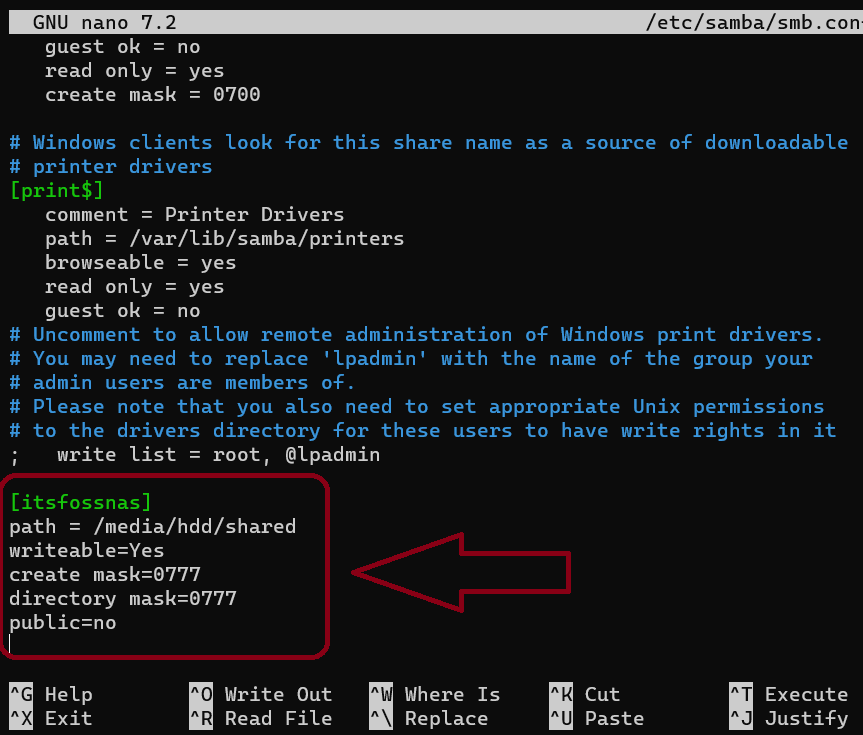
Once you have created the folder, it's time to configure your SMB share. You need to do is edit smb.conf file to make your share visible on the network.
sudo nano /etc/samba/smb.confInside this config file, you need to add the following code at the bottom:
[itsfossnas]
path = /media/hdd/shared
writeable=Yes
create mask=0777
directory mask=0777
public=no
Then save and exit out of Nano using CTRL + X then press Y .
Here, [itsfossnas] is the name of my share and it'll be used to connect to the network share with the address like \\localhost\itsfossnas.
Creating a User for Samba share
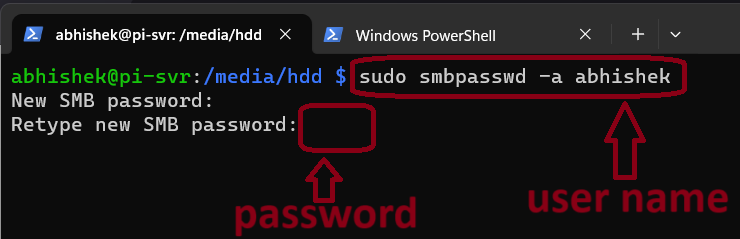
Creating a user for Samba share is crucial for access control, security, and personalized settings.
I am going to create a user called abhishek in this example.
sudo smbpasswd -a abhishek Once you press Enter, it will prompt you to create a password for this user.
Finally, you need to restart the samba service:
sudo systemctl restart smbdSamba will restart automatically when every time you boot up your Pi.
Now it's time to connect to your Samba share and to do that, you need to locate the Pi on the network.
The easiest method is to type hostname -I on the terminal or you can check the DHCP record of your router which will show the IP address assigned to your Pi.
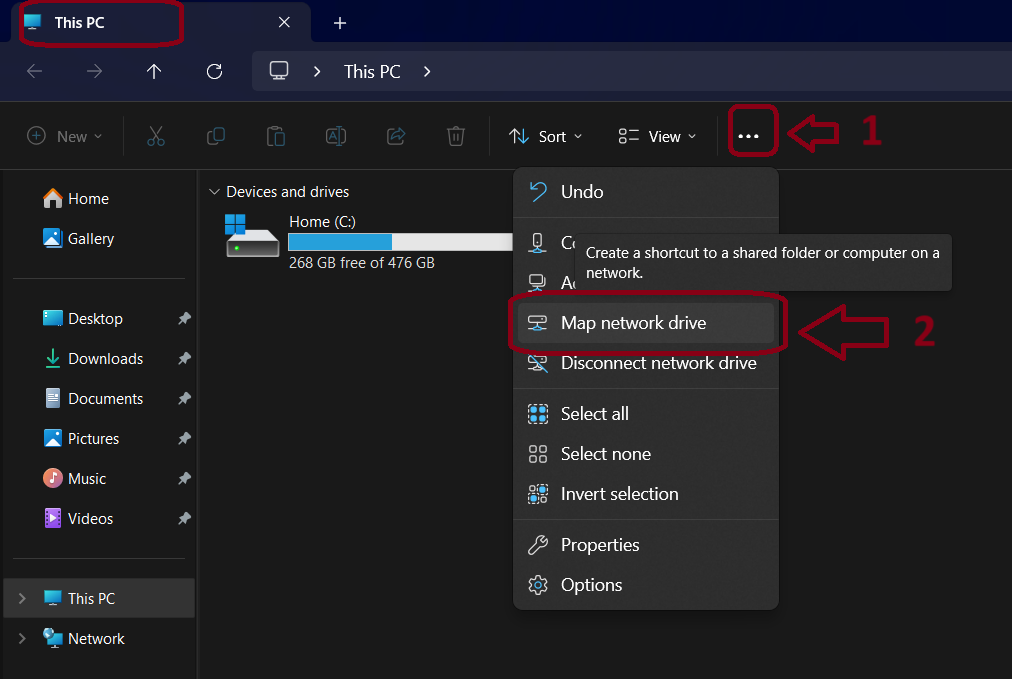
Mounting your Samba Server on Windows
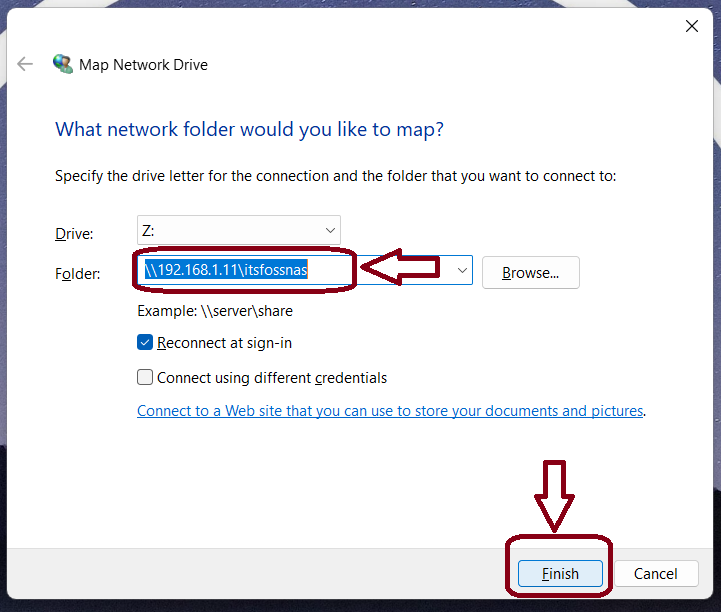
To mount your server in Windows is quite simple. Inside the file explorer app, at the top you will need to click the menu icon ... and a list of options will pop up on your screen from which, You have to select Map Network drive .
I am using Windows 11 in this tutorial.
After that, it will ask you to set the drive letter for your share and the address of your Server. In my case, it is \\192.168.1.11\itsfossnas .
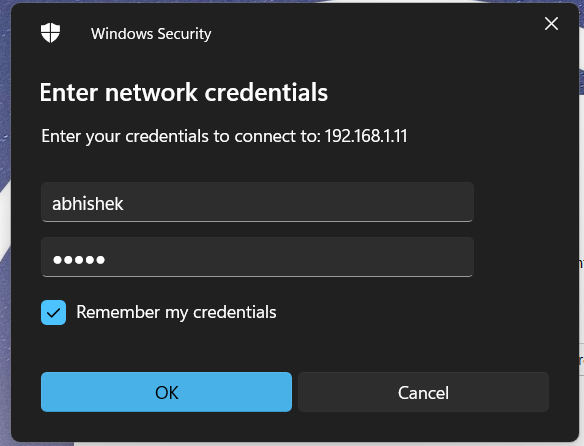
Finally, it will prompt you to enter you Login credentials i.e. the Username and the Password we set at the above step and once you are done, just press Ok.
Your drive is now mounted successfully.
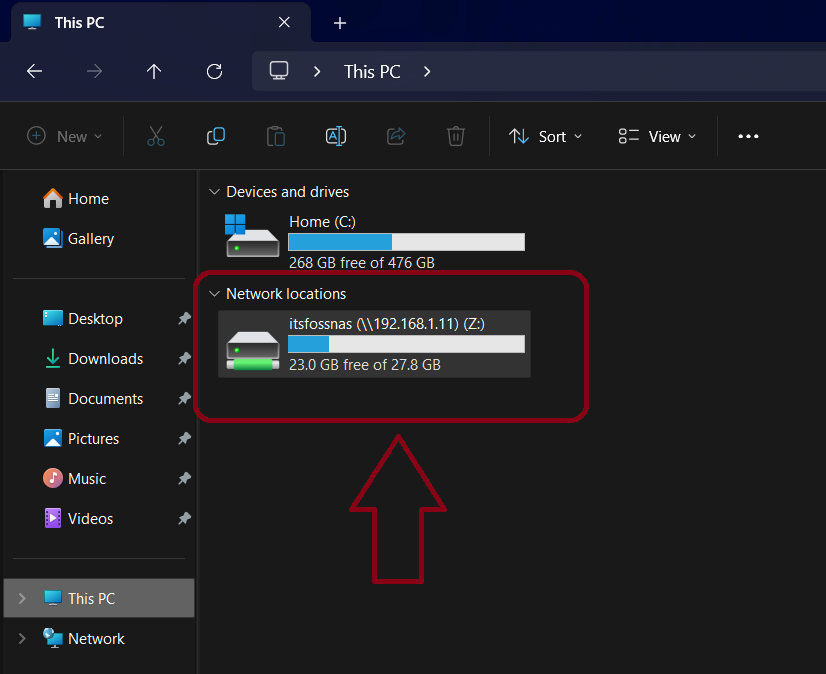
The speeds will vary based on whether you are on WiFi or connected via Ethernet cable.
Conclusion:
I won't say that this will be your permanent storage and backup solution but it is quite impressive that how such a small device can do so much.
I think it's great for learning about Network Storage options before you go all in and buy an expensive NAS.
Hope you have learned something new. Feel free to share your experience or your DIY storage solutions with us in the comments.
Source: It's FOSS