Tkinter Radiobutton
This post will act as a guide about building radio buttons in Python using the Tkinter library, and cover the following content:
How to Build Simple Radio Buttons in Tkinter?
To build radio buttons in Tkinter, you need to use the Radiobutton() method and pass in the frame in which the radio button will be added/displayed, the text to show in the radio button, and the variable in which to store the value.
To demonstrate the use of the Radiobutton(), take the following code example:
window = Tk()
window.geometry("150x150")
frame = Frame(window)
frame.pack()
radVar = ""
radBtn1 = Radiobutton(frame, text = "Apple", variable = radVar,
value = 1).pack()
radBtn2 = Radiobutton(frame, text = "Banana", variable = radVar,
value = 2).pack()
window.mainloop()
In this code snippet:
- A Tkinter window has been created with the shape set to 150 by 150
- A string variable “radVar” has been created to store the value of the radio buttons
- Two radio buttons, radBtn1 and radBtn2, are created on the “frame” with different texts. However, both the radio buttons are passed the same variable, which will link the two radio buttons
When this code is executed, it will produce the following Tkinter window on your machine:
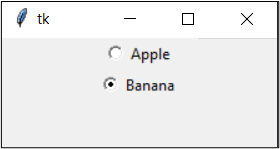
In the output window, only one radio button can be selected at the same time, this is due to the fact that both the radio buttons are linked with each other.
How to Display a Prompt on Selection of Radio Button?
To execute a command or a function upon the selection of the radio button, use the “command” argument in the Radiobutton() method.
To demonstrate this, take the following code snippet:
from tkinter import messagebox
window = Tk()
window.geometry("150x150")
frame = Frame(window)
frame.pack()
radVar = IntVar()
#Function to display Prompt
def showPrompt():
result = ""
if radVar.get() == 1:
result ="Apple"
elif radVar.get() == 2:
result = "Banana"
else:
result = "Error"
return messagebox.showinfo('LinuxHint', f'You Selected {result}.')
#Build Radio Buttons
radBtn1 = Radiobutton(frame, text = "Apple", variable = radVar,
value = 1, command=showPrompt).pack()
radBtn2 = Radiobutton(frame, text = "Banana", variable = radVar,
value = 2, command=showPrompt).pack()
window.mainloop()
In this above code snippet:
- Import tkinter and “messagebox” and build a Tkinter window.
- Define a function named “showPrompt(),” which will use the messagebox package to show a prompt to the user about the selection he has made.
- Create two Radio buttons by passing the same variable that is being used in the showPrompt() method
- Attach the showPrompt() method with the radio buttons by using the “command” argument.
When this code is executed, it produces the following Tkinter window on your machine:
You have successfully executed an action based on the selection of the radio button in Tkinter Python.
Conclusion
The user can create radio buttons in the Tkinter GUI by using the Radiobutton() method. The user can also provide the command argument to run or execute a command upon the selection of the Radio button. This guide has explained and demonstrated the process of creating Radio buttons using Tkinter Python.
Source: linuxhint.com