Python Tkinter Examples
Python is a versatile programming language that can be used to implement different types of applications. It has many types of modules to create the GUI (Graphical User Interface) based applications. Python tkinter is one of them. Any desktop application can be implemented easily using the tkinter module. It will be better if you have a basic knowledge of Python programming to learn the uses of the Python tkinter module. Different uses of the Python tkinter module to create the GUI applications are shown in this tutorial.
Install the Tkinter Module
The tkinter module is not installed on Python by default. So, you have to run the following command to install the tkinter module in the Python 3+ version:
Different Tkinter Widgets
The tkinter module contains various widgets for various purposes.
| Widget Name | Purpose |
| Label | It is used to display the helping message for the user. |
| Button | It is used to add different buttons in the application. |
| Frame | It works like a widget container that contains different types of widgets to design an organized form. |
| Entry | It is used to take a single-line text from the user. |
| Checkbutton | It is used to add the checkbox buttons to take multiple inputs from the user from multiple options. |
| Radiobutton | It is used to add the radio buttons to take a single input from the user from multiple options. |
| Combobox button | It is used to add a dropdown list to take a single input from the user from multiple options. |
| ListBox | It is used to add a listbox to take multiple inputs from the user from multiple options. |
| Text | It is used to take a multi-line text from the user. |
| Message | It is used to display the message window for the user. |
| Scrollbar | It is used to add a scrollbar in the window to scroll the window up and down. |
| Menubutton | It is used to display the menu to the user. |
| Menu | It is used to display the menu items to the user. |
| PanedWindow | It works like a widget container that contains the horizontal and vertical panes. |
| Tabs | It is used to add a tab window in the application. |
Different Tkinter Examples
The uses of some common tkinter widgets are shown in the following examples.
Example 1: Create a Simple GUI Application
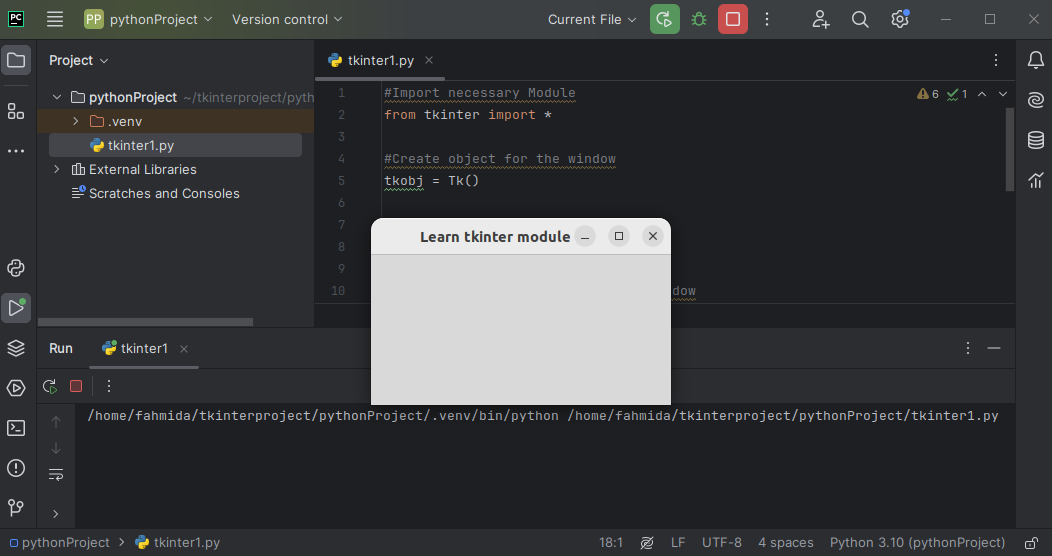
Create a Python file with the following content that displays a dialog box at the center of the screen with a title and the particular height and width:
from tkinter import *
#Create object for the window
tkobj = Tk()
#Set the title of the window
tkobj.title("Learn tkinter module")
#Set the height and width of the window
tkobj.geometry('300x150')
#Set the display position of the window centrally
tkobj.eval('tk::PlaceWindow . center')
#Run the Tkinter
tkobj.mainloop()
Output:
The following output appears after executing the script. A dialog box with the “Learn tkinter module” title is displayed:
Example 2: Use of Label and Button
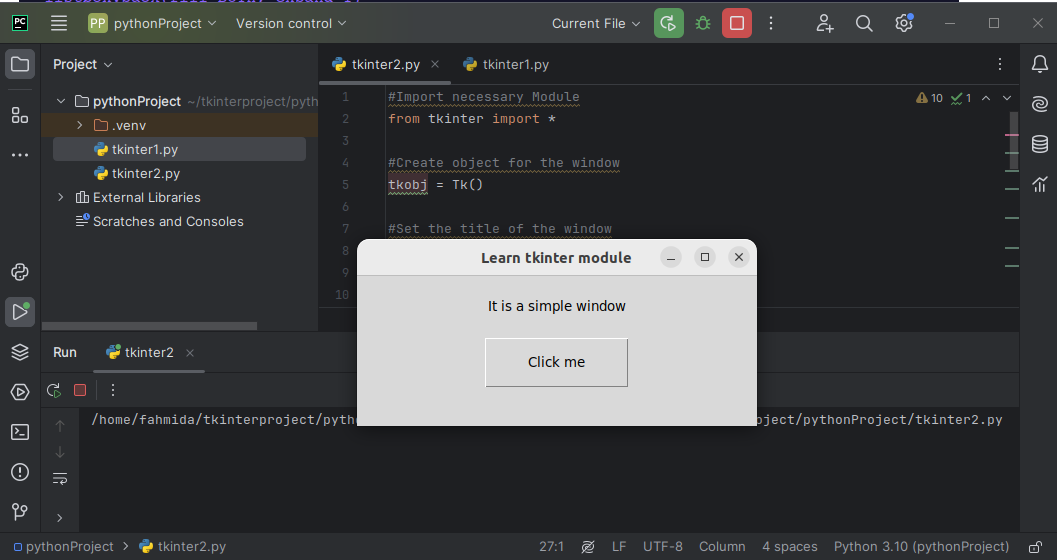
Create a Python file with the following script that displays a window with a label and a dialog box:
from tkinter import *
#Create an object for the window
tkobj = Tk()
#Set the title of the window
tkobj.title("Learn tkinter module")
#Set the height and width of the window
tkobj.geometry('400x150')
#Define label object
lbl = Label(tkobj, text="It is a simple window")
#Add label to the window
lbl.pack(ipadx=30, ipady=20)
#Define button object
btn = Button(tkobj, text="Click me")
#Add button to the window with the position
btn.pack(ipadx=30, ipady=10)
#Set the display position of the window centrally
tkobj.eval('tk::PlaceWindow . center')
#Run the Tkinter
tkobj.mainloop()
Output:
A window with a label and a button appears at the center of the screen after executing the script.
Example 3: Set the Font Color and Background Color
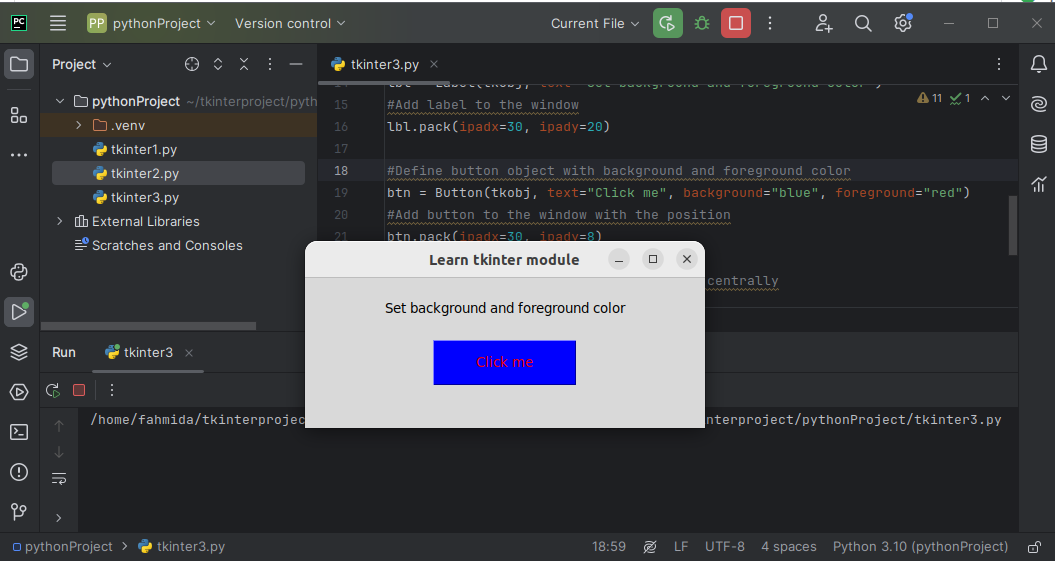
Create a Python file with the following script that displays a window with a label and a colorful button. Here, the background attribute is used to set the background color of the button and the foreground attribute is used to set the font color of the button:
from tkinter import *
#Create an object for the window
tkobj = Tk()
#Set the title of the window
tkobj.title("Learn tkinter module")
#Set the height and width of the window
tkobj.geometry('400x150')
#Define label object
lbl = Label(tkobj, text="Set background and foreground color")
#Add label to the window
lbl.pack(ipadx=30, ipady=20)
#Define button object with background and foreground color
btn = Button(tkobj, text="Click me", background="blue", foreground="red")
#Add button to the window with the position
btn.pack(ipadx=30, ipady=8)
#Set the display position of the window centrally
tkobj.eval('tk::PlaceWindow . center')
#Run the Tkinter
tkobj.mainloop()
Output:
The following window appears after executing the script:
Example 4: Use of Frame
In the following Python script, a label and two buttons are shown within a frame widget. Create a Python file with the script to check the output:
from tkinter import *
#Create an object for the window
tkobj = Tk()
#Set the title of the window
tkobj.title("tkinter Module")
#Set the height and width of the window
tkobj.geometry('250x100')
#Define frame objects
frm = Frame(tkobj)
frm.pack()
lframe = Frame(tkobj)
lframe.pack(side=LEFT)
rframe = Frame(tkobj)
rframe.pack(side=RIGHT)
#Define label inside the frame
lbl = Label(frm, text="Use of Frame", fg="blue")
lbl.pack()
#Define buttons inside the frame
btn1 = Button(lframe, text="", fg="black", bg="white")
btn2.pack(side=RIGHT)
#Set the display position of the window centrally
tkobj.eval('tk::PlaceWindow . center')
#Run the Tkinter
tkobj.mainloop()
Output:
The following output appears after executing the script:

Example 5: Handle the Button Event
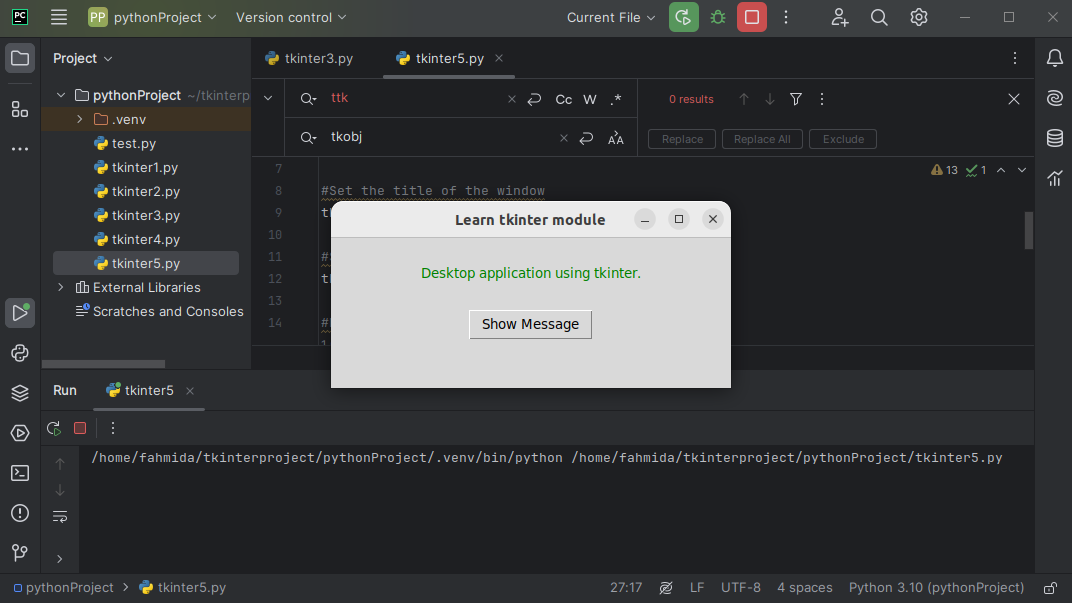
The use of the message box is shown in the following script. The message box is displayed when a button is clicked:
from tkinter import *
from tkinter import messagebox
#Create an object for the window
tkobj = Tk()
#Set the title of the window
tkobj.title("Learn tkinter module")
#Set the height and width of the window
tkobj.geometry('400x150')
#Define a function to display a message box
def display():
messagebox.showinfo("Information","Button is clicked.")
#Create label text with font color, style, and position
Label(tkobj, text="Desktop application using tkinter.", fg="green").pack(pady=25)
#Create a button with a button handler
Button(tkobj, text="Show Message", command=display).pack()
#Set the display position of the window centrally
tkobj.eval('tk::PlaceWindow . center')
#Run the Tkinter
tkobj.mainloop()
Output:
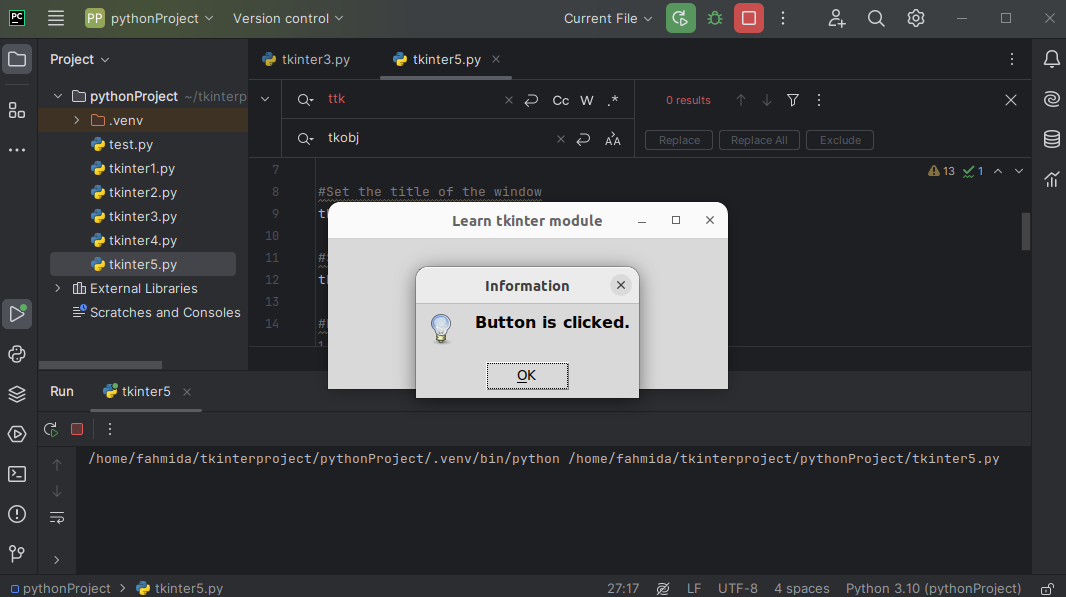
The following window appears after executing the script:
The following message box appears after pressing the button:
Example 6: Take an Input from the User
Multiple widgets are available in the tkinter module to take an input from the user. The uses of the most common widgets are shown in the following script. Create a Python file with the following code to check the output:
from tkinter import *
from tkinter.ttk import Combobox
from tkinter import ttk
import tkinter as tk
from tkinter import messagebox
#Create tkinter object
tkobj = Tk()
#Set the title of the window
tkobj.title("User Information Form")
#Set the height and width of the window
tkobj.geometry('550x320')
#Define a function to display the form values
def display_values():
#Read single-line text
name = "Name : " + name_val.get() + "\n"
#Read the selected radio button value
if gender.get() == 1:
g = "Male"
else:
g = "Female"
g = "Gender : " + g + "\n"
#Read the selected checkbox values
game = ""
if g1.get() == 1:
game = "Cricket"
if g2.get() == 1:
if game != "":
game += ", " + "Football"
else:
game = "Football"
if g3.get() == 1:
if game != "":
game += ", " + "Basketball"
else:
game = "Basketball"
game = "Game : " + game + "\n"
#Read the combobox values
country = "Country : " + countryVal.get() + "\n"
#Read the multi-line text
address = "Address : " + addr.get("1.0", "end") + "\n"
#Merge all values taken by the fields
form_values = name + g + game + country + address
#Display the values in the message box
messagebox.showinfo("User Information Details", form_values)
#Create a label and the name field
Label(tkobj, text="Name : ").place(x=100, y=20)
name_val = StringVar()
ttk.Entry(tkobj, textvariable=name_val).pack(padx=220, pady=20)
#Create a label and the radio button
Label(tkobj, text="Gender : ").place(x=100, y=60)
gender = IntVar()
gender.set(1)
Radiobutton(tkobj, text="Male", variable=gender, value=1).place(x=210, y=60)
Radiobutton(tkobj, text="Female", variable=gender, value=2).place(x=290, y=60)
#Create a label and checkbox button
Label(tkobj, text="Favorite game : ").place(x=100, y=100)
g1 = IntVar()
g2 = IntVar()
g3 = IntVar()
Checkbutton(tkobj, text="Cricket", variable=g1).place(x=210, y=100)
Checkbutton(tkobj, text="Football", variable=g2).place(x=290, y=100)
Checkbutton(tkobj, text="Basketball", variable=g3).place(x=380, y=100)
#Define tuple values
data = ("Bangladesh", "Japan", "USA")
#Create label and combobox
Label(tkobj, text="Country : ").place(x=100, y=140)
countryVal = StringVar()
Combobox(tkobj, values=data, textvariable=countryVal).place(x=220, y=140)
#Create label and text field
Label(tkobj, text="Address : ").place(x=100, y=180)
addr = (tk.Text(tkobj, height=3, width=20))
addr.place(x=220, y=180)
#Create a button with a button handler
Button(tkobj, text="Submit", command=display_values).place(x=250, y=250)
#Run the Tkinter
tkobj.mainloop()
Output:
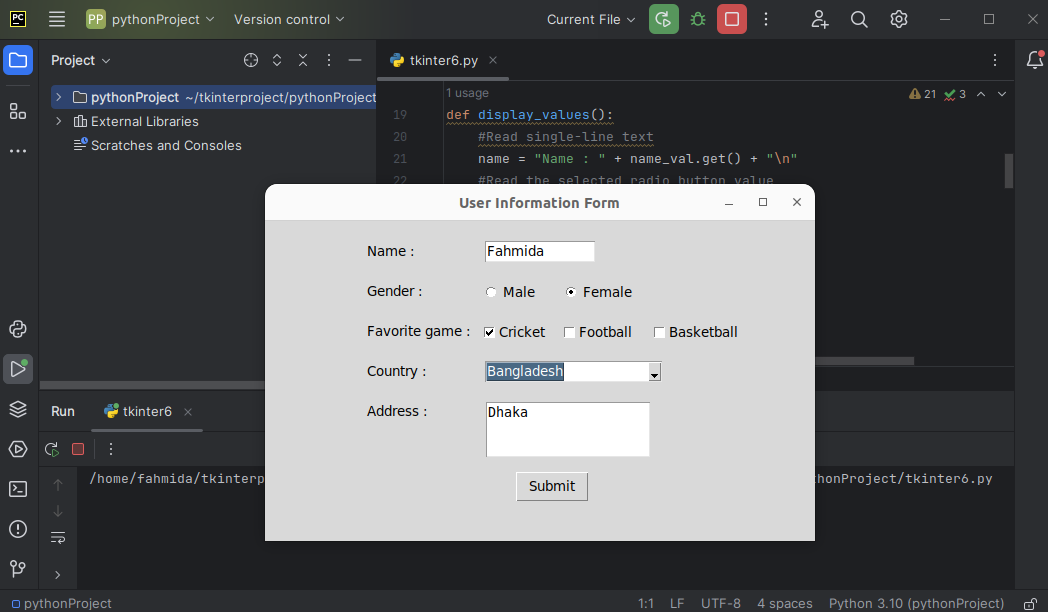
The following window appears after executing the script:
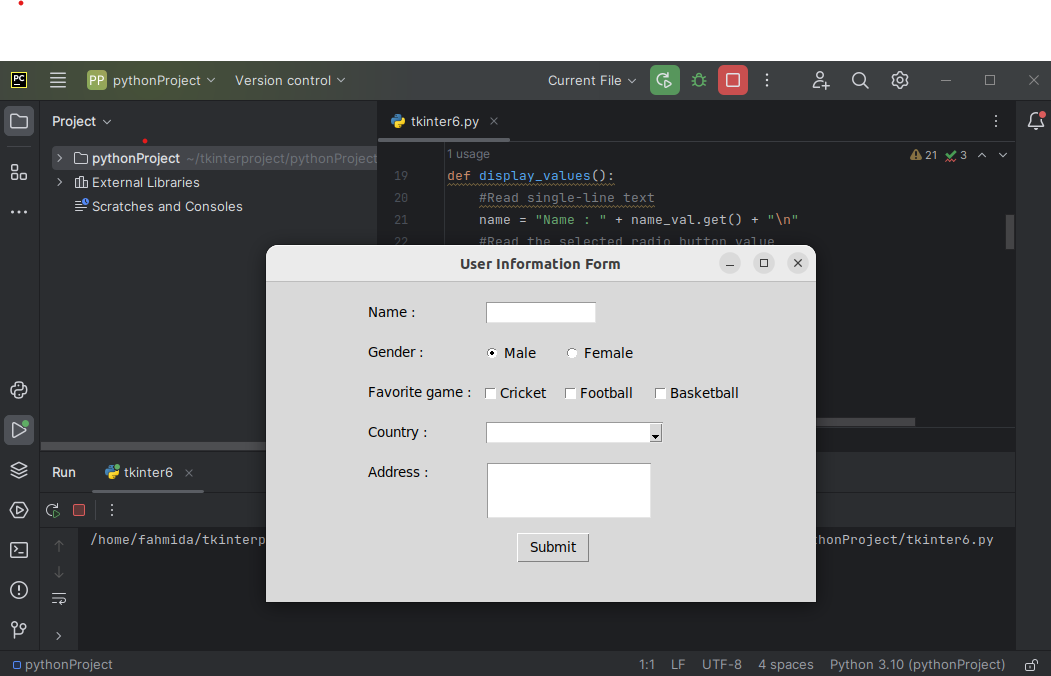
Fill up the fields of the form and press on the “Submit” button.
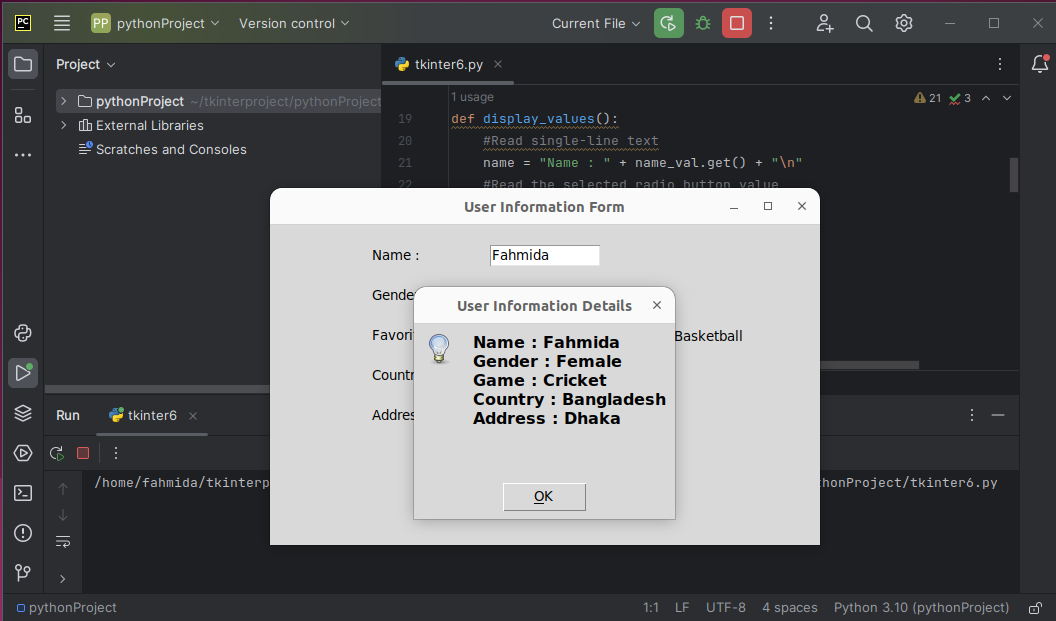
The following message box with the submitted values will appear:
Conclusion
The methods of using the Python tkinter module to create the GUI applications are shown in this tutorial using multiple examples.
Source: linuxhint.com