My Raspberry Pi Turned into a Robo-Dog and I am Loving it
There are tons of ways to put your Raspberry Pi to some good use. Turning it into a robo-dog is just one of them.
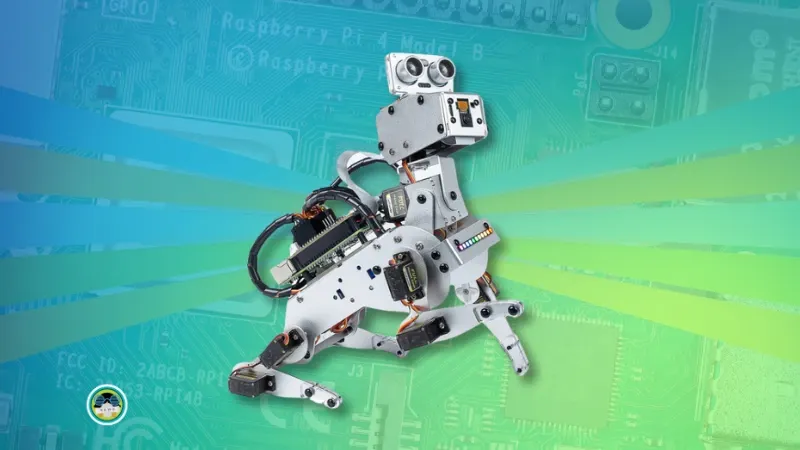
This was made possible with the Pi Dog Robot Dog Kit from SunFounder.
In this article, I'll share my experience and view on using this kit to build a robotic dog based on Raspberry Pi.
I'll be honest. I tried something like this after more than a decade. Although I am not totally new to this territory as I did some basic robotics as an undergraduate, playing with microcontrollers and sensors but that was a long time ago.
But 2024 is the year I get out of my comfort zone, get rid of my laziness and explore rather new things like homelab, more of self hosting and some beginner level embedded system and robotics.
SunFounder PiDog Robot Dog Kit for Raspberry Pi
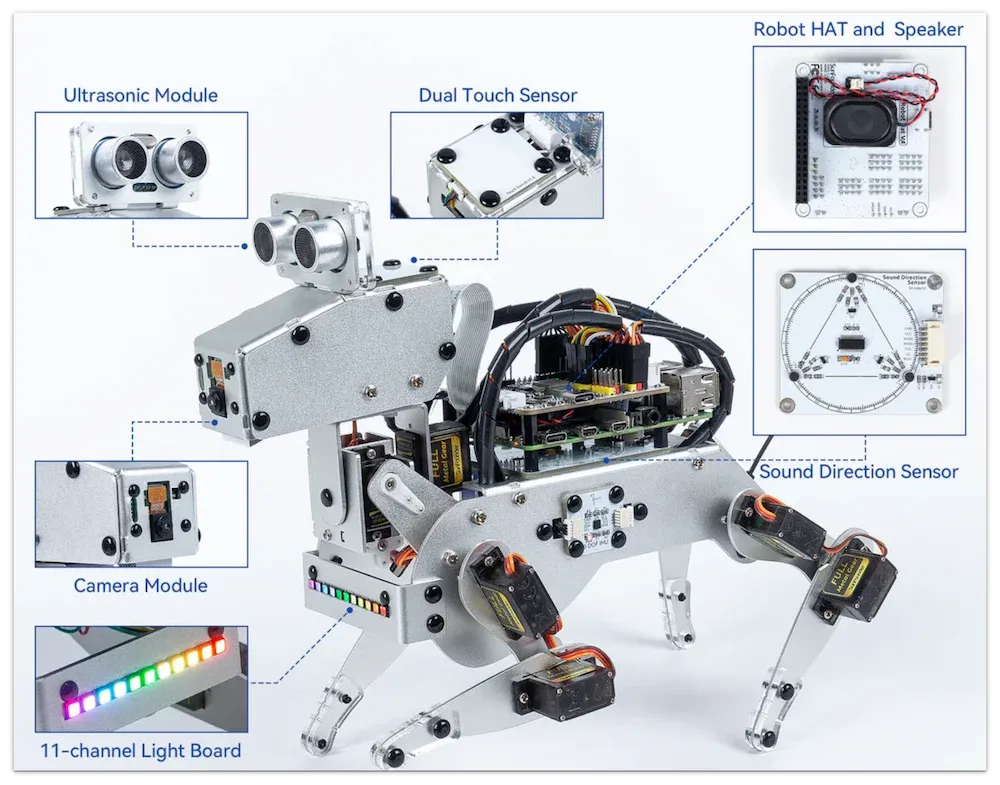
The PiDog by SunFounder is a robot kit designed for the Raspberry Pi platform. It has a range of sensors and it can perform numerous tricks thanks to these sensors.
For example, you can pet it thanks to the touch sensor and it will respond by wagging its tail or barking.
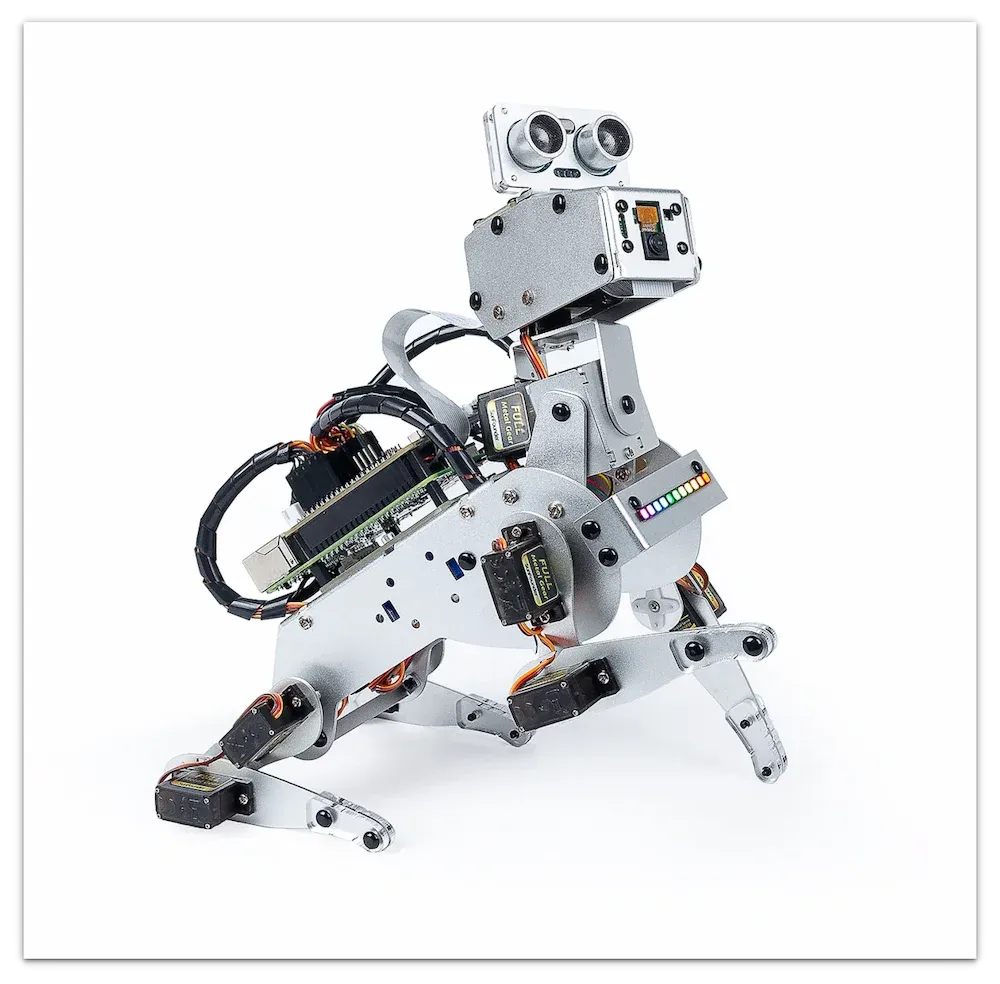
It is constructed with an all-metal design, making it robust and durable. The robot has four legs, each with three degrees of freedom thanks to servo motors, allowing for a wide range of movements.
The ultrasound sensor looks like the eyes and helps it detect obstacles. The overall look resembles a puppy. This is a lot better than many of those Boston Dynamic look alike robo-dog kits.
This kit has a Raspberry Pi Compute Module 4 to enable AI and machine learning capabilities. It also includes a charger for the onboard LiPo battery, ensuring wire-free operation for 30 minutes or so.
The PiDog kit is compatible with Pi 4 and Pi Zero 2 W. It should work with Pi 5 too but I have not tested it.
The tricks it can perform
SunFounder provides some sample Python programs and you can run them to make your Pi Dog perform several tricks. They include:
- Marching
- Sitting, standing, panting, resting etc
- Howling, wagging tail, barking
- Tilting head (like a dog)
- Shaking hand
- Push ups (yes, really)
- Fly like superman (when picked up)
- Face tracking
- Responding to touch (pat on head)
- Detect danger (through ultrasound) and bark
- Track red ball
This official video demos some of its predefined skills.
These are some of the preset actions provided by the SunFounder programs. Since it is based on Python, OpenCV and other open source projects, you can modify the code and teach your dog some new tricks.
My experience of building a robotic dog out of Raspberry Pi
There are three parts to building the Pi-Dog.
- Assembling the hardware
- Installing the software on Raspberry Pi
- Calibrating the assembled hardware
Now, assembling the Pi Dog kit is no simple task. As per the included instructions sheet, there are 73 steps in total.
That's a challenge but a good one. You need to have patience and time to assemble the kit.
Thankfully, the provided sheet covered every instruction in detail. All the parts were properly marked. There are numerous kinds of screws involved and they were all packed in their respective poly-bags. Thankfully, SunFounder provided more than the required number of screws, so even if you lose a few tiny ones, your project is well screwed or not screwed (lame humor alert 😆).
The kit also includes two screwdrivers. Basically you get everything you need to put the pieces together, except the Raspberry Pi. You need your own Pi, it's not included in the kit.
Many screws were really tiny and proved challenging for my fat fingers. If you easily get frustrated, try some zen music to calm yourself.
Both assembling the hardware and installing the necessary software takes time. I did it in two evenings. Don't judge me for being slow. You can see the official assembly videos. It is in two parts and they total over 50 minutes. That's when the video is cut short to show the steps quickly.
My experience with the Pi Dog
It gave me a sense of achievement when I finished building the Pi Dog. I was happy but my 3 year old daughter, Ushika, was more excited than me.
It was a big relief when I powered it on for the first time and it reacted properly. I shared a couple of videos on It's FOSS Instagram account. Let me share them here as well.
Did I tell you that this robo dog can also do push-ups? Looks super cute. It got Ushika excited for push-up as well.
Here's how it works. Power on the Pi Dog and wait for the Pi to boot and be ready. SSH into the Pi and control the dog or issue it some commands by running dedicated programs. The details are available on its document portal.
It can also be controlled via SunFounder's mobile app. That too worked just fine in my experiment.
Few hiccups
Everything was not smooth and I did encounter a few issues here and there.
For example, while assembling, I messed up the touch sensor by pushing it too hard in the wrong direction. I think it can be fixed with a little soldering but at present, my Pi Dog does not respond to touch. I'll work on fixing it some weekend.
The sample Python program provided by SunFounder are quite raw. One program didn't respond to Ctrl+C to exit the command. I had to kill the process explicitly.
Help is not far away
It is only natural that you encounter issues with your project. Perhaps some part is not working as expected.
The good thing is that SunFounder has an active forum where you can seek help and clear your doubt. It is well regulated and you can see that the moderators are active.


Conclusion
If you have teenaged children in family, this could be a fun weekend activity with them. You have to keep patience as there are several pieces and steps involved. Teachers can also use it in their labs to encourage and lead the students towards robotics.
But the overall satisfaction of building a robo-dog, the whooshing sound it makes when the servo motors start, gives you a good feeling.
My three-year-old daughter loves it. She likes how it reacts to her command or shakes her hand. Of course, I don't leave the two unattended. Otherwise, the dog might not be able to walk again 😉
By default, Pi-Dog works for many activities. I still prefer it to have a module to activate and control it via voice without using the app. That would give it the real AI dog feeling. Using controllers is so dated in the 2020s. Since it could just be a software change, perhaps the developers would add it (if they read this review). Otherwise, if you have enough Python skills, you may also try doing it on your own.
The kit costs $179 and that does not include the price of a Raspberry Pi. If you can afford it and you have the temperament of building things, this could be an interesting holiday project. You can spend a day or two assembling the kit. Later on, you can take it up as a coding project and work to teach your dog some new skills.
There is a learning curve involved but it certainly provides the learning opportunity to explore the world of robotics.
Please note that Raspberry Pi is not included in the kit.
SunFounder has many more such assembly kits available for Raspberry Pi and Arduino for enthusiaists, makers and tinkerers. My eyes are on a moon rover. Perhaps I'll get my hands on it this summer.
Source: It's FOSS