Mount Windows Share on Linux using CIFS
In this tutorial, I will be exploring Windows Share and how to mount it on a Linux file system using the mount.cifs utility.
What is CIFS
CIFS also known as Common Internet File System is a dialect of SMB protocol that is developed by Microsoft to access files or folders from users over the same network connection. However, the latest SMB protocols have replaced this widely used network file-sharing protocol for mounting Windows Share on Linux. There is a specific utility called mount.cifs which is used to mount Windows Share on Linux. In the next section, I will discuss the process of installing it on Linux.
How to Install CIFS-Utils on Linux
To mount Windows Share on Linux mount.cifs utility is needed which is a part of the CIFS-Utils package.
To install cifs-utils on Ubuntu, Debian, and distributions based on them, use the default package manager.
Use the dnf package manager to install cifs-utils on CentOS and Fedora distributions,
For Red Hat (RHEL) and Red Hat-based distributions use the yum package manager.
Note: For the instructions implemented in this guide, I am using Ubuntu 22.04. The process is similar and can be performed without any issue on any Linux distribution.
How to Mount Windows Share on Linux
We need a mount point, a directory created anywhere on the Linux system, to mount the Windows share.
I am creating a /media/WinShare directory on root using mkdir command with sudo privileges.
We will follow the below-given syntax of the mount command to mount the Windows Share on Linux.
In the above syntax:
[IP-ADDRESS]: It is the IP address of the remote machine, which is Windows in this case; to access the IP address, open the command prompt and run the ipconfig command. Note the IPV 4 address.
[SHARE-NAME]: It is the Windows Share name or the folder name that is shared for the network.
[MOUNT]: It is the mount point directory set up on the client’s machine, which is Linux.
-o: This is a flag used to define cifs-utils options, to read more about the cifs utils options run man mount.cifs command. The table below lists some options that users often use.
| username | To provide the username of the remote machine |
| password | To provide password explicitly [Not recommended] |
| credentials | To set the file containing credentials [Recommended] |
| vers | To set the protocol version explicitly 1.0, 2.0, or 3.0 |
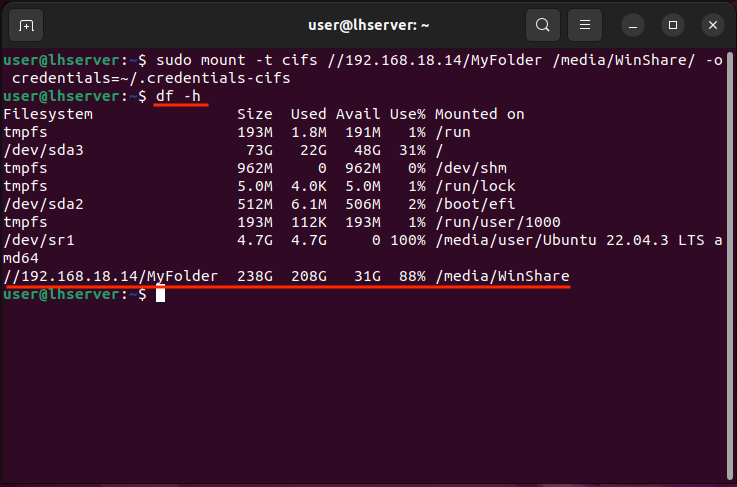
Now, I have created a Windows Share with the name MyFolder, to mount it on Linux using /media/WinShare as a mount point I will use the following command.

After executing the command you will be asked to enter the password of the remote machine. On successfully mounting the Windows Share, you will not get any alert. To verify the successful mount use the df -h command; which is essentially used to get disk space of the file system.

In many instances, it may be necessary to state the user domain. Find the system domain of the Windows system using the wmic (Windows Management Instrumentation Command Line) command in the command prompt.

After knowing the domain which is WORKGROUP in my case, simply insert it in the above command using the domain option.

However, this is not a secure way to mount the shared folder. To make it more secure, the mount.cifs utility has an option called credentials.
The credentials option allows you to set a path of a plain text file containing the credentials of the remote machine instead of explicitly mentioning the username or password. Let’s create a text file that contains the credentials of the machine to be accessed; in this case, it is the Windows machine.
Type the following information in the file.
password=[PASSWORD]
domain=[DOMAIN]
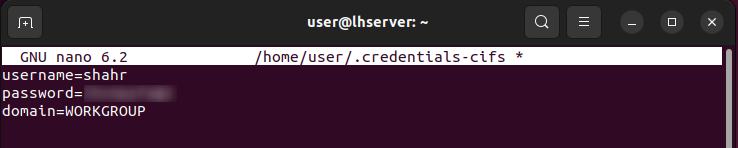
After adding this information to the file, save the file by pressing ctrl+x and then y.
To mount the Windows Share with credentials option use the following command.
Note: I will advise giving the absolute path to the credentials file instead of using ~/.
How to Make the Windows Share Mount Permanent
Before attempting the following section, note key important points.
- If the permanent mount is not properly set up, then Linux will not boot. Ensure everything is correct before reboot. I will suggest using the mount -a command to check for errors.
- The IP of the remote machine must be static, otherwise, the mounting will fail, and eventually the system boot.
To make the Windows Share mount permanent, we need to modify the fstab (File System Table) file. The fstab file manages the file system and also allows you to mount the external file system manually.
Let’s open the fstab file located in the /etc directory using the nano editor.
To make Windows Share permanent on Linux, follow the syntax given below.
Note: Use tab instead of space to separate the fields in the fstab file.
Let’s replace the [IP-ADDRESS], [SHARE-NAME], [MOUNT], and [CREDENTIALS-FILE-PATH] with actual information. The [DUMP] and the [PASS] options are used to enable backup of the mounted file system and fsck check on boot, respectively. Set 0 and 0 for both options to keep them disabled.
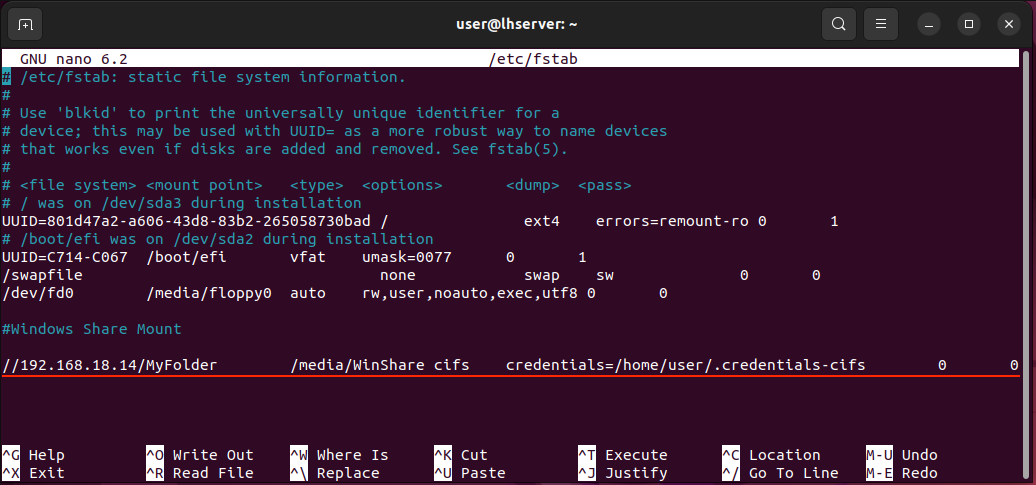
Note: Provide the absolute path of the credentials file.
After modifying the fstab file, save and exit the editor using ctrl+x and then y.
The subsequent step involves mounting the Windows Share by means of the mount command.
If there are no errors, then the mount is successful and will remain permanent even on boot.
How to Unmount the Windows Share
To unmount the Windows Share, use the umount command with the mount point.
In our example, the [MOUNT] is /media/WinShare directory.

If the above command fails to unmount the Windows Share, then try force unmounting using the -f flag.
Or use the -l flag, which detaches the file system if the above command also fails.
To read more about these options, run the man mount command.
How to Create Windows Share
Windows Share is a directory that is set to share on a local area network. Before accessing Windows Share on Linux, it has to be set up on Windows.
First, ensure that Windows is enabled for CIFS communication. For that, open the Turn Windows feature on and off on Windows. Find SMB 1.0/CIFS File Sharing Support in the list and check it.

After a few moments, you will be asked to restart the system.
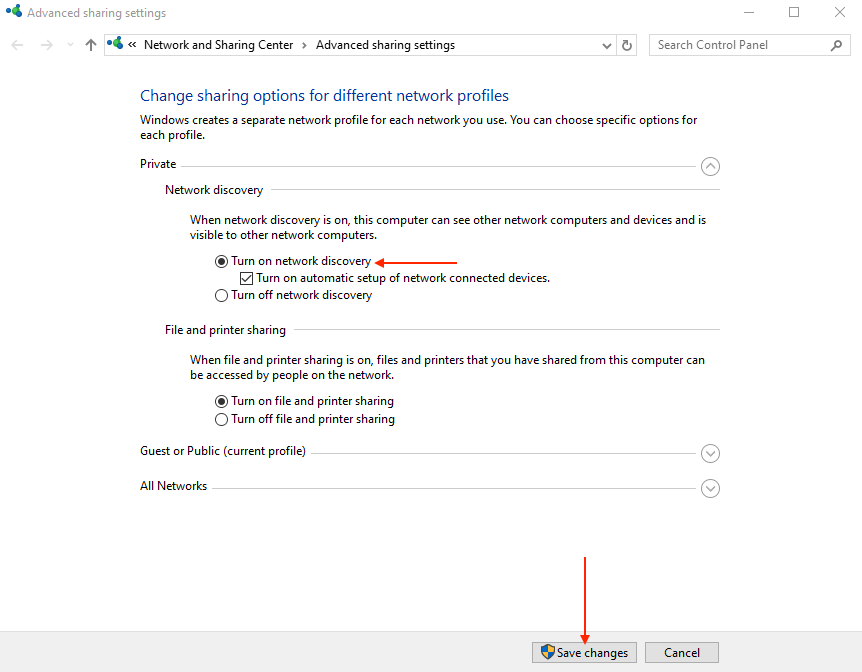
To enable network discovery on Windows, navigate to the Advanced sharing settings; once there, you should find the option for Network discovery and ensure that this option is enabled by selecting the Turn on network discovery option.
Next, we need to create a Windows Share folder that will be mounted on Linux using mount.cifs utility.
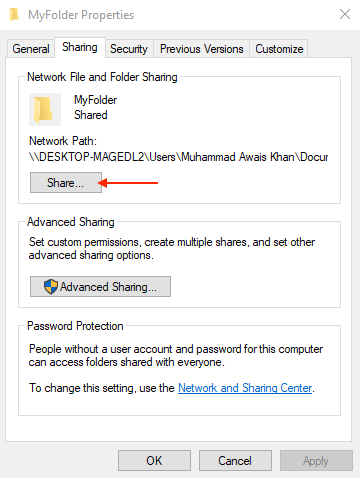
Create a folder anywhere on Windows and right-click on it, and then from the context menu click on Properties. Navigate to the Sharing tab on the opened window and click on the Share button to proceed with the folder-sharing settings.
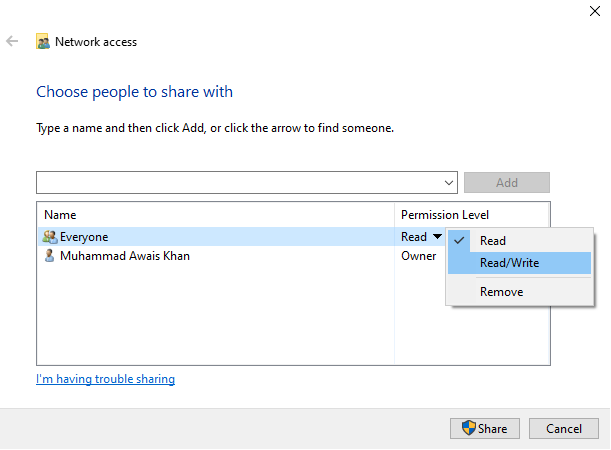
Now, click on the drop-down icon, select Everyone from the list, and then click on the Add button.

Select the Permission Level, set it to Read/Write to this folder, and then click on Share.
Now, the Windows Share is ready to share.
Conclusion
If you have recently moved to Linux, then you will definitely need to access data on your Windows system. Any sort of data can be shared on Linux from Windows using the Windows Share option. To access Windows Share on Linux, the IP address and password of the Windows machine are required.
Mounting the Windows Share on Linux using mount.cifs utility requires two steps. First, set the mount point on Linux and then use the mount command with the -t cifs option to mount the Windows Share on Linux.
Source: linuxhint.com