Learn How to Pull From a Remote Branch in Git
In Git, the “$ git pull” command is utilized to download and merge the remote changes to Git local branches. In simple words, you can say that this command is used to update the local branch with a remote branch. For this purpose, it is required to fetch changes from the remote branch to bring Git’s local branch up to speed.
This study will discuss the procedure for pulling from a remote branch in Git.
How to Pull From a Remote Branch in Git?
To pull from a remote branch in Git, first, move to the Git repository and initialize the repository. After that, list the repository’s content and check the status. Next, add the file to the Git repository and save it to the Git repository using the “$ git commit -m <commit-message>” command. Then, run the “$ git remote add origin <remote-url>” command to add the remote and run the “$ git pull origin <branch-name>” command.
Now, let’s move ahead and implement the above-discussed scenario!
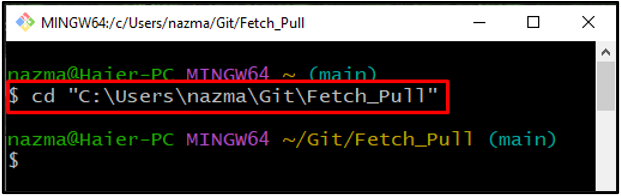
Step 1: Move to Git Repository
At first, run the “cd” command to navigate to Git local directory:
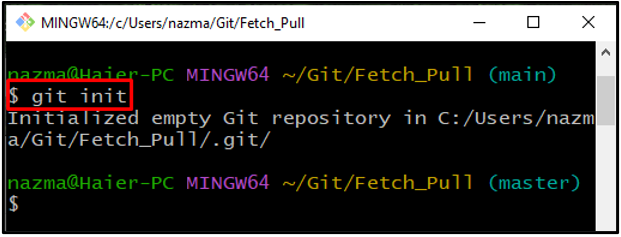
Step 2: Initialize Git Repository
Next, initialize the Git directory through the provided command:
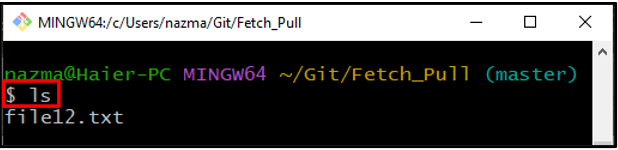
Step 3: List Repository Content
Now, view the existing content of the current local directory:
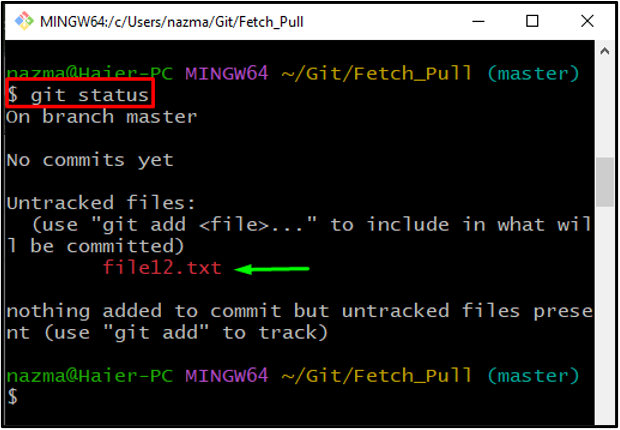
Step 4: Check Status
To check the Git repository status, utilize the following command:
According to the below output, the new file is added to the repository:
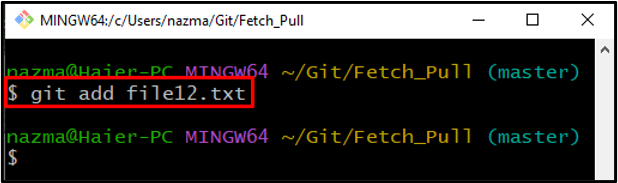
Step 5: Track File
Track the file to the Git repository utilizing the provided command:
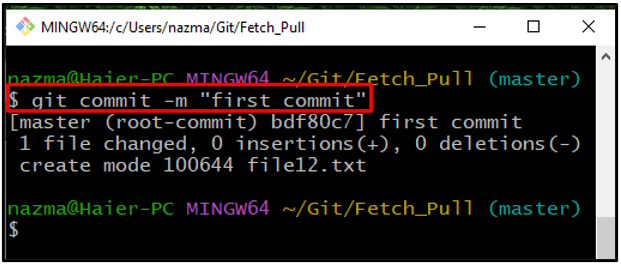
Step 6: Git Commit
Next, store the changes to the Git repository using the “git commit‘ command with the “-m” option to commit the required message:
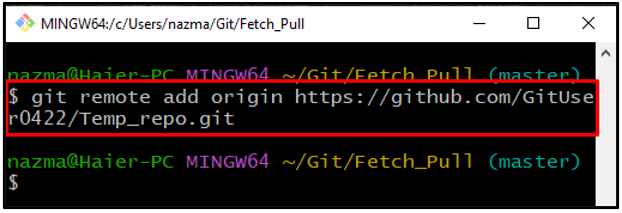
Step 7: Add Remote
Next, execute the “git remote add” command with remote repository name and its repository URL:
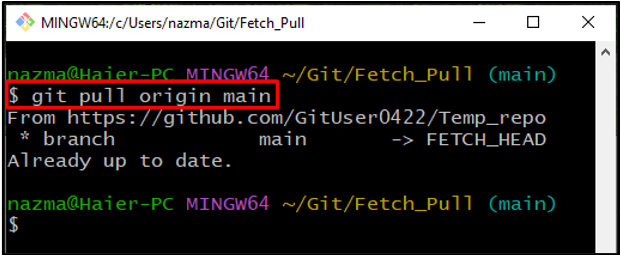
Step 8: Git Pull
Next, run the “git pull” command to pull the remote branch:
It can be seen that the “main” remote command has been pulled successfully:
Step 9: Verify Git Pull
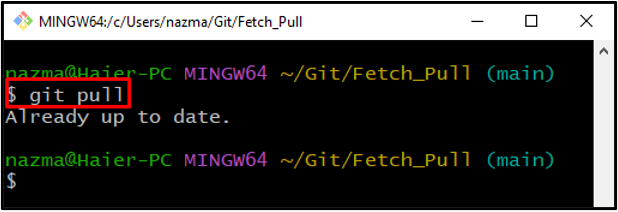
Lastly, verify the performed pull operation by executing the “git pull” command:
The given “Already up to date” message shows that operation is performed successfully:
We have explained the easiest procedure to pull from a remote branch in Git.
Conclusion
To pull from a remote branch in Git, first, navigate to the Git local repository and initialize the repository. Next, list the content of the repository and check the status. After that, add the file to the Git repository and save it to the Git repository using the “$ git commit -m <commit-message>” command. Then, add the remote and run the “$ git pull origin <branch-name>” command. This study illustrated the method to pull from a remote branch in Git.
Source: linuxhint.com