Install & Try out Ubuntu’s New Fonts in Ubuntu 22.04 | 20.04
![]()
The Ubuntu design team is working on new Ubuntu fonts and proposes to use as default in the upcoming Ubuntu 23.04.
For testing purpose, the team posted the .deb packages for the new fonts in this thread. User can try it out by installing in all current Ubuntu releases and report any issue in this page.
I’ve tried out the new fonts in Ubuntu 22.04 LTS. The text in system menu and application window becomes a bit thin and compact than before.
And, the document text in text editor looks enlarged, that I even doubted if the font size was changed mistakenly.
How to Install the New Fonts
First, press Ctrl+Alt+T on keyboard to open a terminal window. When it opens, run single command to download the 2 font packages:
wget https://launchpad.net/ubuntu/+source/fonts-ubuntu/0.862-0ubuntu2/+build/25677616/+files/fonts-ubuntu_0.862-0ubuntu2_all.deb https://launchpad.net/ubuntu/+source/fonts-ubuntu/0.862-0ubuntu2/+build/25677616/+files/fonts-ubuntu-console_0.862-0ubuntu2_all.deb
Install wget via sudo apt install wget if it says command not found.

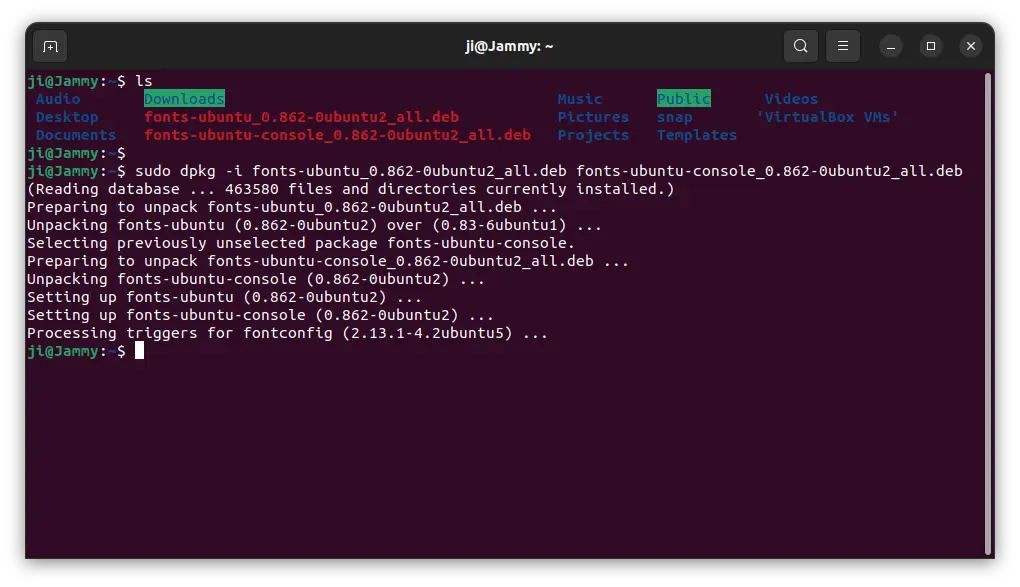
After downloaded the packages, use command to install them:
sudo dpkg -i fonts-ubuntu-console_0.862-0ubuntu2_all.deb fonts-ubuntu_0.862-0ubuntu2_all.deb
You can then remove the 2 packages in user home folder. And restart computer to apply changes after installation.
How to Restore original fonts
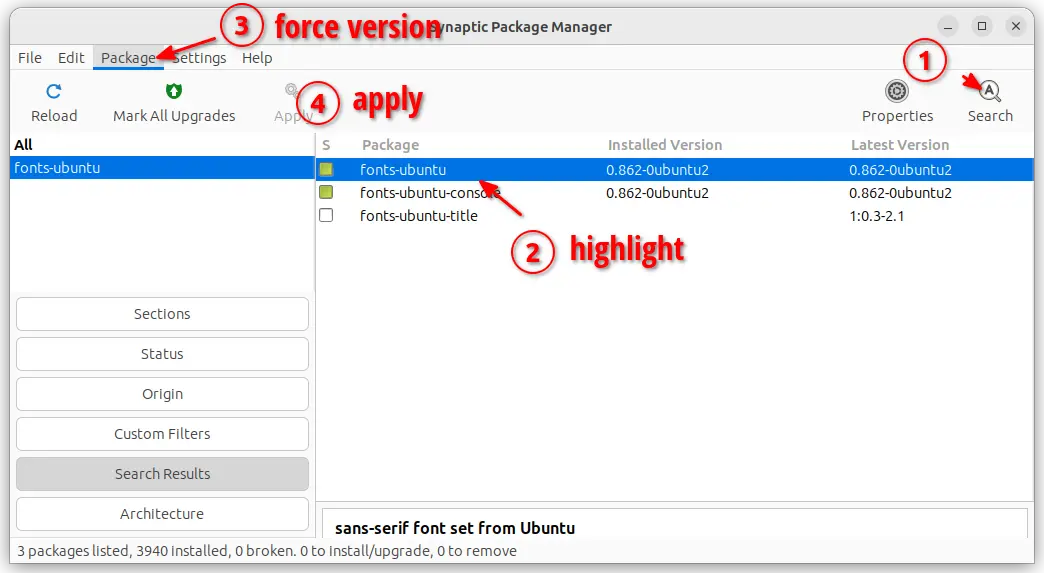
The stock fonts package version varies on different Ubuntu editions, so I would recommend to first install Synaptic package manager in Ubuntu Software.

Then, open “Synaptic” and do:
- Search and highlight “fonts-ubuntu” package.
- Go to menu “Package -> Force Version”.
- Select the old stock version from pop-up dialog, then click “Force Version” button.
- Finally, click “Apply”.
- Also, do the previous steps one by one for “fonts-ubuntu-console” package.
Also, restart computer to apply changes and done!
Source: UbuntuHandbook