How To Use Traceroute Command in Linux
Operating systems use packets for transferring the data on a network. These are small chunks of information that carry data and travel among devices. Moreover, when any network problem arises, packets aid in identifying the root cause of the underlying problem. How? By tracing the route of those packets.
The traceroute command in Linux helps you map the path packets take while traveling to a specific destination. This further helps you troubleshoot network latency, packet loss, network hops, DNS resolution issues, slow website access, and more. So, in this blog, we will explain simple ways to use the traceroute command in Linux.
How To Use Traceroute Command in Linux
Firstly, the traceroute does not come preinstalled in many Linux distributions. However, you can install it by executing one of the below command according to your system:
| Operating System | Command |
| Debian/Ubuntu | sudo apt install traceroute |
| Fedora | sudo dnf install traceroute |
| Arch Linux | sudo pacman -Sy traceroute |
| openSUSE | sudo zypper install traceroute |
After installation, you can implement the traceroute command by entering:
![]()
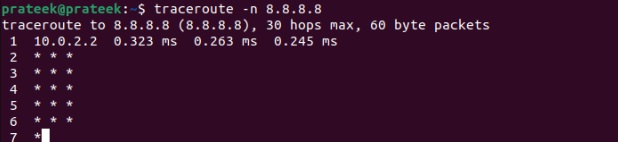
Replace <destination_IP> with the device’s IP address at the destination. Once you run the command, your system will display the list of hops with the IP address and response time. Hops are the devices that your packets go through while traveling to a specific destination. For example, let’s use the traceroute command for Google’s IP address:

The result shows only one hop while marking others as an asterisk(*). This happens because the subsequent hops did not respond within the timeout period of 3 seconds. Moreover, the traceroute command, by default, uses DNS resolution to get the hostnames of hops, which slows down the process. You can omit that part and guide it to display only the IP addresses by using the -n option:
If you want to limit the number of hops, use the -m option along with the traceroute command:

Here, put the desired number of hops in place of N. On execution, it will return only N number of hops in the results. The traceroute command only displays every hop’s round-trip time(RTT). However, you can get more detailed timing information with the -I option:

This command sends an ICMP echo request to retrieve more accurate RTT data. For instance, retake the example of Google:
Tip: If your specified destination restricts ICMP packets, you can instead trace the UDP packets by employing the -U option:

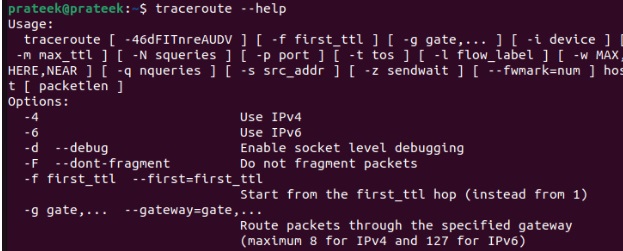
In case you want to explore more options for traceroute, then please run the below command:
A Quick Wrap-up
Traceroute is an amazing CLI utility that you can use to diagnose network-related issues in Linux. It traces the path of packets to identify all the critical issues of the network. Hence, We have explained every single detail about the traceroute command with the help of some examples.
Source: linuxhint.com