How to Capture and Analyze the Packets by Example with Tcpdump
In this guide, we will demonstrate how to install tcpdump on a Linux system and how to capture and analyze the TCP/IP packets using tcpdump.
How to Install Tcpdump
Tcpdump is preinstalled on many Linux distributions. But if it is not already installed on your system, you can install tcpdump on your Linux system. To install tcpdump on the Ubuntu 22.04 system, use the following command:
To install tcpdump on Fedora/CentOS, use the following command:
How to Capture the Packets Using the Tcpdump Command
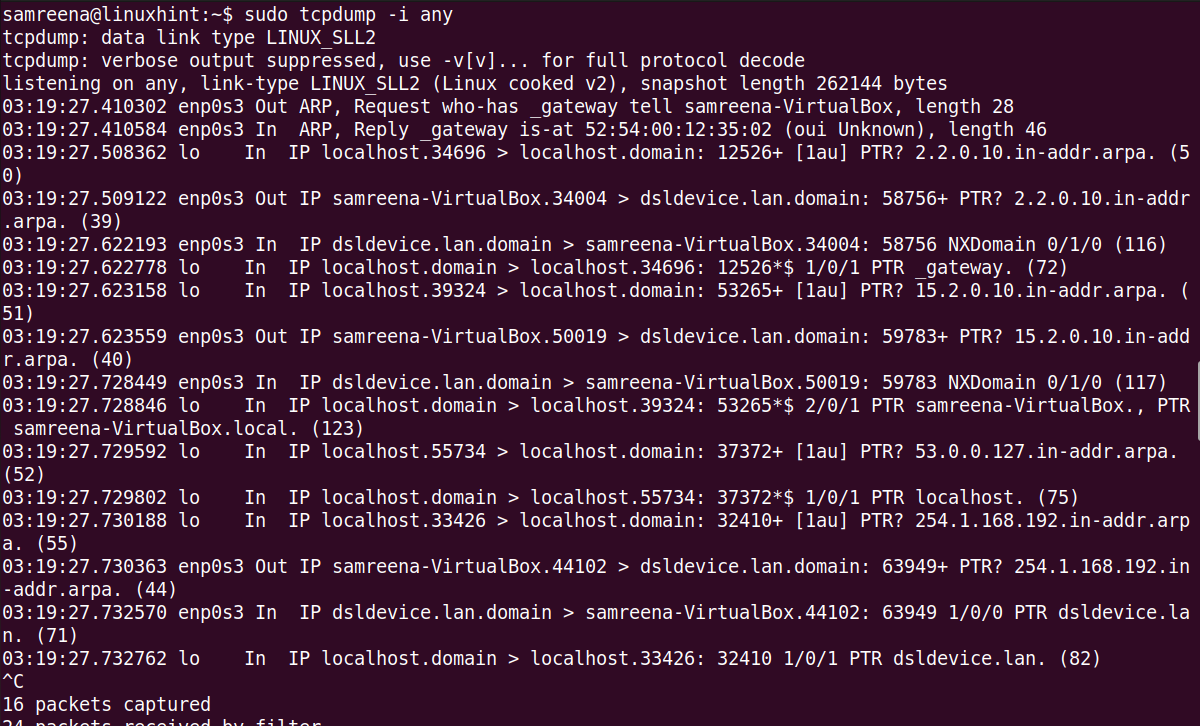
To capture the packets with tcpdump, launch the terminal with sudo privileges using “Ctrl+Alt+t”. This tool includes different options and filters to capture the TCP/IP packets. If you want to capture all flowing packets of the current or default network interface, use the “tcpdump” command without any option.
The given command captures the packets of the default network interface of your system.

At the end of the execution of this command, all captured and filtered packet counts are displayed on the terminal.

Let’s understand the output.

Tcpdump enables the analysis of the TCP/IP packet headers. It shows a single line for each packet, and the command continues running until you press “Ctrl+C” to stop it.
Each line provided by tcpdump contains the following details:
- Unix timestamp (e.g., 02:28:57.839523)
- Protocol (IP)
- Source hostname or IP and port number
- Destination hostname or IP and port number
- TCP Flags (e.g., Flags [F.]) indicating the connection state with values like S (SYN), F (FIN),. (ACK), P (PUSH), R (RST)
- Sequence number of the data in the packet (e.g., seq 5829:6820)
- Acknowledgment number (e.g., ack 1016)
- Window size (e.g., win 65535) representing the available bytes in the receiving buffer followed by TCP options
- Length of the data payload (e.g., length 991)
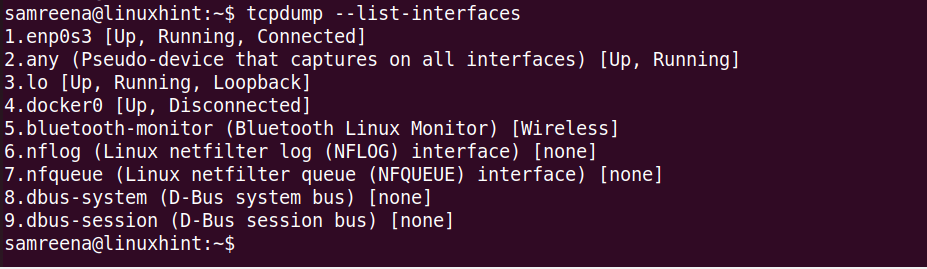
To list all the list network interfaces of your system, use the “tcpdump” command with the “-D” option.
or
This command lists all the network interfaces that are connected or running on your Linux system.
Capture the Packets of Specified Network Interface
If you want to capture the TCP/IP packets that pass through a specific interface, use the “-i” flag with the “tcpdump” command and specify the network interface name.

The given command captures the traffic at the “lo” interface. If you want to display a verbose or detailed information about the packet, use the “-v” flag. To print more comprehensive details, use the “-vv” flag with the “tcpdump” command. Regular use and analysis contribute to maintaining a robust and secure network environment.
Similarly, you can capture the traffic at any interface using the following command:
Capture the Packets Using a Specific Port
You can capture and filter the packets by specifying the interface name and port number. For example, to capture the network packets that pass through the “enp0s3” interface using port 22, use the following command:
The previous command captures all flowing packets from the “enp0s3” interface.
Capture the Limited Packets with Tcpdump
You can use the “-c” flag with the “tcpdump” command to capture a specified number of packets. For example, to capture four packets at the “enp0s3” interface, use the following command:

Replace the interface name using your system.
Useful Tcpdump Commands to Capture the Network Traffic
In the following, we listed some useful “tcpdump” commands that will help you in capturing and filtering the network traffic or packets efficiently:
Using the “tcpdump” command, you can capture the packets of an interface with a defined destination IP or source IP.
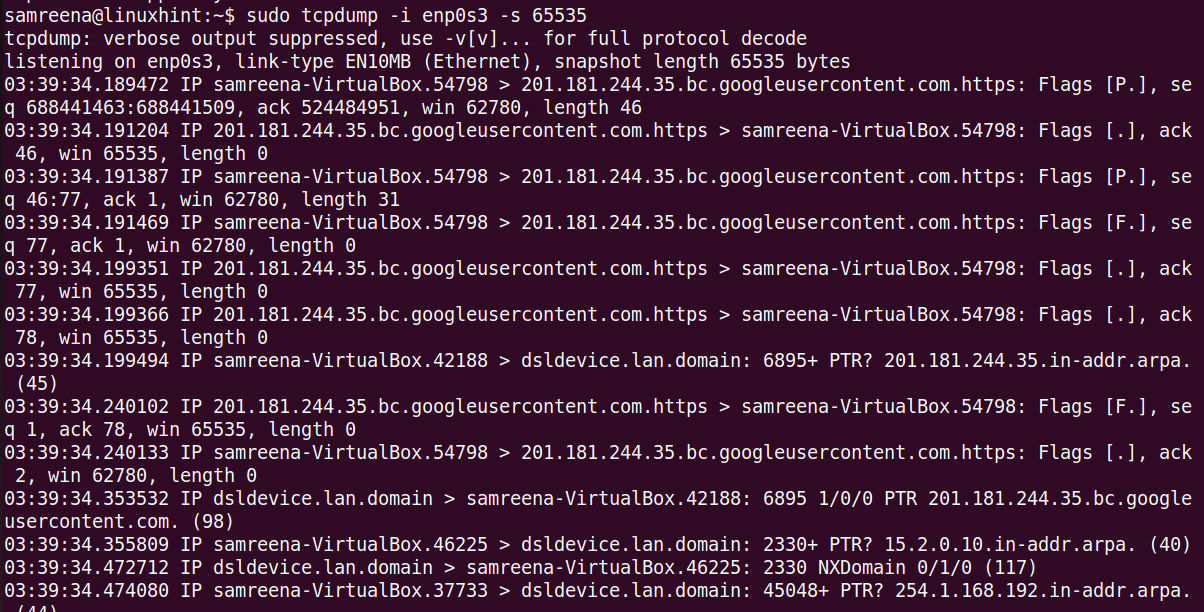
You can capture the packets with a snapshot size of 65535 bytes which is different from the default size of 262144 bytes. In the older versions of tcpdump, the capture size was limited to 68 or 96 bytes.
How to Save the Captured Packets into a File
If you want to save the captured data into a file for further analysis, you can do it. It captures the traffic at a specified interface and then saves it into a “.pcap” file. Use the following command to store the captured data into a file:
For example, we have the “enps03” interface. Save this captured data into the following file:
In the future, you can read this captured file using Wireshark or other network analysis tools. So, if you want to use Wireshark to analyze the packets, use the “-w” argument and save it into a “.pcap” file.
Conclusion
In this tutorial, we demonstrated how to capture and analyze the packets using tcpdump with the help of different examples. We also learned how to save the captured traffic into a “.pcap” file which you can view and analyze using Wireshark and other network analysis tools.
Source: linuxhint.com