How to Upload/Download ISO Images on Proxmox VE Server
Most of the operating system distributes their installer program in ISO image format. So, the most common way of installing an operating system on a Proxmox VE virtual machine is using an ISO image of that operating system. You can obtain the ISO image file of your favorite operating systems from their official website.
To install your favorite operating system on a Proxmox VE virtual machine, the ISO image of that operating system must be available in a proper storage location on your Proxmox VE server.
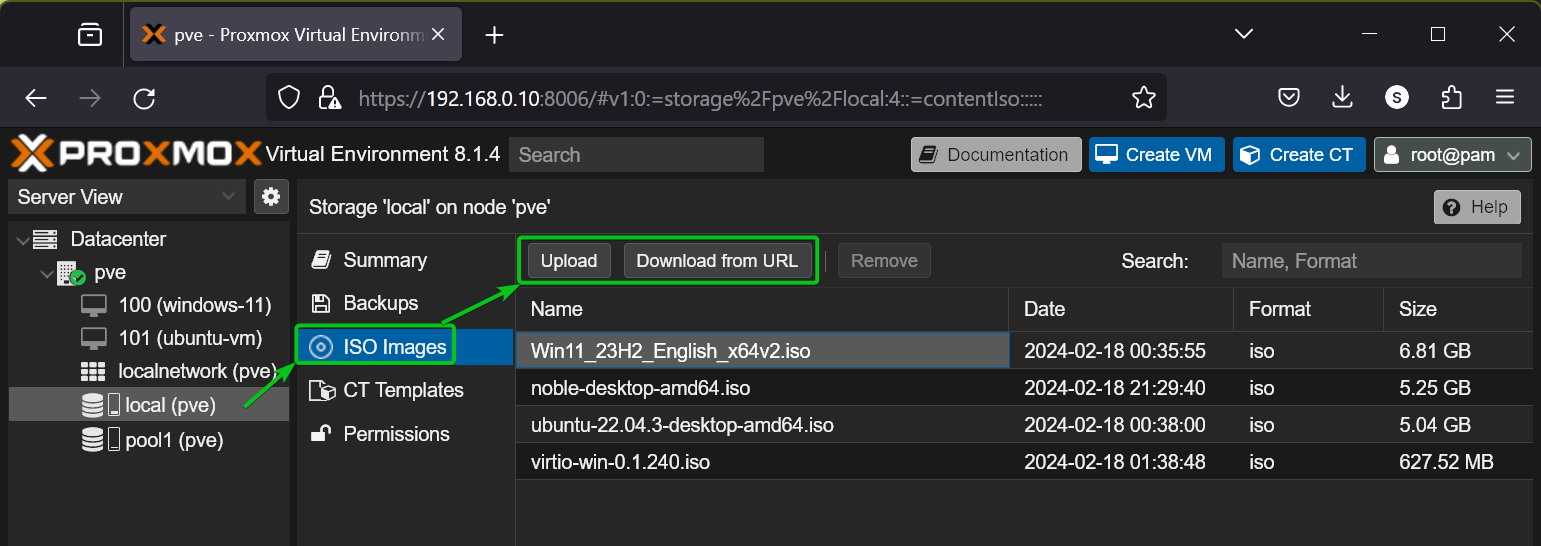
The Proxmox VE storage that supports ISO image files has a section ISO Images and has options for uploading and downloading ISO images.
In this article, I will show you how to upload an ISO image to your Proxmox VE server from your computer. I will show you how to download an ISO image directly on your Proxmox VE server using the download links or URL of that ISO image.
Table of Contents
- Uploading an ISO Image on Proxmox VE Server from Your Computer
- Downloading an ISO Image on Proxmox VE Server using URL
- Conclusion
Uploading an ISO Image on Proxmox VE Server from Your Computer
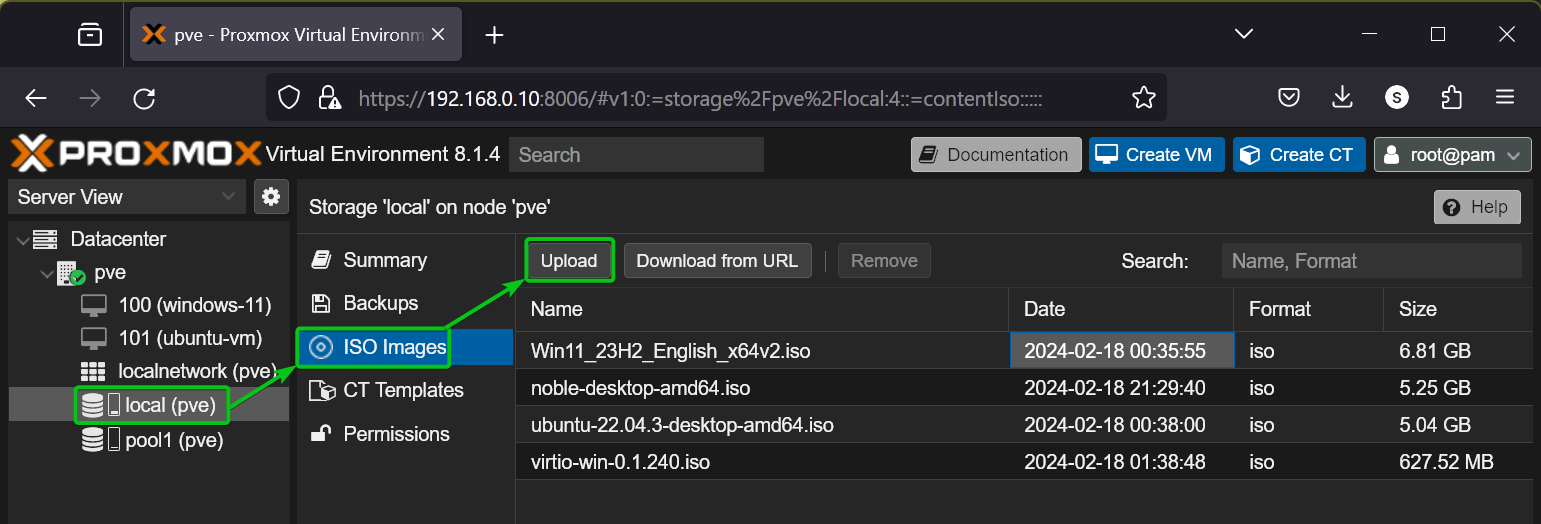
To upload an ISO image on your Proxmox VE server from your computer, navigate to the ISO Images section of an ISO image-supported storage from the Proxmox VE web management UI and click on Upload.
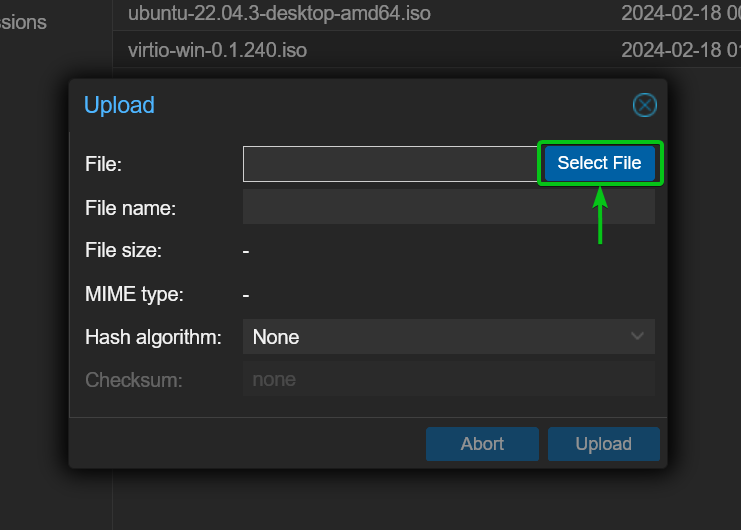
Click on Select File from the Upload window.
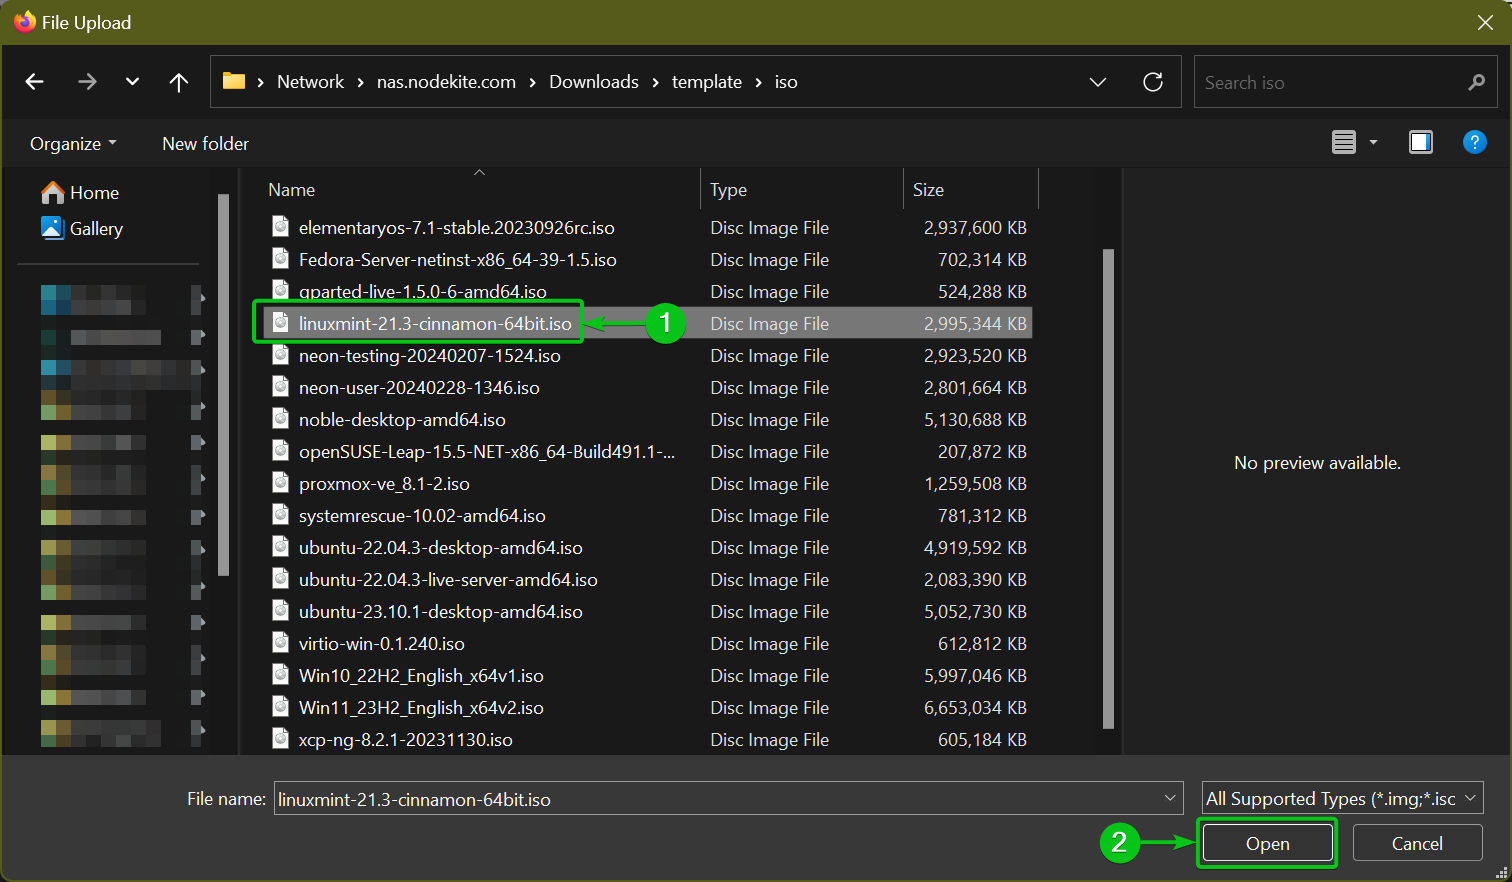
Select the ISO image file that you want to upload on your Proxmox VE server from the filesystem of your computer[1] and click on Open[2].
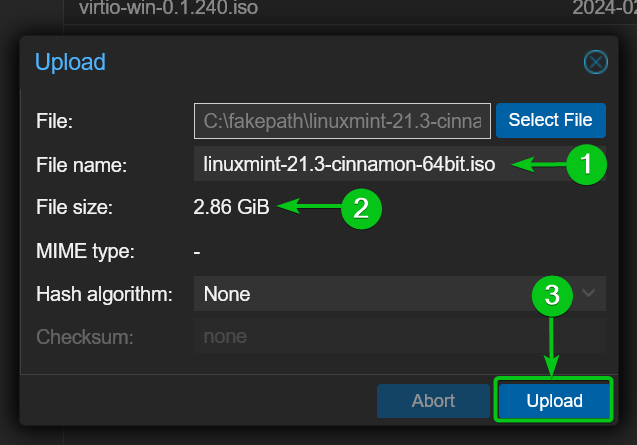
Once the ISO image file is selected, the ISO image file name will be displayed in the File name section. If you want, you can modify the ISO image file name which will be stored on your Proxmox VE server once it’s uploaded[1].
The size of the ISO image file will be displayed in the File size section[2].
Once you’re ready to upload the ISO image on your Proxmox VE server, click on Upload[3].
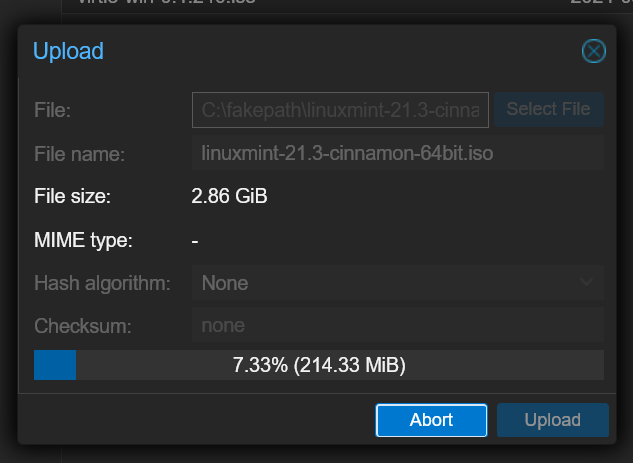
The ISO image file is being uploaded to the Proxmox VE server. It will take a few seconds to complete.
If for some reason you want to stop the upload process, click on Abort.
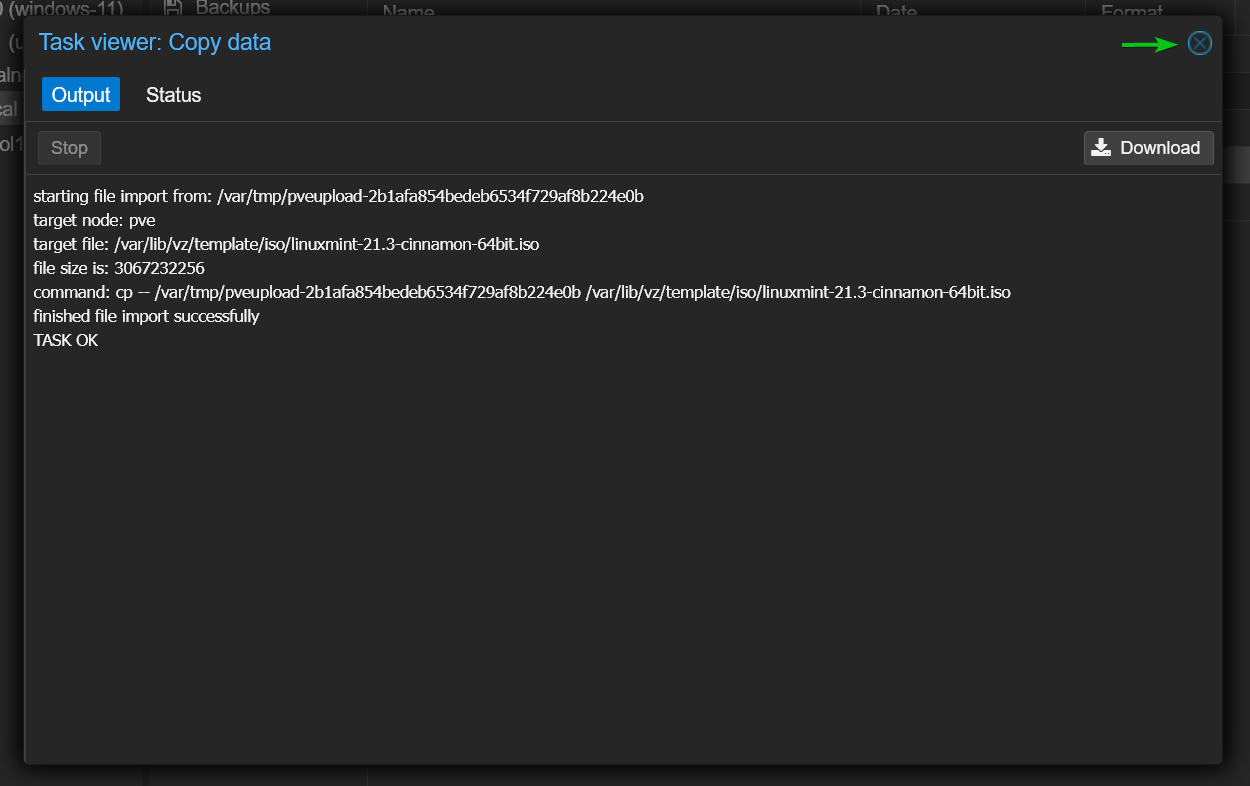
Once the ISO image file is uploaded to your Proxmox VE server, you will see the following window. Just close it.
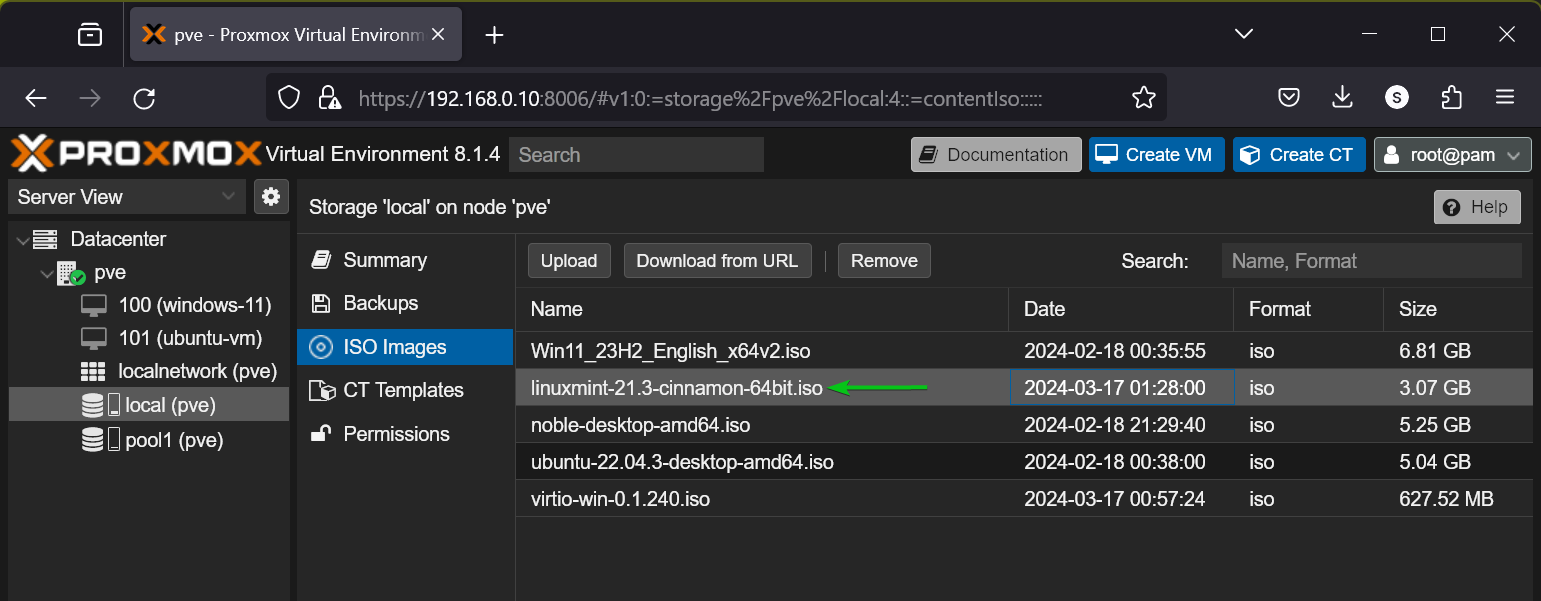
Shortly, the ISO image that you’ve uploaded to your Proxmox VE server should be listed in the ISO Images section of the selected Proxmox VE storage.
Downloading an ISO Image on Proxmox VE Server using URL
To upload an ISO image on your Proxmox VE server using a URL or download link, visit the official website of the operating system that you want to download and copy the download link or URL of the ISO image from the website.
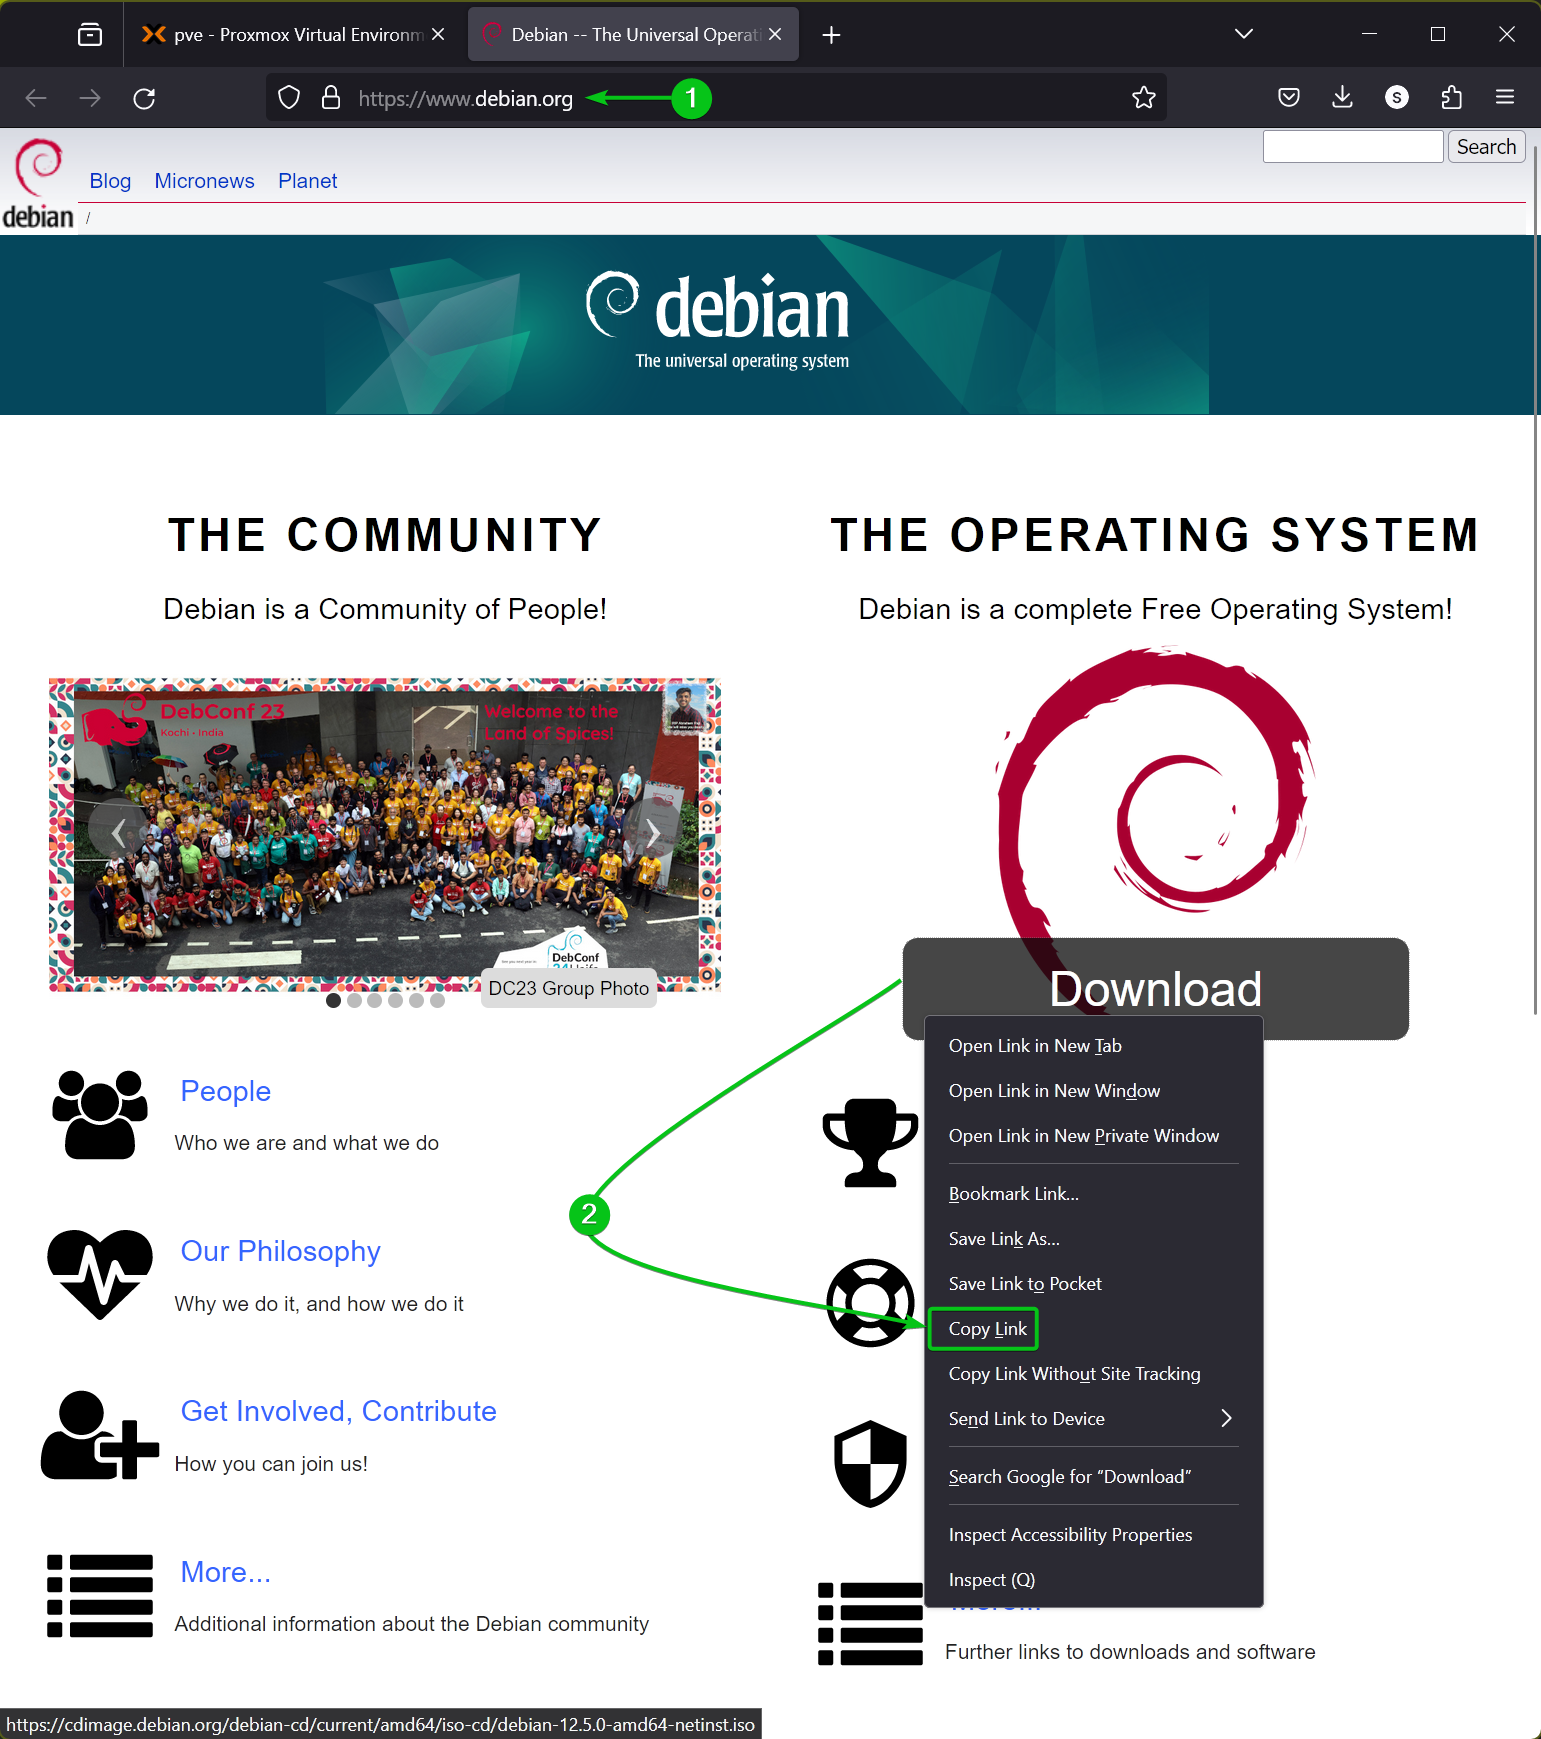
For example, to download the ISO image of Debian 12, visit the official website of Debian from a web browser[1], right-click on Download, and click on Copy Link[2].
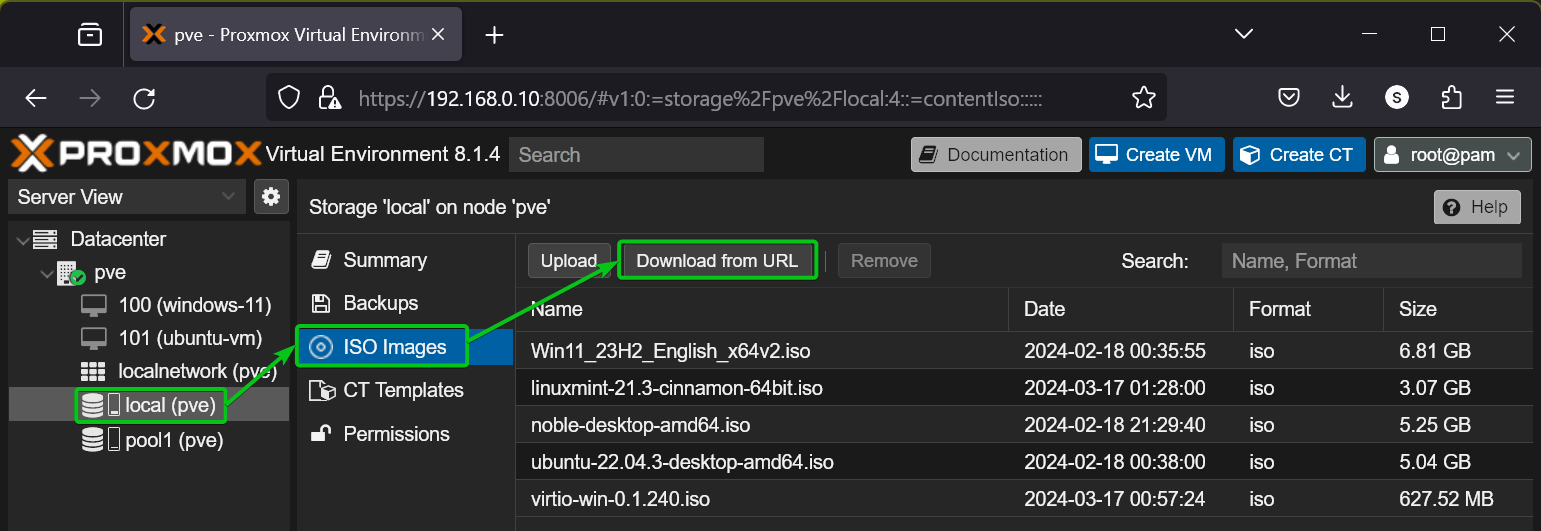
Then, navigate to the ISO Images section of an ISO image-supported storage from the Proxmox VE web management UI and click on Download from URL.
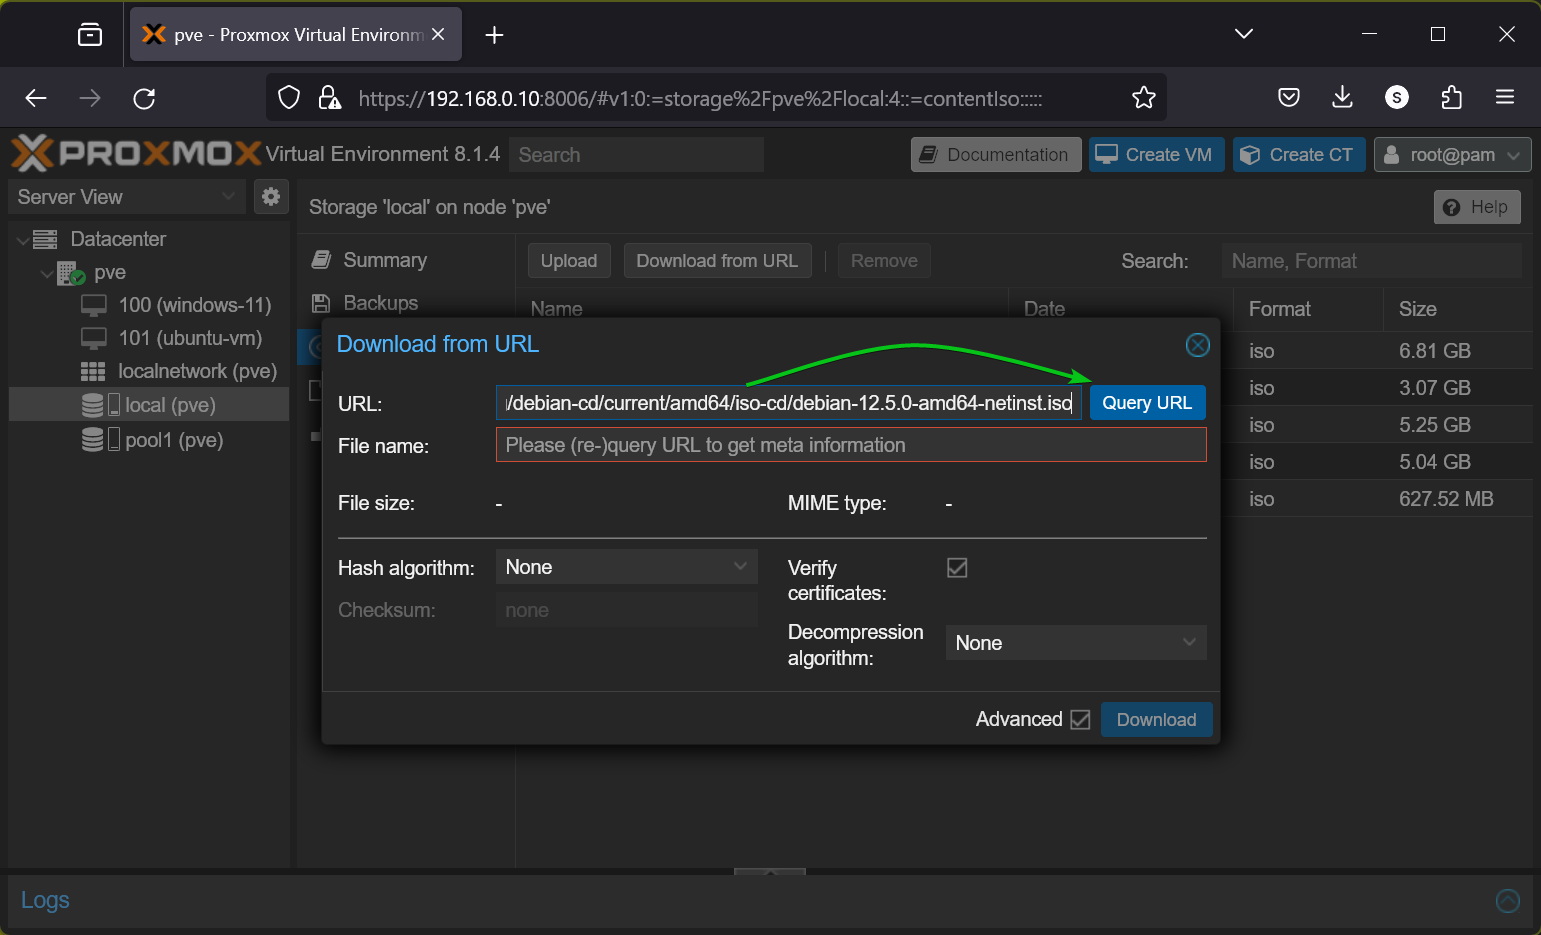
Paste the download link or URL of the ISO image in the URL section and click on Query URL.
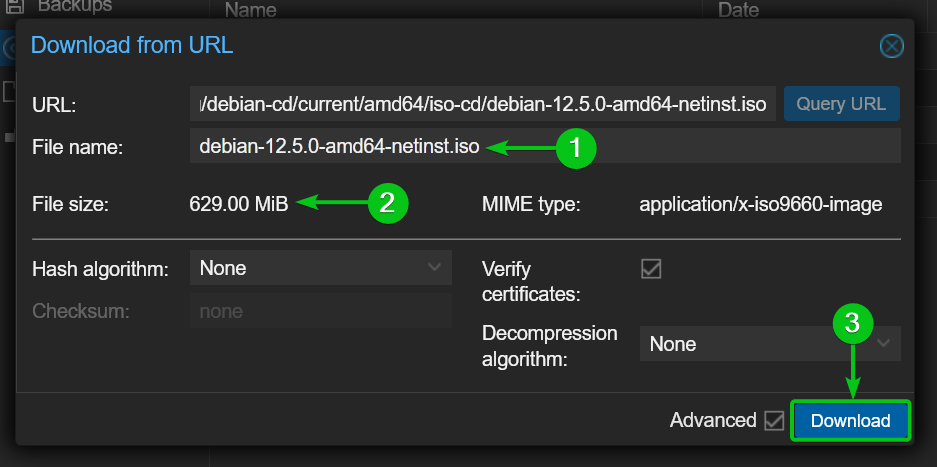
Proxmox VE should check the ISO file URL and obtain the necessary information like the File name[1] and File size[2] of the ISO image file. If you want to save the ISO image file in a different name on your Proxmox VE server, just type it in the File name section[1].
Once you’re ready, click on Download[3].
Proxmox VE should start downloading the ISO image file from the URL. It will take a while to complete.
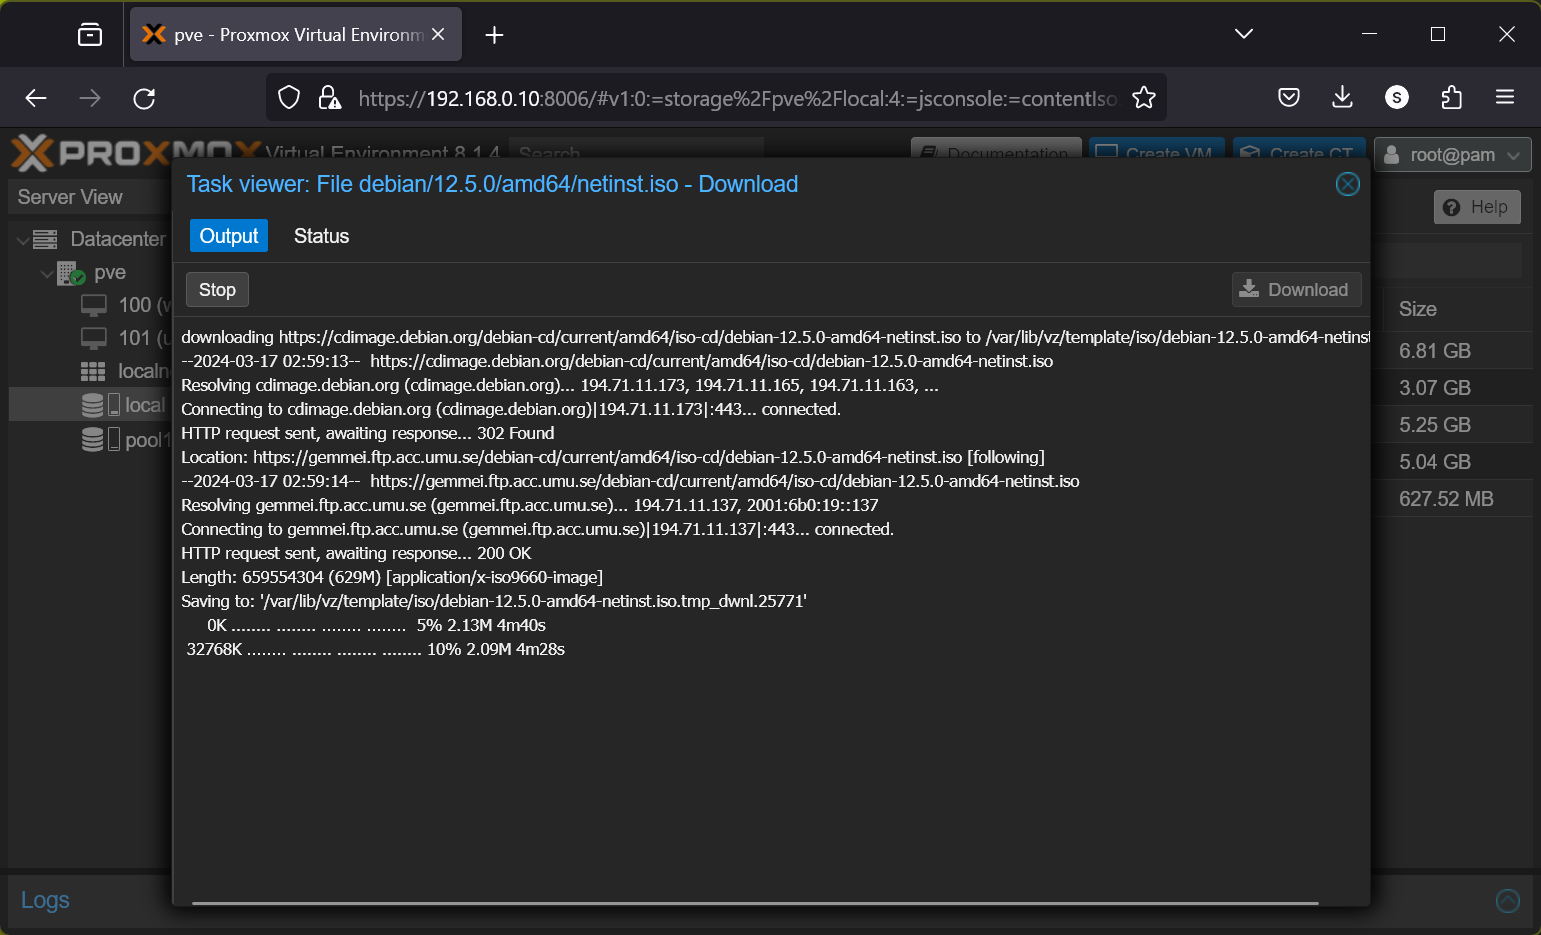
Once the ISO image file is downloaded on your Proxmox VE server, you will see the following window. Just close it.

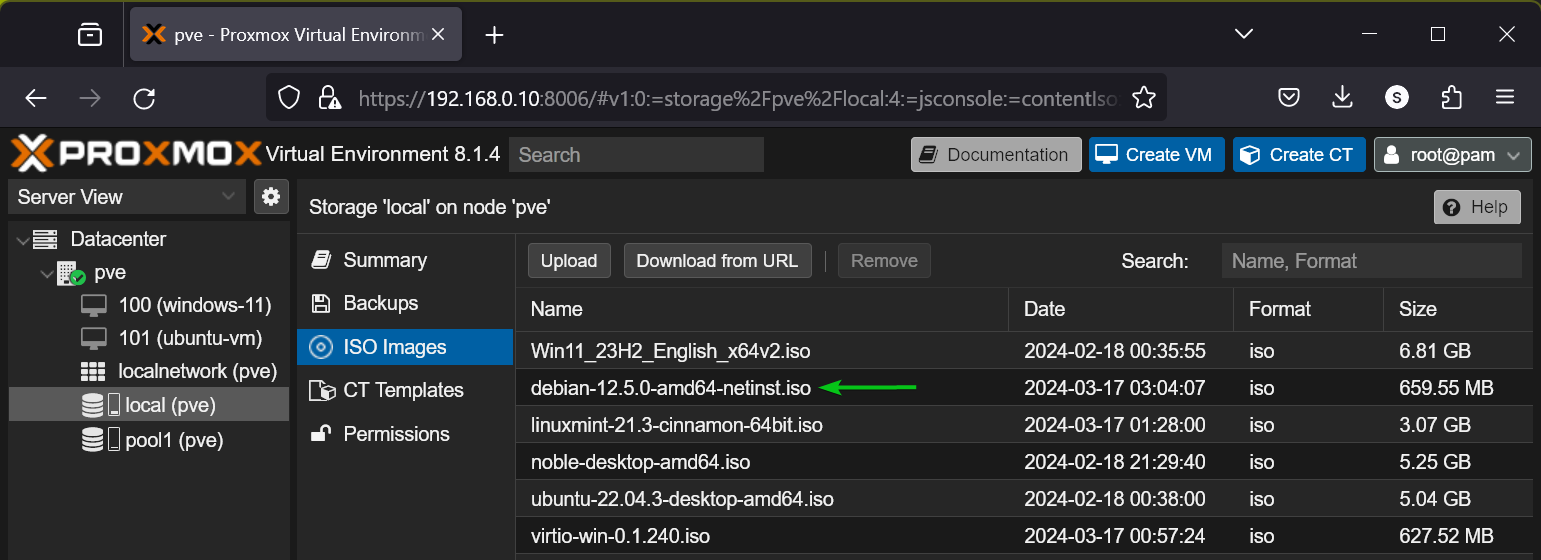
The downloaded ISO image file should be listed in the ISO Images section of the selected Proxmox VE storage.
Conclusion
In this article, I have shown you how to upload an ISO image from your computer on the Proxmox VE server. I have also shown you how to download an ISO image using a URL directly on your Proxmox VE server.
Source: linuxhint.com