How to Install Proxmox VE 8 on Your Server
Proxmox VE (Virtualization Environment) is an open-source enterprise virtualization and containerization platform. It has a built-in user-friendly web interface for managing virtual machines and LXC containers. It has other features such as Ceph software-defined storage (SDS), software-defined networking (SDN), high availability (HA) clustering, and many more.
After the recent Broadcom acquisition of VMware, the cost of VMware products has risen to the point that many small to medium-sized companies are/will be forced to switch to alternate products. Even the free VMware ESXi is discontinued which is bad news for homelab users. Proxmox VE is one of the best alternatives to VMware vSphere and it has the same set of features as VMware vSphere (with a few exceptions of course). Proxmox VE is open-source and free, which is great for home labs as well as businesses. Proxmox VE also has an optional enterprise subscription option that you can purchase if needed.
In this article, I will show you how to install Proxmox VE 8 on your server. I will cover Graphical UI-based installation methods of Proxmox VE and Terminal UI-based installation for systems having problems with the Graphical UI-based installer.
Table of Contents
- Booting Proxmox VE 8 from a USB Thumb Drive
- Installing Proxmox VE 8 using Graphical UI
- Installing Proxmox VE 8 using Terminal UI
- Accessing Proxmox VE 8 Management UI from a Web Browser
- Enabling Proxmox VE Community Package Repositories
- Keeping Proxmox VE Up-to-date
- Conclusion
- References
Booting Proxmox VE 8 from a USB Thumb Drive
First, you need to download the Proxmox VE 8 ISO image and create a bootable USB thumb drive of Proxmox VE 8. If you need any assistance on that, read this article.
Once you’ve created a bootable USB thumb drive of Proxmox VE 8, power off your server, insert the bootable USB thumb drive on your server, and boot the Proxmox VE 8 installer from it. Depending on the motherboard manufacturer, you need to press a certain key after pressing the power button to boot from the USB thumb drive. If you need any assistance on booting your server from a USB thumb drive, read this article.
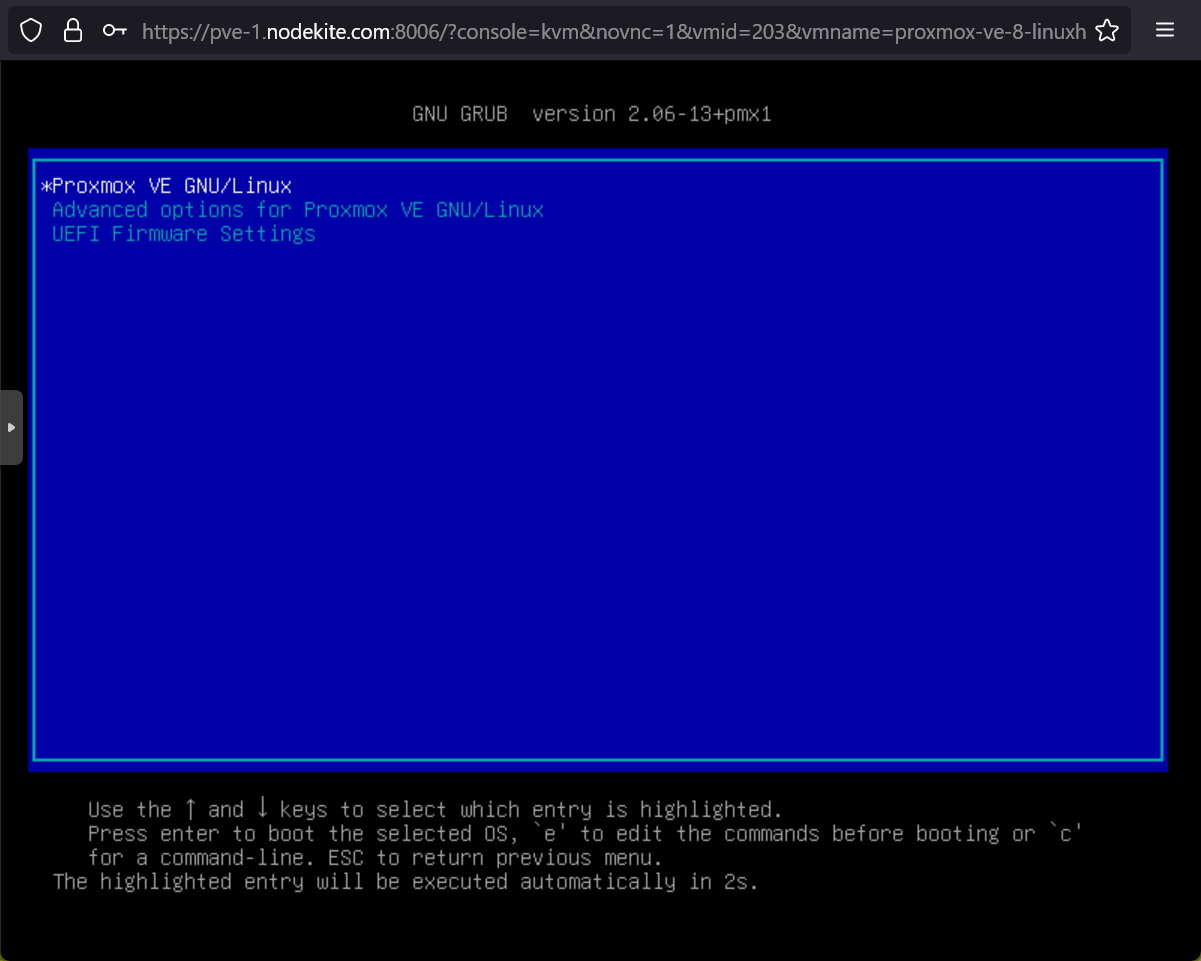
Once you’ve successfully booted from the USB thumb drive, the Proxmox VE GRUB menu should be displayed.
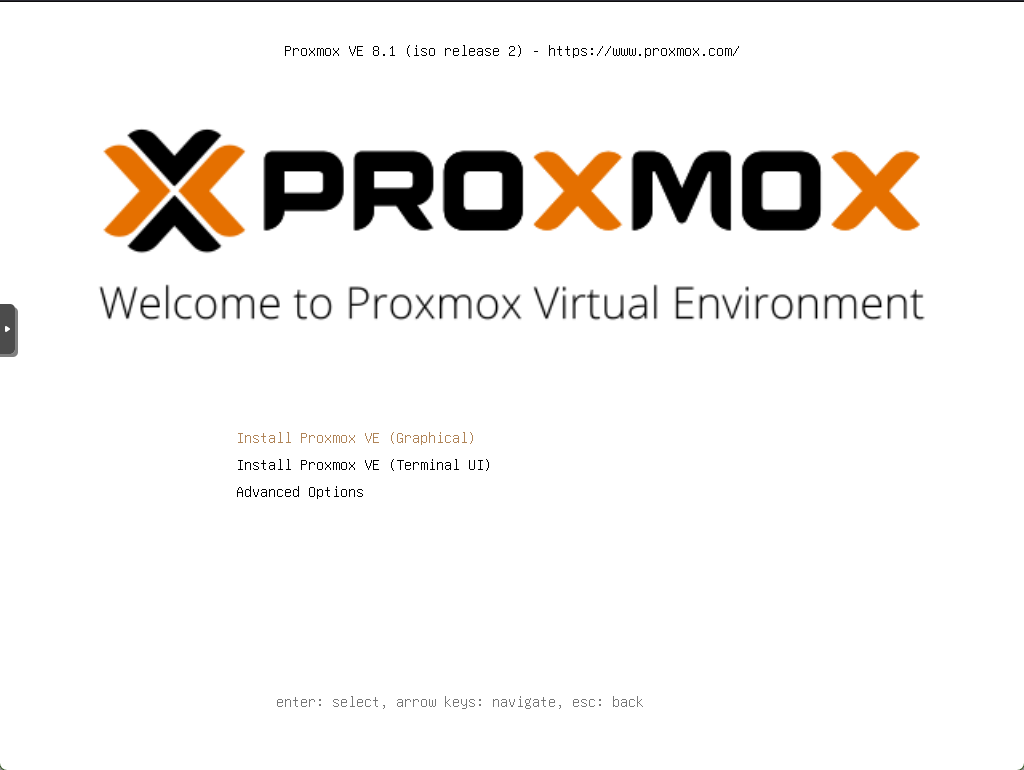
Installing Proxmox VE 8 using Graphical UI
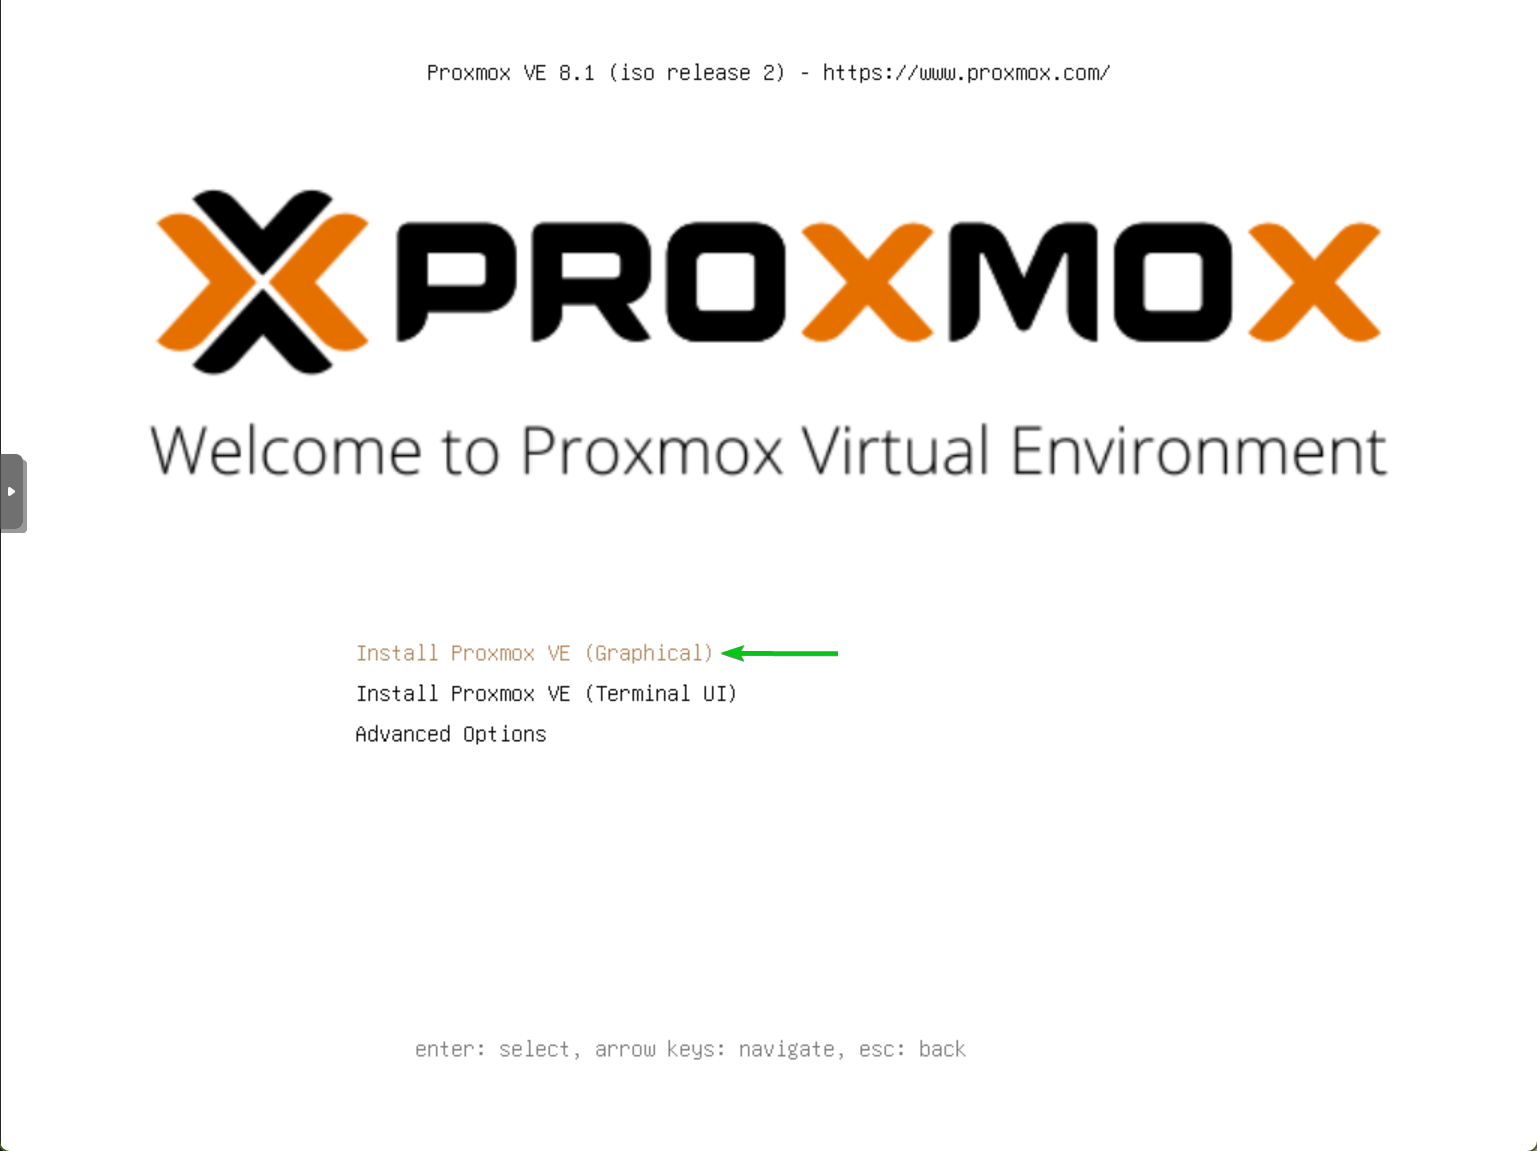
To install Proxmox VE 8 using a graphical user interface, select Install Proxmox VE (Graphical) from the Proxmox VE GRUB menu and press <Enter>.
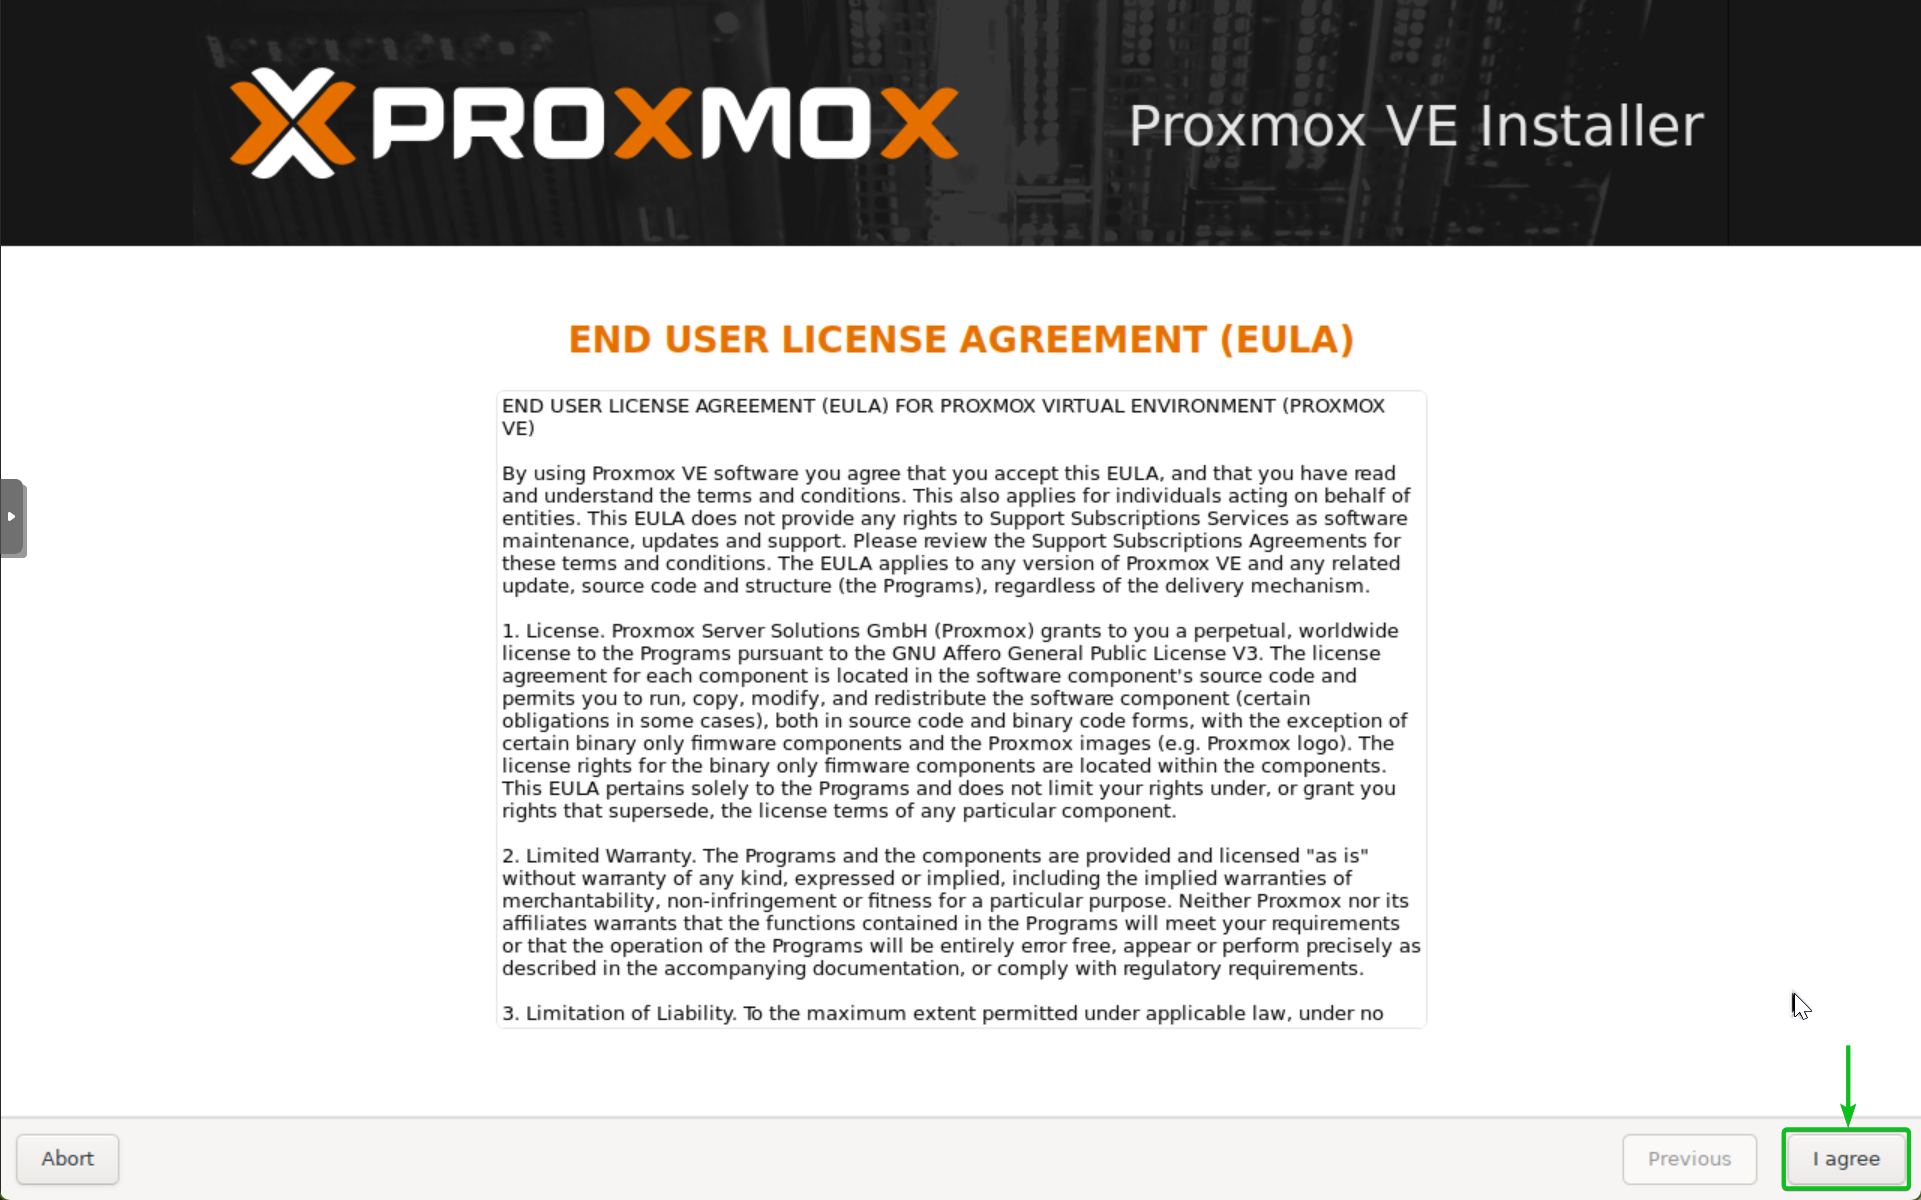
The Proxmox VE installer should be displayed.
Click on I agree.
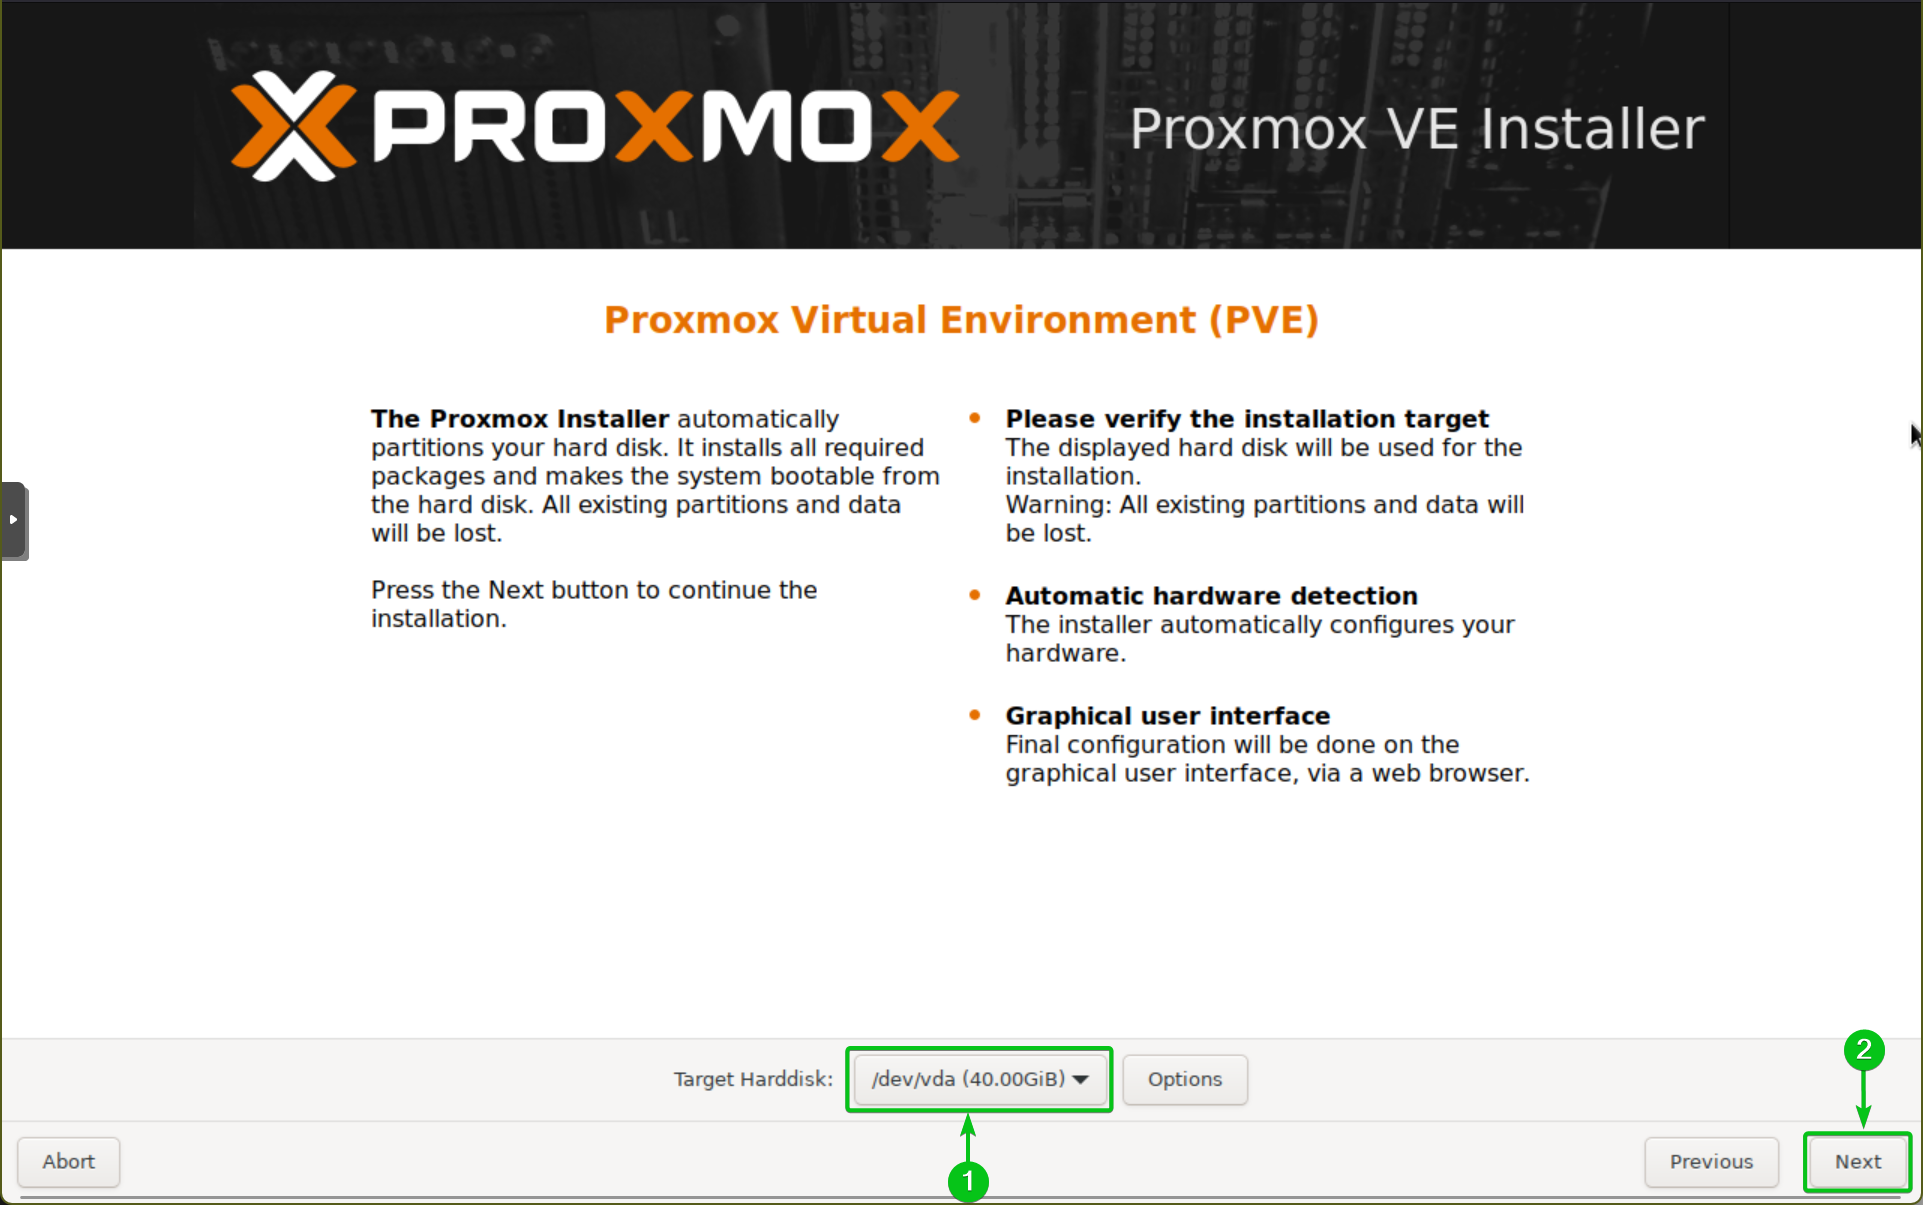
Now, you have to configure the disk for the Proxmox VE installation.
You can configure the disk for Proxmox VE installation in different ways:
- If you have a single 500GB/1TB (or larger capacity) SSD/HDD on your server, you can use it for Proxmox VE installation as well as storing virtual machine images, container images, snapshots, backups, ISO images, and so on. That’s not very safe, but you can try out Proxmox this way without needing a lot of hardware resources.
- You can use a small 64GB or 128GB SSD for Proxmox VE installation only. Once Proxmox VE is installed, you can create additional storage pools for storing virtual machine images, container images, snapshots, backups, ISO images, and so on.
- You can create a big ZFS or BTRFS RAID for Proxmox VE installation which will also be used for storing virtual machine images, container images, snapshots, backups, ISO images, and so on.
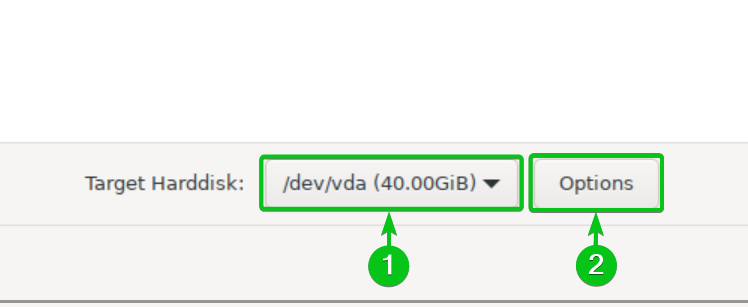
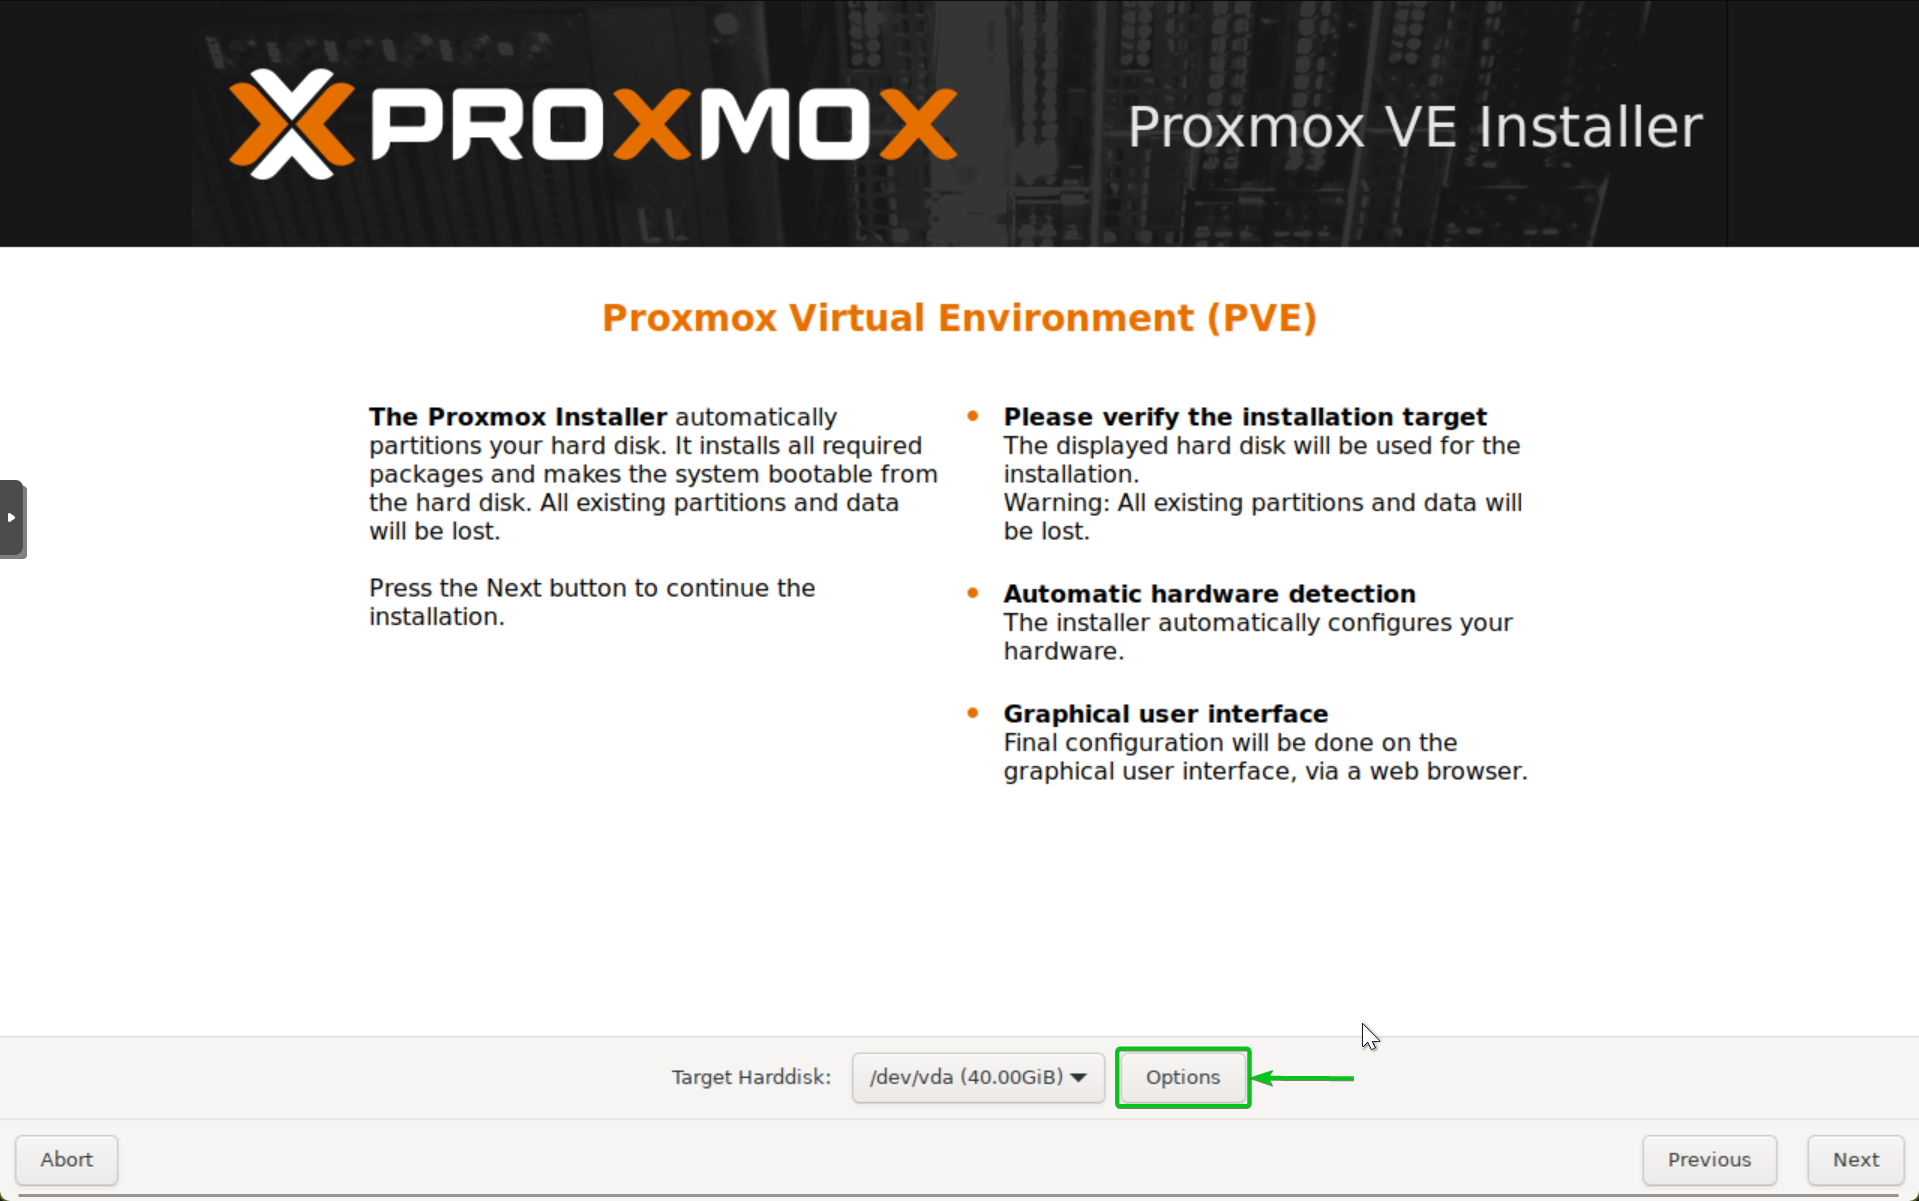
a) To install Proxmox VE on a single SSD/HDD and also use the SSD/HDD for storing virtual machine and container images, ISO images, virtual machine and container snapshots, virtual machine and container backups, etc., select the SSD/HDD from the Target Harddisk dropdown menu[1] and click on Next[2].
Proxmox VE will use a small portion of the free disk space for the Proxmox VE root filesystem and the rest of the disk space will be used for storing virtual machine and container data.
If you want to change the filesystem of your Proxmox VE installation or configure the size of different Proxmox VE partitions/storages, select the HDD/SSD you want to use for your Proxmox VE installation from the Target Harddisk dropdown menu and click on Options.

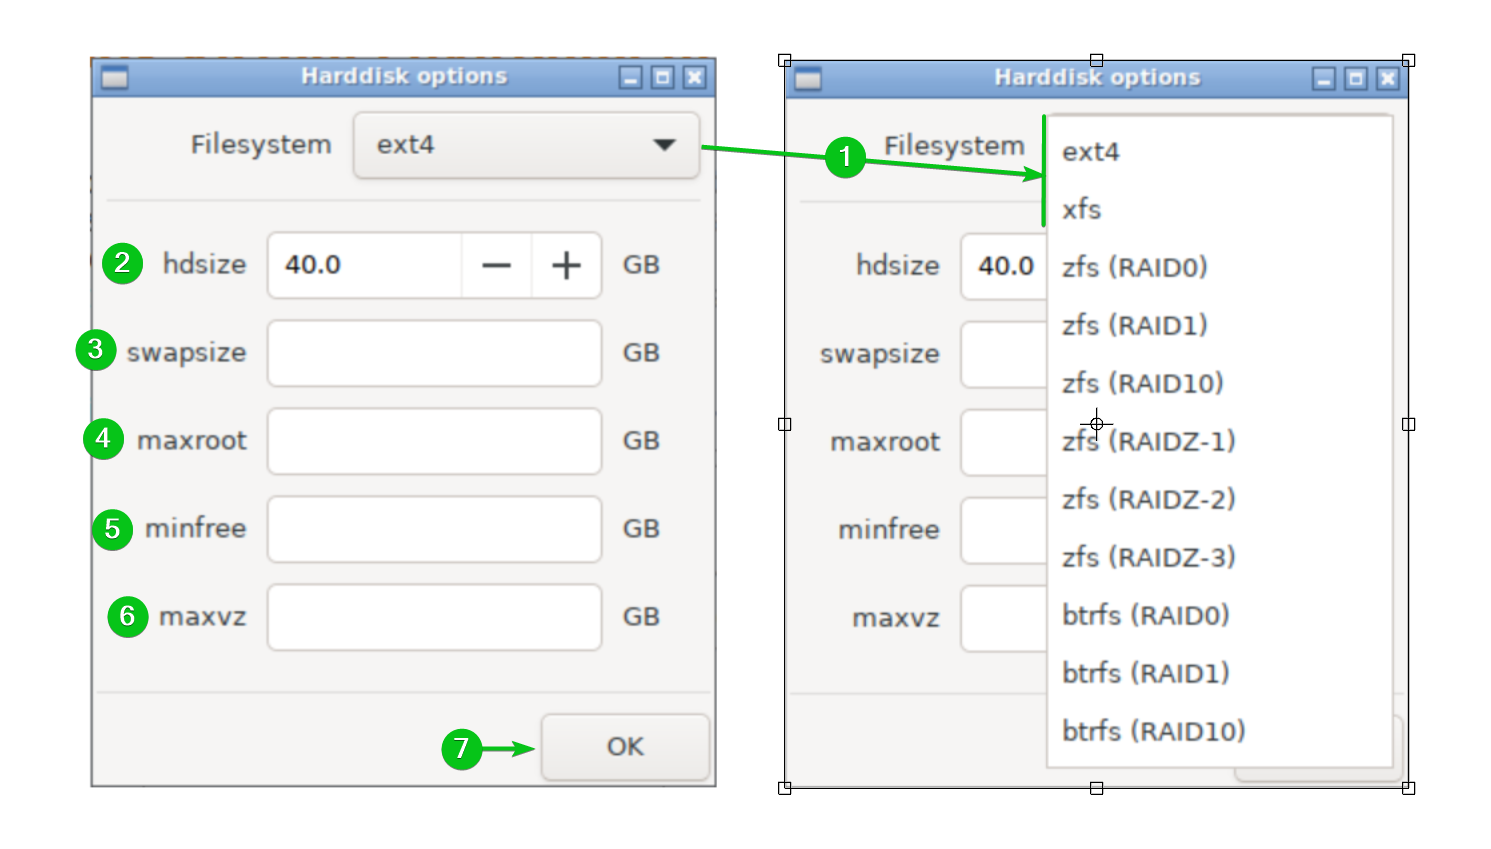
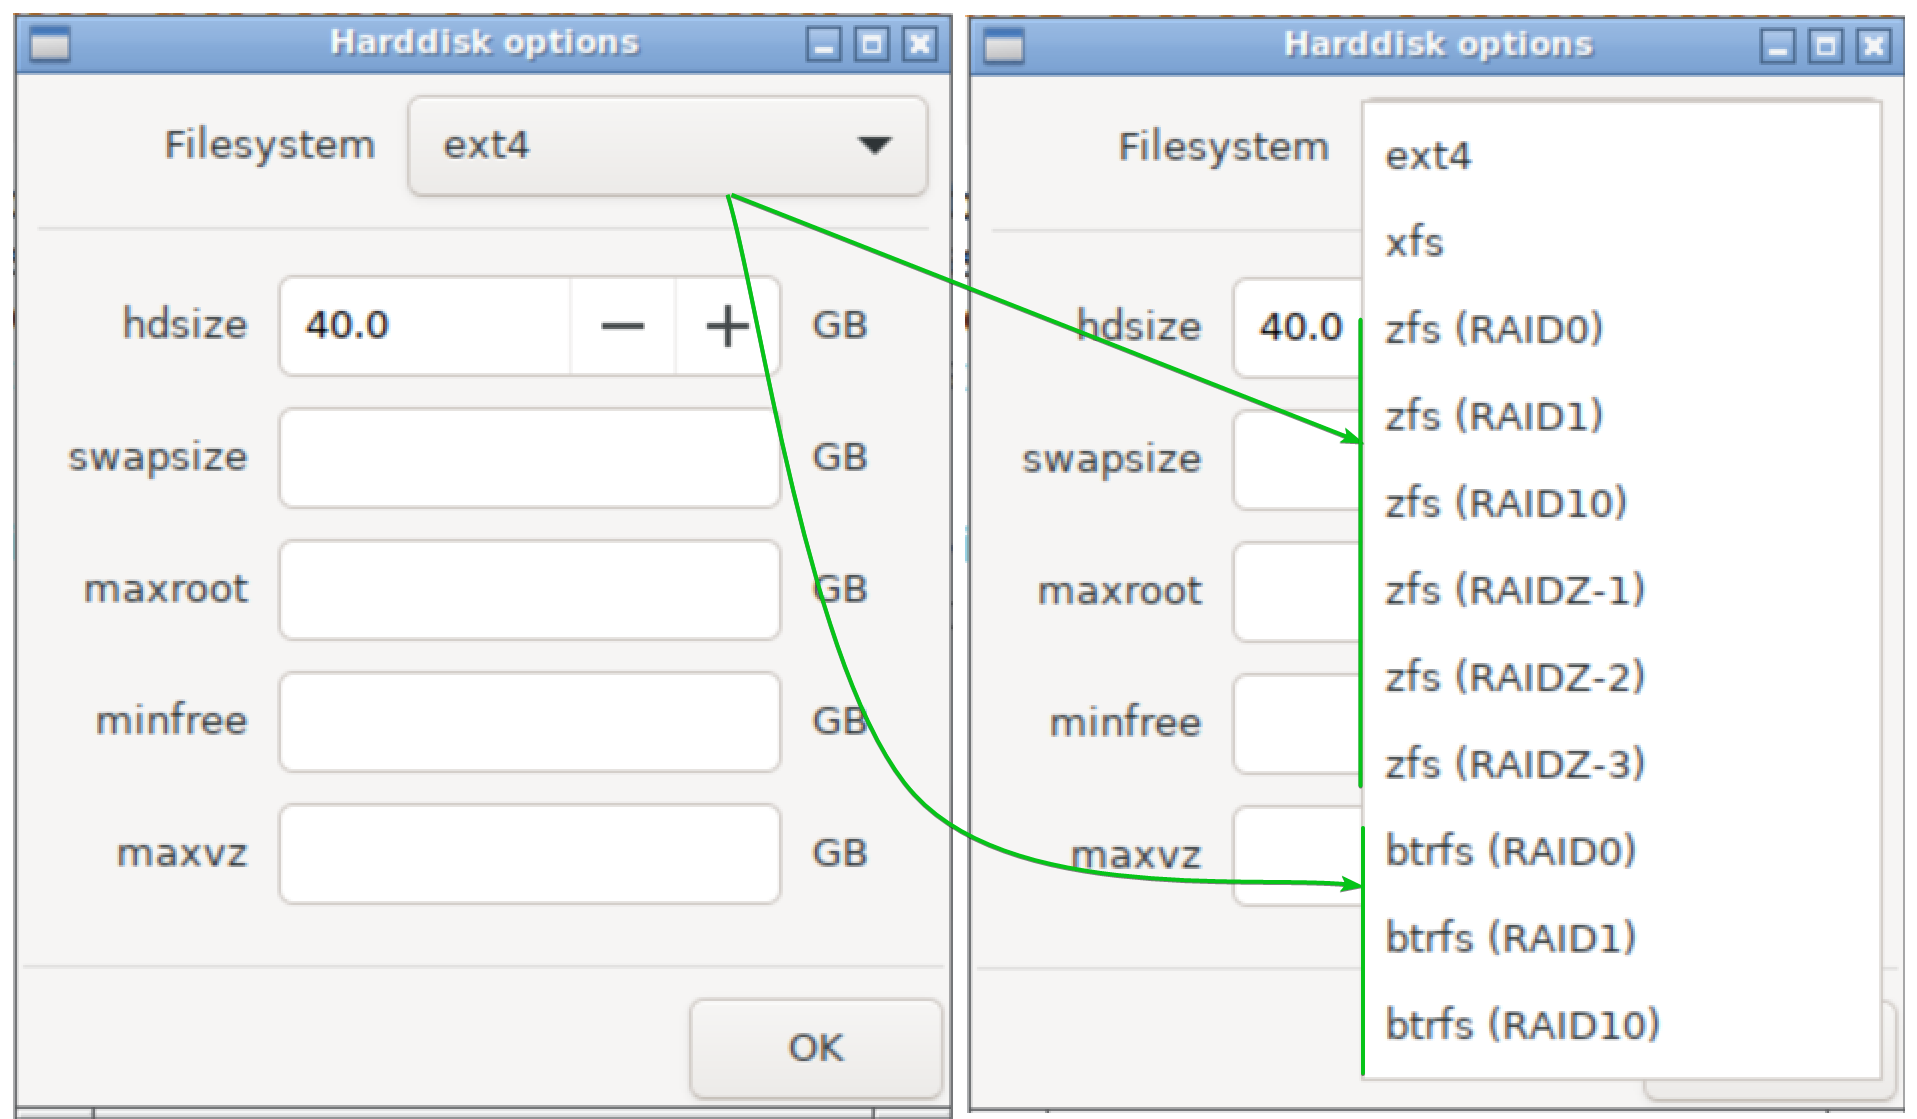
An advanced disk configuration window should be displayed.
From the Filesystem dropdown menu, select your desired filesystem. ext4 and xfs filesystems are supported for single-disk Proxmox VE installation at the time of this writing[1].
Other storage configuration parameters are:
hdsize[2]: By default Proxmox VE will use all the disk space of the selected HDD/SSD. To keep some disk space free on the selected HDD/SSD, type in the amount of disk space (in GB) that you want Proxmox VE to use and the rest of the disk space should be free.
swapsize[3]: By default, Proxmox VE will use 4GB to 8GB of disk space for swap depending on the amount of memory/RAM you have installed on the server. To set a custom swap size for Proxmox VE, type in your desired swap size (in GB unit) here.
maxroot[4]: Defines the maximum disk space to use for the Proxmox VE LVM root volume/filesystem.
minfree[5]: Defines the minimum disk space that must be free in the Proxmox VE LVM volume group (VG). This space will be used for LVM snapshots.
maxvz[6]: Defines the maximum disk space to use for the Proxmox VE LVM data volume where virtual machine and container data/images will be stored.
Once you’re done with the disk configuration, click on OK[7].
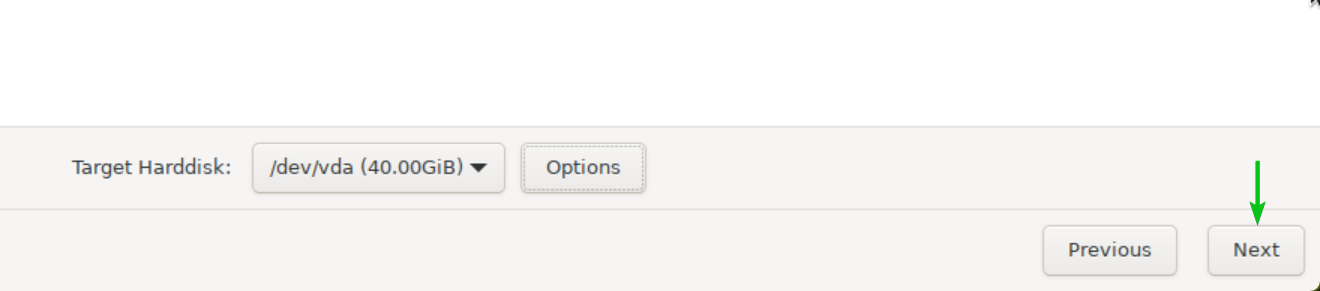
To install Proxmox VE on disk with your desired storage configuration, click on Next.

b) To install Proxmox VE on a small SSD and create the necessary storage for the virtual machine and container data later, select the SSD from the Target Harddisk dropdown menu[1] and click on Options[2].
Set maxvz to 0 to disable virtual machine and container storage on the SSD where Proxmox VE will be installed and click on OK.
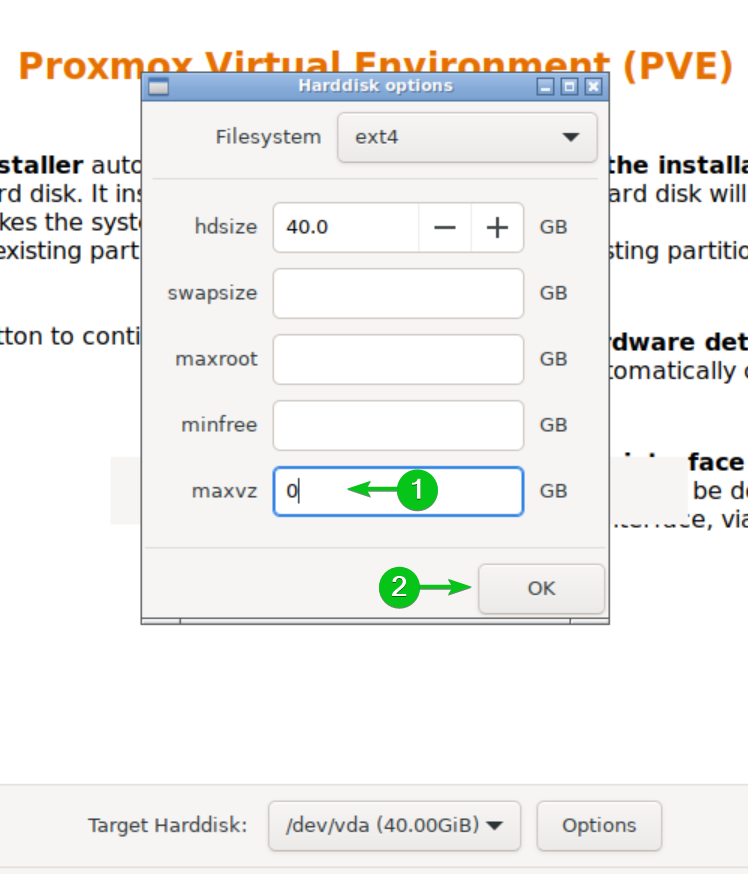
Once you’re done, click on Next.
c) To create a ZFS or BTRFS RAID and install Proxmox VE on the RAID, click on Options.
You can pick different ZFS and BTRFS RAID types from the Filesystem dropdown menu. Each of these RAID types works differently and requires a different number of disks. For more information on how different RAID types work, their requirements, features, data safety, etc, read this article.
RAID0, RAID1, and RAID10 are discussed in this article thoroughly. RAIDZ-1 and RAIDZ-2 work in the same way as RAID5 and RAID6 respectively. RAID5 and RAID6 are also discussed in this article.
RAIDZ-1 requires at least 2 disks (3 disks recommended), uses a single parity, and can sustain only 1 disk failure.
RAIDZ-2 requires at least 3 disks (4 disks recommended), uses double parity, and can sustain 2 disks failure.
RAIDZ-3 requires at least 4 disks (5 disks recommended), uses triple parity, and can sustain 3 disks failure.
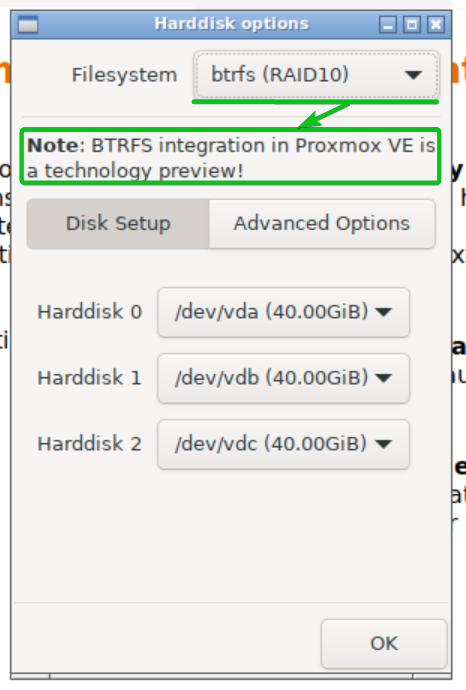
Although you can create BTRFS RAIDs on Proxmox VE, at the time of this writing, BTRFS on Proxmox VE is still in technology preview. So, I don’t recommend using it in production systems. I will demonstrate ZFS RAID configuration on Proxmox VE in this article.
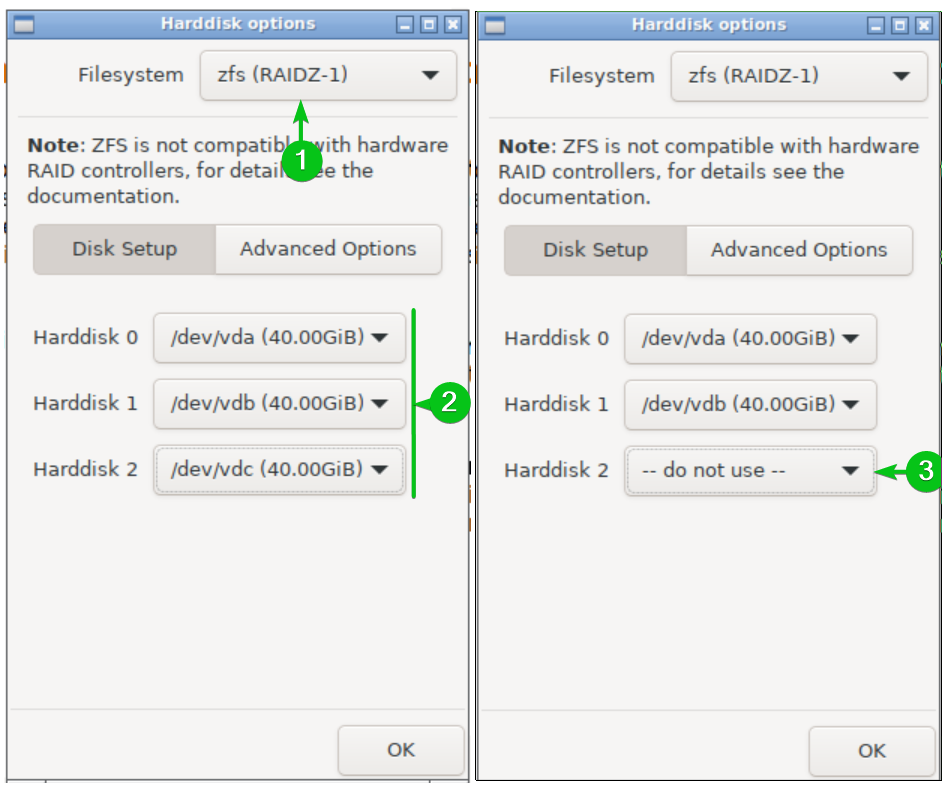
To create a ZFS RAID for Proxmox VE installation, select your desired ZFS RAID type from the Filesystem dropdown menu[1]. From the Disk Setup tab, select the disks that you want to use for the ZFS RAID using the Harddisk X dropdown menus[2]. If you don’t want to use a disk for the ZFS RAID, select – do not use – from the respective Harddisk X dropdown menu[3].
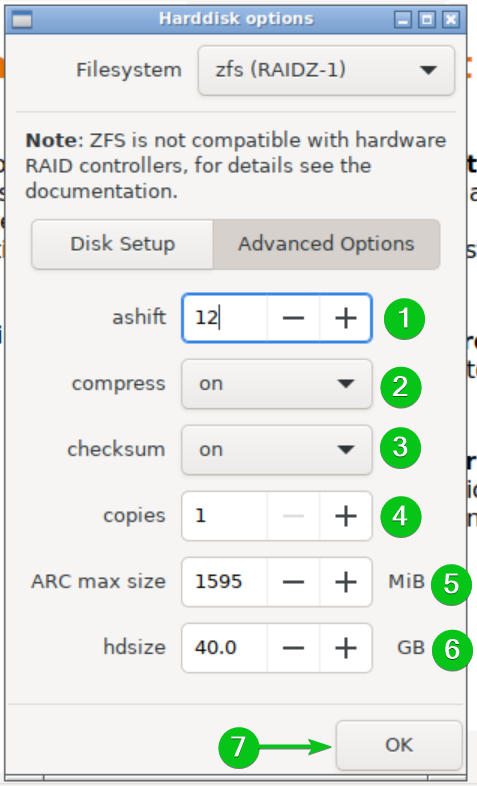
From the Advanced Options tab, you can configure different ZFS filesystem parameters.
ashift[1]: You can set ZFS block size using this option. The block size is calculated using the formula 2ashift. The default ashift value is 12, which is 212 = 4096 = 4 KB block size. 4KB block size is good for SSDs. If you’re using a mechanical hard drive (HDD), you need to set ashift to 9 (29 = 512 bytes) as HDDs use 512 bytes block size.
compress[2]: You can enable/disable ZFS compression from this dropdown menu. To enable compression, set compression to on. To disable compression, set compression to off. When compression is on, the default ZFS compression algorithm (lz4 at the time of this writing) is used. You can select other ZFS compression algorithms (i.e. lzjb, zle, gzip, zstd) as well if you have such preferences.
checksum[3]: ZFS checksums are used to detect corrupted files so that they can be repaired. You can enable/disable ZFS checksum from this dropdown menu. To enable ZFS checksum, set checksum to on. To disable ZFS checksum, set checksum to off. When checksum is on, the fletcher4 algorithm is used for non-deduped (deduplication disabled) datasets and sha256 algorithm is used for deduped (deduplication enabled) datasets by default.
copies[4]: You can set the number of redundant copies of the data you want to keep in your ZFS RAID. This is in addition to the RAID level redundancy and provides extra data protection. The default number of copy is 1 and you can store 3 copies of data at max in your ZFS RAID. This feature is also known as ditto blocks.
ARC max size[5]: You can set the maximum amount of memory ZFS is allowed to use for the Adaptive Replacement Cache (ARC) from here.
hdsize[6]: By default all the free disk space is used for the ZFS RAID. If you want to keep some portion of the disk space of each SSD free and use the rest for the ZFS RAID, type in the disk space you want to use (in GB) here. For example, if you have 40GB disks and you want to use 35GB of each disk for the ZFS RAID and keep 5GB of disk space free on each disks, you will need to type in 35GB in here.
Once you’re done with the ZFS RAID configuration, click on OK[7].
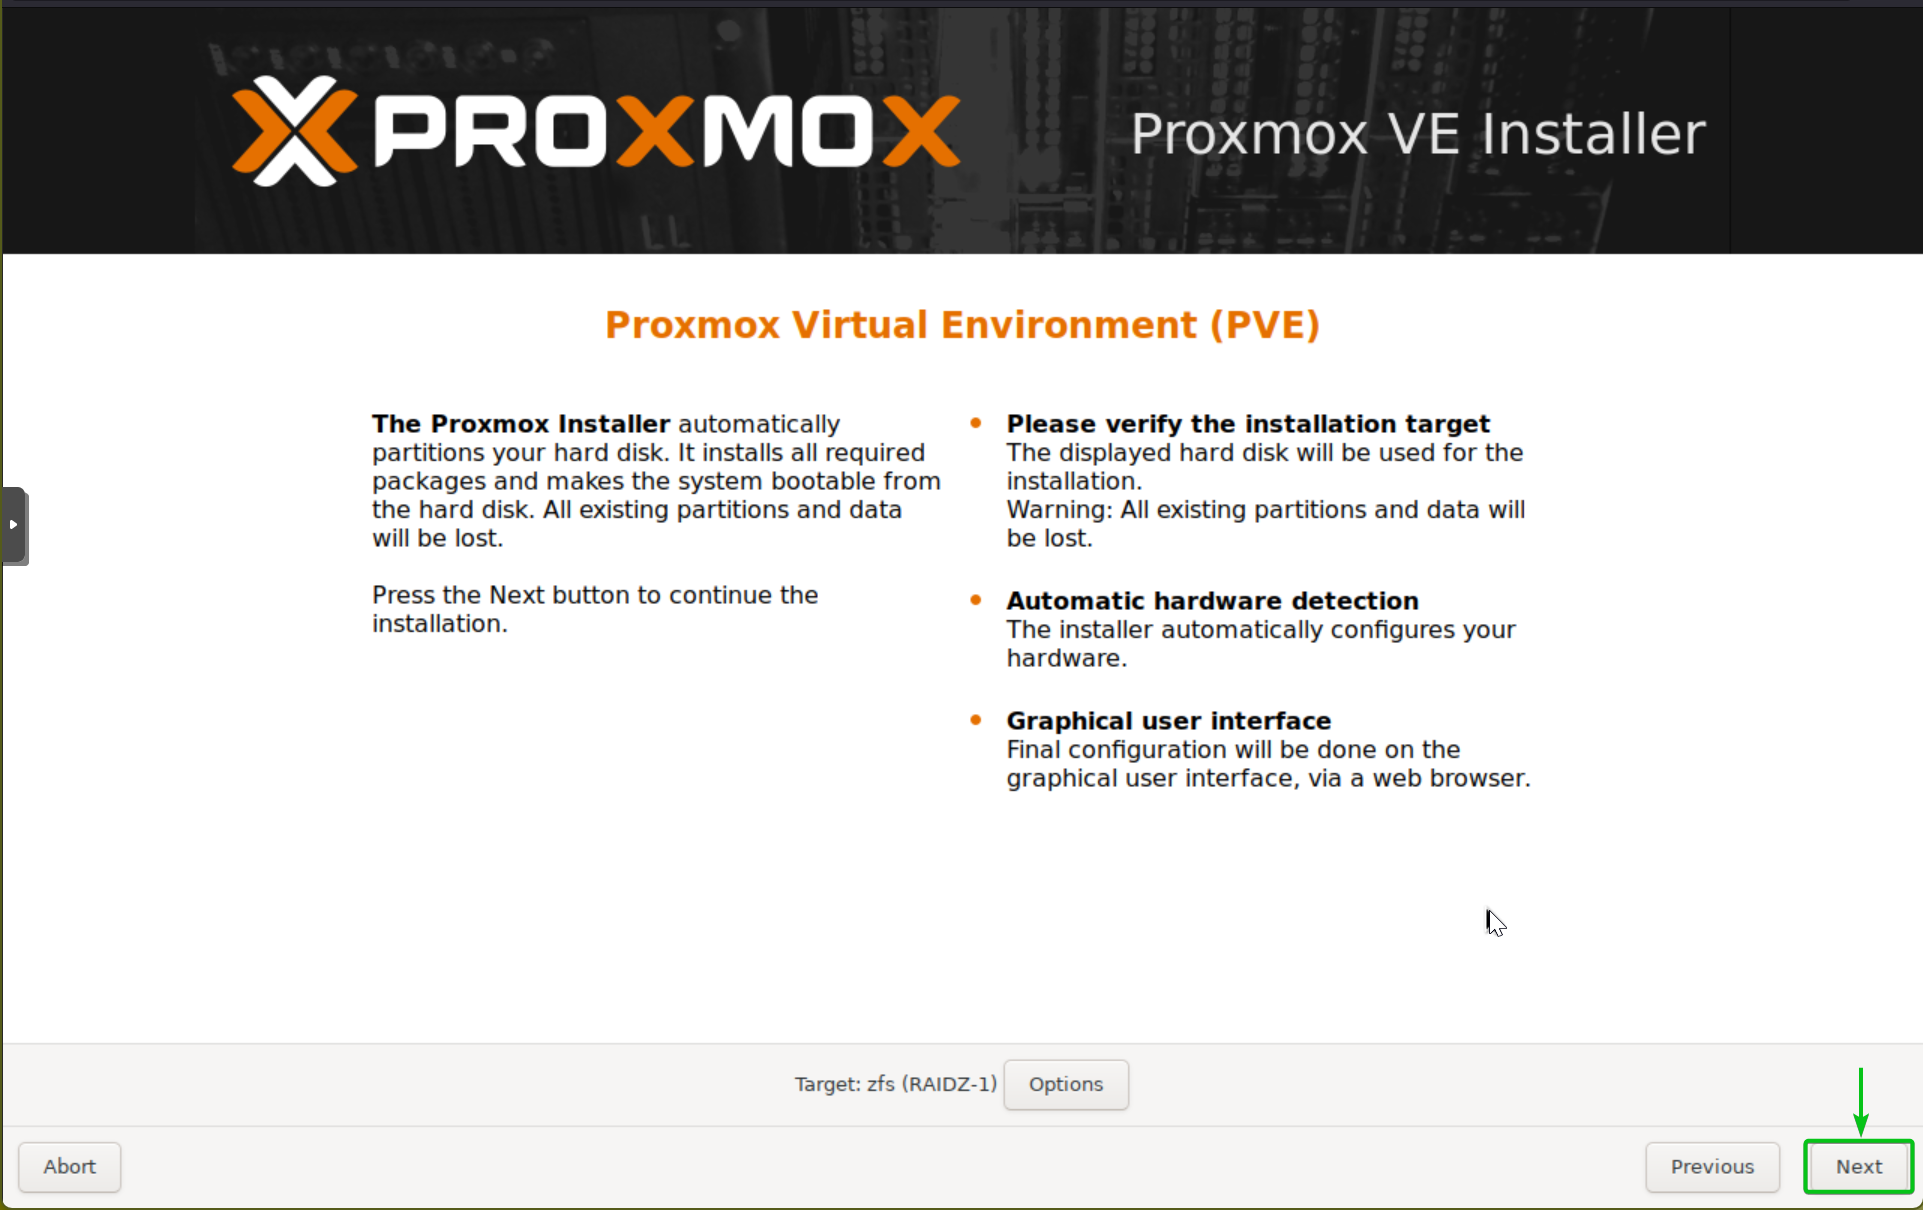
Once you’re done with the ZFS storage configuration, click on Next to continue.
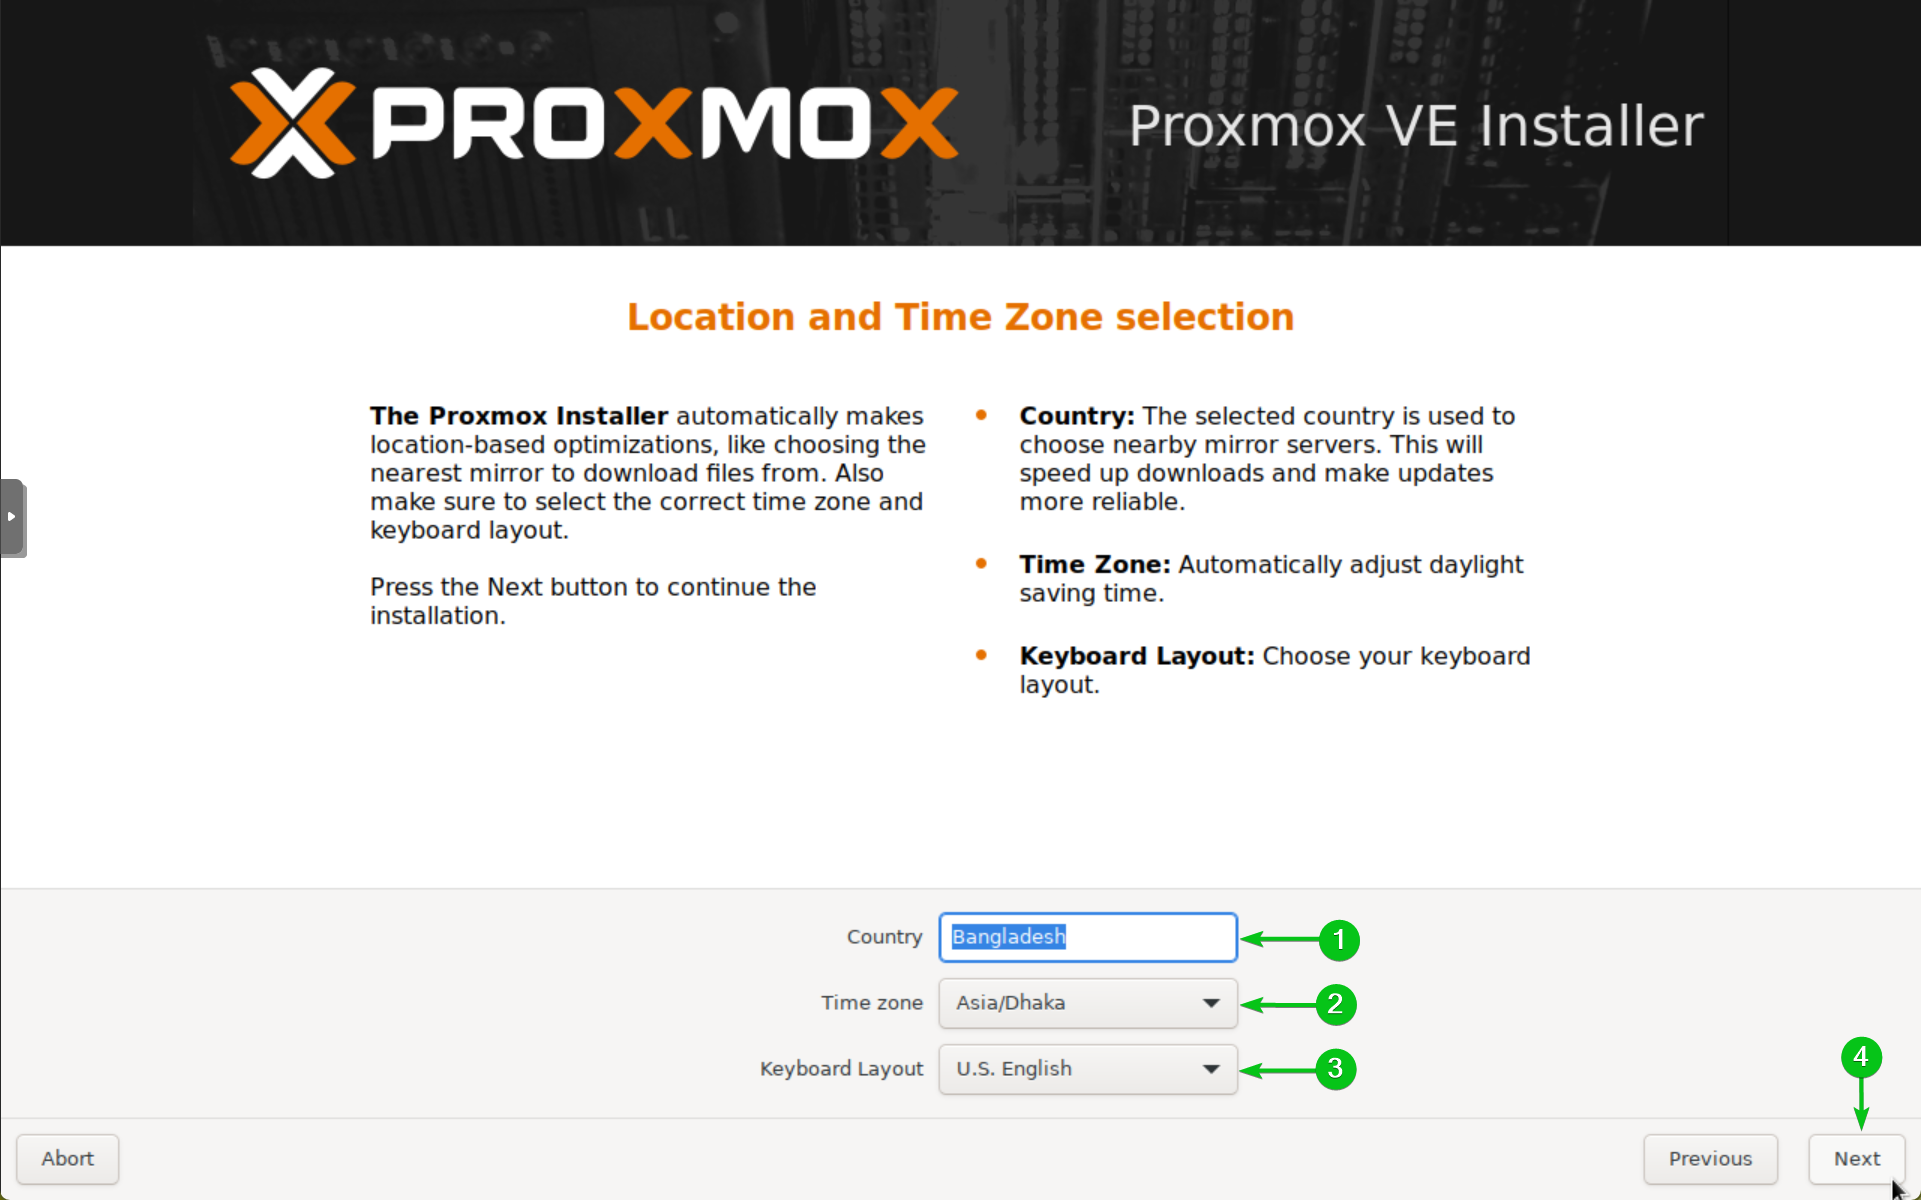
Type in the name of your country[1], select your time zone[2], select your keyboard layout[3], and click on Next[4].
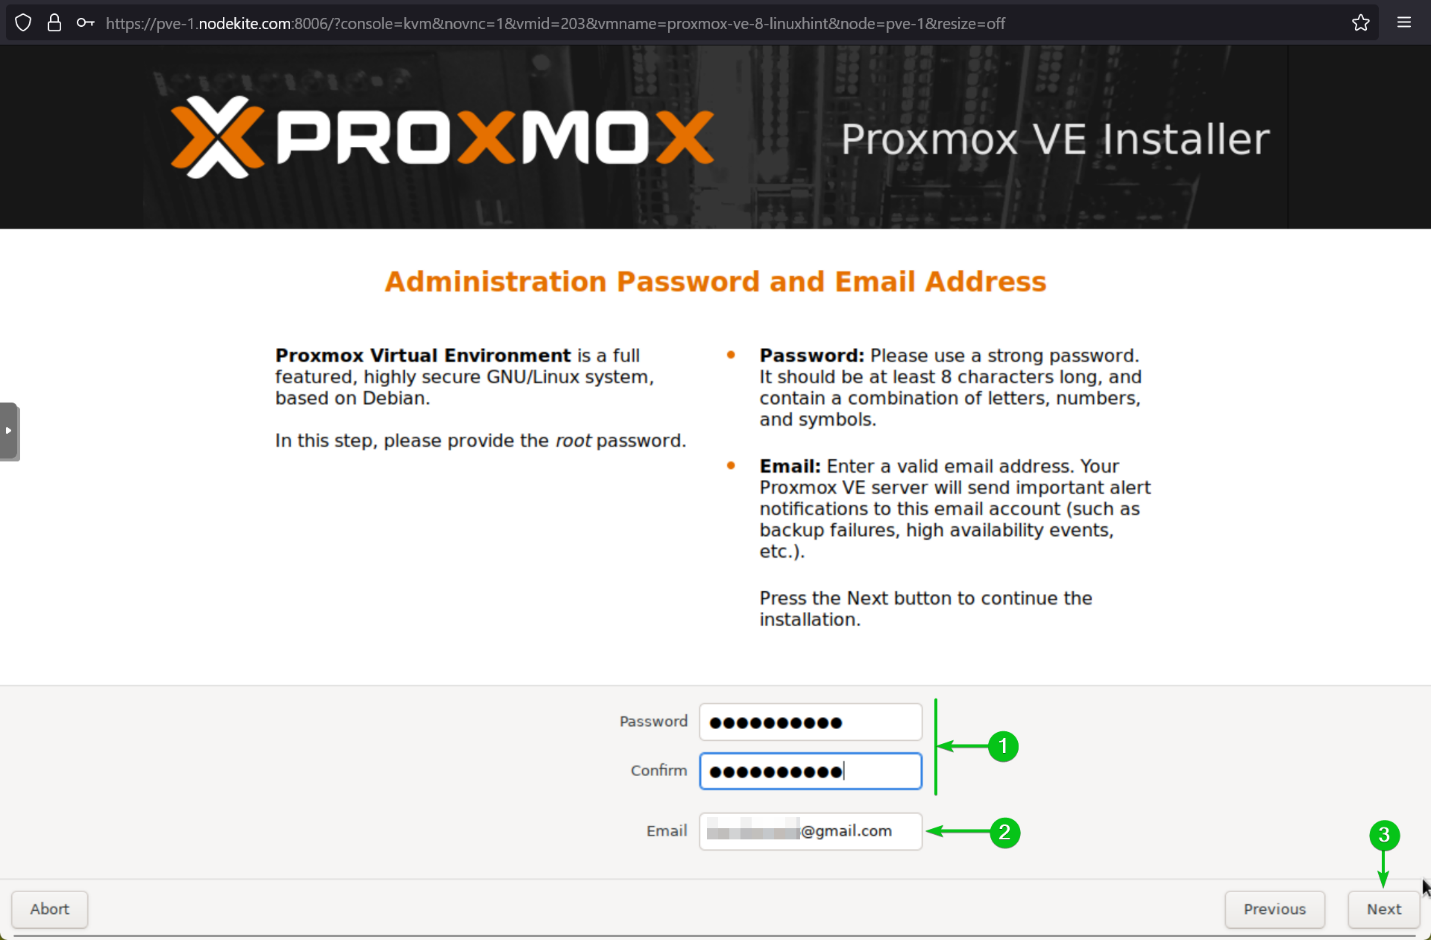
Type in your Proxmox VE root password[1] and your email[2].
Once you’re done, click on Next[3].
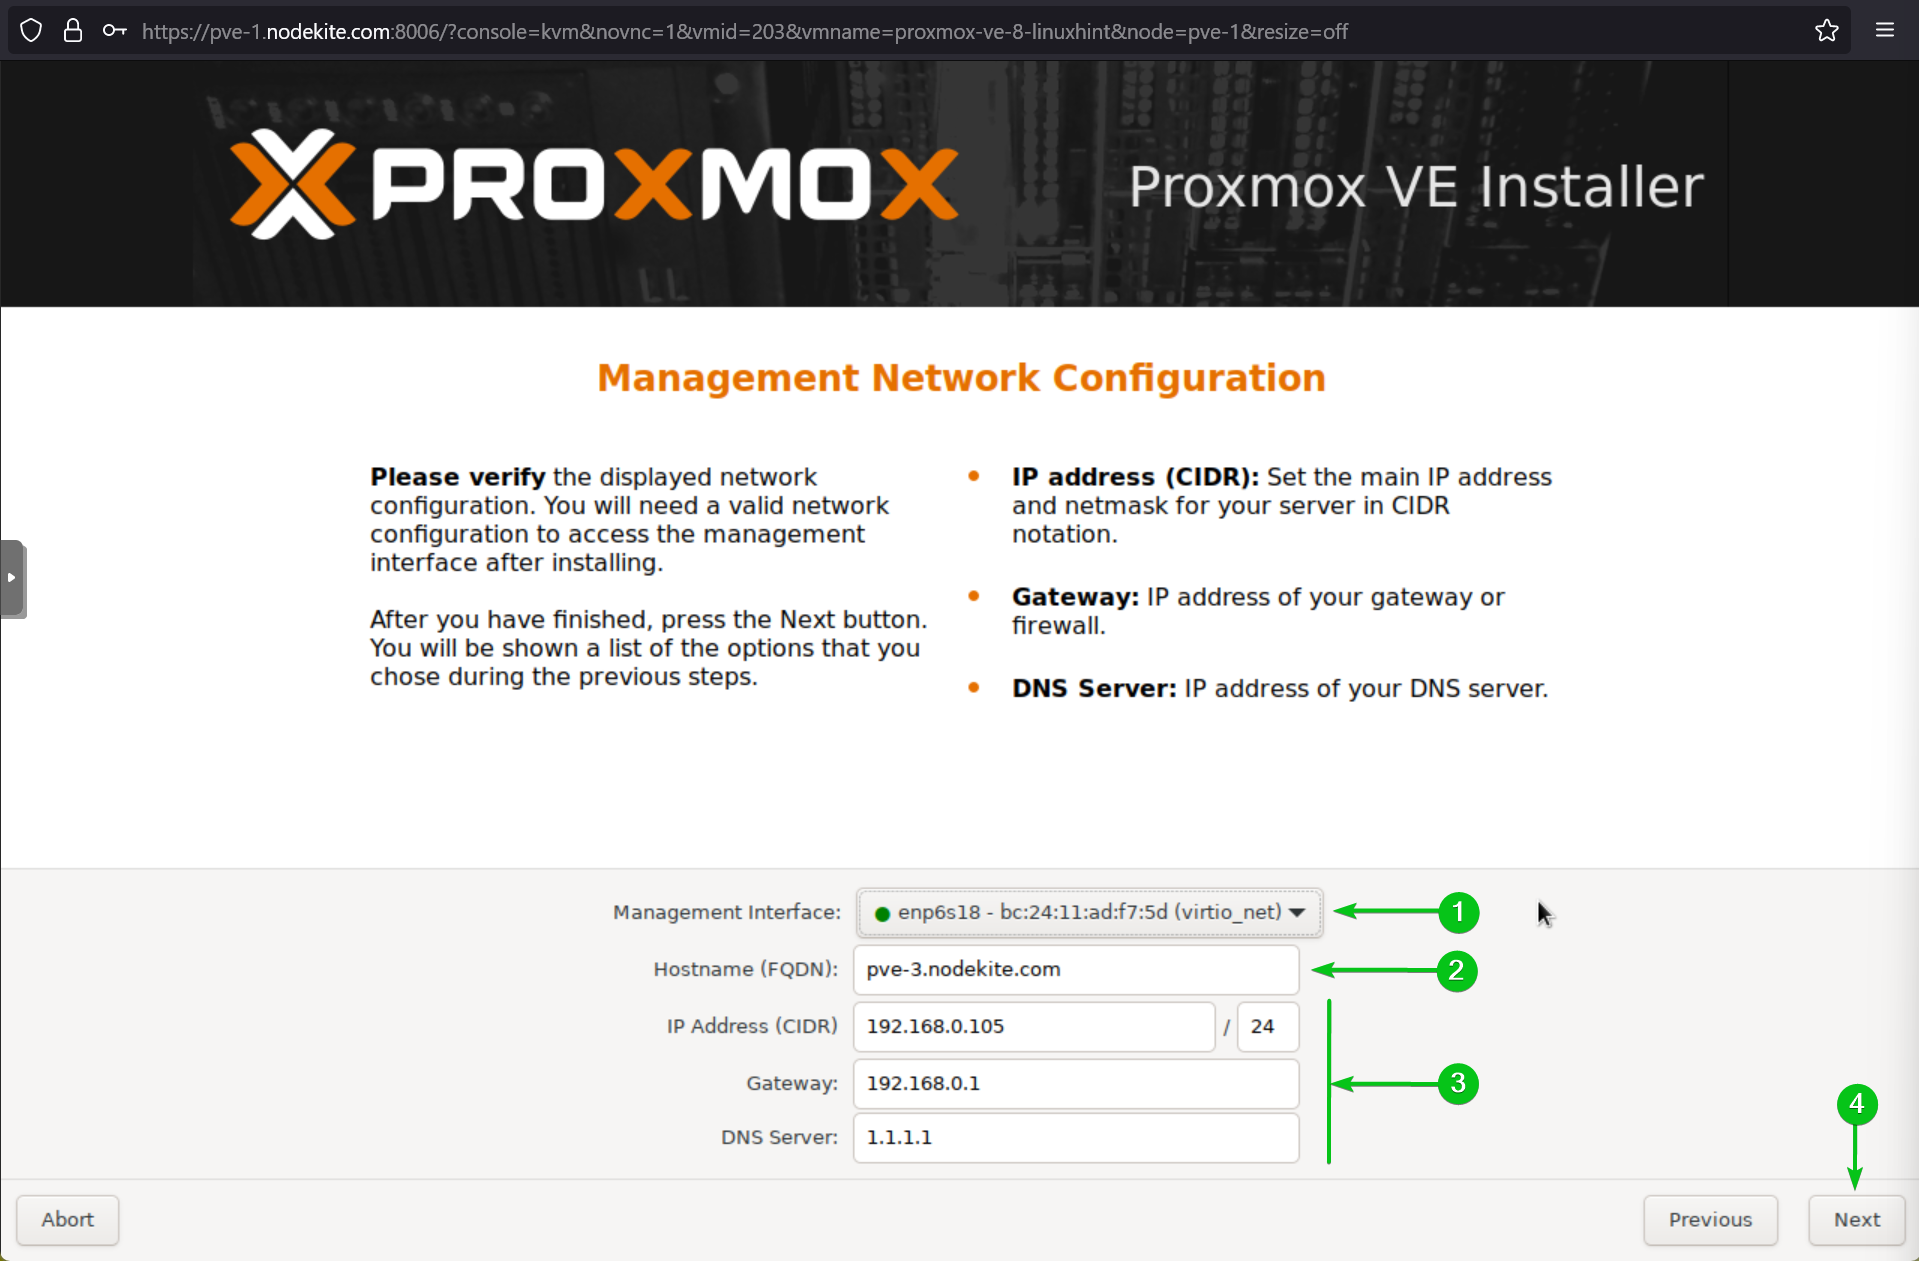
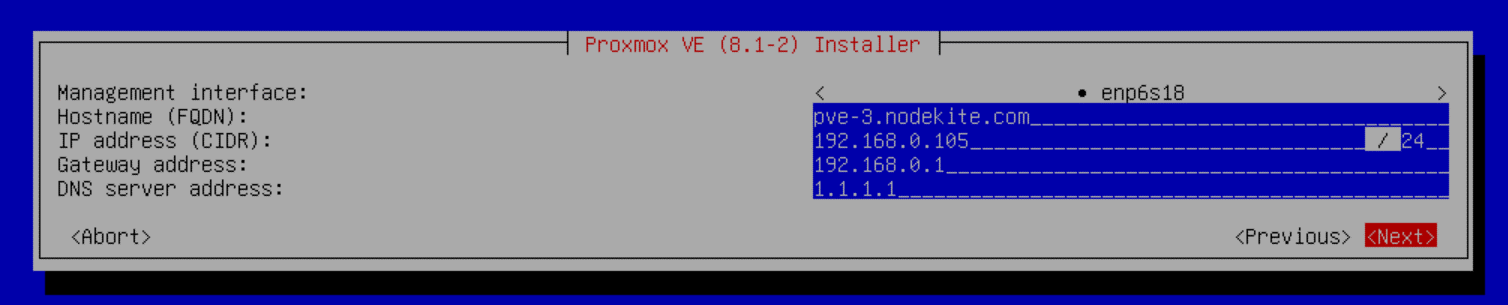
If you have multiple network interfaces available on your server, select the one you want to use for accessing the Proxmox VE web management UI from the Management Interface dropdown menu[1]. If you have only a single network interface available on your server, it will be selected automatically.
Type in the domain name that you want to use for Proxmox VE in the Hostname (FQDN) section[2].
Type in your desired IP information for the Proxmox VE server[3] and click on Next[4].
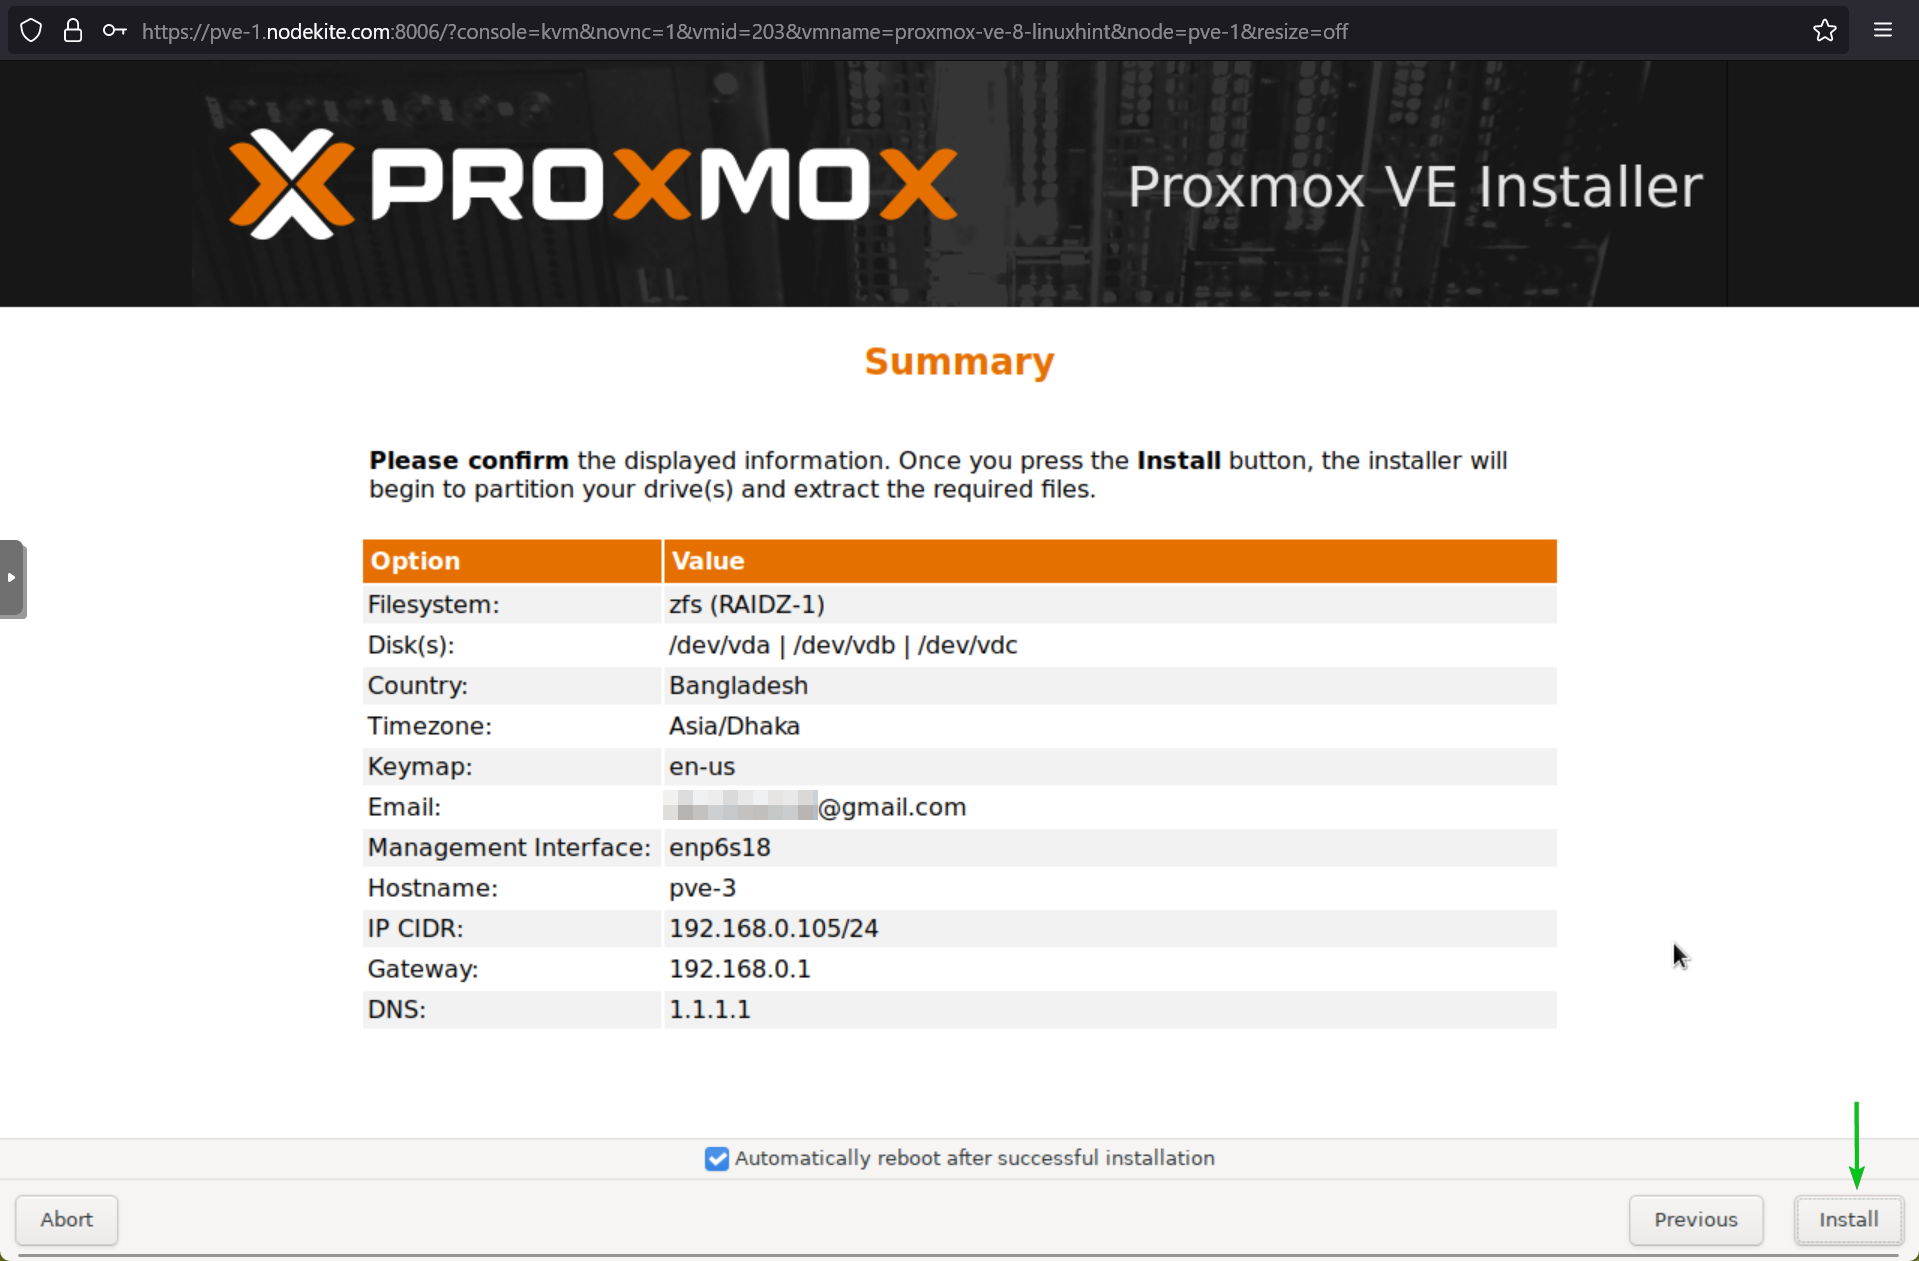
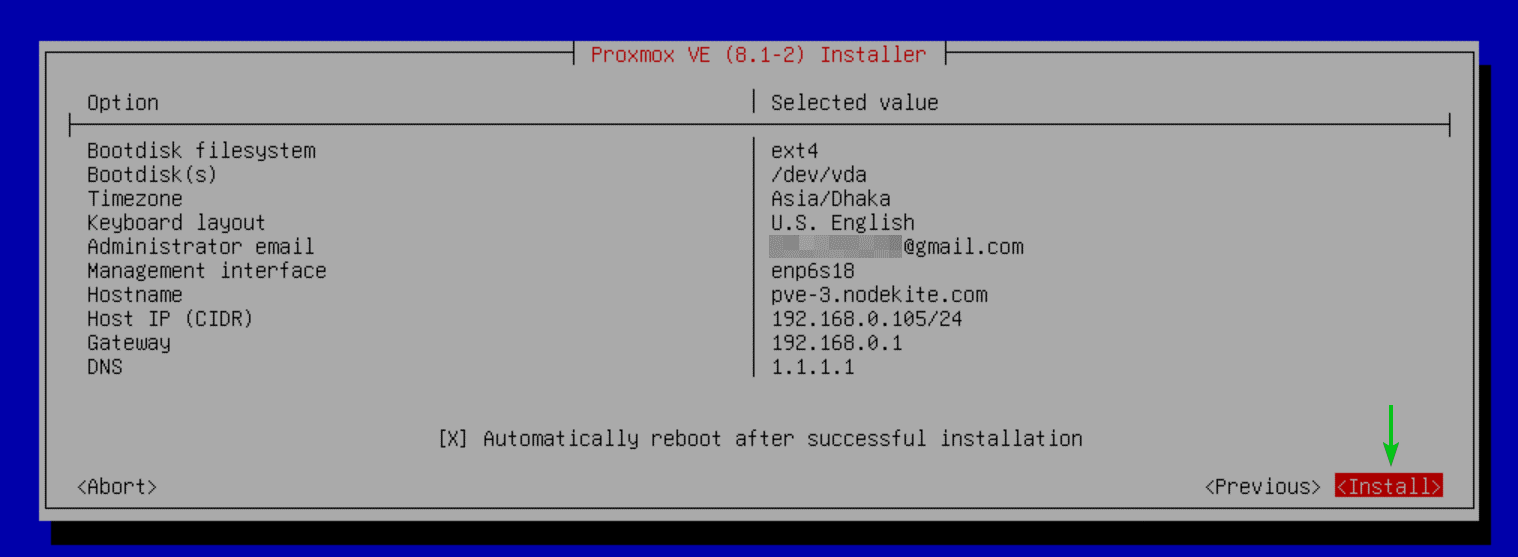
An overview of your Proxmox VE installation should be displayed. If everything looks good, click on Install to start the Proxmox VE installation.
NOTE: If anything seems wrong or you want to change certain information, you can always click on Previous to go back and fix it. So, make sure to check everything before clicking on Install.
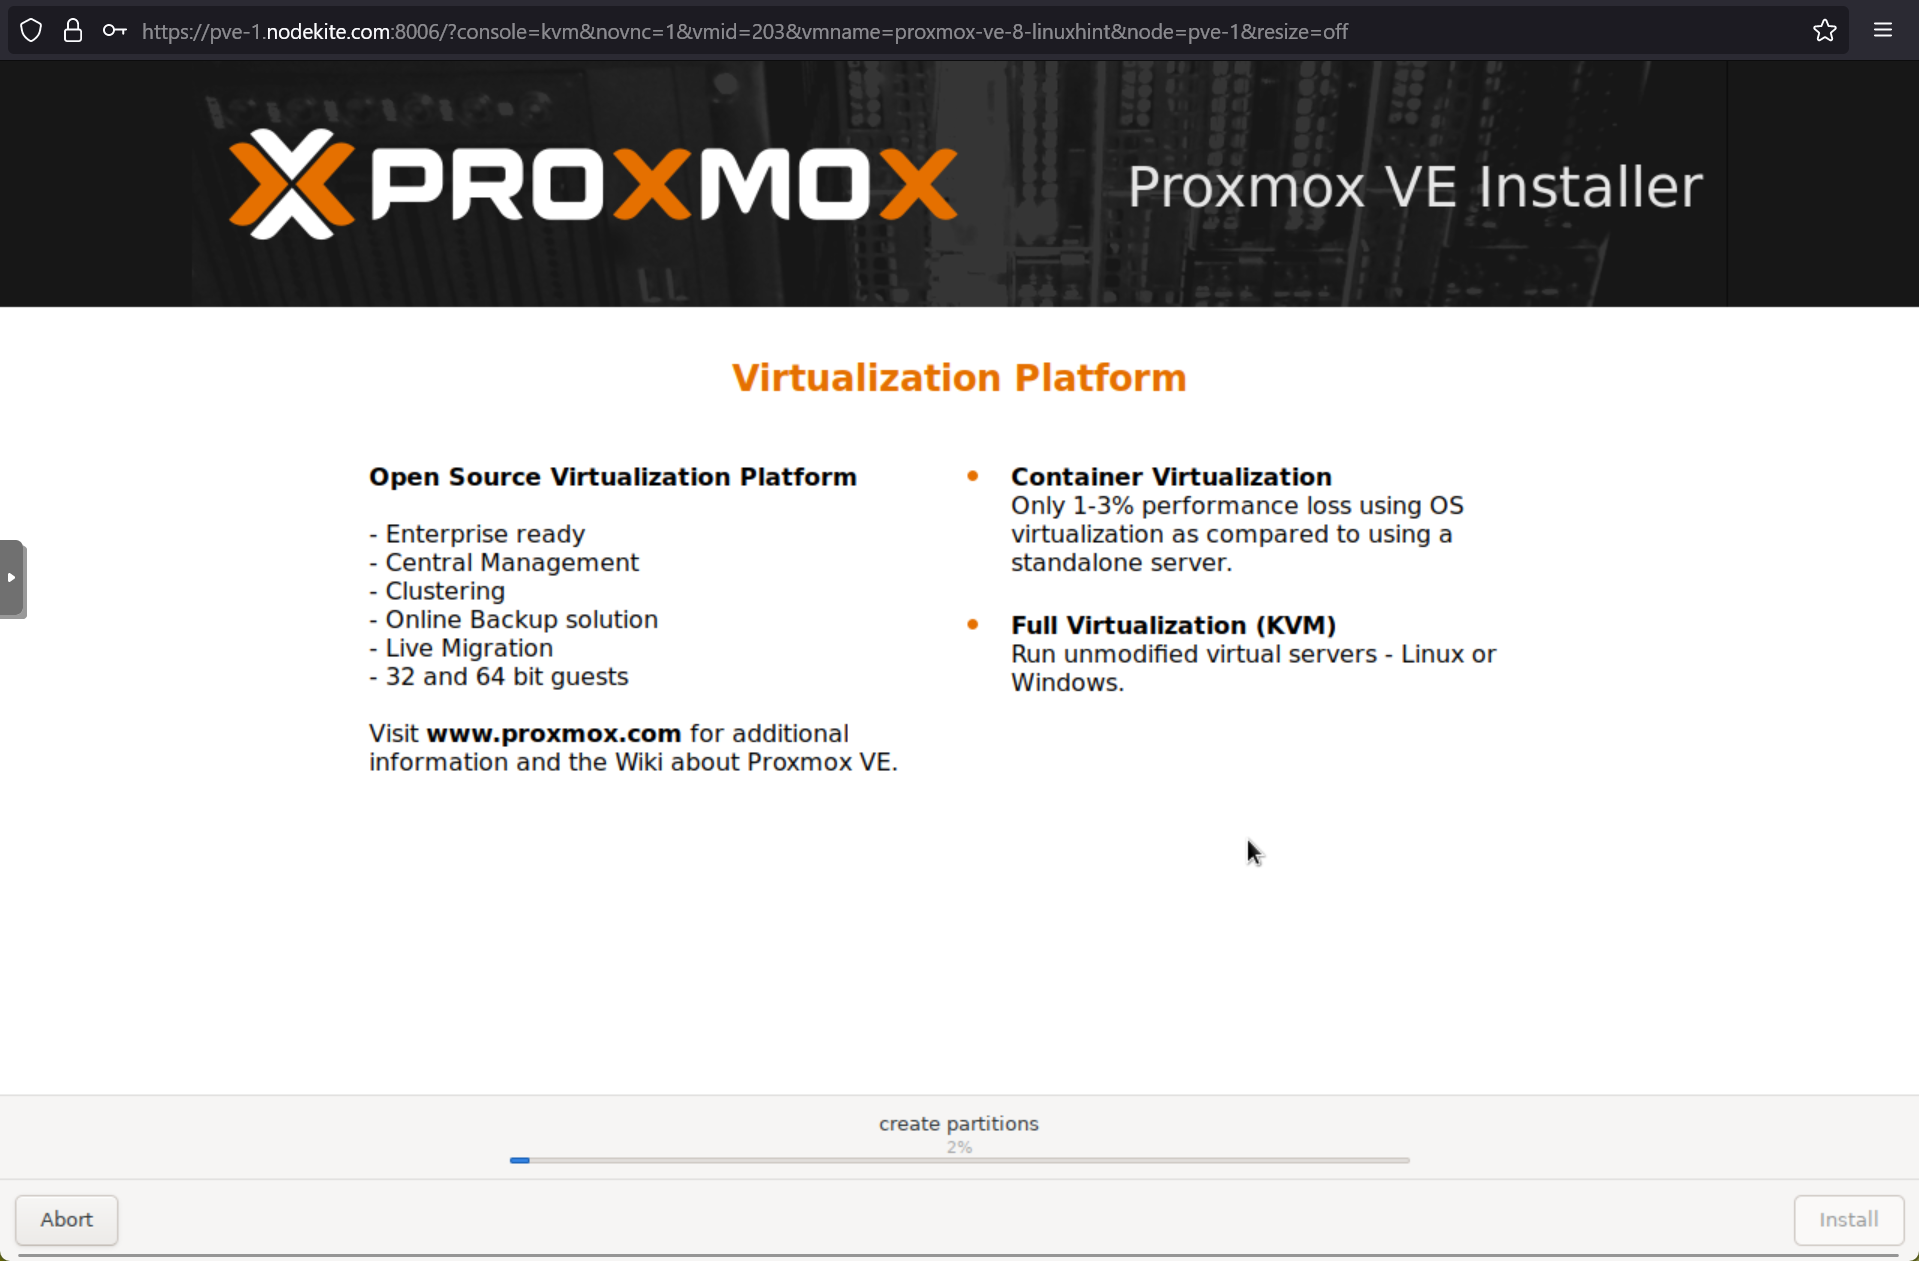
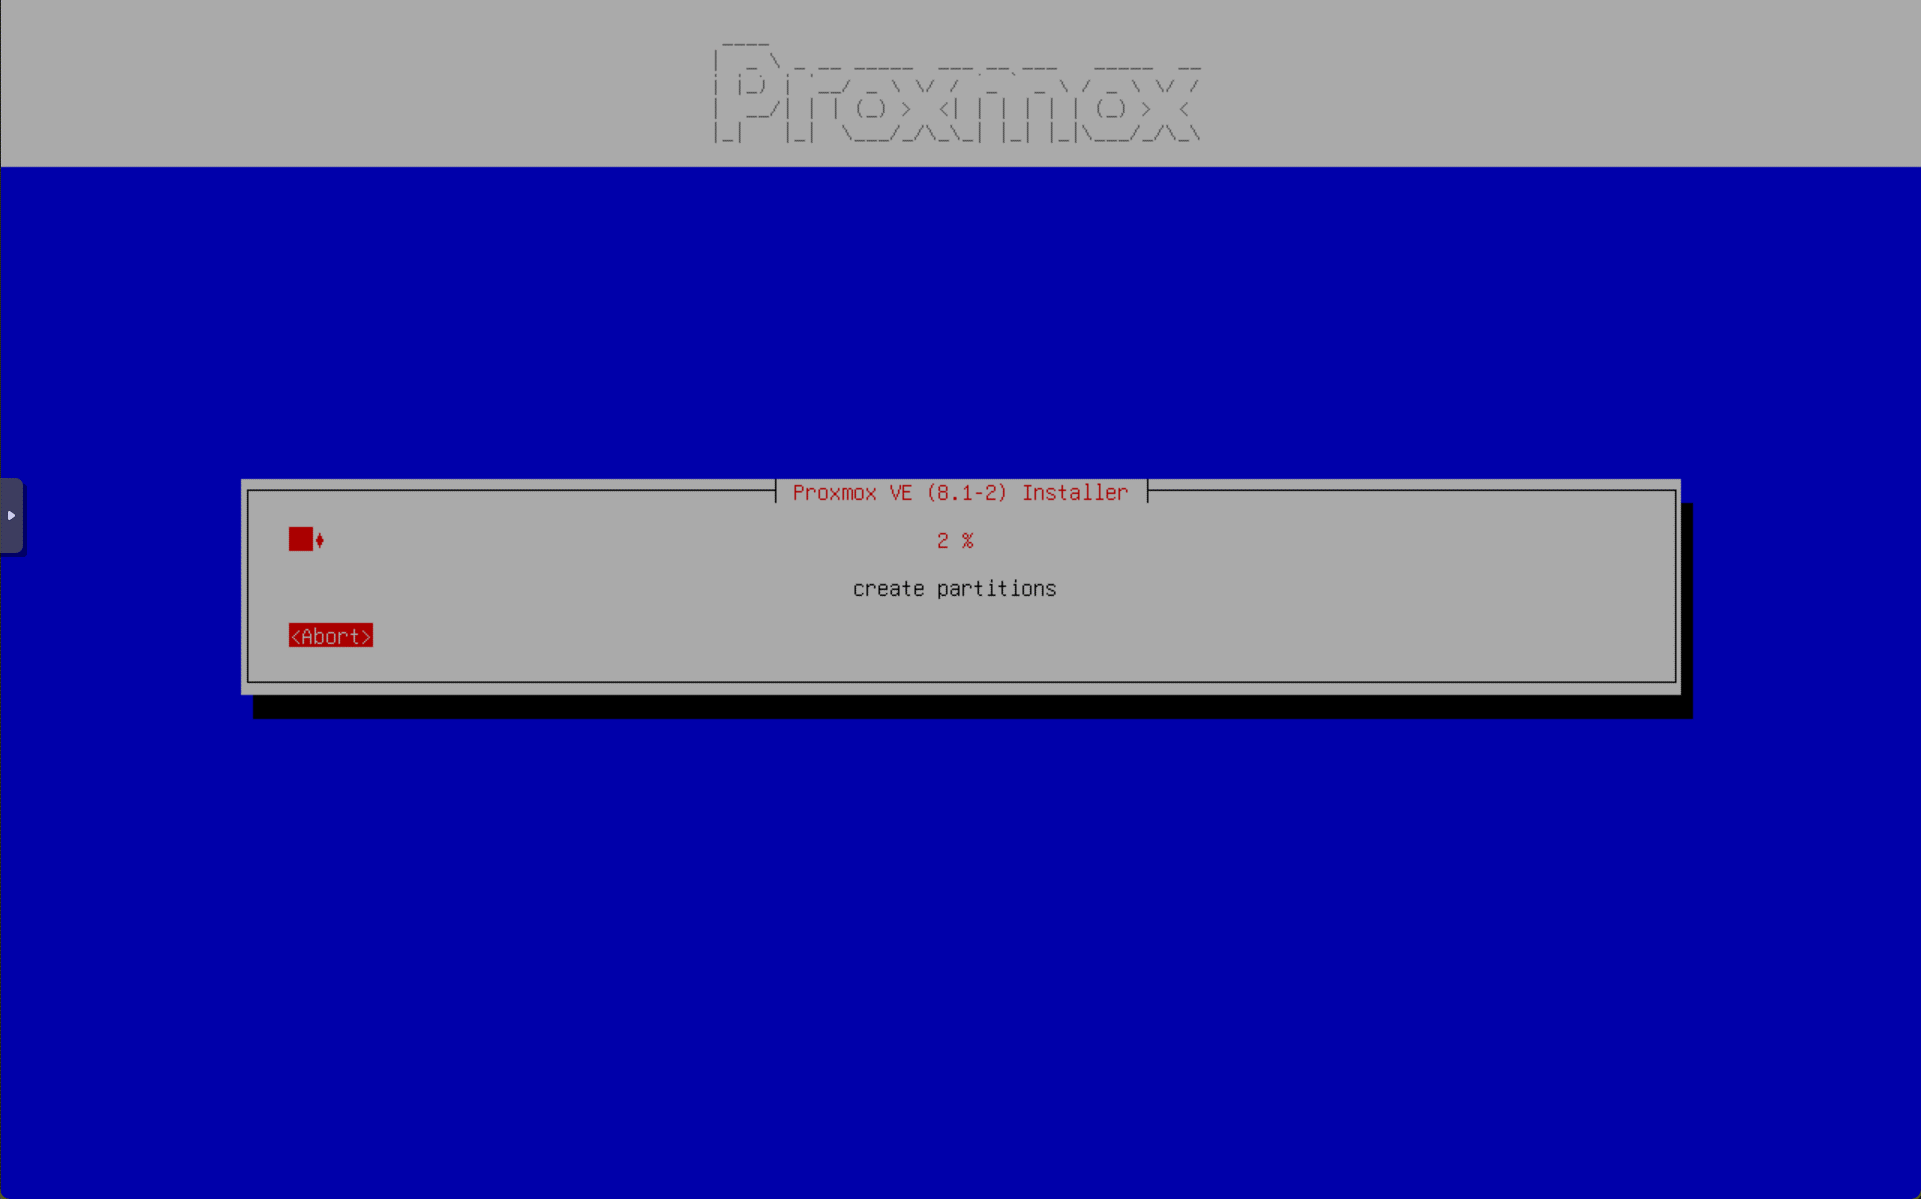
The Proxmox VE installation should start. It will take a while to complete.
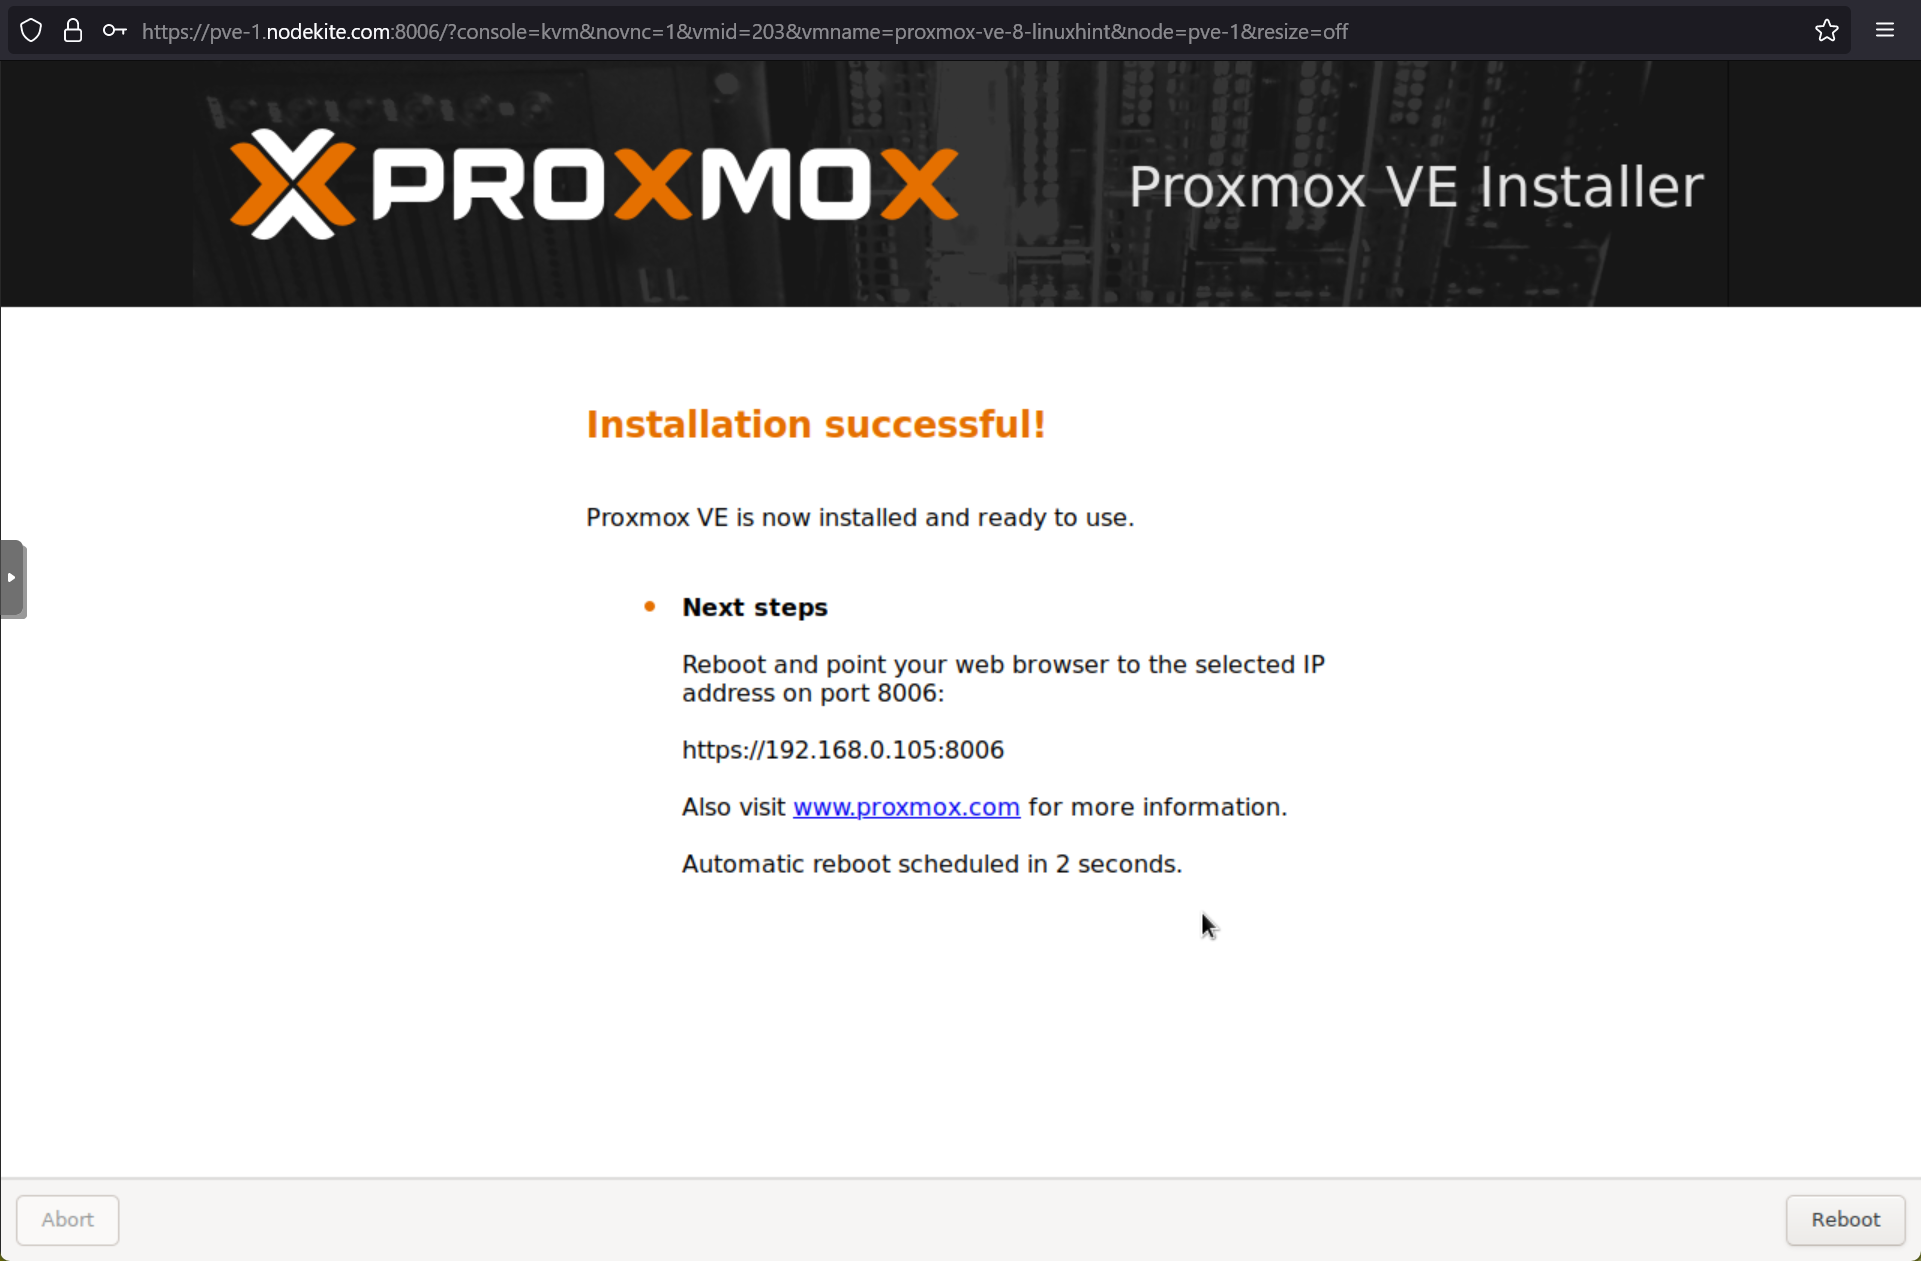
Once the Proxmox VE installation is complete, you will see the following window. Your server should restart within a few seconds.
On the next boot, you will see the Proxmox VE GRUB boot menu.
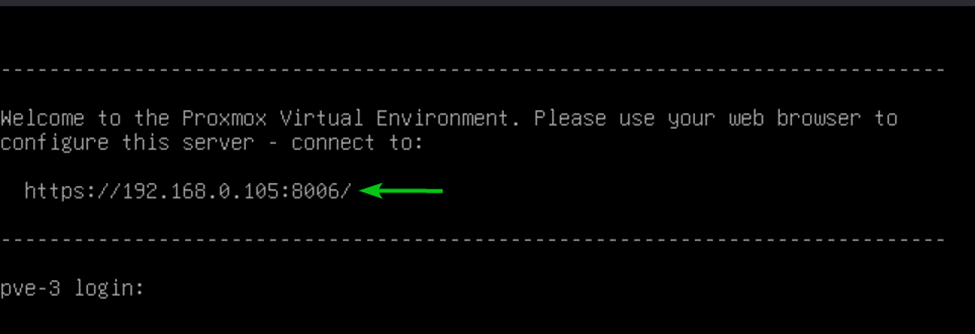
Once Proxmox VE is booted, you will see the Proxmox VE command-line login prompt.
You will also see the access URL of the Proxmox VE web-based management UI.

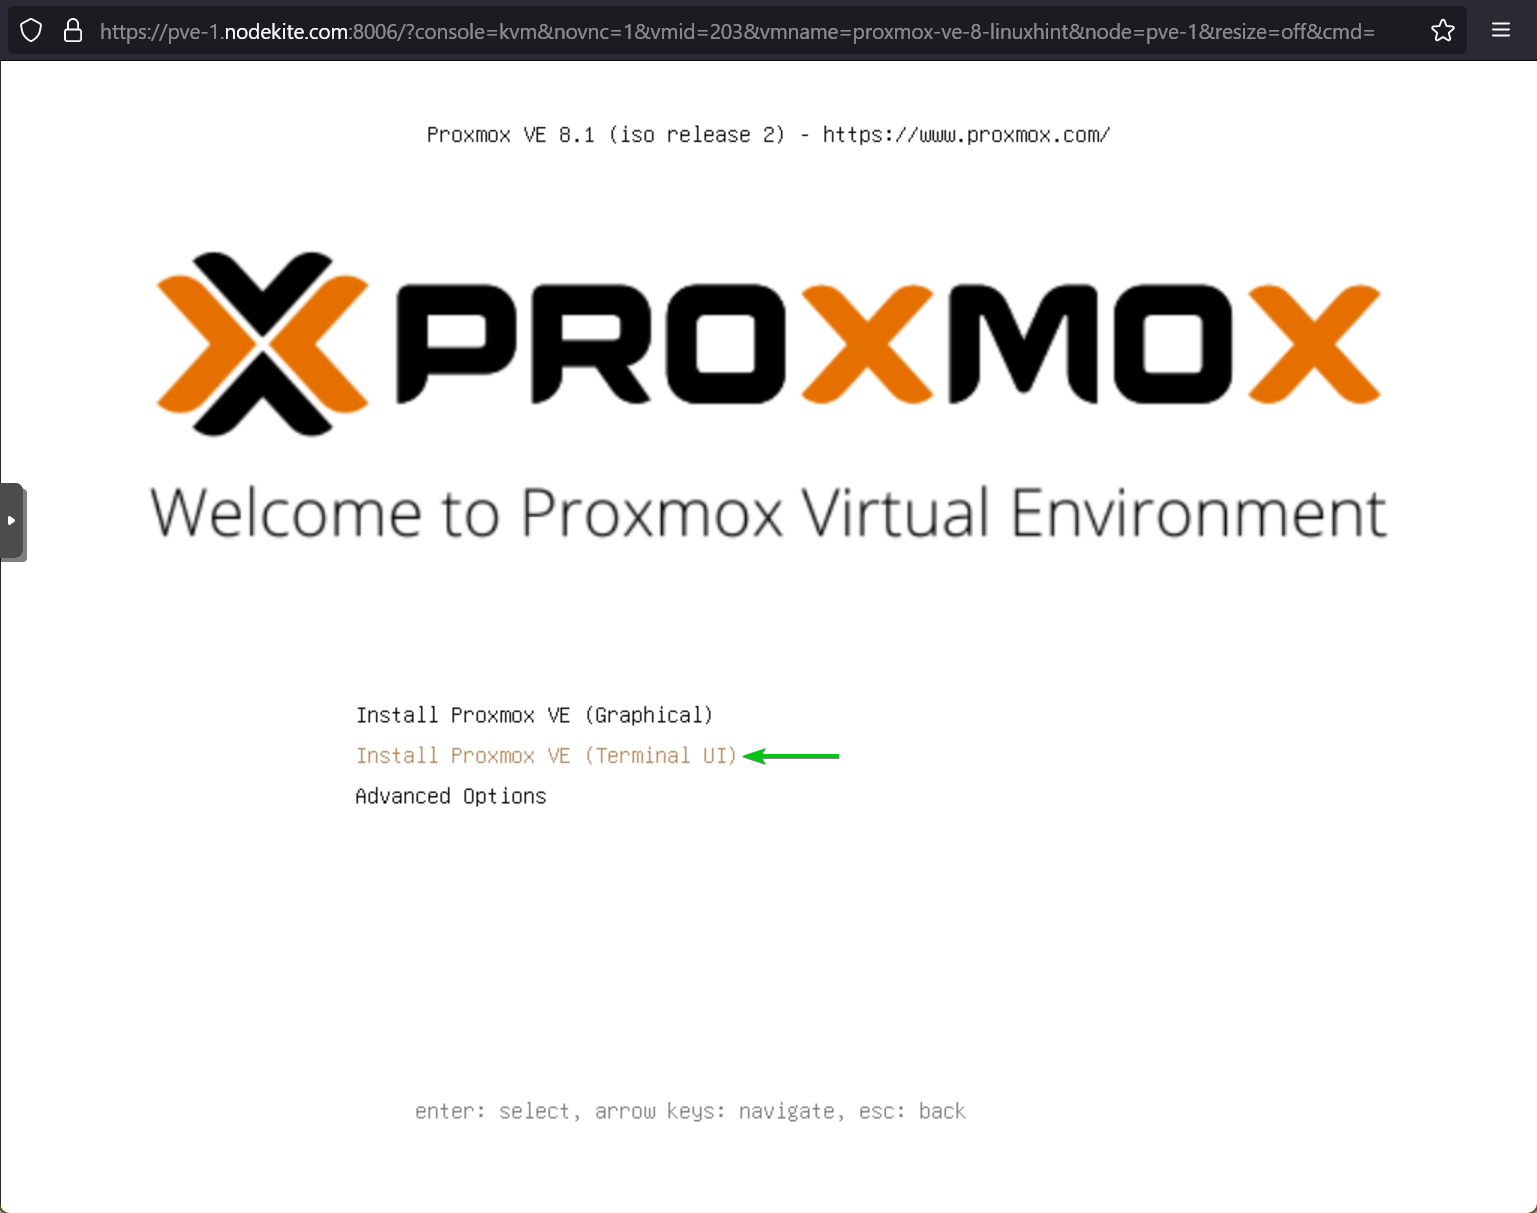
Installing Proxmox VE 8 using Terminal UI
In some hardware, the Proxmox VE graphical installer may not work. In that case, you can always use the Proxmox VE terminal installer. You will find the same options in the Proxmox VE terminal installer as in the graphical installer. So, you should not have any problems installing Proxmox VE on your server using the terminal installer.
To use the Proxmox VE terminal installer, select Install Proxmox VE (Terminal UI) from the Proxmox VE GRUB boot menu and press <Enter>.
Select <I agree> and press <Enter>.

To install Proxmox VE on a single disk, select an HDD/SSD from the Target harddisk section, select <Next>, and press <Enter>.

For advanced disk configuration or ZFS/BTRFS RAID setup, select <Advanced options> and press <Enter>.

You will find the same disk configuration options as in the Proxmox VE graphical installer. I have already discussed all of them in the Proxmox VE Graphical UI installation section. Make sure to check it out for detailed information on all of those disk configuration options.
Once you’ve configured the disk/disks for the Proxmox VE installation, select <Ok> and press <Enter>.
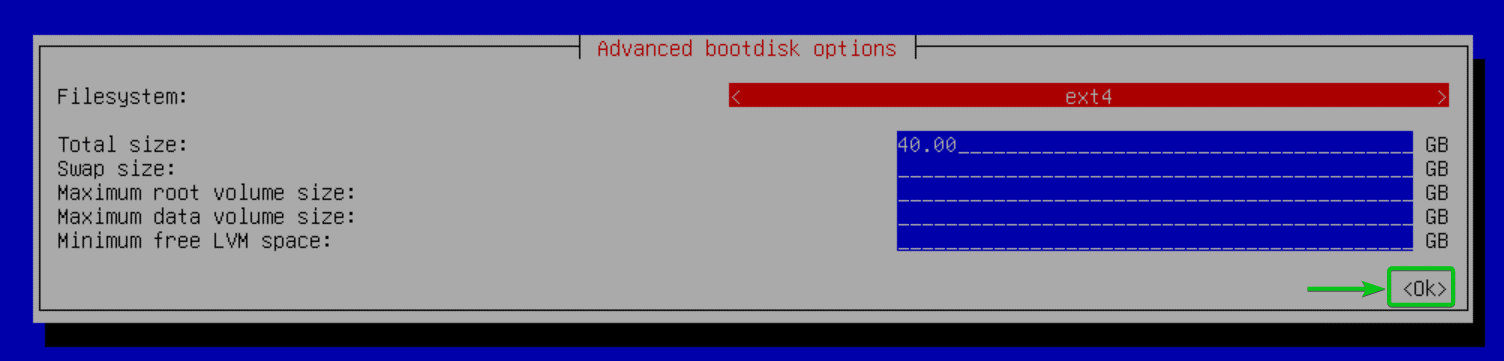
Once you’re done with advanced disk configuration for your Proxmox VE installation, select <Next> and press <Enter>.

Select your country, timezone, and keyboard layout.
Once you’re done, select <Next> and press <Enter>.

Type in your Proxmox VE root password and email address.
Once you’re done, select <Next> and press <Enter>.

Configure the management network interface for Proxmox VE, select <Next>, and press <Enter>.
An overview of your Proxmox VE installation should be displayed. If everything looks good, select <Install> and press <Enter> to start the Proxmox VE installation.
NOTE: If anything seems wrong or you want to change certain information, you can always select <Previous> and press <Enter> to go back and fix it. So, make sure to check everything before installing Proxmox VE.
The Proxmox VE installation should start. It will take a while to complete.
Once the Proxmox VE installation is complete, you will see the following window. Your server should restart within a few seconds.

Once Proxmox VE is booted, you will see the Proxmox VE command-line login prompt.
You will also see the access URL of the Proxmox VE web-based management UI.
Accessing Proxmox VE 8 Management UI from a Web Browser
To access the Proxmox VE web-based management UI from a web browser, you need a modern web browser (i.e. Google Chrome, Microsoft Edge, Mozilla Firefox, Opera, Apple Safari).
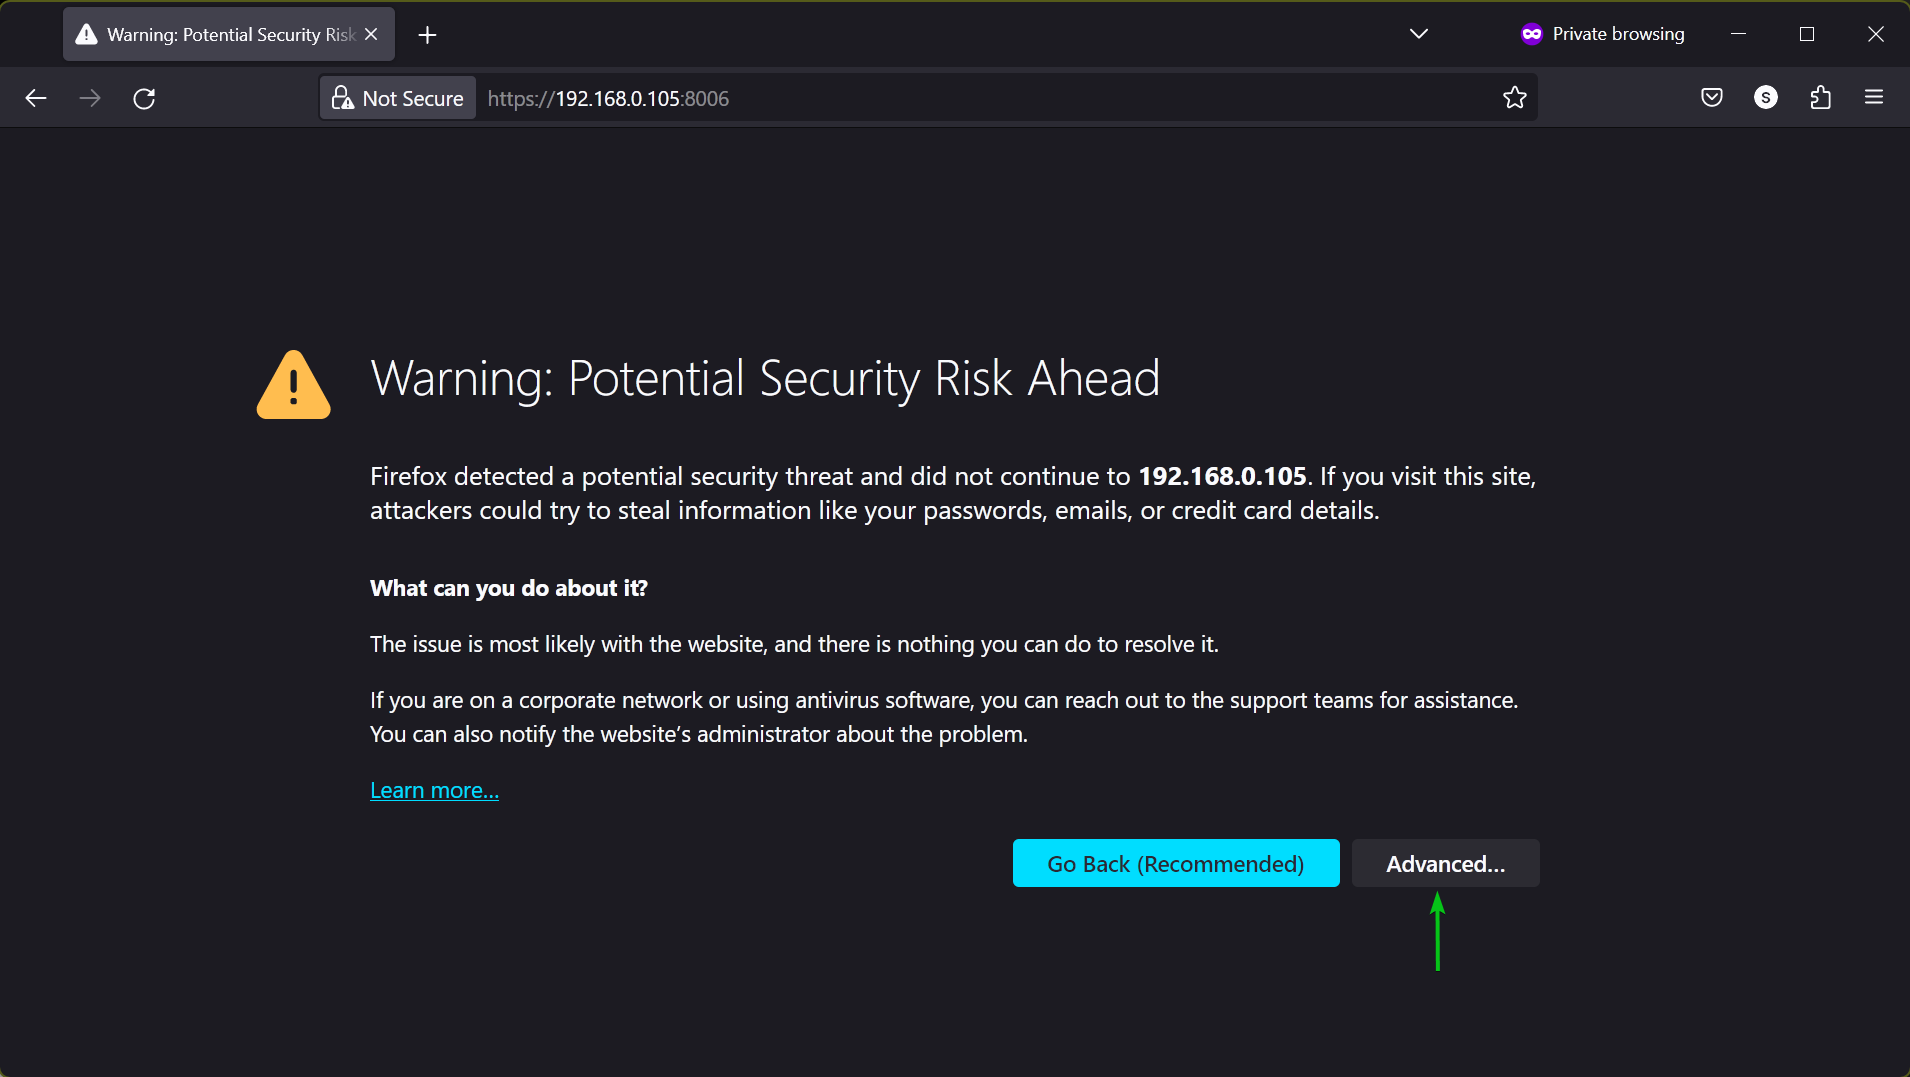
Open a web browser of your choice and visit the Proxmox VE access URL (i.e. https://192.168.0.105:8006) from the web browser.
By default, Proxmox VE uses a self-signed SSL certificate which your web browser will not trust. So, you will see a similar warning.
To accept the Proxmox VE self-signed SSL certificate, click on Advanced.
Then, click on Accept the Risk and Continue.

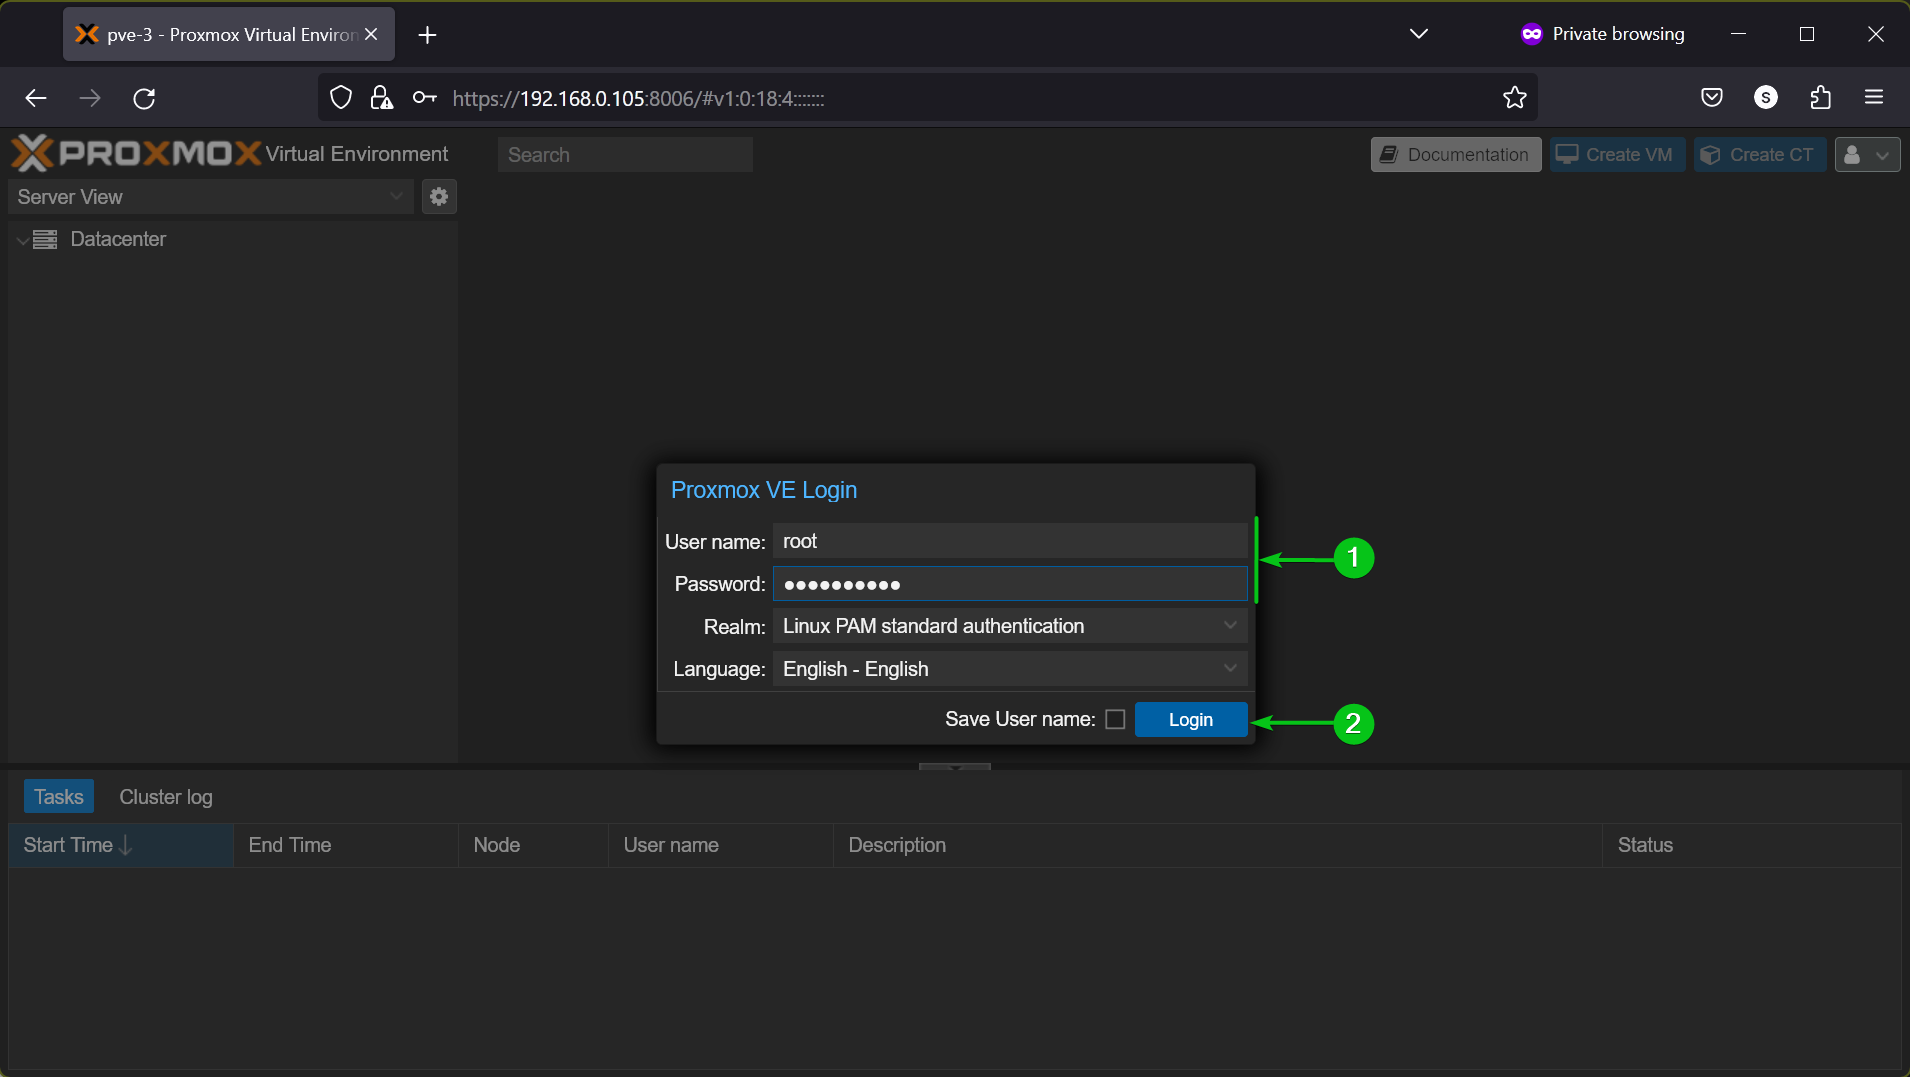
You will see the Proxmox VE login prompt.
Type in your Proxmox VE login username (root) and password[1] and click on Login[2].
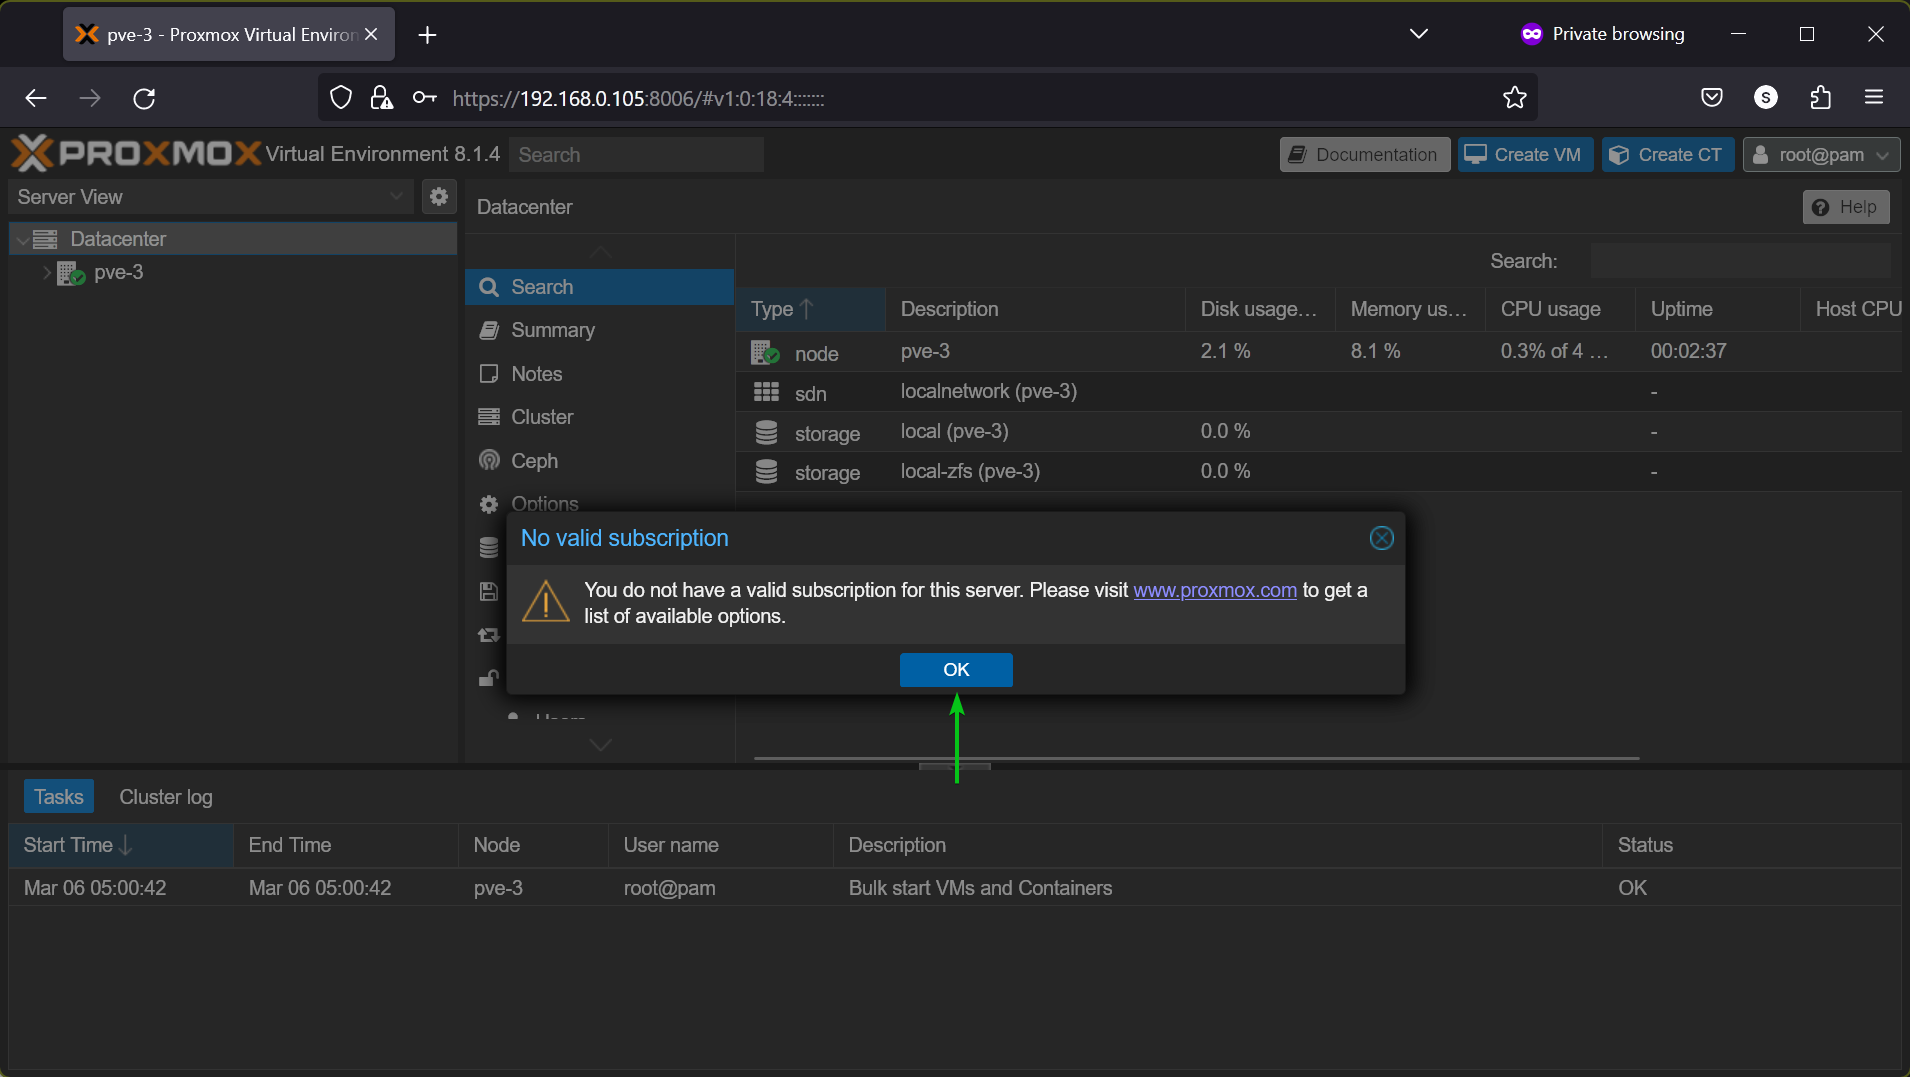
You should be logged in to your Proxmox VE web-management UI.
As you’re using the free version of Proxmox VE, you will see a No valid subscription warning message every time you log in to Proxmox VE. To ignore this warning and continue using Proxmox VE for free, just click on OK.
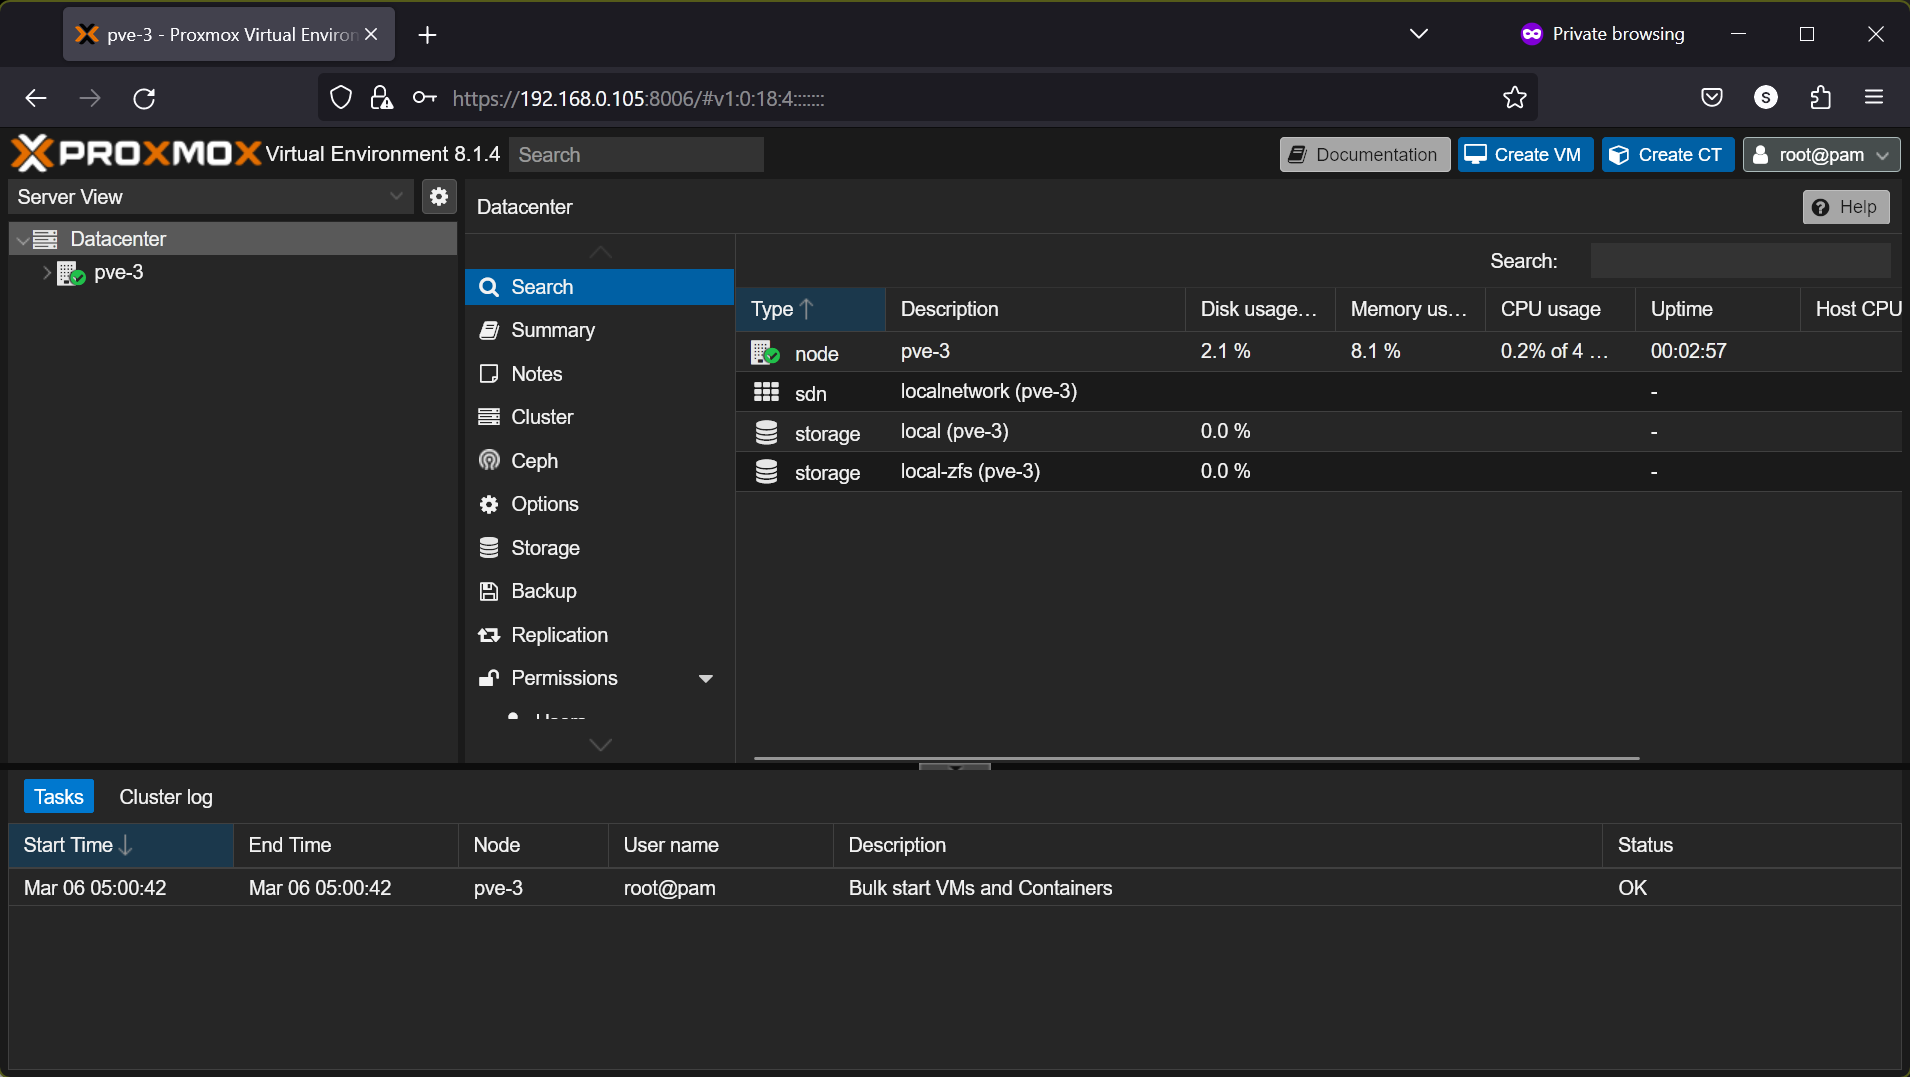
The No valid subscription warning should be gone. Proxmox VE is now ready to use.
Enabling Proxmox VE Community Package Repositories
If you want to use Proxmox VE for free, after installing Proxmox VE on your server, one of the first things you want to do is disable the Proxmox VE enterprise package repositories and enable the Proxmox VE community package repositories. This way, you can get access to the Proxmox VE package repositories for free and keep your Proxmox VE server up-to-date.
To learn how to enable the Proxmox VE community package repositories, read this article.
Keeping Proxmox VE Up-to-date
After installing Proxmox VE on your server, you should check if new updates are available for your Proxmox VE server. If new updates are available, you should install them as it will improve the performance, stability, and security of your Proxmox VE server.
For more information on keeping your Proxmox VE server up-to-date, read this article.
Conclusion
In this article, I have shown you how to install Proxmox VE on your server using the Graphical installer UI and the Terminal installer UI. The Proxmox VE Terminal installer UI installer is for systems that don’t support the Proxmox VE Graphical installer UI. So, if you’re having difficulty with the Proxmox VE Graphical installer UI, the Terminal installer UI will still work and save your day. I have also discussed and demonstrated different disk/storage configuration methods for Proxmox VE as well as configuring ZFS RAID for Proxmox VE and installing Proxmox VE on the ZFS RAID as well.
References
Source: linuxhint.com