How to Speed Up Windows: 12 Tips
There is no doubt that Windows 10 is super fast as long as it is running on compatible devices. It is way much better than the previous edition of Windows. Whenever the user installs the new Windows, its speed remains quite good. But, with the passage of time, Windows starts to behave slowly. It happens due to various reasons including, too many programs open, viruses, insufficient RAM, low storage space, outdated Windows, or
How to Speed Up Windows: 10 Tips?
These are the tips, by following which users can speed up Windows:
- Tip 1: Update the Windows
- Tip 2: Restart your PC
- Tip 3: Disable Startup Programs
- Tip 4: Perform Disk Cleanup
- Tip 5: Remove Unnecessary Software
- Tip 6: Change the Appearance in Performance Options
- Tip 7: Pause OneDrive Syncing
- Tip 8: Check for Malicious Viruses and Spyware
- Tip 9: Switch from Power Mode to Best Performance
- Tip 10: Run System Maintenance
- Tip 11: Turn Off Search Indexing
- Tip 12: Defrag the Hard Disk
- Conclusion
Tip 1: Update the Windows
Keeping Windows up to date, not only makes the system secure but, also makes it fast. To update the Windows, follow the steps provided below.
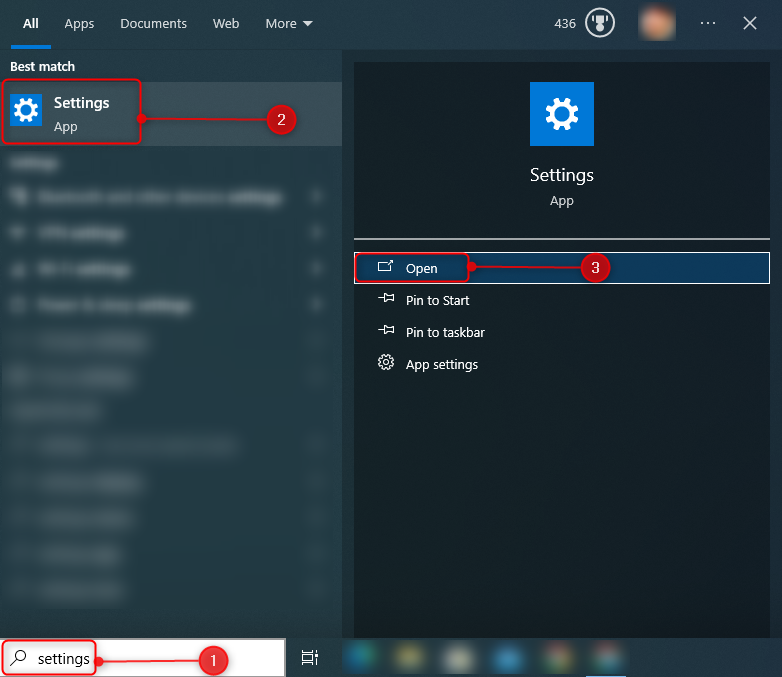
Step 1: Open Windows Settings
First, launch the “Settings” app:
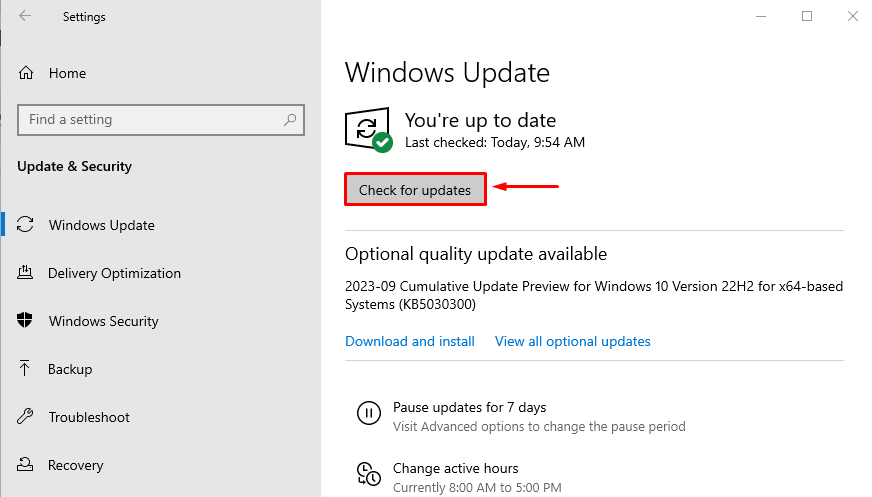
Step 2: Open “Updates & Security” Settings
Hit the highlighted section to launch the “Update & Security” settings:

Step 3: Update Windows
To update the Windows simply hit the highlighted button. It will check the updates and update the Windows:
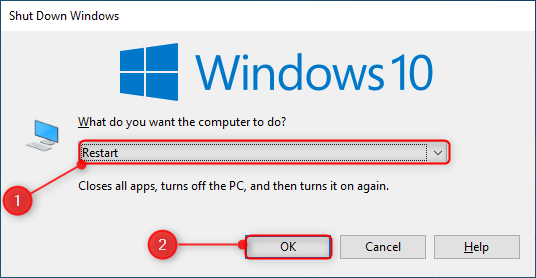
Tip 2: Restart your PC
Glitches in the Windows cause the system to slow down. However, knowing about all these glitches could be a troublesome process. However, all these glitches can be killed by restarting the Windows to speed up the Windows.
To restart the Windows, first, press the “Alt+F4” shortcut key to open the “Shut Down Windows” pop-up. Then, choose “Restart” from the drop-down section and trigger the “OK” button to restart:
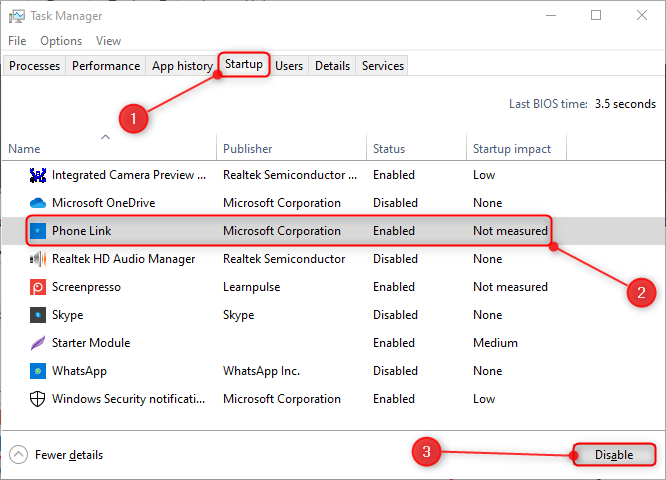
Tip 3: Disable Startup Programs
Startup programs are the ones that start, whenever the Windows boots up. These startup programs cause the Windows to slow down. Disabling the startup programs will ease up the processor and will result in speeding up the Windows.
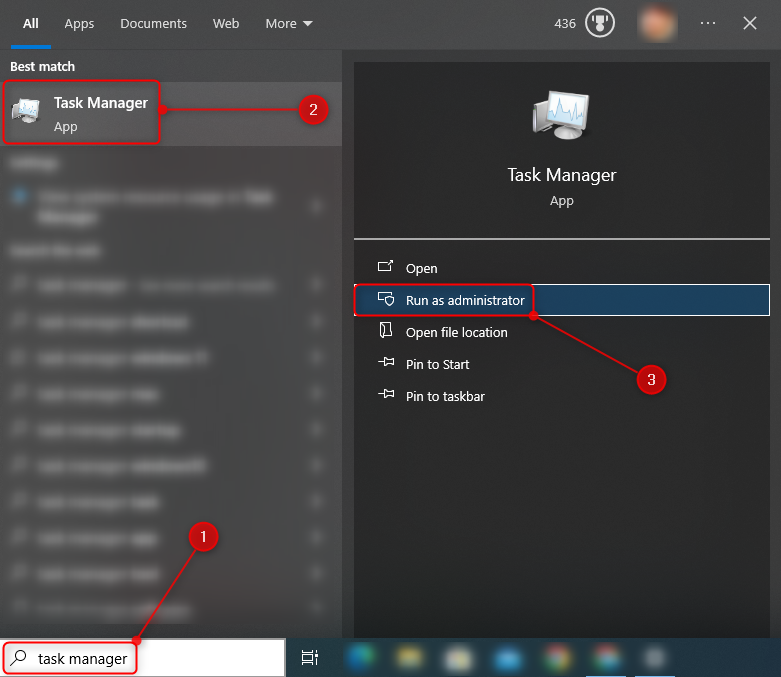
Step 1: Launch Task Manager App
First, open the “Task Manager” app:
Step 2: Disable the Startup Program
Move to the “Startup” tab, choose the app, and hit the “Disable” option to disable the app:
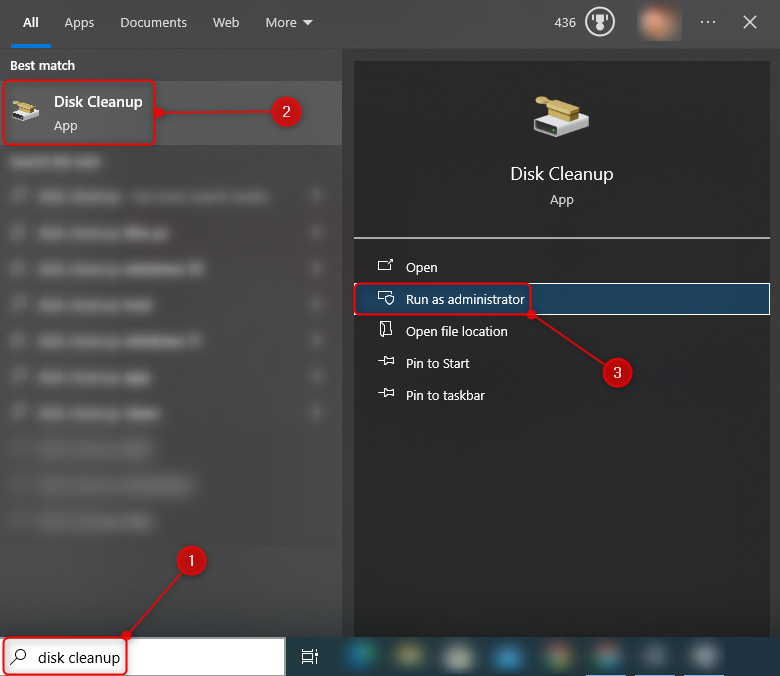
Tip 4: Perform Disk Cleanup
The program “Disk Cleanup” is used in the system to remove unnecessary files and cache data. Clearing the unnecessary files and cache data will speed up the Windows.
Step 1: Launch the Disk Cleanup App
Move to the Start menu, search, and open the “Disk Cleanup” app as an administrator:
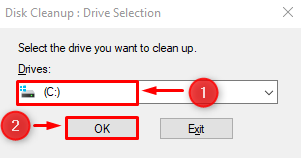
Step 2: Select the Drive
Select the drive to perform disk cleanup and then hit the “OK” button:
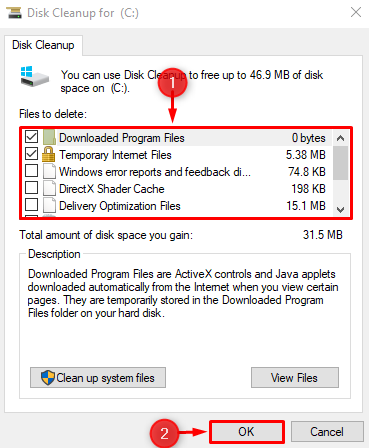
Step 3: Select the Files to Delete
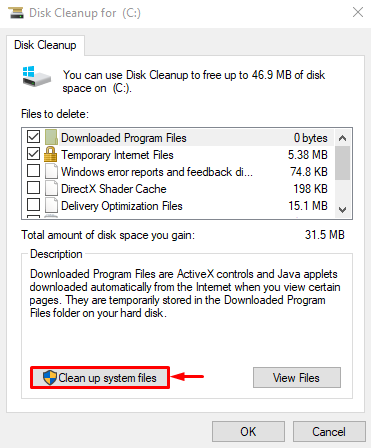
Check the files to delete and trigger the “OK” button:
Step 4: Clean up System Files
Click on the “Clean up system files” to begin the process of cleaning the system files:
Select the drive:

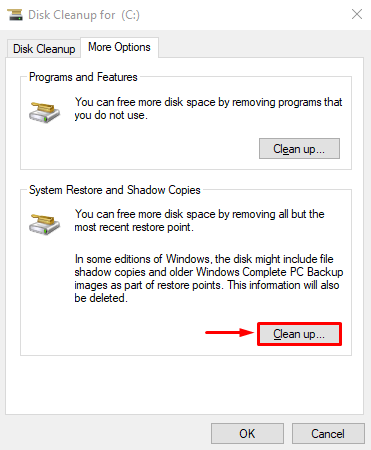
Move to the “More Options” tab, and click on the highlighted button to perform the disk cleanup:
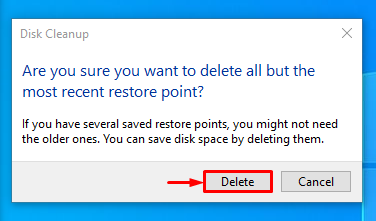
Click on the “Delete” button to finish the cleanup process:
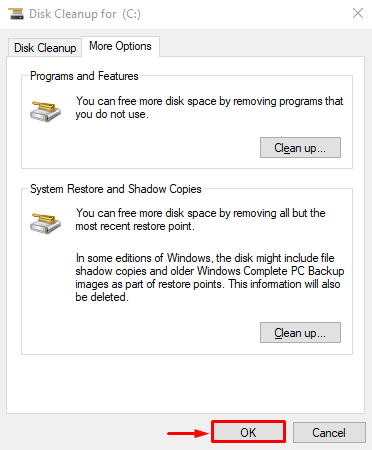
Hit the “OK” button to close the window:
Tip 5: Remove Unnecessary Software
Installed Software that is not used on a daily basis needs to be uninstalled to free up the space and increase the Windows speed.
Step 1: Launch the Control Panel App
First, open the “Control Panel” app:
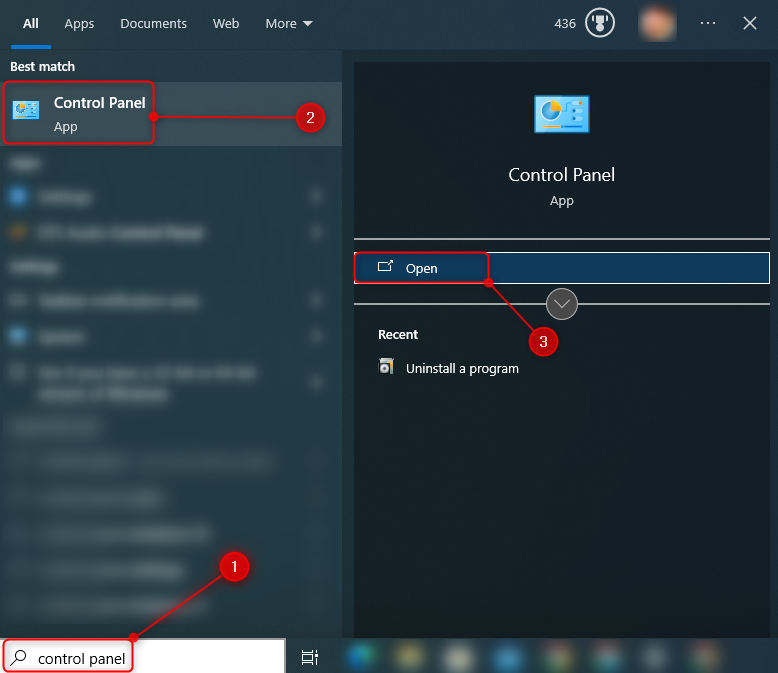
Step 2: Open the “Programs and Features” Window
Hit the “Uninstall a program” button to open the “Programs and Features” Window:
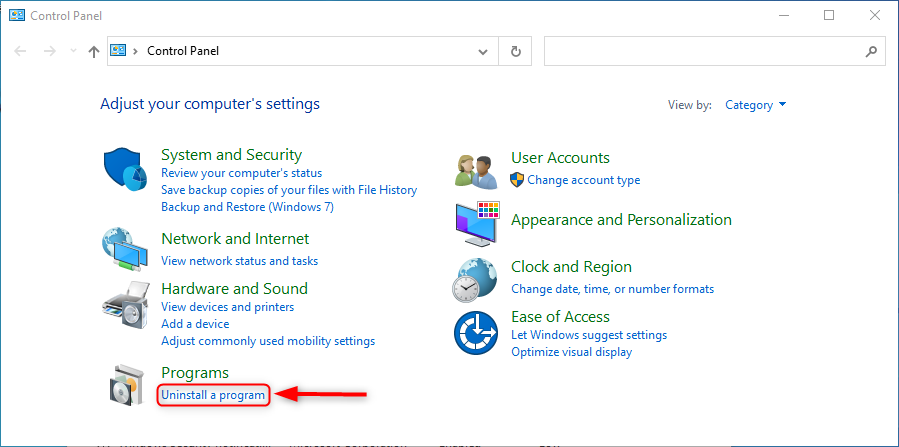
Step 3: Uninstall the Program
Choose the program and hit the “Uninstall” button:
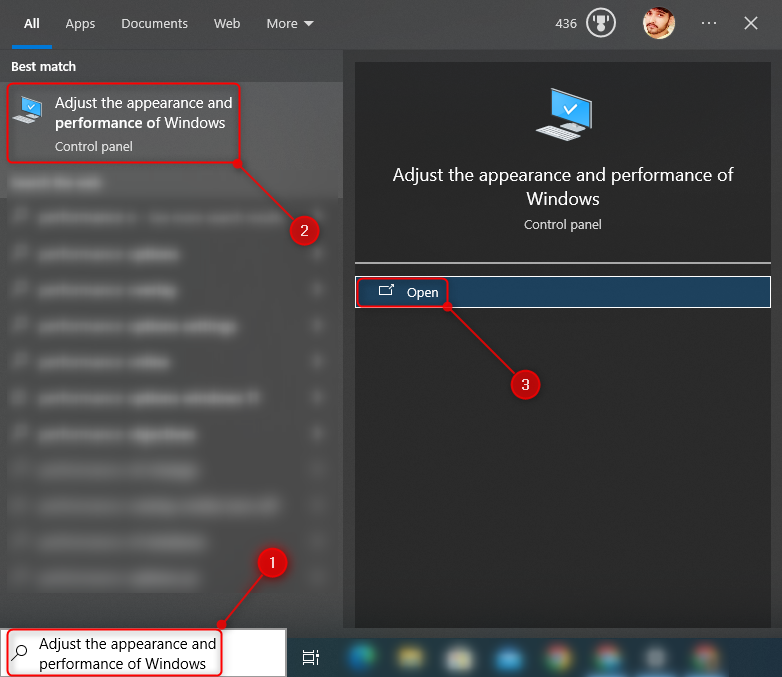
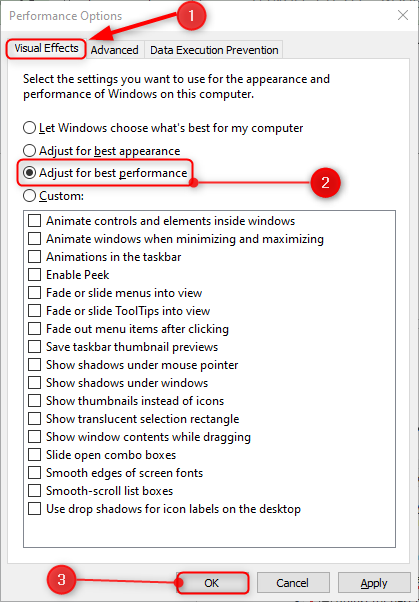
Tip 6: Change the Appearance in Performance Options
Reducing the visual effects will help Windows to speed up. For that cause, check the guide provided below.
Step 1: Launch the “View advanced system settings” Settings
Move to the Start menu, and open the “View advanced system settings” control panel settings to open the “Performance Options” window:
Step 2: Adjust Visual Effects for Best Performace
Move to the “Visual Effects” tab, select the second highlighted option, and hit “OK”:
Tip 7: Pause OneDrive Syncing
Windows save the files in the local drive. However, users can choose to save the files on OneDrive. Saving the files on OneDrive has an advantage over local drives. In case the local drive is damaged, then the user will lose the data, but if it is saved on OneDrive, then that data can be retrieved from anywhere. OneDrive uses the sync feature to upload the files. But, this feature can affect the Windows performance, however, pausing this feature can speed up Windows. To pause the OneDrive syncing, follow the steps given below.
- First, find the “OneDrive” icon in the right bottom corner and click on it to open a menu.
- Then, click on the “Help & Settings” icon to open further menu.
- After that select the “Pause syncing” button and then select the duration for which you want to pause the syncing:

Tip 8: Check for Malicious Viruses and Spyware
Suspicious viruses and software can sometimes slow down Windows. For that cause, it is necessary to run a system scan.
Step 1: Open “Virus & threat protection” System Settings
Move to the Start menu and open “Virus & threat protection” system settings:
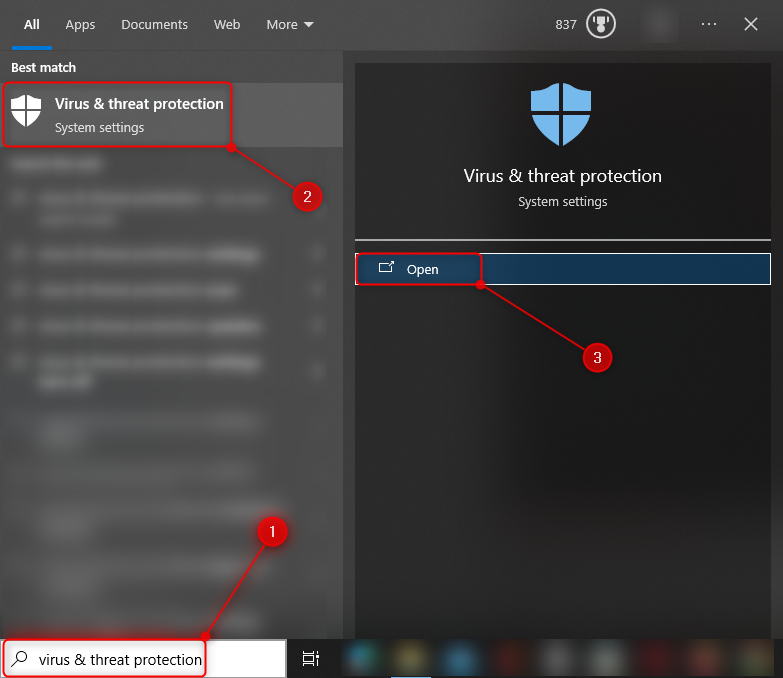
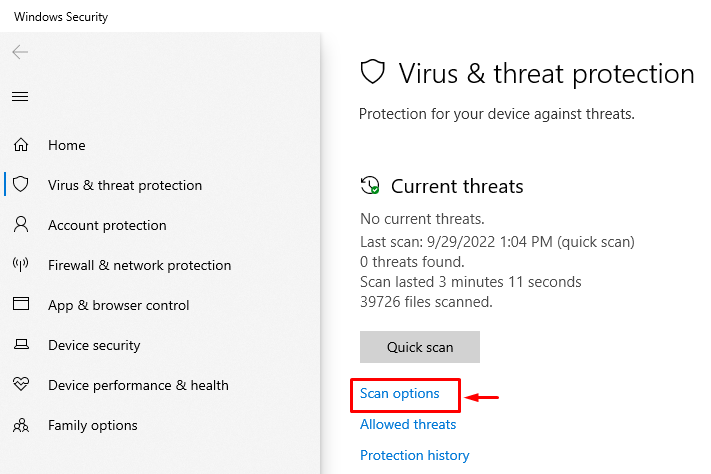
Step 2: Open Scan Options
Click on the highlighted option to launch the “Scan options” window:
Step 3: Start the System Scan
Select the “Full scan” option and then hit the “OK” button:
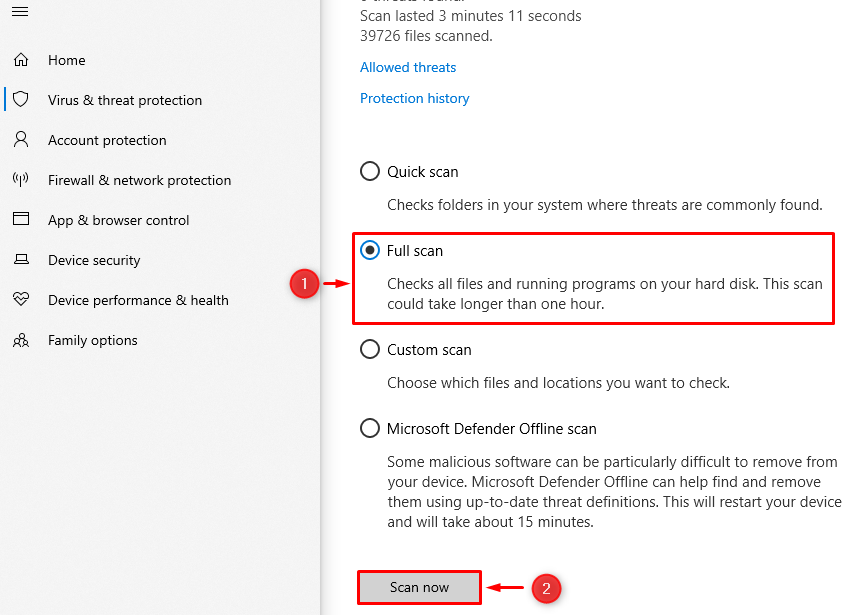
It can be observed that the system scan has started to check and fix the malicious viruses:

Tip 9: Switch from Power Mode to Best Performance
Sometimes, switching to “High performance” mode will increase the Windows speed. So, to enable the “High performance” power plan, view the steps given below.
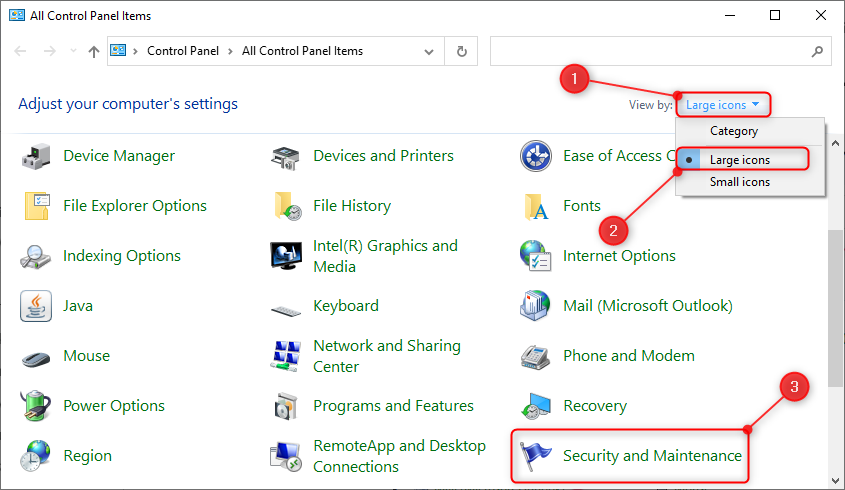
Step 1: Launch “Power Options” Settings
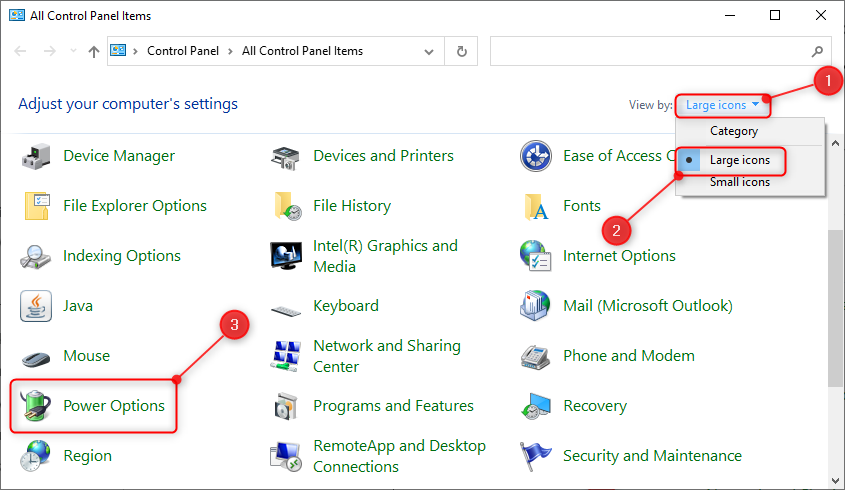
- First, open the “Control Panel” app via the Start menu.
- Click on the “View by” button and select the “Large icons” option.
- Locate and click on the “Power Options” settings to open:
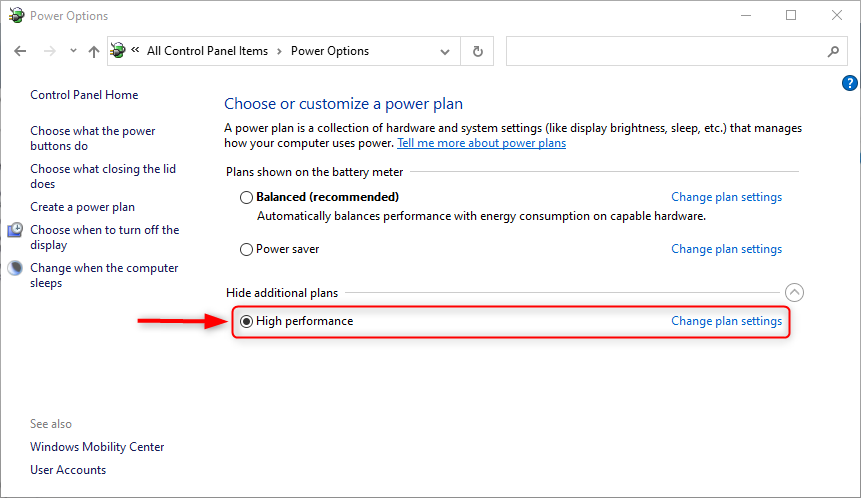
Step 2: Switch to “High Performance” Power Plan
Locate the “High performance” power plan and select to enable it:
Tip 10: Run System Maintenance
Running the system maintenance will surely fix the glitches in Windows. Which will ultimately speed up Windows 10.
Step 1: Launch “Security and Maintenance” Settings
- First, open the “Control Panel” app via the Start menu.
- Click on the “View by” button and select the “Large icons” option.
- Locate and click on the “Security and Maintenance” settings to open:
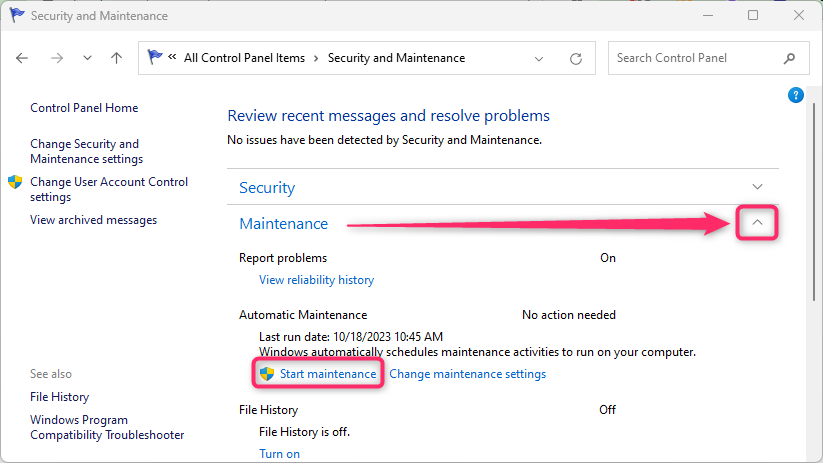
Step 2: Run System Maintenance
Expand the “Maintenace” section by clicking on the highlighted arrow. Then, click on the “Start maintenance” button to run the system maintenance:
Tip 11: Turn Off Search Indexing
Windows 10 can be made quick by simply turning off the search indexing. For that reason, a comprehensive stepwise guide is provided below.
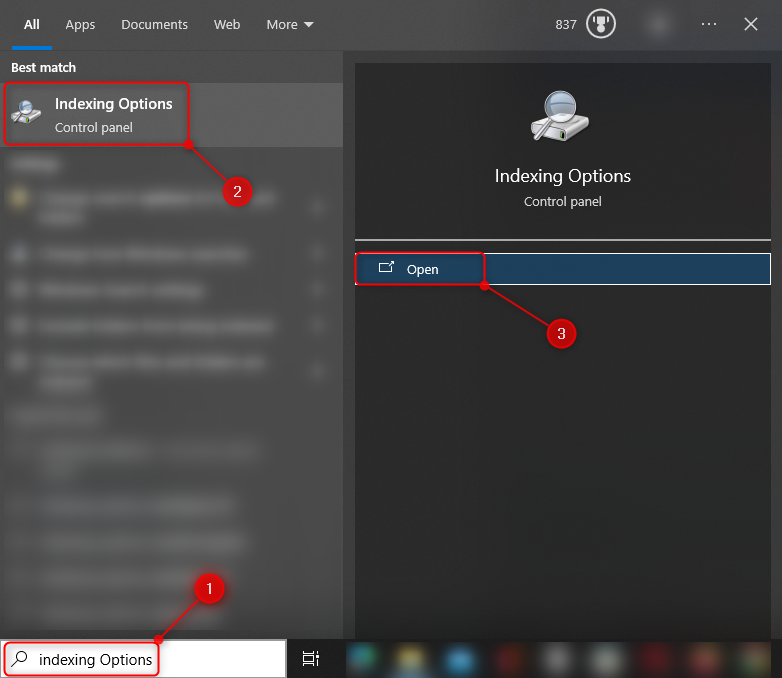
Step 1: Launch “Indexing Options” Control Panel Settings
Move to the Start menu, type “Indexing Options” and open it:
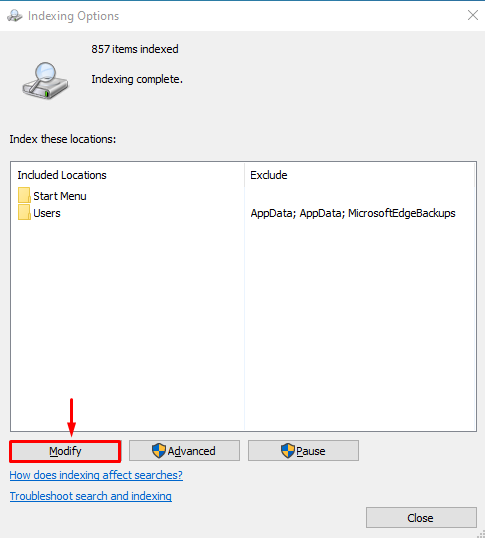
Step 2: Open the “Indexed Locations” Window
Click on the “Modify” button to launch the “Indexed Locations” window to modify indexing locations:
Step 3: Disable Indexed Locations
Un-check all the given locations and hit the “OK” button to turn off search indexing:

Tip 12: Defrag the Hard Disk
It is highly possible that performing the defragment on the hard disk may speed up the the Windows. To perform the defragment on the hard disk, check the stepwise guide below.
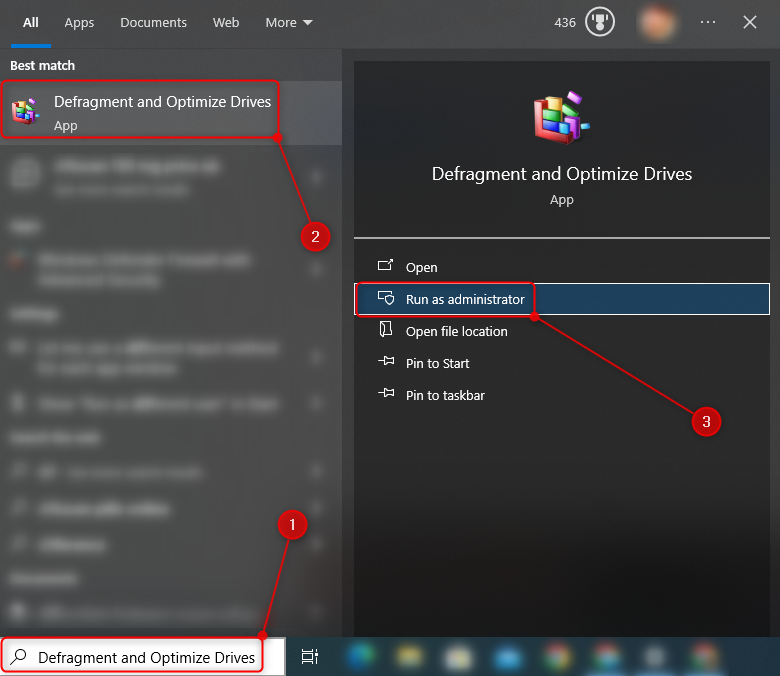
Step 1: Launch the “Defragment and Optimize Drivers” App
First, open the “Defragment and Optimize Drivers” app as an administrator:
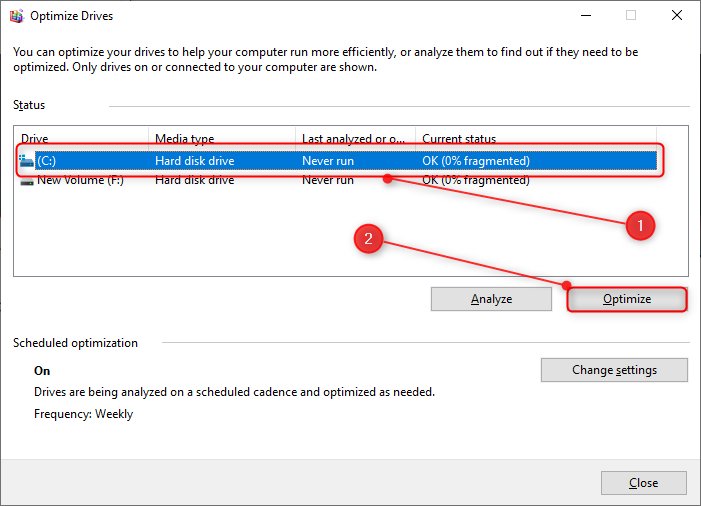
Step 2: Perform Defragment on the Drive
Choose the drive, and hit the “Optimize” option to perform the defragment:
Conclusion
Windows can be speed up by removing the malicious virus, unnecessary programs, and by disabling startup programs. Additionally, keeping Windows up to date, performing disk cleanup, running system maintenance, and pausing OneDrive sync can help to speed up Windows. To speed up the Windows practically, read the guide provided above.
Source: linuxhint.com