How to Shrink, Move or Expand System Partition in Ubuntu 24.04
![]()
This is a beginners guide shows how to decrease, move, and/or increase file/system partition in Ubuntu 24.04 LTS.
Sometimes you need to shrink a partition to free up some un-allocated disk space for other use. Or Ubuntu system is a bit small, that you need to increase its size for long time use.
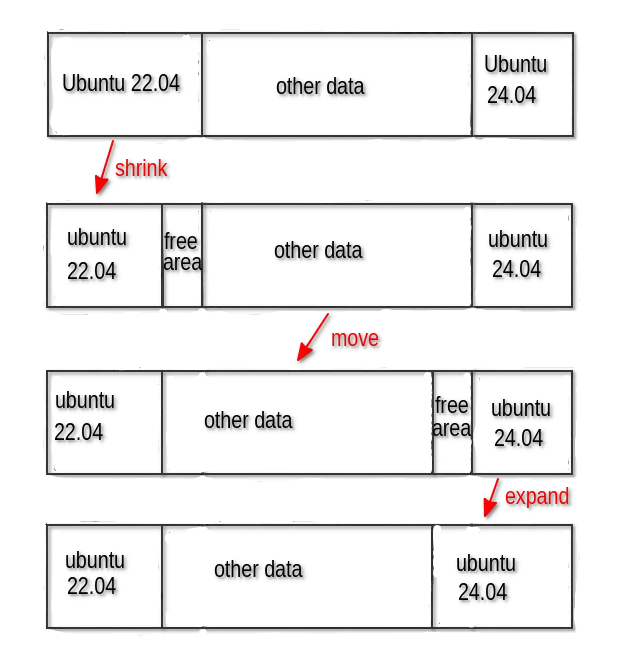
In my case, I want to shrink the Ubuntu 22.04 partition to free up some space, then use the free space to increase the dual-boot Ubuntu 24.04 partition that’s a bit small for me. There’s another partition (contains personal data) sits in between the 2 Ubuntu system, so I also need to move it before being able to expand the 24.04 system.
NOTE 1: This tutorial is totally written for Ubuntu Desktop without any Linux command. All partitions are not encrypted.
NOTE 2: Everything’s done successfully without issue in my case. But, it’s still HIGHLY recommended to backup important data, just in case of any interruption!
1. Shrink via Ubuntu’s Built-in Tool
It’s quite easy to shrink a partition to decrease its size using the system built-in “Disks” tool.
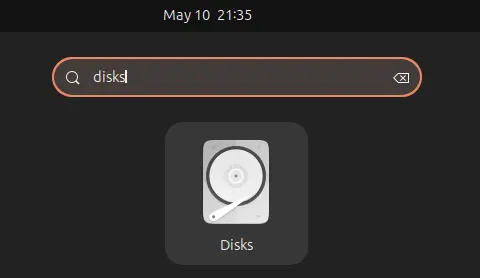
First, search for and launch “Disks” tool.
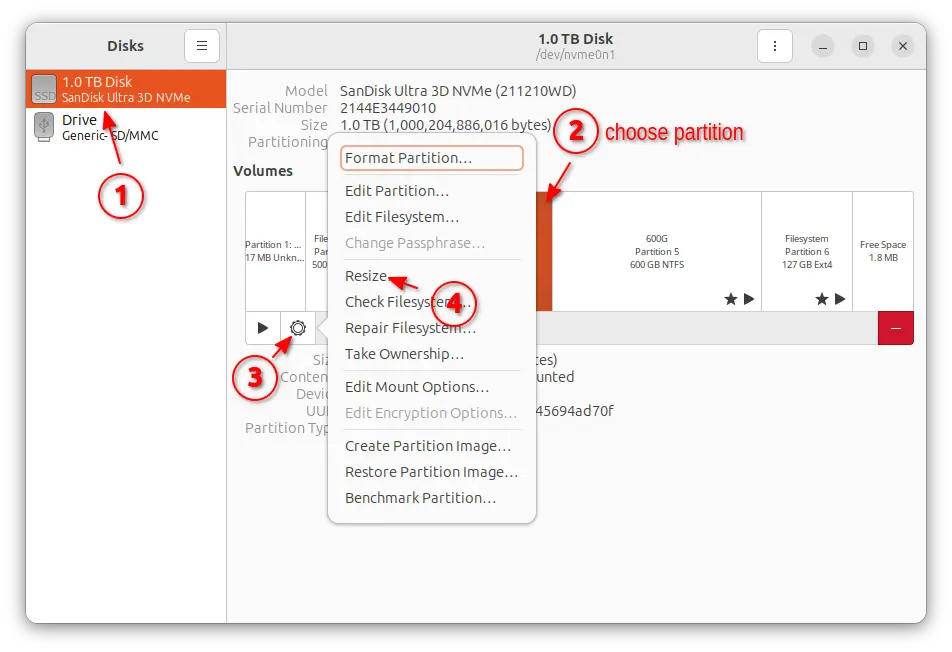
When the tool opens, choose the disk drive in the left, then select the partition your want to shrink. Finally, click the gear icon underneath to get the “Resize…”
NOTE: NOT all file systems can be resized. In my tests, it’s able to resize/shrink Ext4, NTFS partitions.
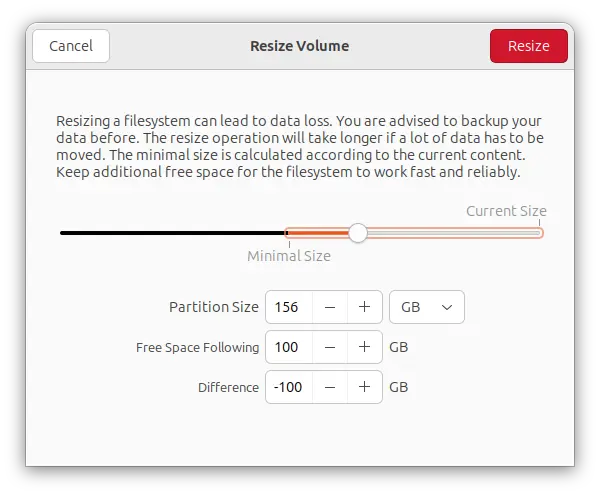
In next dialog, you can now move the slider to set how much space to shrink. In my case, I resize the 256GB Ubuntu 22.04 partition to 156GB, so there’ll be 100GB un-allocated space left.
NOTE: You cannot shrink the current Ubuntu system partition, because it needs to un-mount the partition first! In the case, either re-boot into a dual-boot system (if any) or boot Live Ubuntu from USB, then follow this tutorial.
And, it’s HIGHY recommended to backup your important data first!
Once you click the red “Resize” button and confirm, it automatically un-mounts the partition and starts the process moving files and resizing. There will be blinking circle indicate the working process.
For laptop, it’s BETTER to plug-in ac power and keep screen alive (disable suspend) to avoid any interruption.
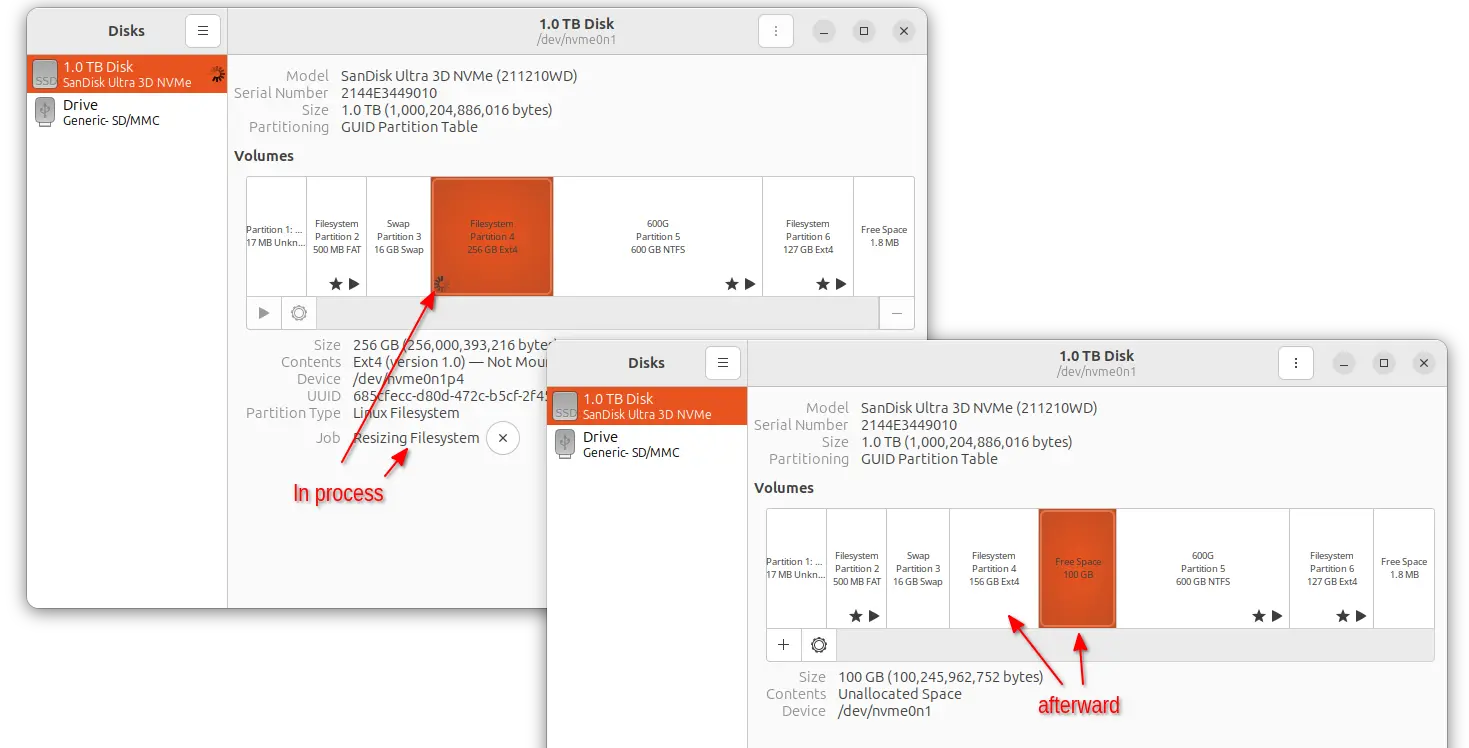
When done you’ll see the free space following the resized partition. You can create new file system on it, use it for installing another operating system, or do whatever as you want.
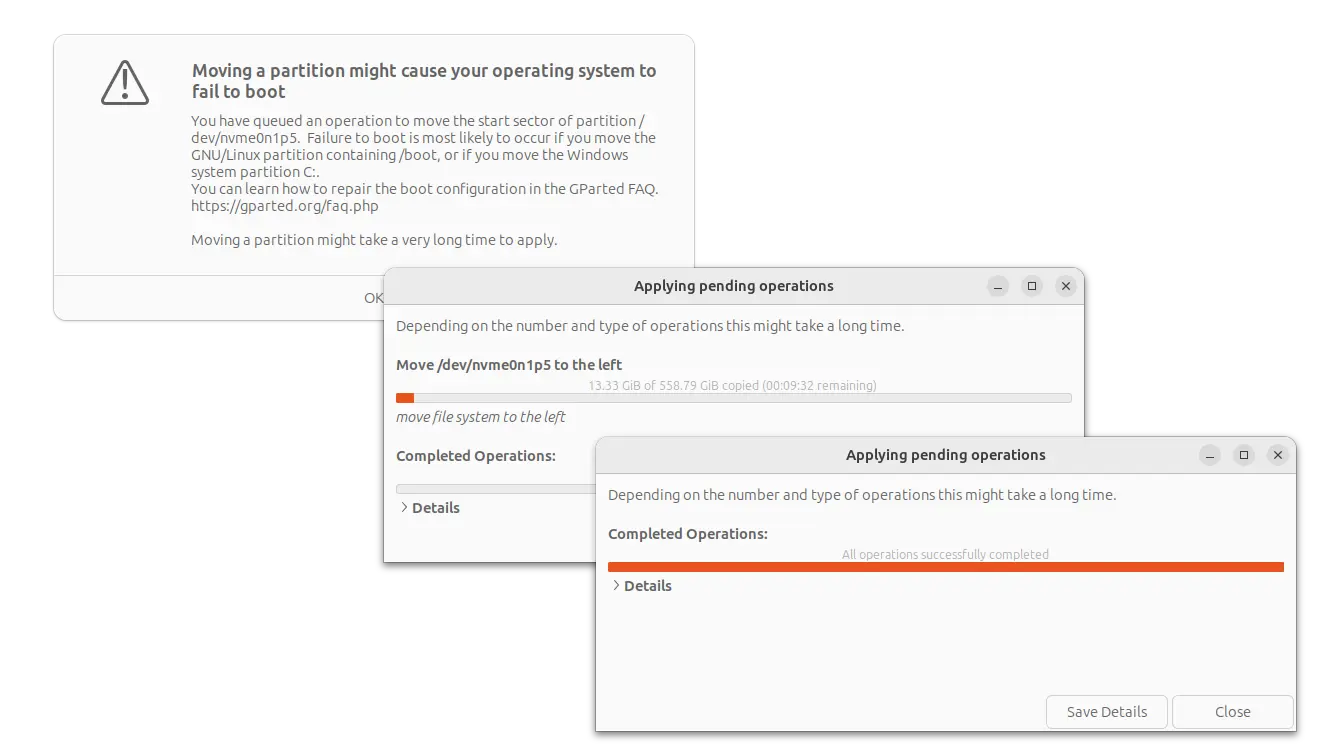
2. Resize, Move, Expand via GParted
For any other Linux system without Gnome ‘Disks’ tool, the popular gparted tool is available for choice. With it, you can resize (either shrink or expand), and move partitions as you want.
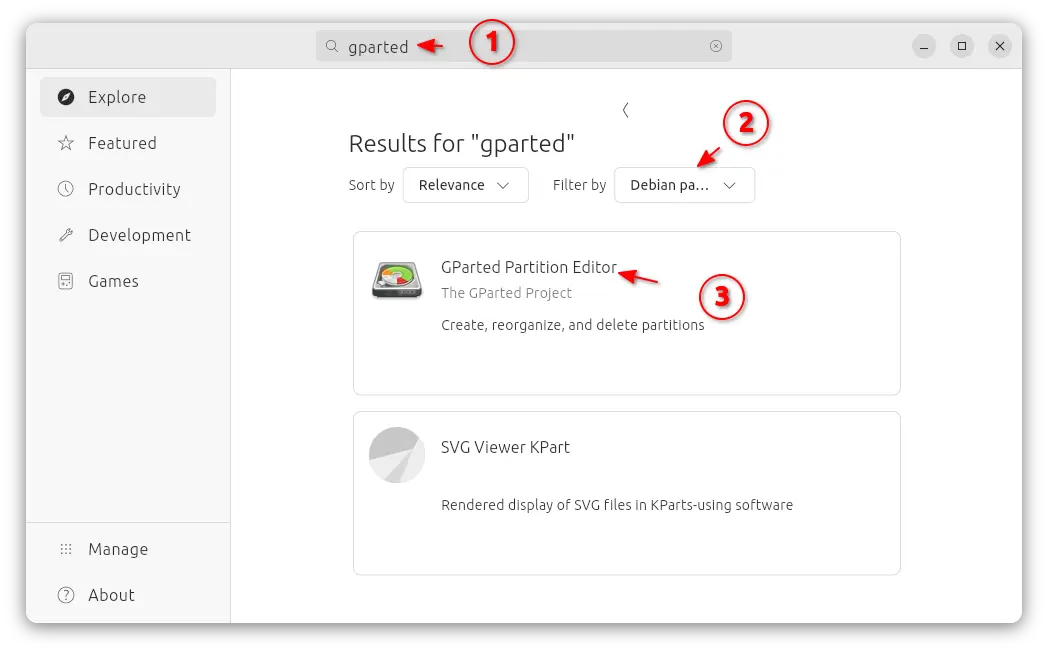
First, search for and install ‘GParted’ from Ubuntu Software, App Center, or your system package manager.
Then, launch the tool. Choose the destination disk drive from the top-right corner of the app window. Finally, you can right-click on target partition and select “Resize/Move” (need to select un-mount first).
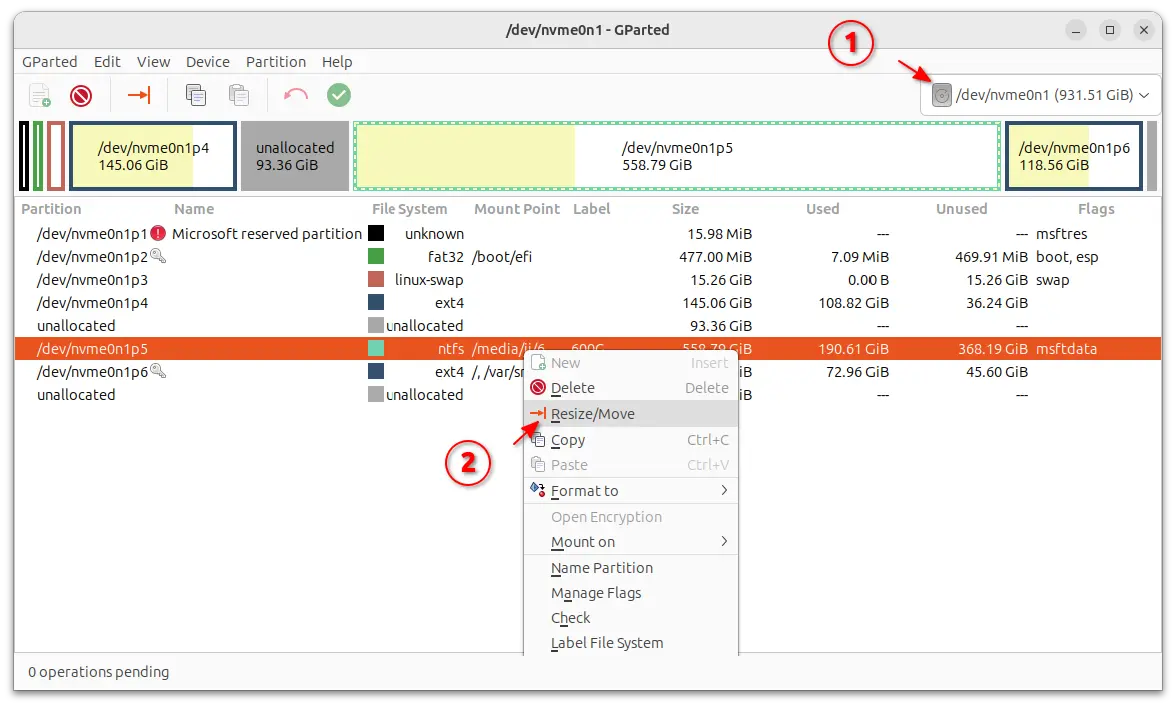
NOTE: Same to Disks tool, you cannot Resize/Move current system partition. Reboot to dual-boot OS if any, or boot live Ubuntu (Linux Mint recommended) system from USB.
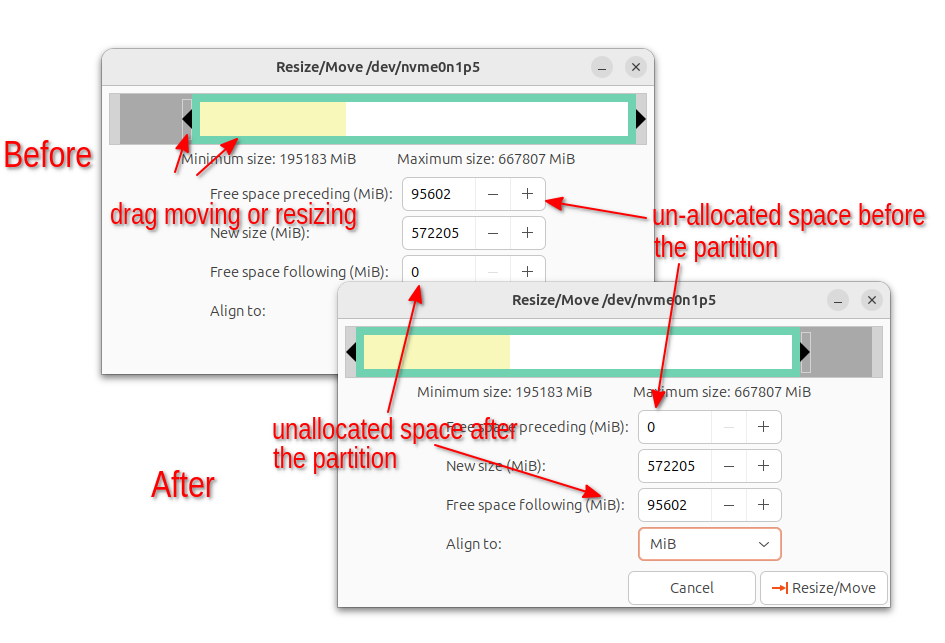
In pop-up dialog, either drag moving the slider to move the partition if there’s preceding or following free space. Or, clicking dragging the tri-angle icon to increase/decrease the partition size.
In my case, I move the partition forward so there’ll be free space following that’s side by side my Ubuntu 24.04 system partition.
NOTE again: backup your important data! Moving/Resizing partition might break your system.
The action does NOT apply until you click on the ‘green check mark’ icon.
After that, the free space and Ubuntu 24.04 partition are side by side in my disk drive. I have to reboot into Ubuntu 22.04, install GParted, and use Resize/Move option to expand (drag tri-angle icon to resize) the 24.04 partition.
Source: UbuntuHandbook