How to Resolve ‘Permission Denied (Public Key)’ Error
Sometimes, when you try to connect via SSH, you may encounter the “Permission denied (public key)” error. This error can occur if you changed the permission settings on your SSH server such as creating new user accounts or installing new packages. So, it prevents you from successfully connecting to your SSH server.
In this guide, we will learn how to fix the SSH Permission Denied (public key) error. In addition, we will also explore its causes and possible solutions to resolve this common SSH authentication error.
You can also learn how to generate an SSH key on Ubuntu using this guide.
Why Does the SSH “Permission Denied (Public Key)” Error Occur?
This error may occur due to different causes such as an incorrect username or host, missing public key on the server, invalid permissions for SSH keys and folders, and SSH service configuration. However, the two main causes of this error are listed in the following:
- This error may occur due to an incorrect configuration in the “/etc/ssh/sshd_config” file that contains the default SSH configurations.
- The error can also occur due to inadequate permissions on the “~/.ssh/authorized_key” file that is located on the remote system. This file holds the public keys of client systems that are permitted to establish the SSH connections with the server.
How to Fix the “Permission Denied (Public Key)” Error
You can resolve the “permission denied (public key)” error using the two different methods:
Solution 1: Check and Enable the Password Authentication
One of the main reasons for this error is the wrong configuration of the “/etc/ssh/sshd_config” file. Disabling the password authentication feature on your system may cause this error when someone uses only the SSH key-based authentication, and the private key may not be present due to any reason. So, if you want to access the SSH server using password authentication, you can fix the “permission denied error” by enabling the password authentication feature in your SSH configuration file.
To do this, open the terminal using the “Ctrl+Alt+t” keyboard shortcut and perform the following steps on the server side:
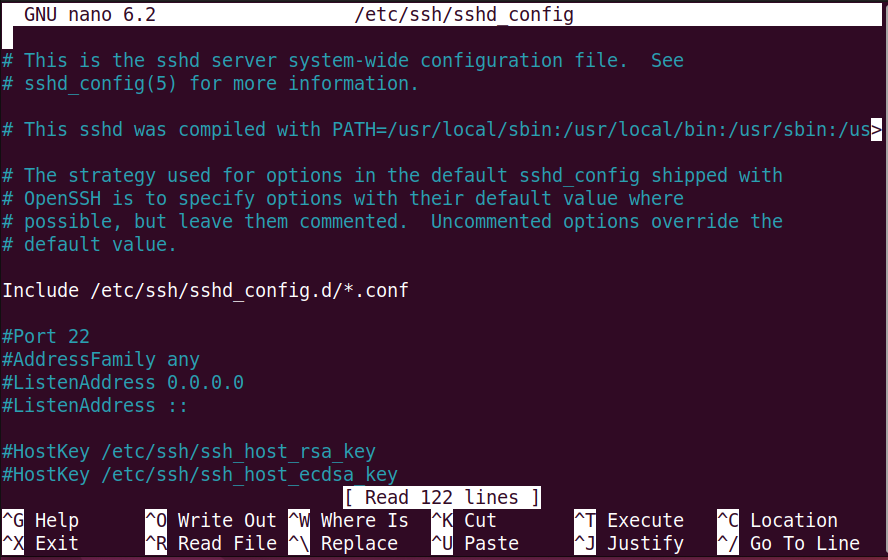
Step 1: Open the “/etc/ssh/sshd_config” configuration file in a text editor. Here, we use the default nano text editor.
Step 2: Locate the “PasswordAuthentication” line and enable it to “yes”. If this line is commented, remove the “#” symbol at the start to uncomment this line.
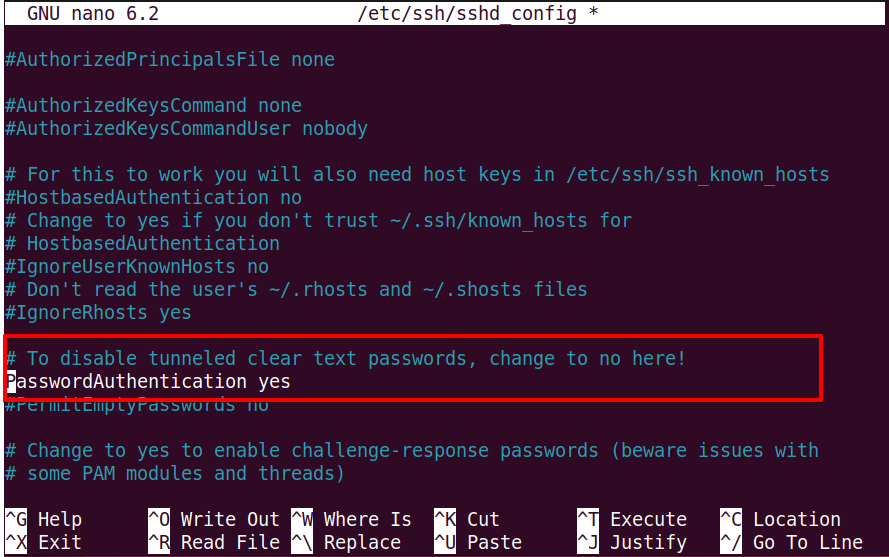
Save the previous changes using “Ctrl+O” and exit from the configuration file via “Ctrl+x”.
Step 3: Reload or restart the SSH service again on your system using the following mentioned command to apply the changes to a file.

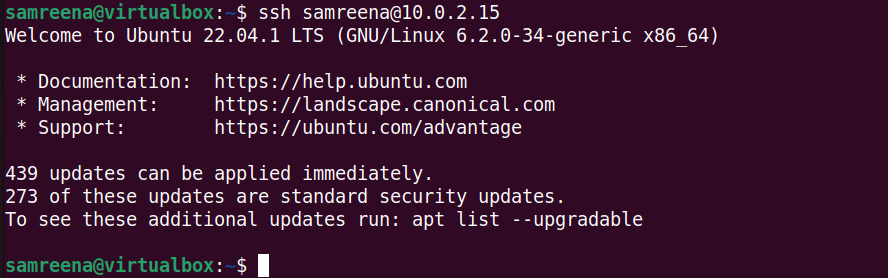
Now, if you try to connect with your SSH client again, you should be able to access the remote host machine.
Solution 2: Change the Permissions on SSH Authorized_Keys
Using the SSH password-based authentication method is not recommended due to security issues. Therefore, this method is preferable since it fixes this error using the public fundamental authentication approach. In most cases, the error comes by setting up the wrong ownership and permissions on a “~/.ssh/authorized_keys” file located on the remote server. To fix the error using this method, you need to follow the given steps:
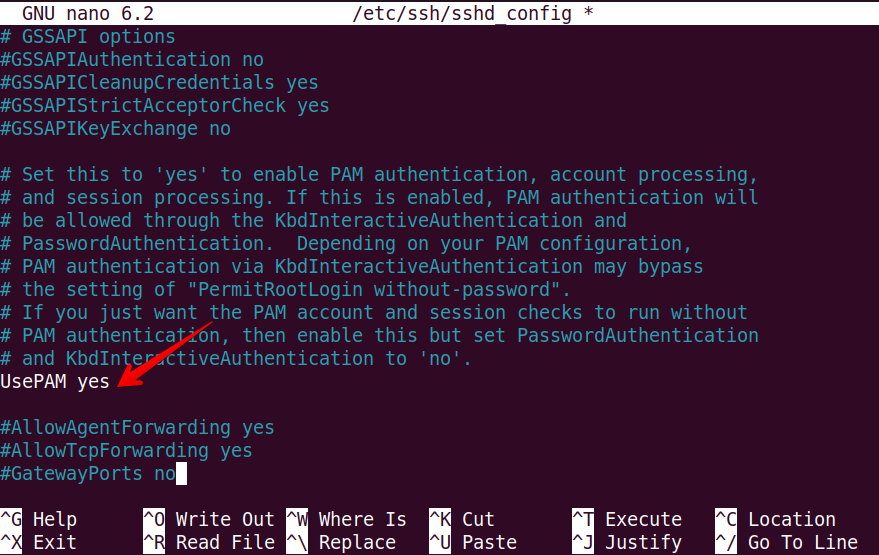
Step 1: Open the “/etc/SSH/sshd_config” file in a text editor.

Now, edit the following options:
PubkeyAuthentication yes
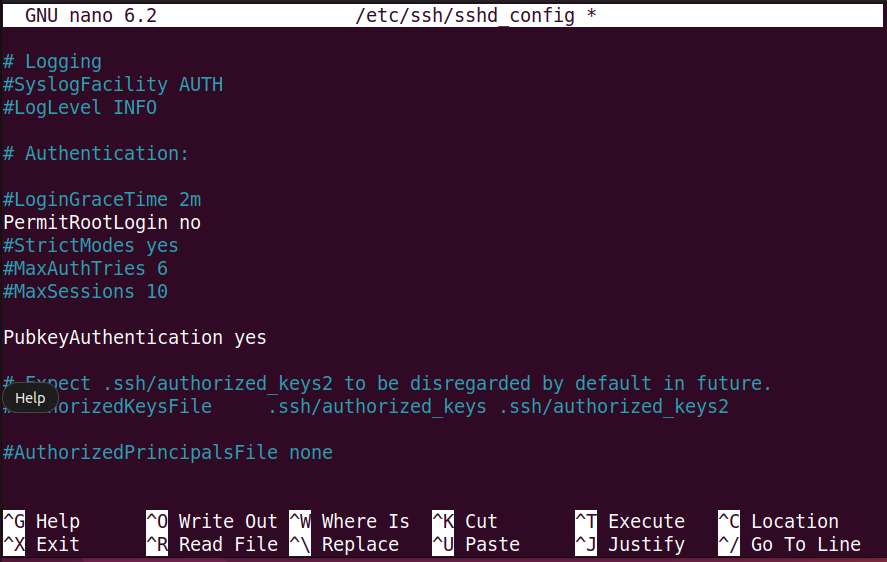
If you want to use the root login, set the “permitrootlogin yes”.
Step 2: Comment on the GSSAPI options by adding the “#” symbol at the start of these lines.
#GSSAPICleanupCredentials no
Also, set the “UsePAM yes” in the configuration file.
Step 3: Save the previous configuration and restart the SSH services using this command:
Now, check the permissions on your home folder:

If you don’t have the read-write permissions (drwx——) on this folder, set the permissions using the “chmod” command:

Change the permission on the “.ssh” folder using the following command:
The “.ssh” folder contains the “authorized_keys” file. Check the permissions on this file.

The file owner should have the read-write permissions. To change the file permissions, use the following command:

Now, try to connect with the SSH remote host. We hope that you will receive no error at the time of connection.
Conclusion
In this troubleshooting guide, we explored how to resolve the “Permission Denied (Public Key)” error. We discussed the potential causes of this error and recommended two different solutions to solve this error. We hope that the previous instructions will help you to fix this error on your Linux system. If you want to get more knowledge, you can visit its documentation here. Thanks!
Source: linuxhint.com