How to Modify Startup Programs in Windows 10
Modifying startup programs in Windows 10 can help you improve your system boot time and also improve the overall performance. The startup programs are applications that automatically run you turn the device on. However, these applications can use a lot of RAM, putting up a negative effect on the system performance.
In this article, we will demonstrate how you can modify your Windows 10 startup programs.
How to Modify Startup Programs in Windows 10?
To change the startup programs in Windows 10, apply the below methods:
- Modify the Startup Programs from Windows Settings
- Modify the Startup Programs from the Device Manager
- Modify the Startup Programs from the Startup Folder
Method 1: Modify the Startup Programs from Windows Settings
Windows Settings is the central hub for managing Windows’ user preferences and operating system configurations. Using Windows Settings, you can also modify the startup program by applying the below step-by-step procedure:
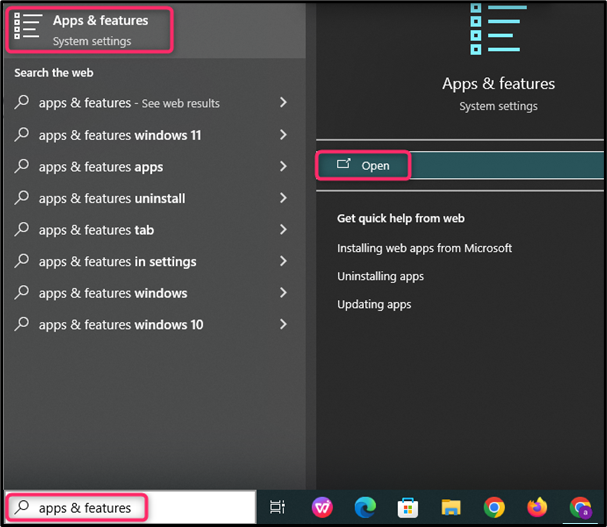
Step 1: Open the Start Menu, type Apps & features, and click on the Open button.
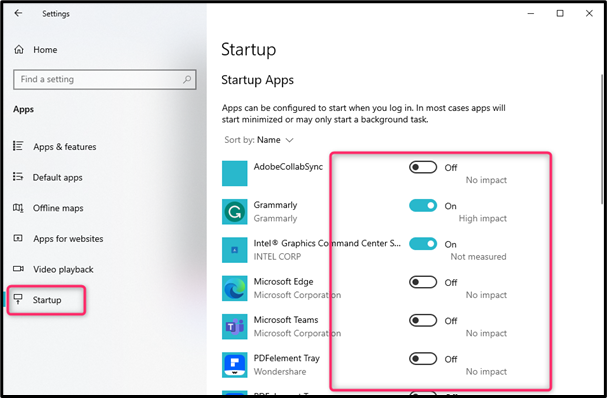
Step 2: Inside the Apps Settings, navigate towards the Startup section from the side menu list. Then enable or disable the programs from the Startup app list by either toggle on or off.
Method 2: Modify the Startup Programs from the Task Manager
Another way to manage your Windows startup programs is to use the Task Manager, which is a built-in Windows utility that keeps track of all running applications and services on your system. To modify your startup programs from the Task Manager, follow the below steps:
Step 1: Click on the Start button to open the Start Menu, type Task Manager in the search field, and click to open it.
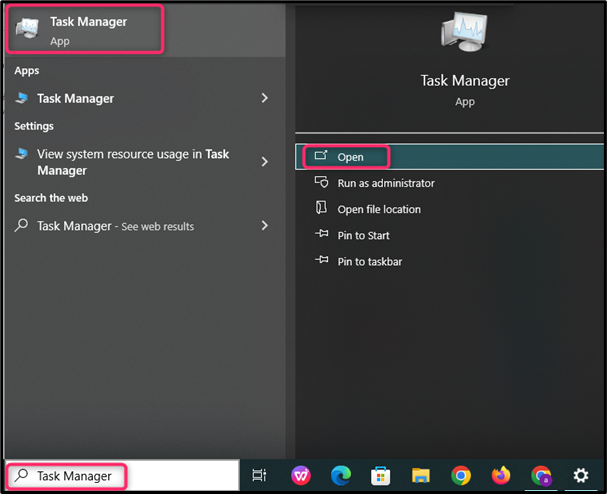
Note: You can also open Task Manager from the keyboard shortcut keys “Ctrl+ Shift + Esc”.
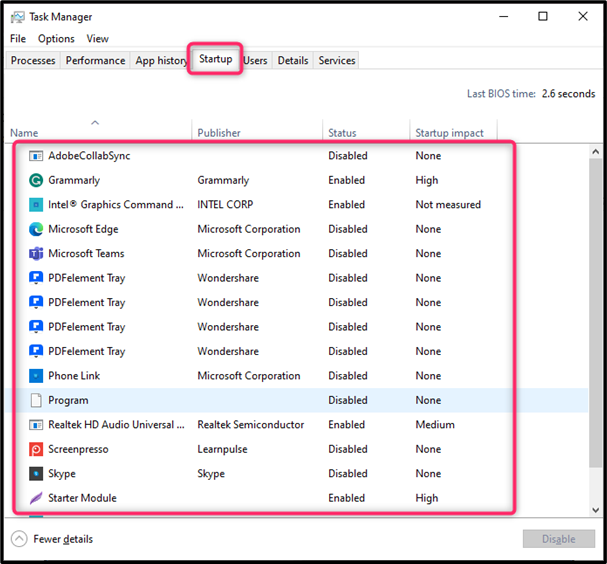
Step 2: Once you get into the Task Manager, move towards the Startup tab. Under this tab, you will find a list of the Startup programs, and you easily enable and disable these programs.
For example, if you want to disable an unusual program, simply select the program and click on the disable button to disable it on your system.
Method 3: Modify the Startup Programs Using the Startup Folder
On your device, you can manage the startup programs from the Windows drive contains the Startup folder and it contains shortcuts to the programs that run automatically when you turn on the system. Follow the step-by-step guidelines written below to modify the Startup program using the Startup folder.
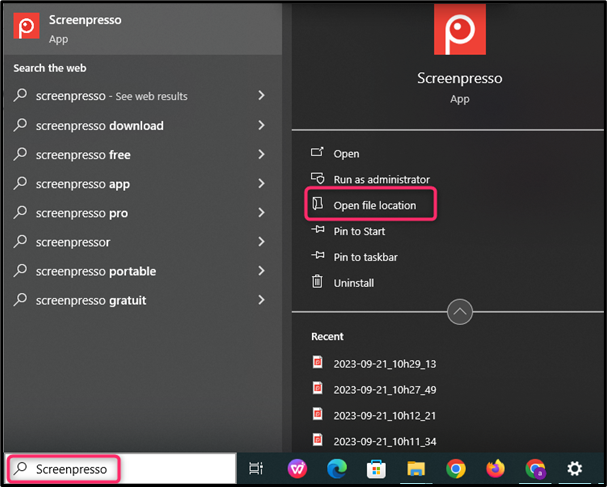
Step 1: Find the file you want on Startup by typing its name in the Windows search bar. Then select file location from the side menu.
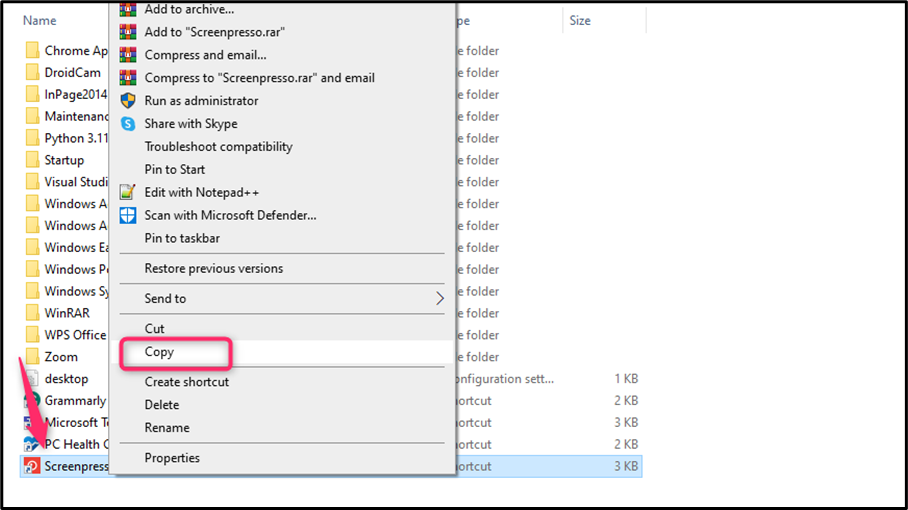
Step 2: Right-click on program and choose Copy from the appeared context menu.
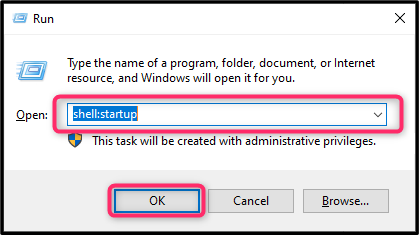
Step 3: After that, open the Run dialog box by pressing the Windows key + R, type the following command in the text box, and click on the OK button.
Step 4: Once you get into the Startup folder, right-click on the empty space to open the context menu and click on the Paste option.
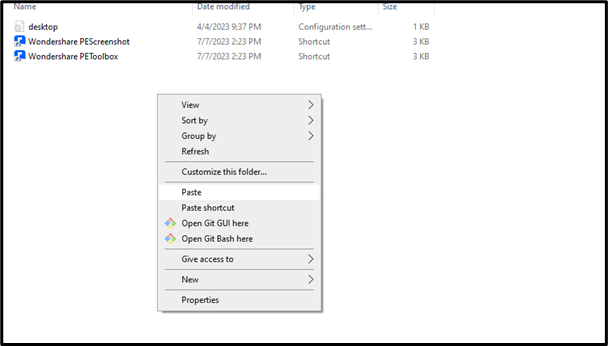
After pasting the program in the Windows Startup folder, it will be enabled on your system; this means that the application will start automatically when you start your PC
Conclusion
You can use the Windows Settings or try Device Manager to modify the startup program on Windows 10. You can also modify the Startup programs using the Windows Startup folder located in your drive by pasting the program shortcut in that folder.
Source: linuxhint.com