How to Install, Secure, and Set Up MySQL on Ubuntu 26.04 LTS
If you have been using an ecommerce store to place online orders or have been using multiple softwares for work, it is very likely that one or many of those would be using MySQL on the backend to store, retrieve and manage data. MySQL is a relational database that stores data in a structured format like in tables with columns and rows. Multiple tables are connected with each other using foreign keys and each table has its own primary keys as well which is unique means it doesn’t repeat more than once in the table. When a relationship is built between multiple tables, usually one table’s primary key becomes the foreign key.
MySQL was built by young devs back in 1995, it was acquired by Sun microsystems back in 2008 and later when Oracle acquired Sun microsystems in 2010 then they became the steward of MySQL. Its community version is available for free via GPL and its latest version, offered by Ubuntu repo, is MySQL 8.4.
Let’s see how to install, secure and set up MySQL on Ubuntu 26.04 LTS step by step:
Step 1: Verify Available Version of MySQL on Ubuntu 26.04
First off, verify the version of MySQL offered by the Ubuntu repository. For that matter, open up your terminal and type:
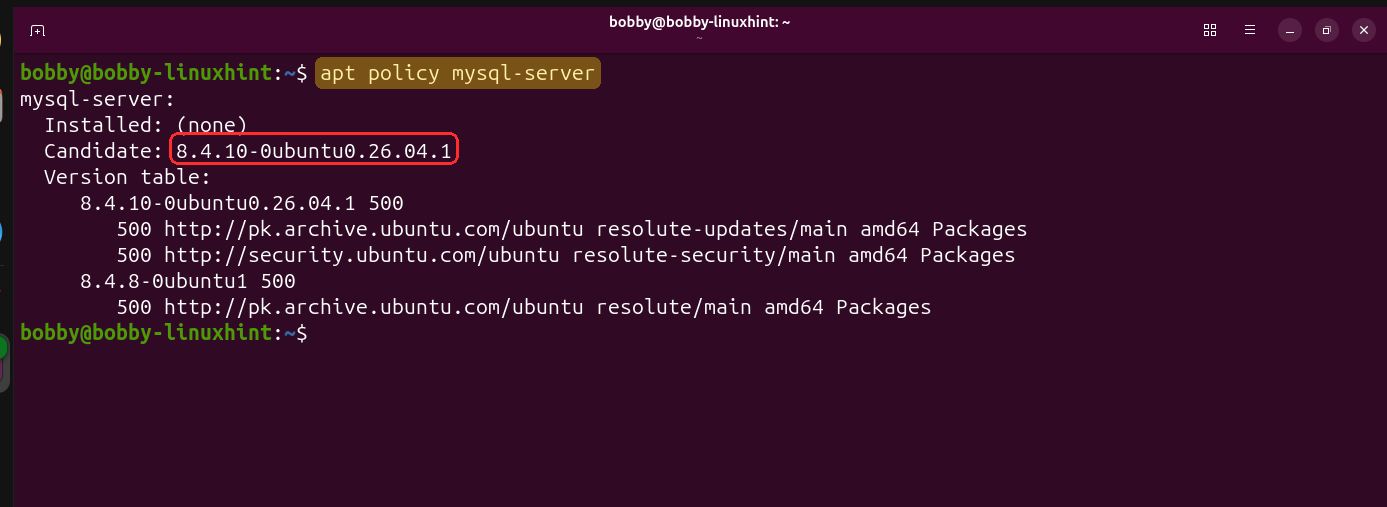
You can see it offers MySQL 8.4.
Step 2: Update & Upgrade Ubuntu Repository
Go ahead and update and upgrade your ubuntu repo before the installation step:
Step 3: Install MySQL on Ubuntu 26.04 LTS
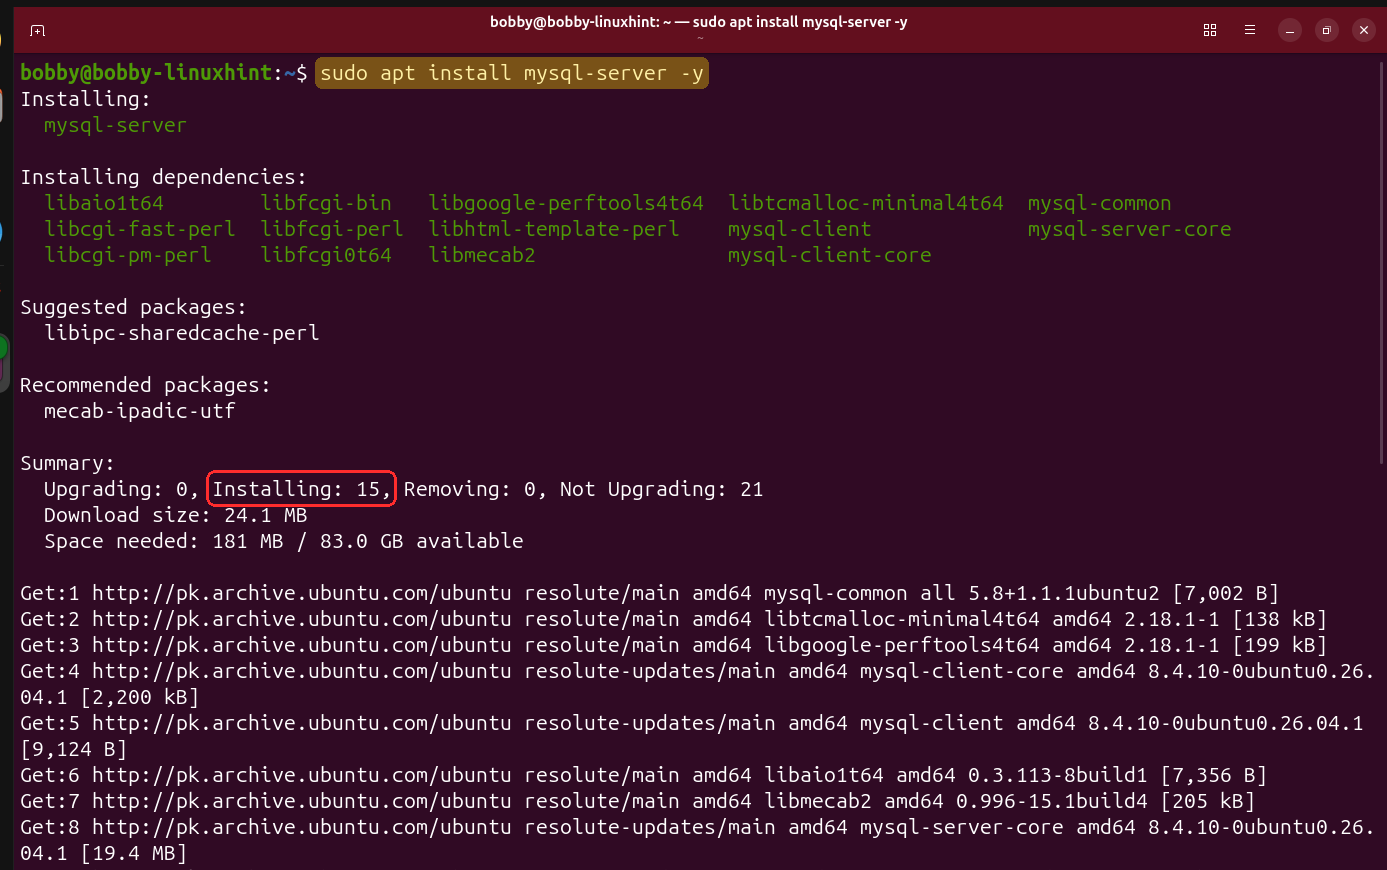
To install MySQL on Ubuntu 26.04, write this command in your terminal:
Step 4: Verify the Installed MySQL Version
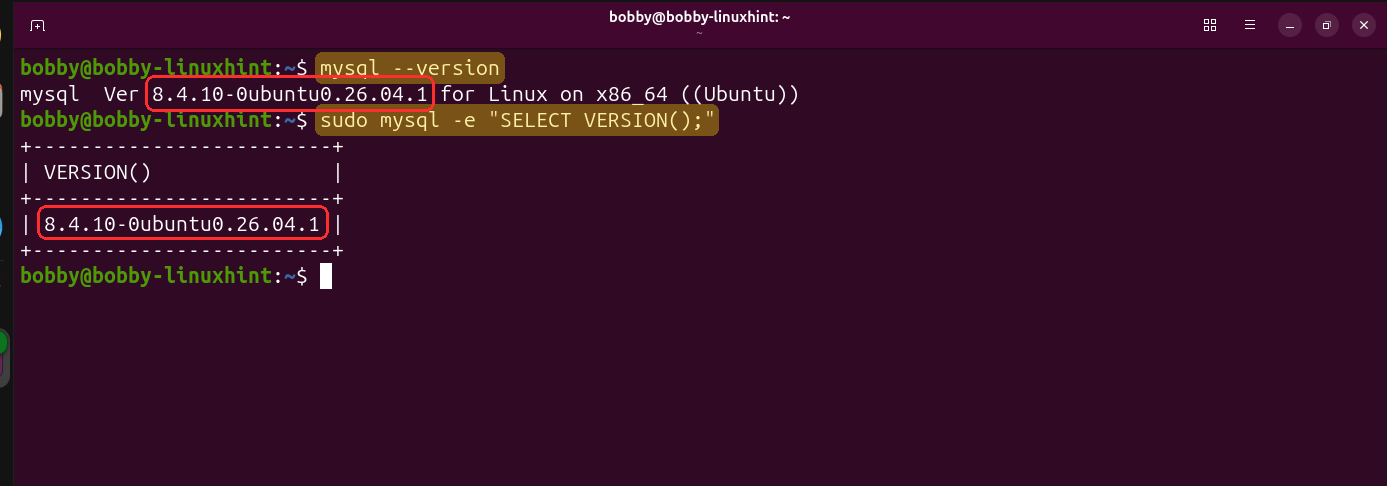
To verify if the MySQL was successfully installed, check the version:
You can also verify it by using this command:
Step 5: Manage MySQL Service with systemctl
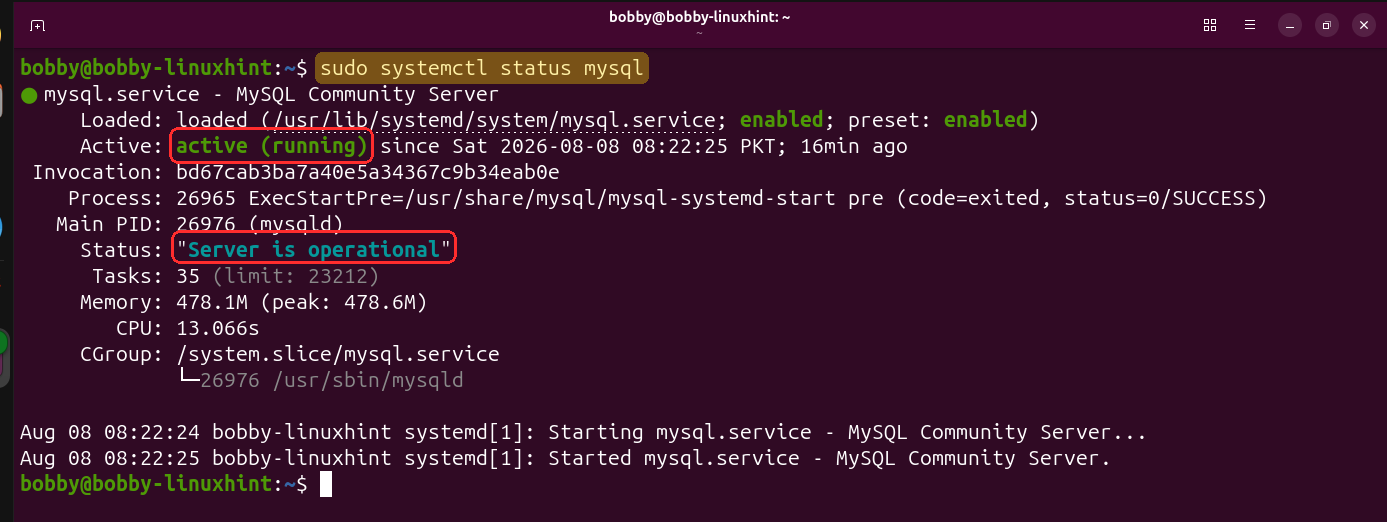
First off, to check if the MySQL service is up and running, use this command:
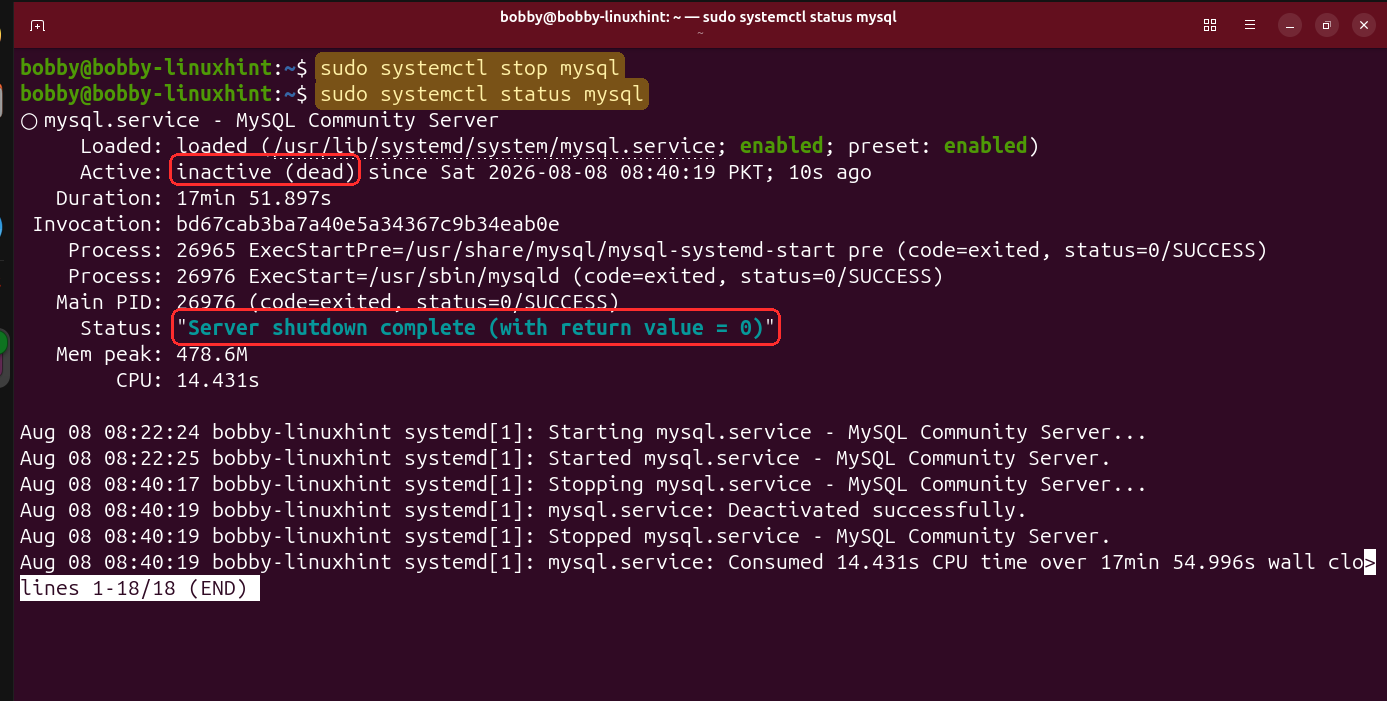
To stop this MySQL service:
Now, if you will check the status:
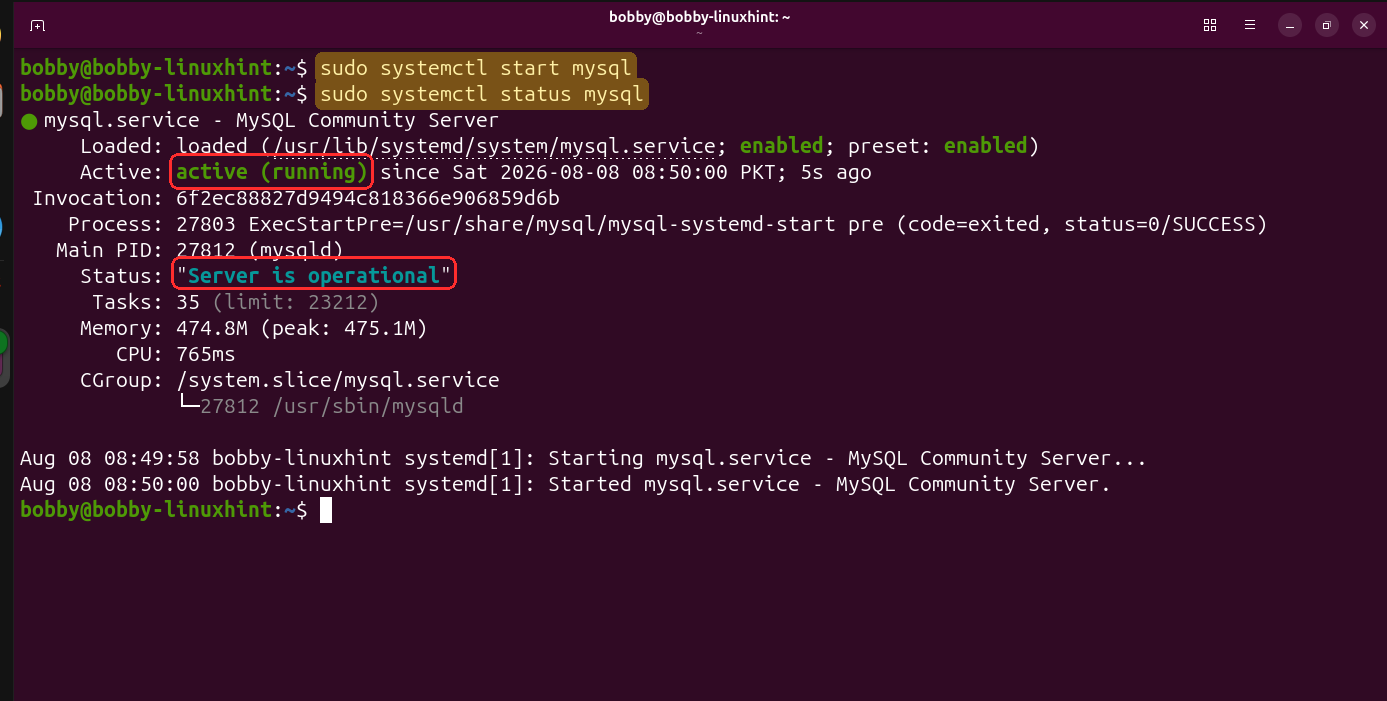
To start the service again:
Check the status and you will see that service is active again. You will also notice that process id has essentially changed as well.
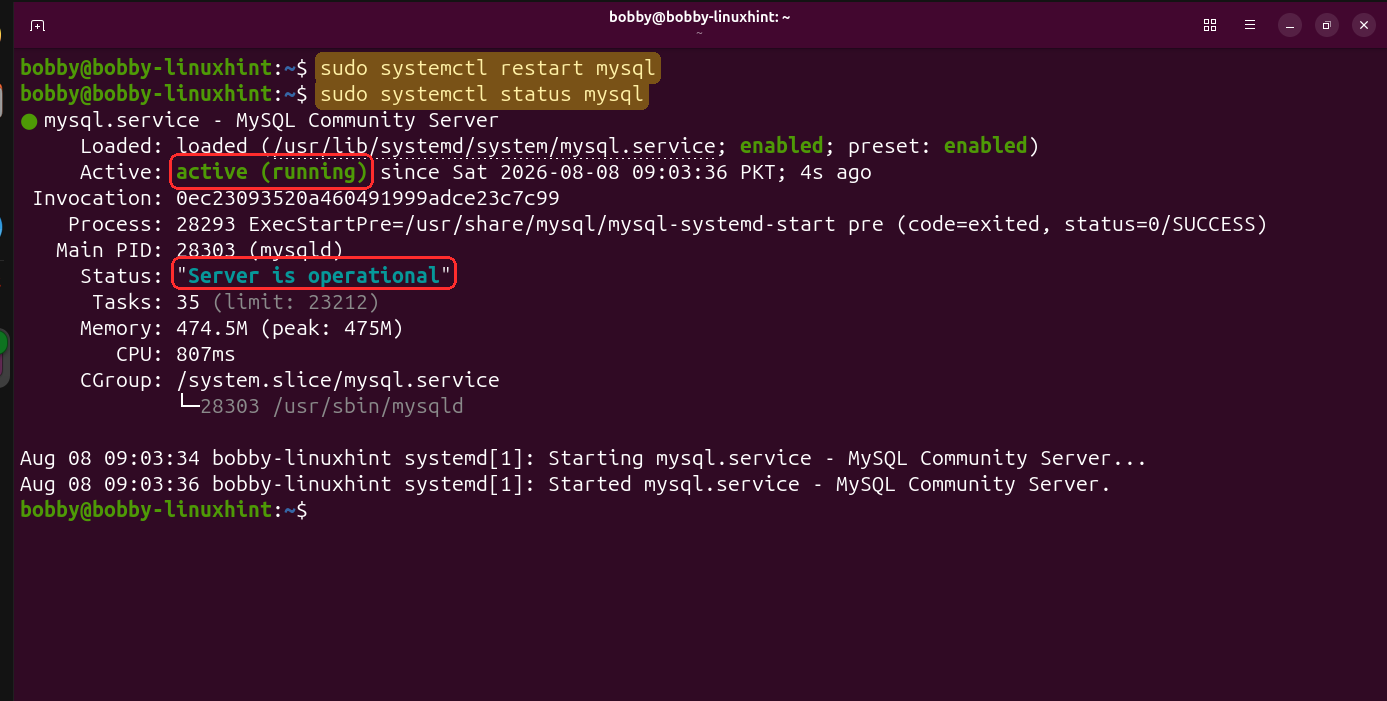
After some changes, if you want to restart your mysql service for some reason then:
Always check the status after a restart.
Step 6: Secure MySQL on Ubuntu 26.04 LTS
So we are going to secure MySQL server and harden it, for that run this command:
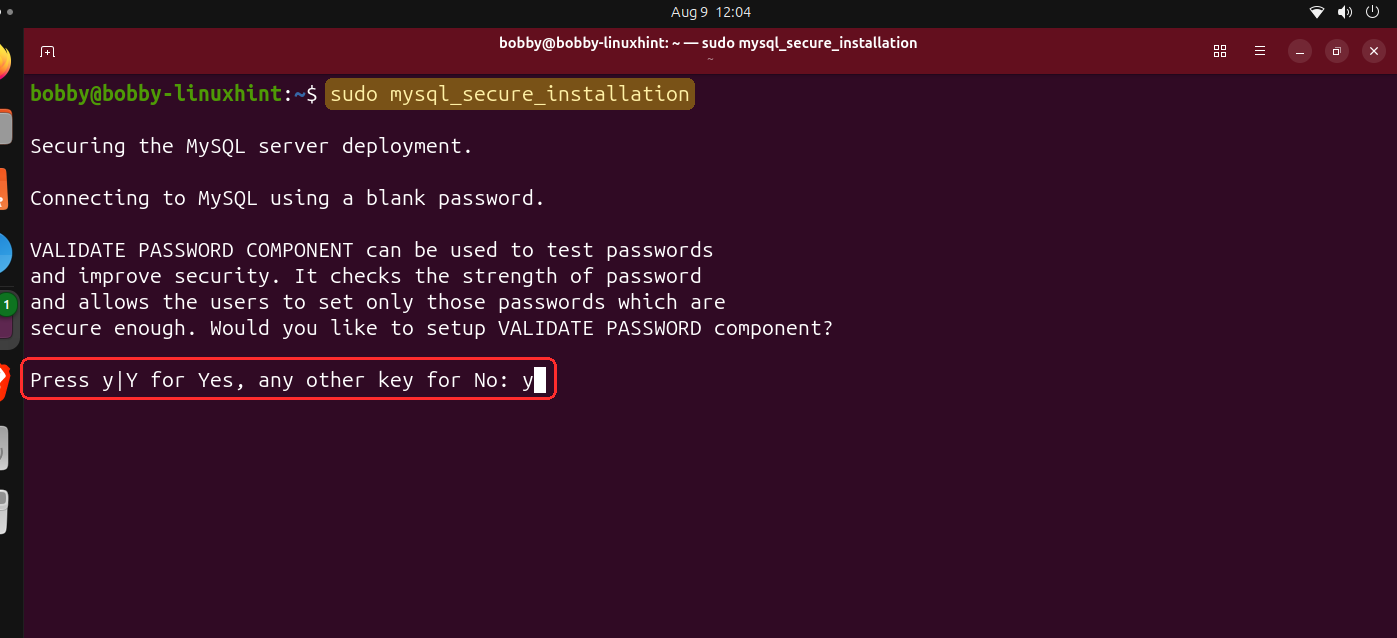
It’s a security script that will give you security hardening options to enable such as Validate password component, remove anonymous users, disable remote login, delete the test table and reload the table privileges.
For the first option of VALIDATE PASSWORD COMPONENT, press “y” and hit enter key to enable it.
Next it will ask you to confirm the level of password validation policy, MEDIUM is fine so I will type in “1” and hit enter key.

Next it will ask you to remove the anonymous users for which you must type in “y” and hit enter so they are removed, that’s the best security hardening practice.
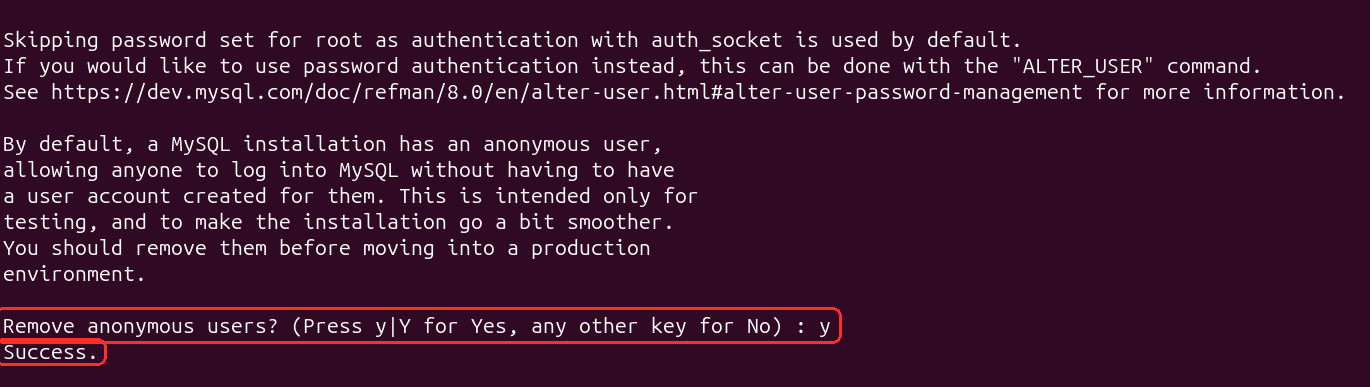
Next disallow root login remotely as it can increase the attack surface. That’s probably the most important security hardening step. Type in “y” and hit enter.

Next you must remove the test databases and access to it because it might have access to the parts of MySQL server where you don’t want it. So, best to remove it and for that type in “y” and hit enter.
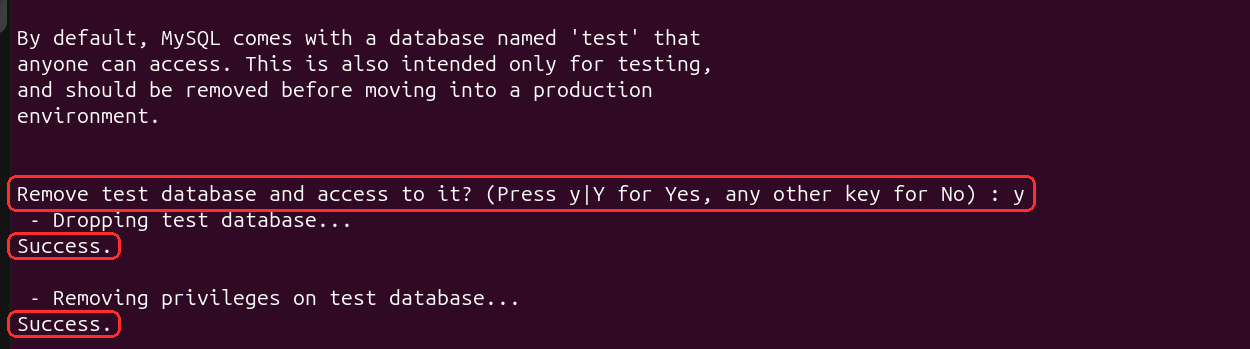
After this it’d ask you to reload table privileges for which you must type in “y”.

After this you will see a message “All done!” which means that now our mysql server is secure.
Step 7: Create a MySQL Database and User
First off, log into MySQL with administrative access:
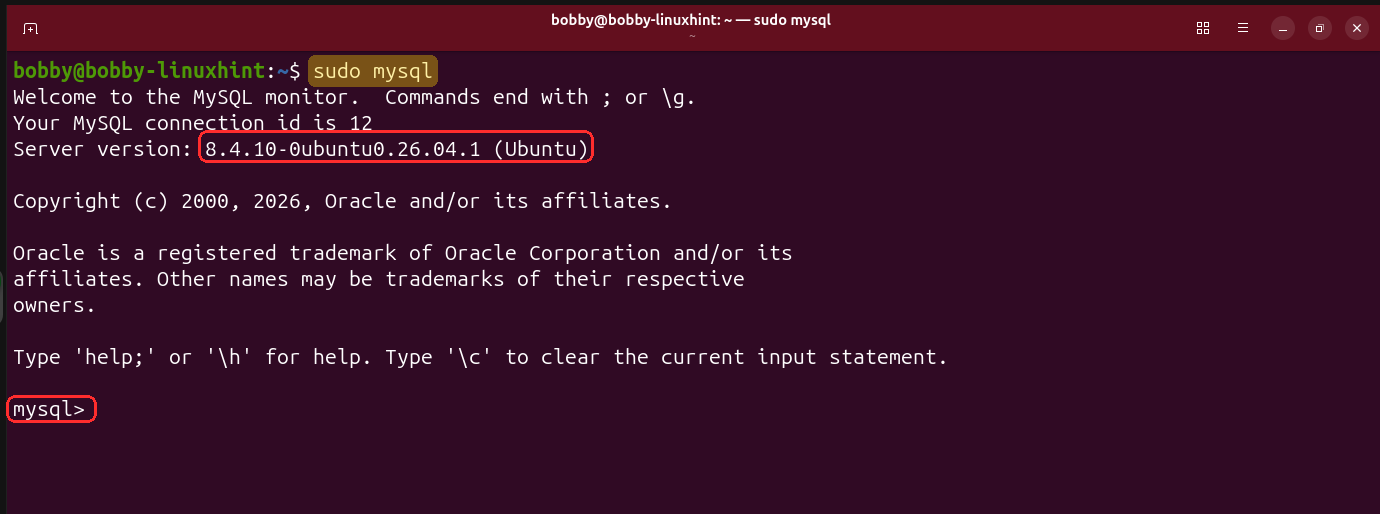
Now quickly check the version of MySQL in mysql prompt by typing:
Take a look at the databases which are already available:
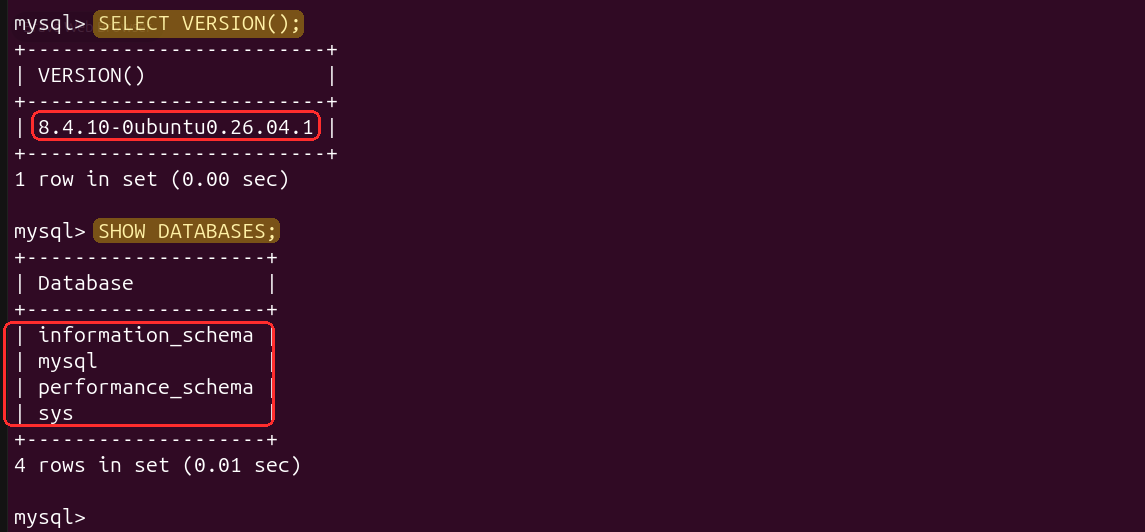
Note these databases available.
Next, let’s define or create a database of our own:
See if this database was created successfully:
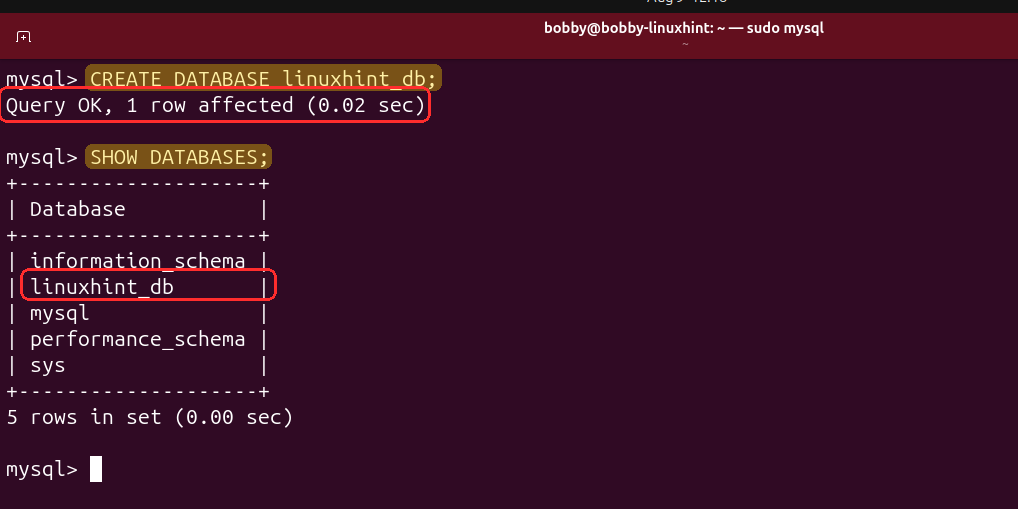
If you noted down the system databases, you know we have a new database added successfully.
So now we created the database but this can be accessed only through the root user which in my opinion is not a good practice to login with each time. So we will create a new user that will be given access to this newly created database.
To create a new user:
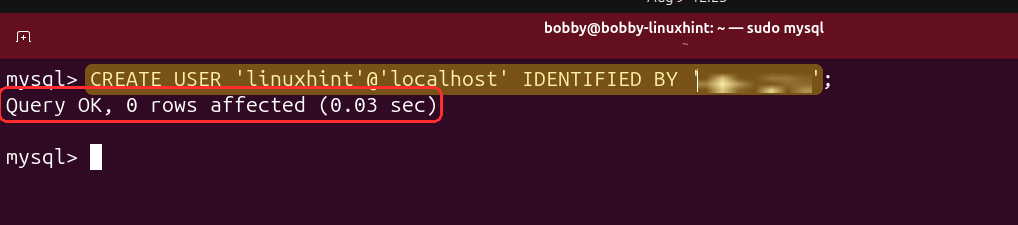
The new user has been created but it has no authority over the created database. So we need to give privileges to the database and everything inside this database such as tables.
Inside mysql prompt, write this:
* in linuxhint_db.* means everything inside this database.
Now to verify if all the privileges have been assigned correctly, you write down this:
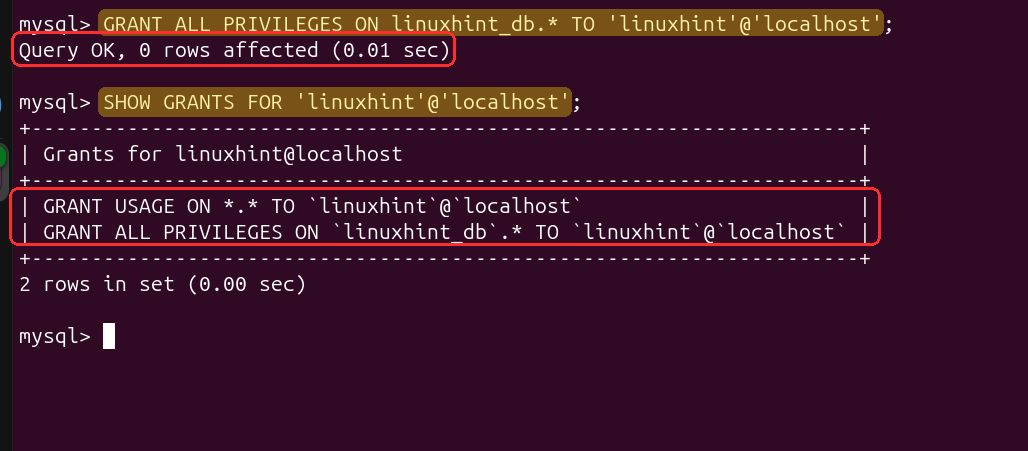
These are the permissions we intended to give and these 2 lines above show that all privileges have been assigned correctly.
Now, exit the mysql prompt to leave the root session:

Step 8: Login to MySQL With New User
We login with the user we created earlier, for that write this command in your terminal:
-u means the user and linuxhint is the username. -p means the password which means it will prompt you for the user’s password. So just enter the password and you’re in.
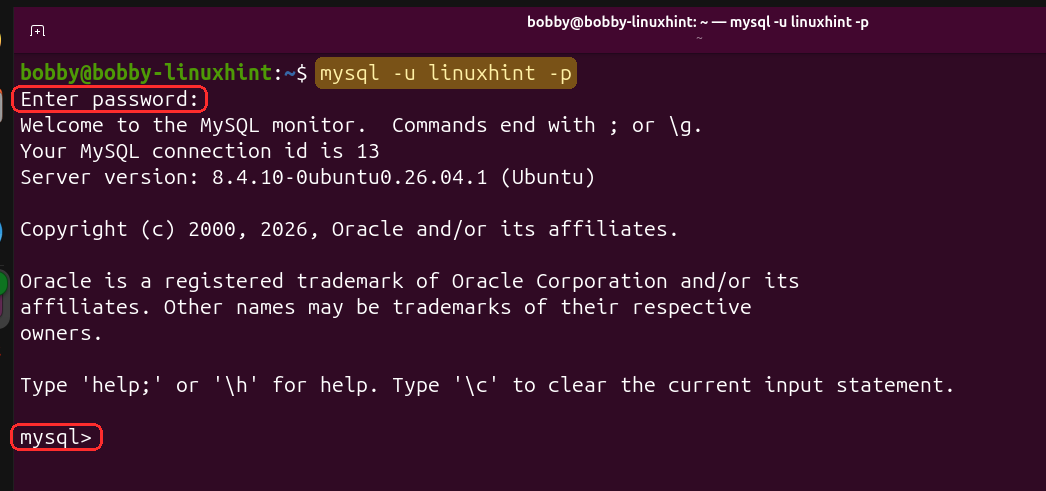
After logging in, you will notice that the connection id will change indicating that this is a brand new session.
If you will check the databases available now, instead of 5 this user will have access to only 3. MySQL and sys databases will be hidden because this user doesn’t have access to those.
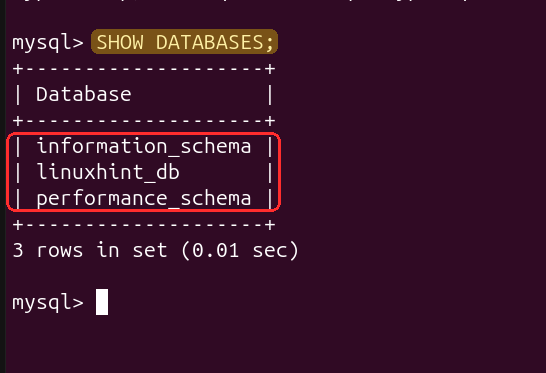
You can see only 3 databases.
Step 9: Create a Table and Insert Data into MySQL
We will add a table to this database that we created earlier and then insert data into it.
First off, we need to select this database so whatever we do happens inside this database. To do just that, inside mysql prompt you need to type in:
It says “Database changed” which means that now whatever we do now will happen inside of this database or in other words, we are using this database and if we create tables or insert values, that will go inside this database.
So let’s create a table first:
id INT AUTO_INCREMENT PRIMARY KEY,
title VARCHAR(255) NOT NULL,
author VARCHAR(100) NOT NULL,
published_date DATE
);
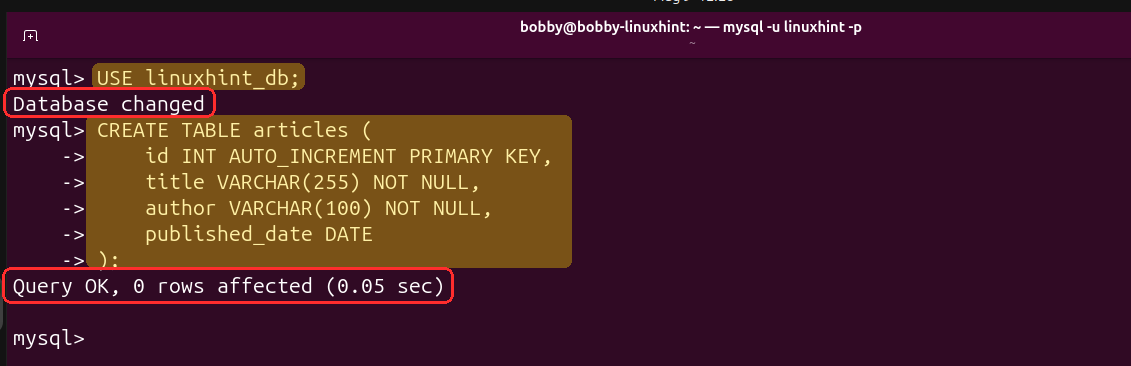
It will create a table named as articles, it will have a primary key that works like a serial number and is unique for each entry i.e. id INT AUTO_INCREMENT PRIMARY KEY. INT means integer datatype. Then we have title and author column names which can’t be empty because of NOT NULL and for the title length can’t exceed 255 and for title it’s 100. Then we have published_date which has a datatype DATE.
Now, let’s insert a sample article value in our table:

Let’s read it back or check how it is stored in the table:
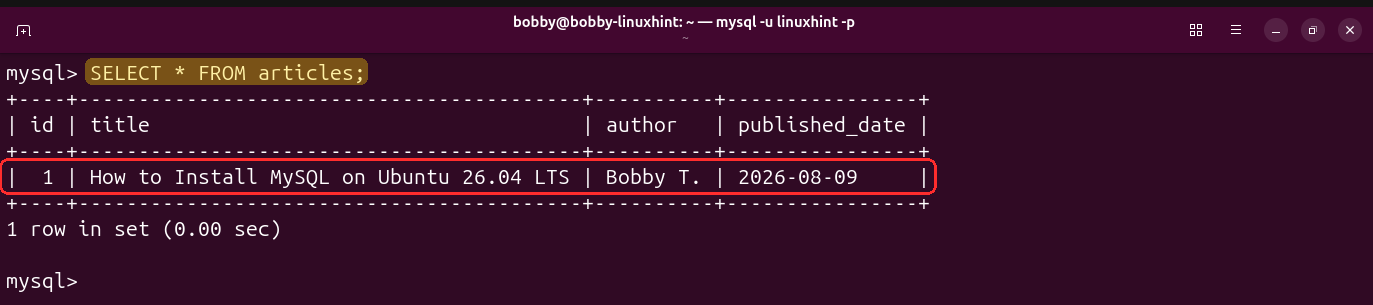
Take a look this is how we insert a value inside a table within a database.
Conclusion
MySQL has been installed, secured, and set up successfully. We are able to create users, databases, tables inside the database and insert values. The whole database operations have been completed and from this point onwards you can start to work with your MySQL database for anything you want. Just keep a few things in mind and you’re good to go. Like always ensure mysql service is up and running, secure your mysql server by ensuring no remote access, no anonymous users and enabling the VALIDATE PASSWORD COMPONENT etc., create a separate user and not always use root user to login, and always give required privileges to the newly created user.
Source: Linux Hint