How to Install Docker on Ubuntu
Docker is the new way of managing the applications in containers. That way, you can run your application in a resource-isolated container without affecting the host. Think of containers as an advanced version of virtual machines, only that they are more resource-friendly and portable.
Again, each container is separated from the other and bundles its software. Thus, you can have different versions of a program that runs on different containers to achieve your build goals. With Docker, you can install the free community version or get the enterprise edition. For this guide, we will focus on the Docker community edition and detail how you can install it on Ubuntu.
Two Ways to Install Docker on Ubuntu
Ubuntu supports installing Docker, and there are two approaches that you can use. First, you can install Docker from the official Docker repository. This option is ideal if you want to get the latest Docker version. Alternatively, you can follow the simpler method and install Docker from the Ubuntu repository. However, this option won’t give you the latest Docker version.
Let’s detail the two methods.
Method 1: Installing Docker from the Ubuntu Repository
With this method of installing Docker, only two steps are required, and you will have Docker available on your system.
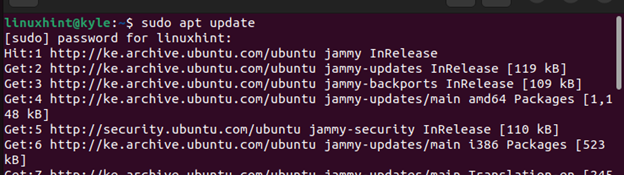
Step 1: Update Your Repository
It’s a good habit to always update the system repositories before installing any software.
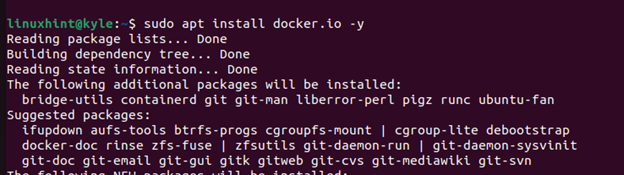
Step 2: Install Docker
Once you update the repositories, you can install Docker by installing the “docker.io” package. Use the following command:
The installation will begin, and you will get a similar output to the one in the following:
Once the process completes, you can verify that Docker is installed successfully by checking its version. We can confirm that we have the Docker version 24.0.5 installed for this case. Note that this version is not the latest. However, when writing this post, it is the latest available version from the Ubuntu repository.

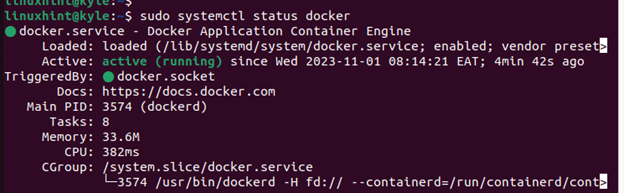
You can now start your Docker as follows:

Check its status to ensure that it is active and running.
Lastly, let’s run a simple “hello world” with Docker to verify that Docker is working correctly.
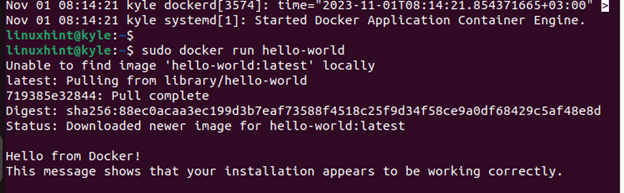
That’s it. We just confirmed that Docker is installed and working on Ubuntu. You can now proceed and configure it to suit your needs.
Method 2: Installing Docker from Its Official Repository
For someone who wants to get the latest Docker version, installing it from its repository is the recommended approach. However, more steps are involved with this option, and more dependency packages must be installed. Take a look!
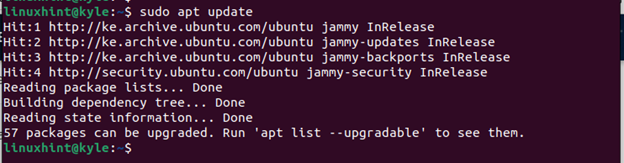
Step 1: Update the Ubuntu Repository
Start the installation by updating the Ubuntu repositories with the “apt” command.
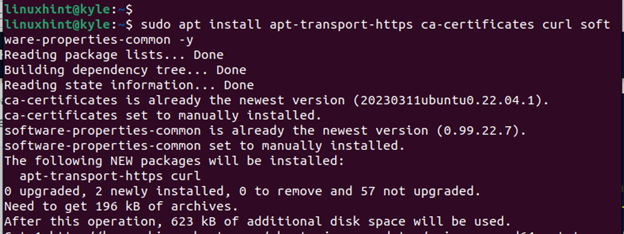
Step 2: Install the Dependencies
Different prerequisite packages must be available on Ubuntu to support installing Docker. While some are already installed on some Ubuntu versions, running the following command checks and installs all the required packages:
Step 3: Add the GPG Key
Using curl, which we installed with the previous command, get the required GPG key to check the authenticity of the Docker package.
Here’s the command to get the Docker GPG key:
You should get an output that shows “OK” to confirm that the GPG key is added successfully.

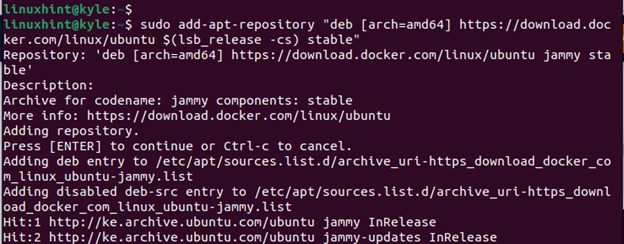
Step 4: Get the Docker Repository
Remember, we are installing Docker from its official repository. Therefore, we must add the Docker repository and get the suitable version for your Ubuntu system. The following command adds the appropriate Docker repository, and we included the “lsb_release” command to get the correct version for our system.
Step 5: Set the Docker Installation Source
You must specify that the Docker installation source for this case is its official repository, not the Ubuntu repository. For that, use the “apt-cache” command as shown in the following:
The output displays the candidate variable, whose value is the Docker installation source, which shows the latest version that you will get after installing it.

Step 6: Install Docker
The last step is to install Docker using “apt”.
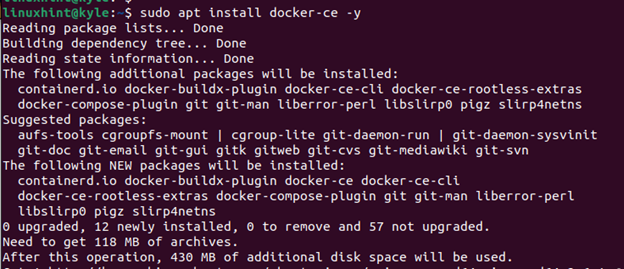
Once the installation completes, check the Docker version.

Notice how the installed version matches the output that we got earlier in step 5 after specifying the installation source. Also, you might notice that this method installs the Docker version 24.0.7 which is the latest version compared to what we got with the first method.
Conclusion
There are two approaches that you can take to install Docker on Ubuntu. This post discussed both approaches and provided the detailed steps that you must follow to install Docker on Ubuntu comfortably. One approach installs the latest Docker version than the other. Check out both methods and see which is convenient for your case.
Source: linuxhint.com