Managing Docker Volumes Using Docker Compose
Docker is a free, open-source development and testing environment that is utilized to build, test, and ship applications and software. The applications are built and tested in an isolated environment through containers in Docker. The Docker containers are just like containers that pack the project with all essential dependencies.
Sometimes, users remove the Docker containers intentionally or unintentionally which can cause the loss of all data stored in the container. However, users may require the deleted data in the future. To preserve the container data and to prevent it from being deleted while removing the container, users can mount external storage to a container that is Docker volume.
This blog will guide:
- What is Docker Volume?
- How to Create and Inspect Docker Volume?
- How to Manage and Mount Volume Using Docker Compose?
- How to Mount Current Working Directory as Volume Using Docker Compose?
- Conclusion
What is Docker Volume?
Docker volume is one of the major components of the Docker framework that persists the data created and used by the Docker container. It is an external storage system that is totally independent of the container’s life cycle and managed by Docker. In other words, it is referred to as a backup system of a Docker container and when the containers are removed, the volume still preserves the container’s data. Additionally, this data can be easily accessible and used by other containers in the future.
Basic Commands to Manage Docker Volume
The commands used to manage the Docker volume are listed below in tabular form:
| Command | Description |
| docker volume create | It is used to create new Docker volume |
| docker volume inspect | This command inspects the created Docker volume |
| docker volume ls | List down all the volumes that are hosted by Docker |
| docker volume prune | Prune or remove all unused Docker volume |
| docker volume rm | It is used to remove specific volumes by id or name. |
How to Create and Inspect Docker Volume?
To create the volume that will be hosted and managed by Docker, utilize the “docker volume create”. This external volume can be easily mounted with any container to preserve the container’s data. Users can also view the mounted point of the Docker volume where data will be stored through the “docker volume inspect” command.
For illustration, go through the provided steps.
Step 1: Create Volume
First, create a new volume in Docker using the “docker volume create <volume-name>” command. Here, “–name” is used to specify the name of the volume:

Step 2: List the Docker Volumes
To confirm whether the volume is created or not, list down the Docker volumes using the “docker volume ls” command:

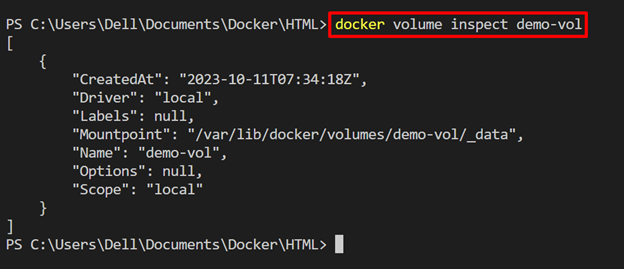
Step 3: Inspect the Docker Volume
In order to view the mount point of volume where the container’s data will be stored, inspect the volume using the given command:
Let’s move ahead to mount or manage the Docker volume through Docker Compose.
How to Manage and Mount Volume Using Docker Compose?
The Docker compose is one of the major plugins of Docker that is utilized to manage and execute multiple container applications and services. To manage or mount Docker volume through Docker compose, follow up on the below demonstration.
Step 1: Make a Program File
First, make a program file named “index.html” and add the following line of code to the file:
<head>
<style>
body{
background-color:rgb(9, 4, 4);
}
h1{
color:rgb(221, 219, 226);
font-style: italic;
}
</style>
</head>
<body>
<h1> This is First HTML page </h1>
</body>
</html>
Step 2: Make Dockerfile
Next, create the Dockerfile that will be used to provide the build context of the container to Docker compose:
COPY index.html /usr/share/nginx/html/index.html
ENTRYPOINT ["nginx", "-g", "daemon off;"]
In the above code:
- “FROM” command is utilized to define the base image for building the container.
- “COPY” command will copy the program file to the container’s path.
- “ENTRYPOINT” command will set the default executing points for the container.
Step 3: Create “docker-compose.yml” File
Next, create a YAML file “docker-compose.yml” and paste the following snippet into the file:
services:
web:
build: .
volumes:
- demo-vol:/usr/share/nginx/html
ports:
- 8080:80
volumes:
demo-vol:
external: true
In the above code:
- “services” key is used to specify services in the container. Here, we have configured the “web” service.
- “build” key is utilized to read the build context. Here, we will read the build context from the Dockerfile.
- “volumes” key mounts the external volume to the Docker container. Here, the source volume will be stated on the left side of the colon and the destination path will be mentioned on the right side. For illustration, we have mounted the above-created “demo-vol” volume to the container path.
- “ports” key allocates the exposing port of the container.
- Now, again use the “volumes” key to define the external volume and enable it by setting the “external” value as “true”.
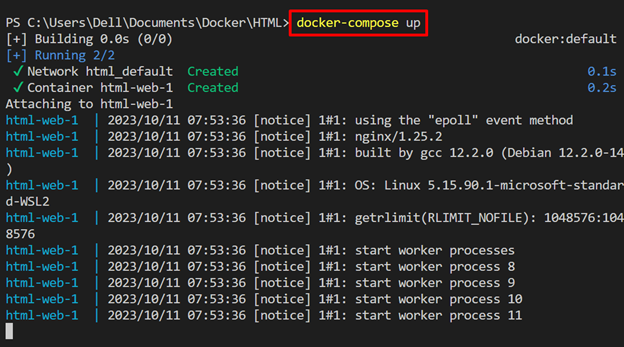
Step 4: Start the Docker Container
Start the composing service inside the container using the “docker-compose up” command:
In the below output, the “html-web-1” container will execute the “web” service:
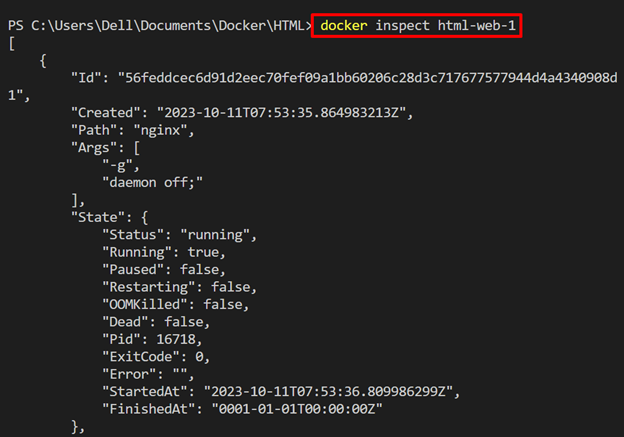
Step 5: Inspect the Docker Container
To confirm whether the external volume is mounted with a running container or not, inspect the container using the “docker inspect <cont-name>” command:
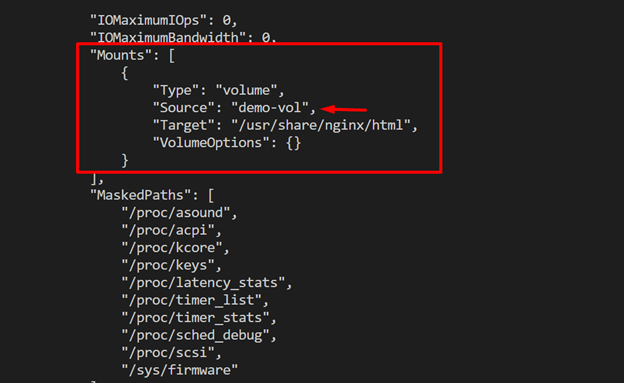
Under the “Mounts” key, the user can check the details about the mounted volume. The below output indicates that we have mounted the “demo-vol” volume successfully to the “html-web-1” container:
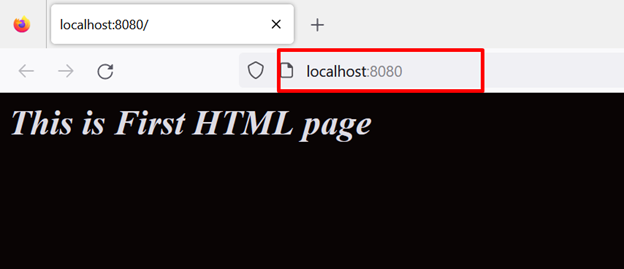
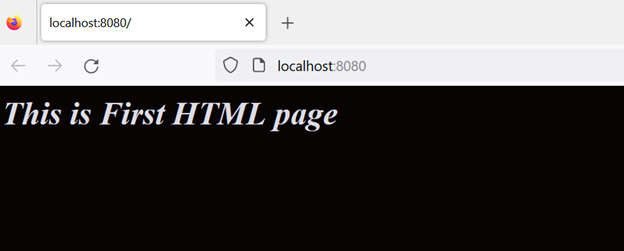
Now, navigate to the “http://localhost:8080” to verify whether the container is executing effectively or not:
However, instead of mounting an external volume, the user can also mount any system directory as a volume to the Docker container.
How to Mount Current Working Directory as Volume Using Docker Compose?
To mount the local directory of the system to a Docker container through the composing service, go through the following demonstrations.
Step 1: Create “docker-compose.yml” File
Create a “docker-compose.yml” file and add the following keys to the file:
services:
web:
build: .
ports:
- 8080:80
volumes:
- type: bind
source: .
target: /usr/share/nginx/html
In the above code block, the build process of the service container will remain the same. However, use the “volumes” key and specify its “type” as “bind” to bind the local system directory as volume. After that, define the source address or binding address in the “source” key, and the “target” key will contain the path of the destination where the volume will be bound.
Step 2: Start the Docker Container
Now, fire up the container using the “docker-compose up” command:

Step 3: Inspect the Docker Container
For verification, inspect the running container using the given command:

Inside the “Mounts” key, the user can verify whether the volume is mounted or not. The below output shows that we have successfully mounted the current working directory as volume:

Now, visit the “http://localhost:8080” and check if the “web” service is executing in a container or not:
That is all about managing Docker volume using Docker compose.
Conclusion
To manage Docker volume, the Docker community provides different commands such as “docker volume create” to create the volume, “docker volume inspect” to inspect the created volume, and so on. To manage and mount the volume using Docker Compose, the user can utilize the “volumes” key through which they can specify the volume type, volume source, and target point. This blog has demonstrated how to manage and mount an external volume or working directory as a volume using Docker Compose.
Source: linuxhint.com