How to Install AWS CLI Using Chocolatey Package Manager?
In modern times, technology has become the lifestyle and every day is a new invention for a better and advanced tomorrow. Continuing this legacy, AWS has revolutionized the traditional ways of data storage and manipulation by introducing the advanced concepts of Cloud Computing. Today, millions of users are trusting AWS with their confidential data and AWS is effectively and efficiently providing its services to these users.
Quick Outline
This article covers the following aspects:
Amazon Web Services has become the market leader and top innovator by introducing services at affordable prices with exceptional features. One of the most powerful yet simplest tools for using AWS is AWS CLI.
What is AWS CLI?
AWS CLI is a unified tool that allows users to interact with multiple services and manage various resources. It is an open-source command-based application that is compatible with multiple operating systems such as Linux, Mac, and Windows. AWS CLI is capable of performing all the actions and functionalities that are achieved via the AWS Console.
The feature that makes it stand out from other technologies in the market is that the user does not need to sign into their console to access AWS. With AWS CLI, the user can access the resources and services by using simple and one-line commands with multiple options available from their local machines.
Why AWS CLI Should be Used?
Among the many reasons for working with AWS CLI, one of the most common use cases of this tool is that it reduces the number of steps with the simple one-line command and various parameters. It achieves the same functionality with additional benefits e.g., less time consuming and no need to separately log into the AWS Console.
Unlike the AWS Console which requires the provision of the credentials for authorizing and authenticating the user, AWS CLI is only configured once with the credentials. AWS CLI can be installed using various package managers and libraries such as APT, pip Chocolatey, etc.
What is Chocolatey Package Manager?
Chocolatey or Choco is a free open-source package manager for Windows that contains various software. This software can easily be installed on local machines via the Command Line Interface. Chocolatey will download software, install it, and then keep track of the necessary updates for the software. It will automatically update the software with the latest updates and provide a smooth user experience.
Why Chocolatey Package Manager is Preferred?
Most of the users wonder why they should use Chocolatey when there are multiple options available for installing the software. Well, Chocolatey works similarly to the APT or DNF package manager of the Linux realm but what makes this package manager stand out from the rest due to the following reasons:
-
- Automatically detects and updates the software.
- Easily manages complex environment variables
- Reduces the effort and time by accelerating the deployment tasks.
- Consists of a repository to easily install and execute different versions of various software.
Prerequisite
Now, after understanding the purpose and reasons for using Chocolatey, let’s look at the requirements for installing the AWS CLI via Chocolatey:
-
- Windows PowerShell v2.0 or higher
- Windows PowerShell v3 for direct installation of Chocolatey
- AWS Account
How to Install AWS CLI Using Chocolatey?
AWS CLI with its abilities of fast responses, flexibility, exemplary customer service, and tying up the control of these resources into the Command line interface has succeeded in attracting millions of users around the globe. On the other hand, Chocolatey with its features like automating the updates and saving the time of its users has wide support for the 59 various packages of AWS.
AWS CLI can be installed via the Chocolatey package manager in the following two ways:
Method 1: Install AWS CLI using Chocolatey in PowerShell
The first method for installing the AWS CLI by using the Chocolatey is through the PowerShell in Windows. For this purpose, follow the below-mentioned steps:
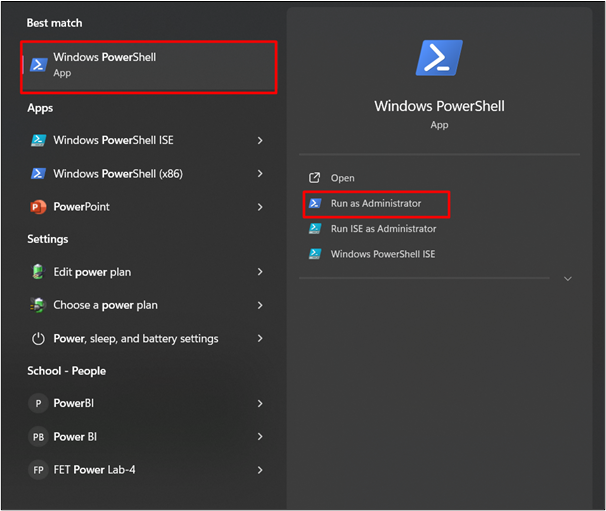
Step 1: Open PowerShell
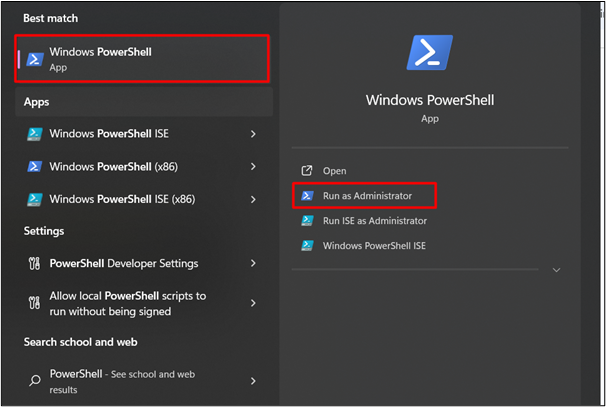
Search the “Windows PowerShell” in the search bar of the Windows. Click on it from the displayed results and tap the “Run as administrator” option:
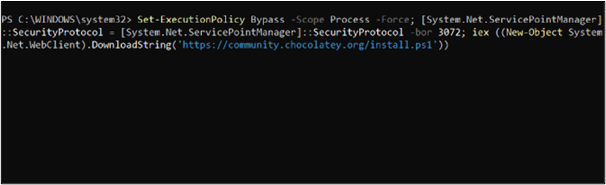
Step 2: Install Chocolatey
Within the PowerShell of the Windows, provide the following command to install the Chocolatey:
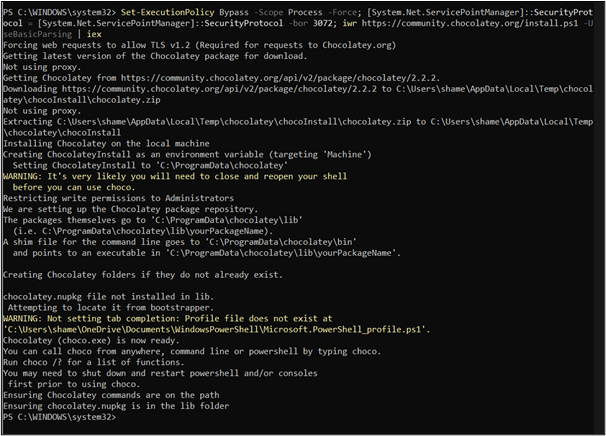
After providing the command to the Powershell, hit the “Enter” button from the keyboard:
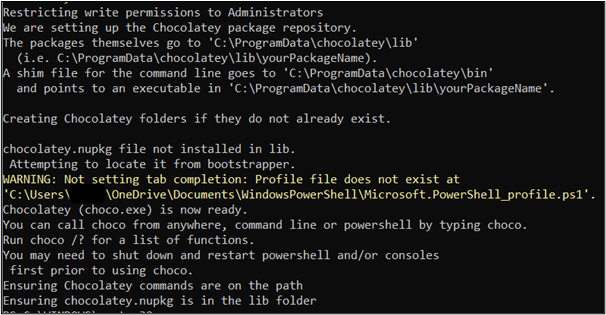
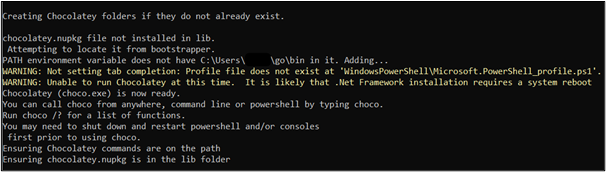
This will take some time to install the Chocolatey package manager:

The package manager has been successfully installed:
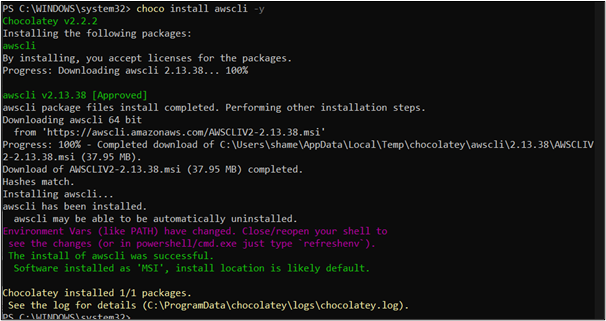
Step 3: Install AWS CLI
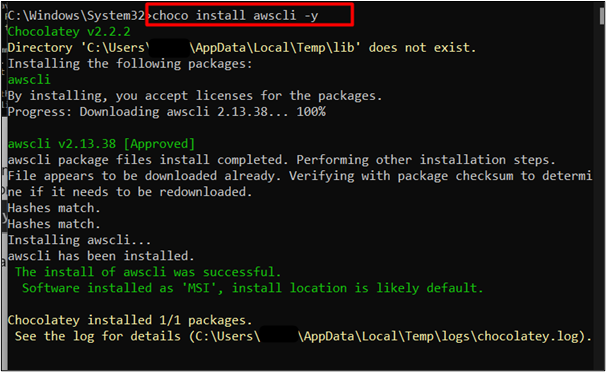
To install the AWS CLI via Chocolatey, use the following command:
After providing the command to PowerShell, the “awscli” has been successfully installed via the Chocolatey package manager:
Step 4: Verification
To verify if the AWS CLI has been successfully installed or not, use the below-mentioned command:
This command will prompt the user to provide credentials such as Access Key ID, Secret Access Key, Default region, and output format. Enter the credentials to configure the AWS CLI or if already provided, simply hit the “Enter” button:

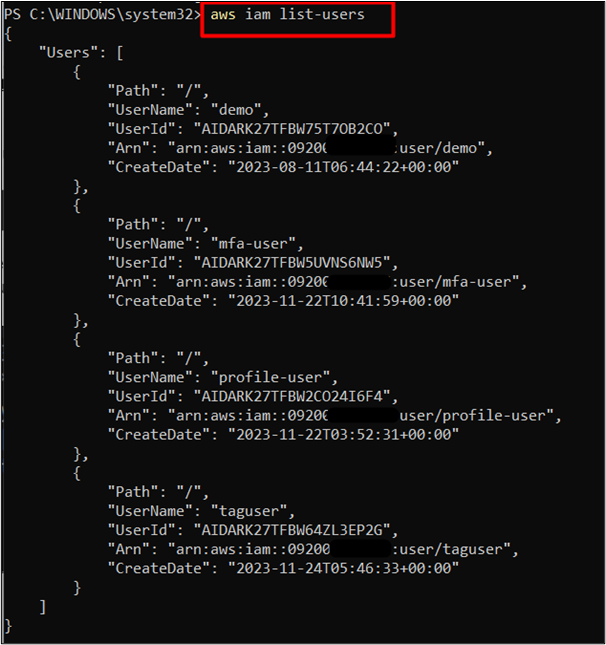
Provide the following command to the AWS CLI in order to verify if the credentials are successfully configured:
In the output, the command has returned a set of IAM users within the AWS account:
That is all from this method of the tutorial.
Method 2: Install the AWS CLI via Chocolatey in CMD
The second method discusses the implementation of installing the AWS CLI via Chocolatey in CMD. For this purpose, the steps are given below:
Step1: Open CMD
To install the Chocolatey via CMD, open the CMD from the Windows search bar and tap the “Run as Administrative” option:

Step 2: Install Chocolatey
Provide the following command to CMD for downloading and installing the Chocolatey package manager:
Here, the Chocolatey package manager has been successfully downloaded and installed:
Step 3: Install AWS CLI
To install the AWS CLI, use the following command:
The AWS CLI has been installed via Chocolatey in CLI:
Step 4: Configure Credentials
To configure the AWS CLI with credentials, follow step 4 of Method 1 which demonstrates the practical implementation of this functionality.
Bonus Tip: Uninstall the Chocolatey Package Manager
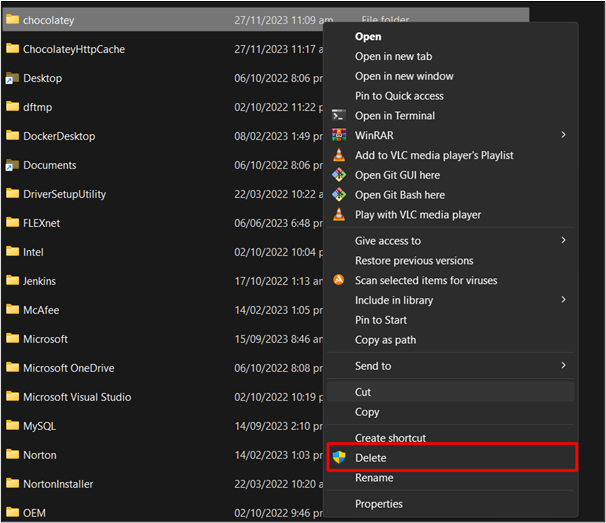
To uninstall the Chocolatey Package Manager, the user has to only delete the Chocolatey folder. The Chocolatey folder contains the files and directories necessary for the installation of the package manager.
The Chocolatey package manager is usually installed in the C drive of the system. Navigate to the following path:
Within the ProgramData directory, there will be a “Chocolatey” folder. Right-click on the folder and click the “Delete” option from the “Show more options” menu:
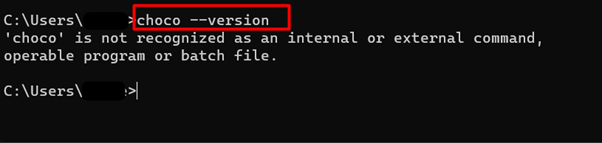
After deleting the folder, the Chocolatey package manager will be successfully uninstalled from your system. To verify this, open the CMD and provide the following command to it:
The Chocolatey Package Manager has been successfully uninstalled:
Runtime Exception: Chocolatey Requires Administrative Access
Oftentimes, users run into the Runtime Exception while installing Chocolatey. This error occurs because Administrator permissions are required for the Chocolatey installation which currently are not configured in the PowerShell.

If the above-shown exception occurs while installing Chocolatey via PowerShell, follow the below-mentioned steps:
Step 1: Open CMD
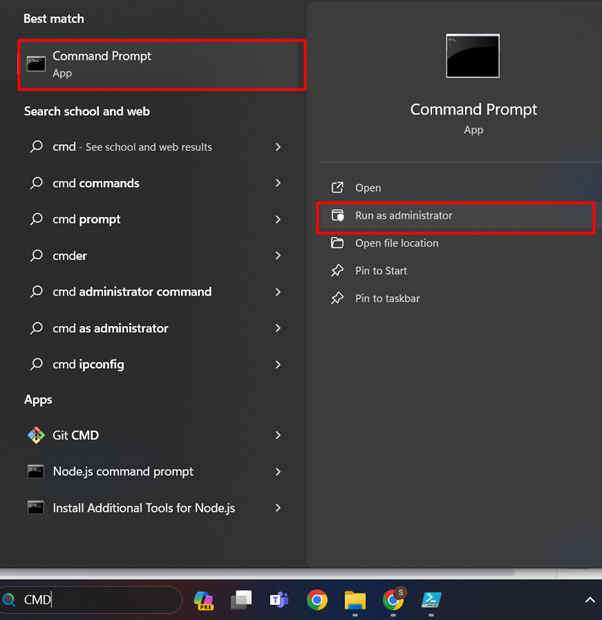
From the Windows Start Menu, search the “CMD” in the search bar of the Windows. Click on it and select the “Run as administrator” option:
Step 2: Administrator Access
Provide the following command to check if the Administrator account is enabled or not:
The output of the command is as follows:

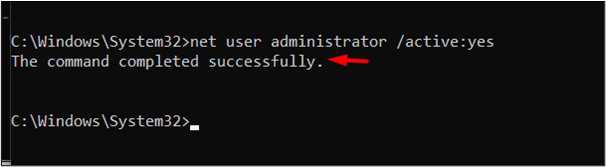
To enable the Administrator access for the Windows account, use the following command:
Below is the output of the command which indicates that the execution of the command has been successful:
Step 3: Open PowerShell
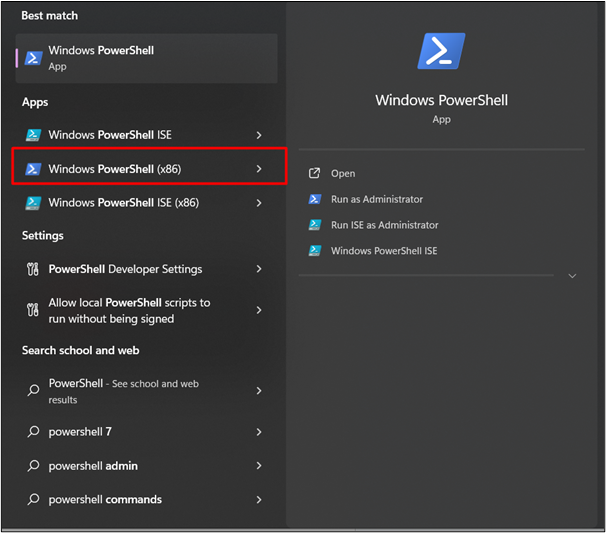
The next step in resolving this error is to run the Administrative PowerShell. Search the “PowerShell” in the Windows search bar and click the highlighted option from the various options displayed:
To verify if the PowerShell is executing the Administrative mode, provide the following command to the PowerShell:
In the output of the command, it should display “Bypass” as shown in the below image:
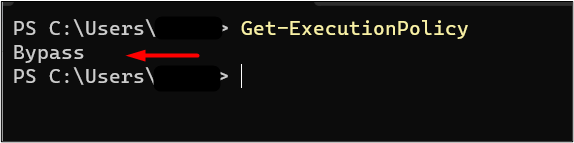
Note: If the command returns “Restricted”, provide the “Set-ExecutionPolicy AllSigned” or “Set-ExecutionPolicy Bypass-Scope Process” command to the PowerShell.
Step 4: Install Chocolatey
Close the PowerShell and open it again in the administrative mode. To open the PowerShell in the administrative mode, search the “PowerShell” in the Windows search bar. Click the following option and tap the “Run as administrator” option:
After the PowerShell is set to run in the administrative mode, provide the following command to install Chocolatey:
The Chocolatey has been installed successfully:
That is all from this section.
Conclusion
To install AWS CLI using Chocolatey, the users can use PowerShell v2.0 or later or CMD with admin access. Provide the mentioned commands to begin installations. The Chocolatey package manager provides support for multiple AWS packages and allows users to interact and manage the resources remotely via terminals and a few simple commands. This article presents a practical implementation for installing the AWS CLI using Chocolatey Package Manager.
Source: linuxhint.com