How to Initialize Vector in C++
While working with different programming languages, users are required to save and handle the huge data that will be gathered through different data structures. Similarly, in C++ there are numerous types of data structures, such as Vectors, Arrays, Linked lists, and many more. To handle these data structures in the memory for performing some operations, users need some variables of data types like characters, integers, float, double, and many more.
The outcomes from this write-up are:
Disadvantages of Vector in C++
How to Initialize Vectors in C++?
- Using Existing Array in C++
- By Entering Values One-by-One With push_back() Method in C++
- Using fill() Method in C++
- Using Using an Existing Vectors in C++
- Using Overloaded Constructor in C++
- By Passing an Array to the Vector Constructor in C++
- Using Index Position in C++
- With Consecutive Numbers Using std::iota in C++
What is Vector in C++?
In C++, a vector is a dynamic array class that is implemented in its standard library. In simple words, the vector is the collective storage in a memory same as the arrays, however, their size can increase dynamically. The size of the vector is changed dynamically when the elements are inserted and deleted during the program execution. Additionally, vector save these elements in contiguous memory locations.
Advantages of Vectors in C++
There are some advantages of the vectors in C++, as follows:
- The size of the vectors varies according to the user’s requirements dynamically.
- It is placed in a contiguous memory.
Disadvantages of Vector in C++
Like advantages, vectors also have some drawbacks which are listed below:
- Vector utilizes more memory because it is an object.
- As compared to the vectors, ArrayList is faster than it.
Syntax of Vector in C++
The general syntax of the vector in C++ is provided below:
Here:
- The “vector” keyword is used for declaring a vector in C++.
- “<data_type>” argument represents the data type of the vector’s elements.
- “vector_name” is the vector’s variable name that will be provided by the user.
- “size” represents the size of the vector(optional parameter)
How to Initialize Vectors in C++?
To initialize vectors in C++, there are multiple methods available. Let’s check them out one by one.
Method 1: Initialize Vectors Using Existing Array in C++
To initialize the vectors in C++, one of the standard ways is by using an existing array. For that purpose, users need to pass the array’s element to the vector’s class iterator constructor. To understand this concept, check out the following code:
#include <vector>
using namespace std;
int main() {
char my_array[] = {‘M’, ‘A’, ‘R’, ‘I’, ‘A’};
vector<char> my_vec(begin(my_array), end(my_array));
for (char a : my_vec)
cout << a << " ";
}
In the above-provided code:
- First, we have added the header file “<iostream>” and “<vector>”. Then, specify the “std” namespace that includes the standard C++ library components.
- Next, we initialized the character type of the array named “my_array[ ]” inside the “main()” function.
- Then, initialized the “<char>” type vector named “my_vec” with the iterator functions, such as “begin()” and “end()”. We passed the array to the iterator functions.
- Afterward, we used the “for” loop and passed the initialized vector.
- Lastly, added the “cout” statement to show the resultant value.
According to the below-given output, we have successfully printed the elements of the array:

Method 2: Initialize Vectors by Entering Values One-by-One With push_back() Method in C++
Another way to initialize the vectors in C++ is by using the “push_back()” method. This method is used to add or push elements one by one into a vector. Additionally, each added element will be placed at the end of the vector and the vector’s size will be increased by 1. Moreover, the “push_back()” method can insert only one element at a time. So, for multiple elements initialization, users need to invoke this method each time.
Let’s check out the following block of code to understand the above-discussed scenario:
#include <vector>
using namespace std;
int main() {
vector<char> Vec;
Vec.push_back(‘D’);
Vec.push_back(‘a’);
Vec.push_back(‘v’);
Vec.push_back(‘i’);
Vec.push_back(‘d’);
for (char a:Vec)
cout << a << " ";
}
Here:
- We have added the required header files along with the “std” namespace.
- Next, we created an empty character type vector named “Vec”.
- Then, we called the “push_back()” function and passed 5 new characters to the vector.
- Afterward, we used the “for” loop to show these characters on the console.
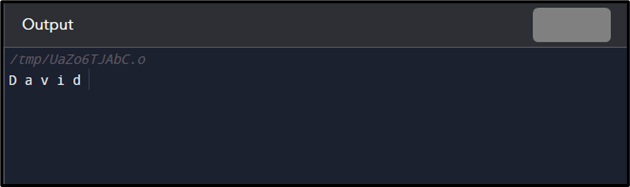
Let’s check out the output of the above-given code:
Method 3: Initialize Vectors Using fill() Method in C++
The “fill()” method is also used for initializing the vectors in C++. Basically, it is used for assigning all the elements in the particular range to the provided value.
Let’s have a look at the following code, where we will initialize the vectors with the “fill()” method:
#include <vector>
using namespace std;
int main() {
vector<char> Vec(5);
fill(Vec.begin(), Vec.end(), ‘M’);
for (char a:Vec)
cout << a << " ";
}
In the above-given code:
- First of all, we have added the header files same as the previously described method with the “std” library.
- Afterward, we created the character type vector named “Vec” and passed it the “5” as the size of the vector.
- Then, invoked the “fill()” method for initializing the vector.
- Next, we added the “for” loop and passed it a vector. Then, added the “cout” statement to print the vector elements on the console.
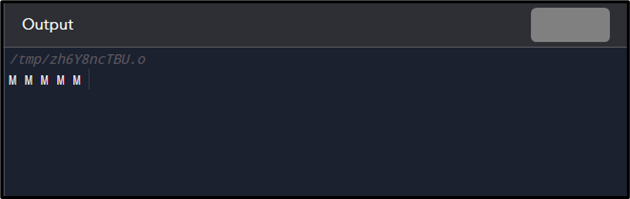
Output
Method 4: Initialize Vectors Using Existing Vectors in C++
In C++, you can also initialize the vectors with the help of the existing vectors. As it is implemented in the following code:
#include <vector>
using namespace std;
int main() {
vector<int> V1{5, 10, 15, 20, 25};
vector<int> V2(V1.begin(), V1.end());
for (int a:V2)
cout << a << " ";
}
According to the above-stated code:
- After adding the header files, we created a vector named “V1” having the integer type.
- Then, we have initialized the vector by an array.
- Next, we used the “for” loop to display the vector elements on the console.
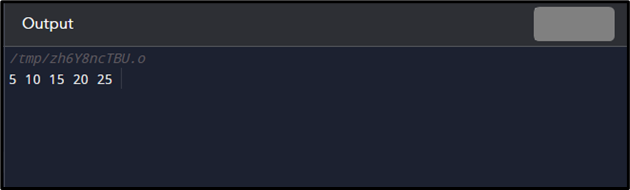
In the below-given output, it can be seen that the elements of the vector have been printed successfully:
Method 5: Initialize Vectors Using Overloaded Constructor in C++
In C++, overloaded constructors are also used for initializing the vectors. The overloaded constructor accepts two arguments. The vector value and size are provided while the vector initialization. To understand this particular scenario, check out the following code example:
#include <vector>
using namespace std;
int main() {
vector<int> V1(5, 6);
for (int a:V1)
cout << a << " ";
}
Here:
- First of all, we have created an integer type vector named “V1” and passed the “5” as a size and “6” as a value.
- Then, we utilized the “cout” statement inside the “for” loop to show the elements of the vector.
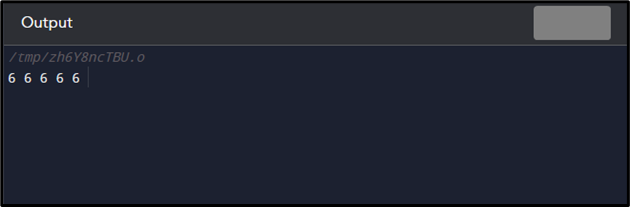
Output
Method 6: Initialize Vectors By Passing an Array to the Vector Constructor in C++
In C++, users can initialize the vector by passing an array to its constructor. The array elements will be added into the vector in the same manner and the size of the vector adjusted automatically:
#include <vector>
using namespace std;
int main() {
vector<int> V1{5, 10, 15, 20, 25};
for (int i = 0; i < V1.size(); i++)
cout << V1[i] << " ";
}
In the above-provided code:
- Inside the “main()” function, we initialized the vector by passing an integer type array.
- Then, used the “for” loop to print the elements of the vector.
Let’s have a look at the following output of the above-given code:

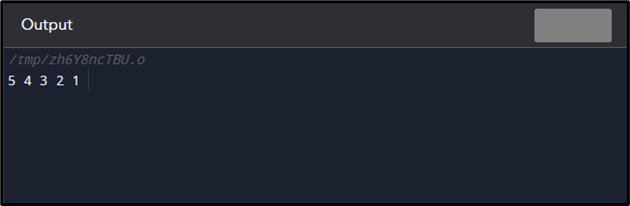
Method 7: Initialize Vectors Using Index Position in C++
In C++, users can initialize each element of the vector by allocating value to it using the index position. To do so, use the following code:
#include <vector>
using namespace std;
int main() {
int x = 5;
vector<int> V1(x);
V1[0] = 5;
V1[1] = 4;
V1[2] = 3;
V1[3] = 2;
V1[4] = 1;
for (int a : V1)
cout << a << " ";
}
In accordance to the above-given code:
- First, we declared the integer type variable named “x” and initialized it with “5”.
- Next, created the integer type vector and passed the variable as an argument.
- Then, we passed the value to the vector using array indexes.
- After that, invoked the “for” loop to view the elements of the vector.
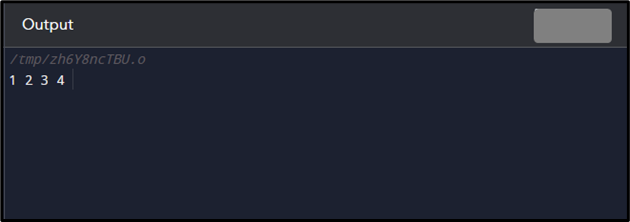
Method 8: Initialize Vectors With Consecutive Numbers Using std::iota in C++
The “std::iota” is a standard function template in the “<numeric>” header. Here, the “iota” is the greek letter that represents consecutive integer numbers. It can also be utilized for initializing vectors. Let’s check out the following code for better understanding:
#include <numeric>
#include <vector>
using namespace std;
int main()
{
vector<int> V(4);
iota(V.begin(), V.end(), 1);
for (int x = 0; x < 4; x++) {
cout << V[x] << " ";
}
}
Here:
- First, we have defined the “<iostream>”, “<numeric>”, and “<vector>” header files along with the “std” namespace library.
- Next, declared an integer vector and pass the “4” as its size.
- Afterward, initialized the vector using the “iota()” function.
- Lastly, print the vector’s elements on the screen.
Output
That’s all! We have provided all the possible methods for initializing the vector in C++.
Final Thoughts
Vector is the collective storage in a memory same as the array but their size can be maximized dynamically. There are multiple different ways for initializing vectors, such as using an existing array, push_back() method, fill() method, existing vectors, overloaded constructor, by passing an array to the vector constructor, index position, and iota() function. This guide described the different methods for initializing the vector in C++.
Source: linuxhint.com