How to Edit Columns in Vim
Vim offers different editing modes; one of them is VISUAL BLOCK mode which is used to edit the columns in a file. Column editing is very useful for editing multiple elements in a code, XML, or CSV files. I will explore how to use Vim column edit mode in this guide.
What is Vim VISUAL BLOCK Mode to Edit Columns
- How to Edit Columns in Vim Editor
- Replacing the Columns
- Copy and Paste the Columns
- Cut and Paste the Columns
- Appending Text to the Columns
- Why Can’t I Use r to Replace Columns in Vim?
- Vim Cheat Sheet For Editing Columns
- Conclusion
Note: For the instructions in this tutorial, I am using Vim on macOS. Note that Vim is available for Linux and Windows as well.
What is Vim VISUAL BLOCK Mode to Edit Columns
As discussed Vim has various editing modes, if you are not new to Vim then you must be aware of two mostly used Vim modes: NORMAL mode and INSERT mode. However, there is another mode that is called VISUAL BLOCK mode which is used to visually highlight the text and modify it. The columns are edited in the VISUAL BLOCK mode of the Vim editor.
To enter the VISUAL BLOCK editing mode press CTRL+v key binding.

You will be prompted that you are in the VISUAL BLOCK mode at the bottom of the window.
The cursor position will be the beginning of the marking. In VISUAL BLOCK mode, various columns can be selected and modified at the same time instead of editing them one by one.
Note: VISUAL mode is different from the VISUAL BLOCK mode. The VISUAL mode can be accessed by pressing the v key only while the VISUAL BLOCK mode is accessed through the ctrl+v keys.
How to Edit Columns in Vim Editor
The instructions to edit columns in Vim are listed below:
- Enter the VISUAL BLOCK mode by pressing ctrl+v.
- Select the columns using keyboard directional keys or h, j, k, or l.
- Press shift+i to enter the INSERT mode and type the text to insert.
- Apply the changes to the entire set of selected columns by pressing the Esc key.
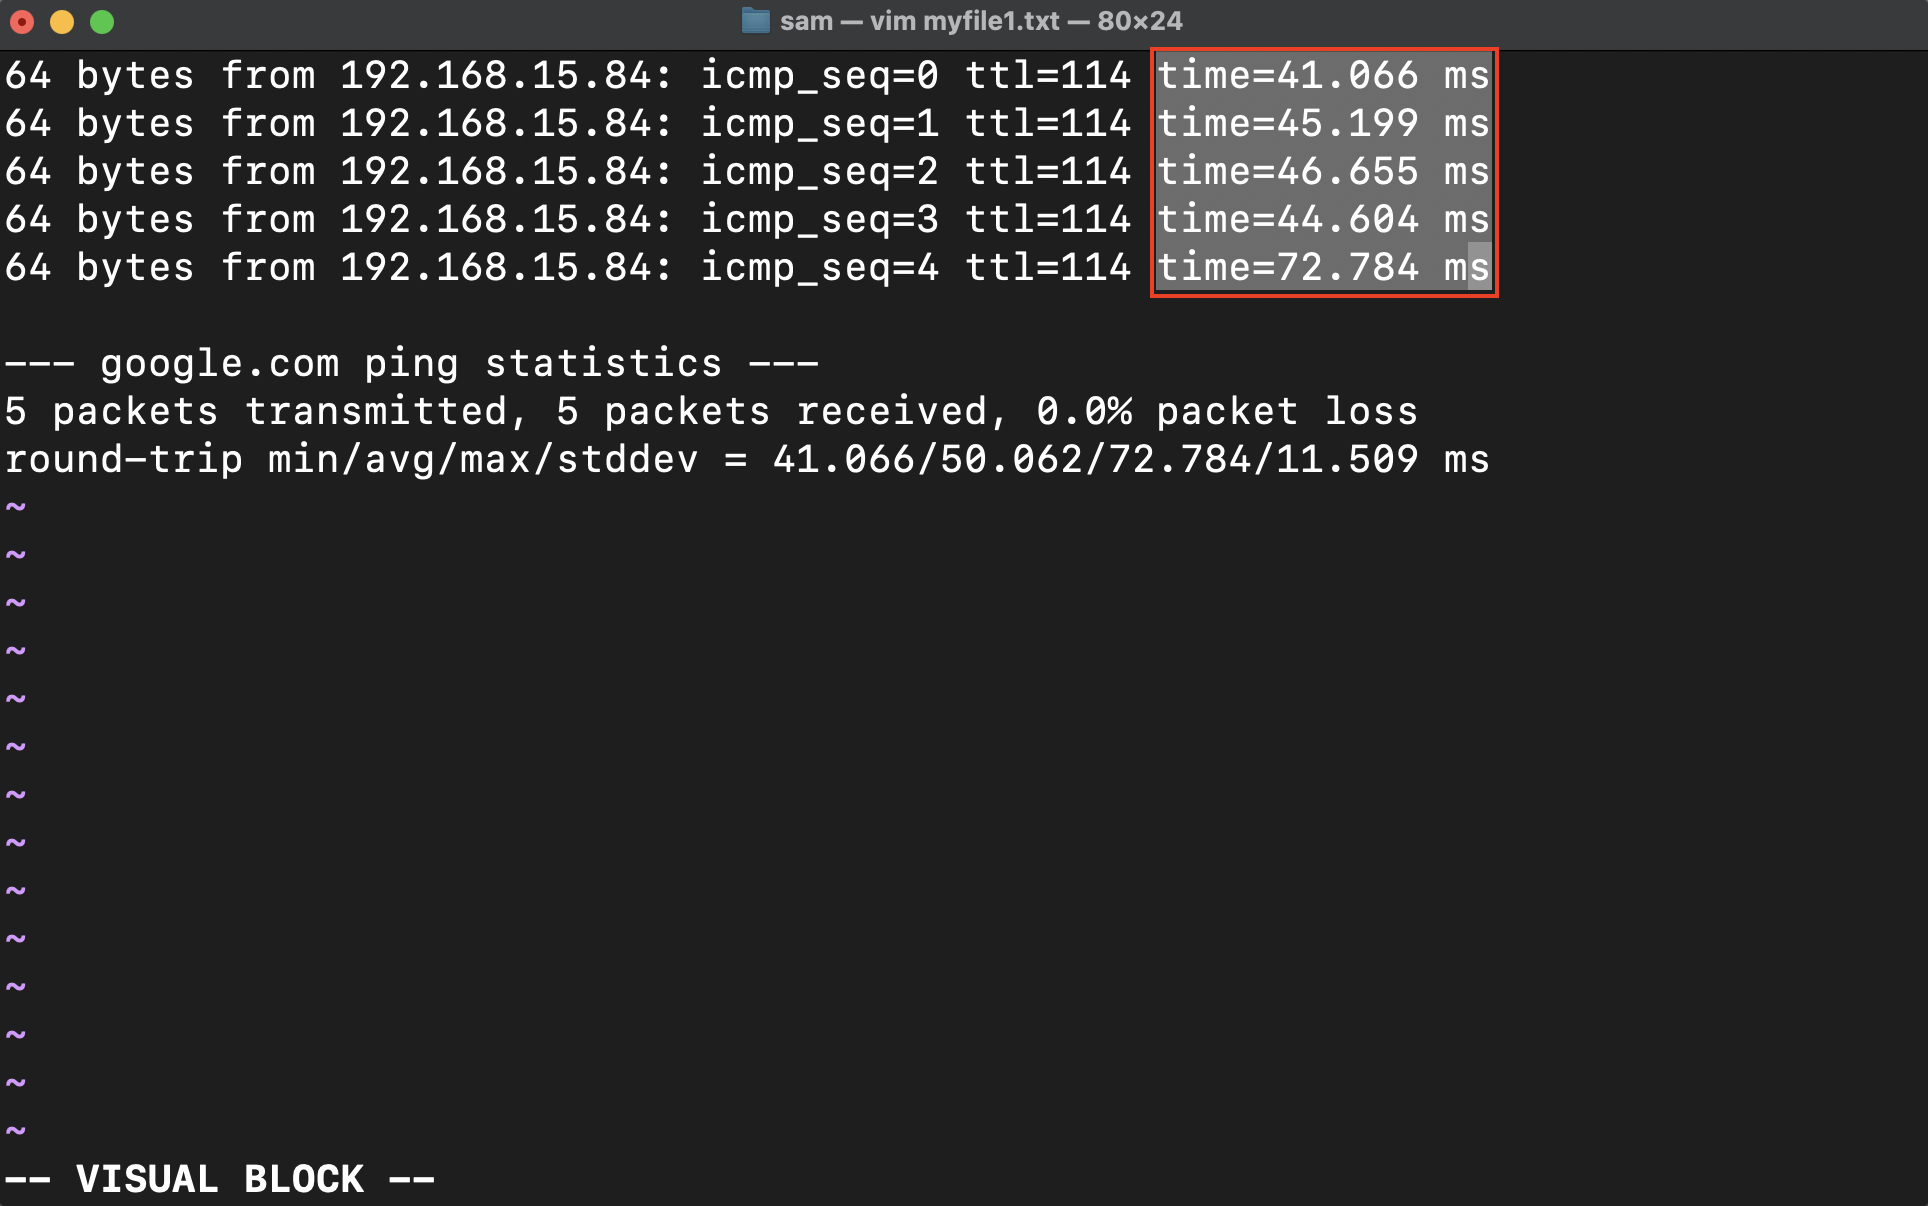
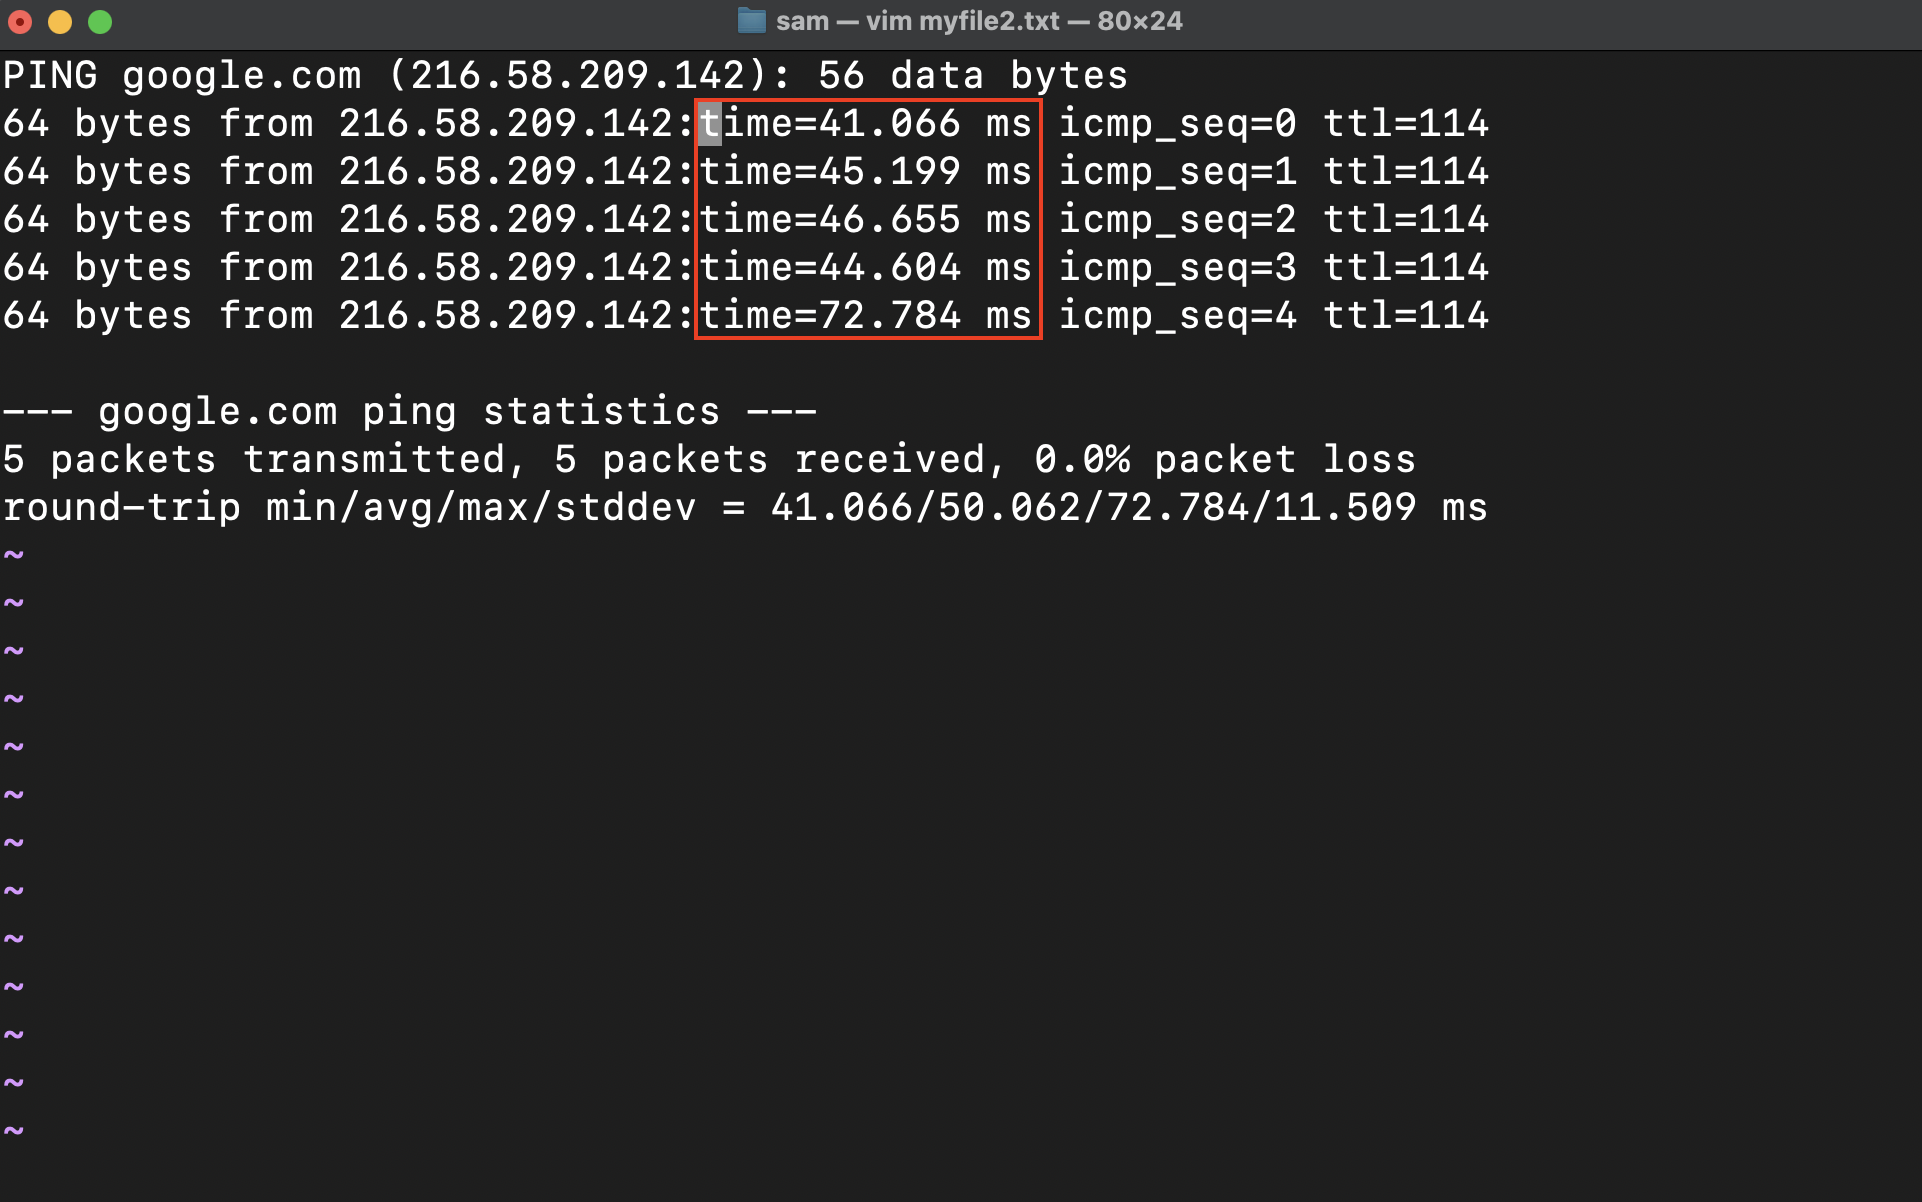
Let’s understand it with an example.
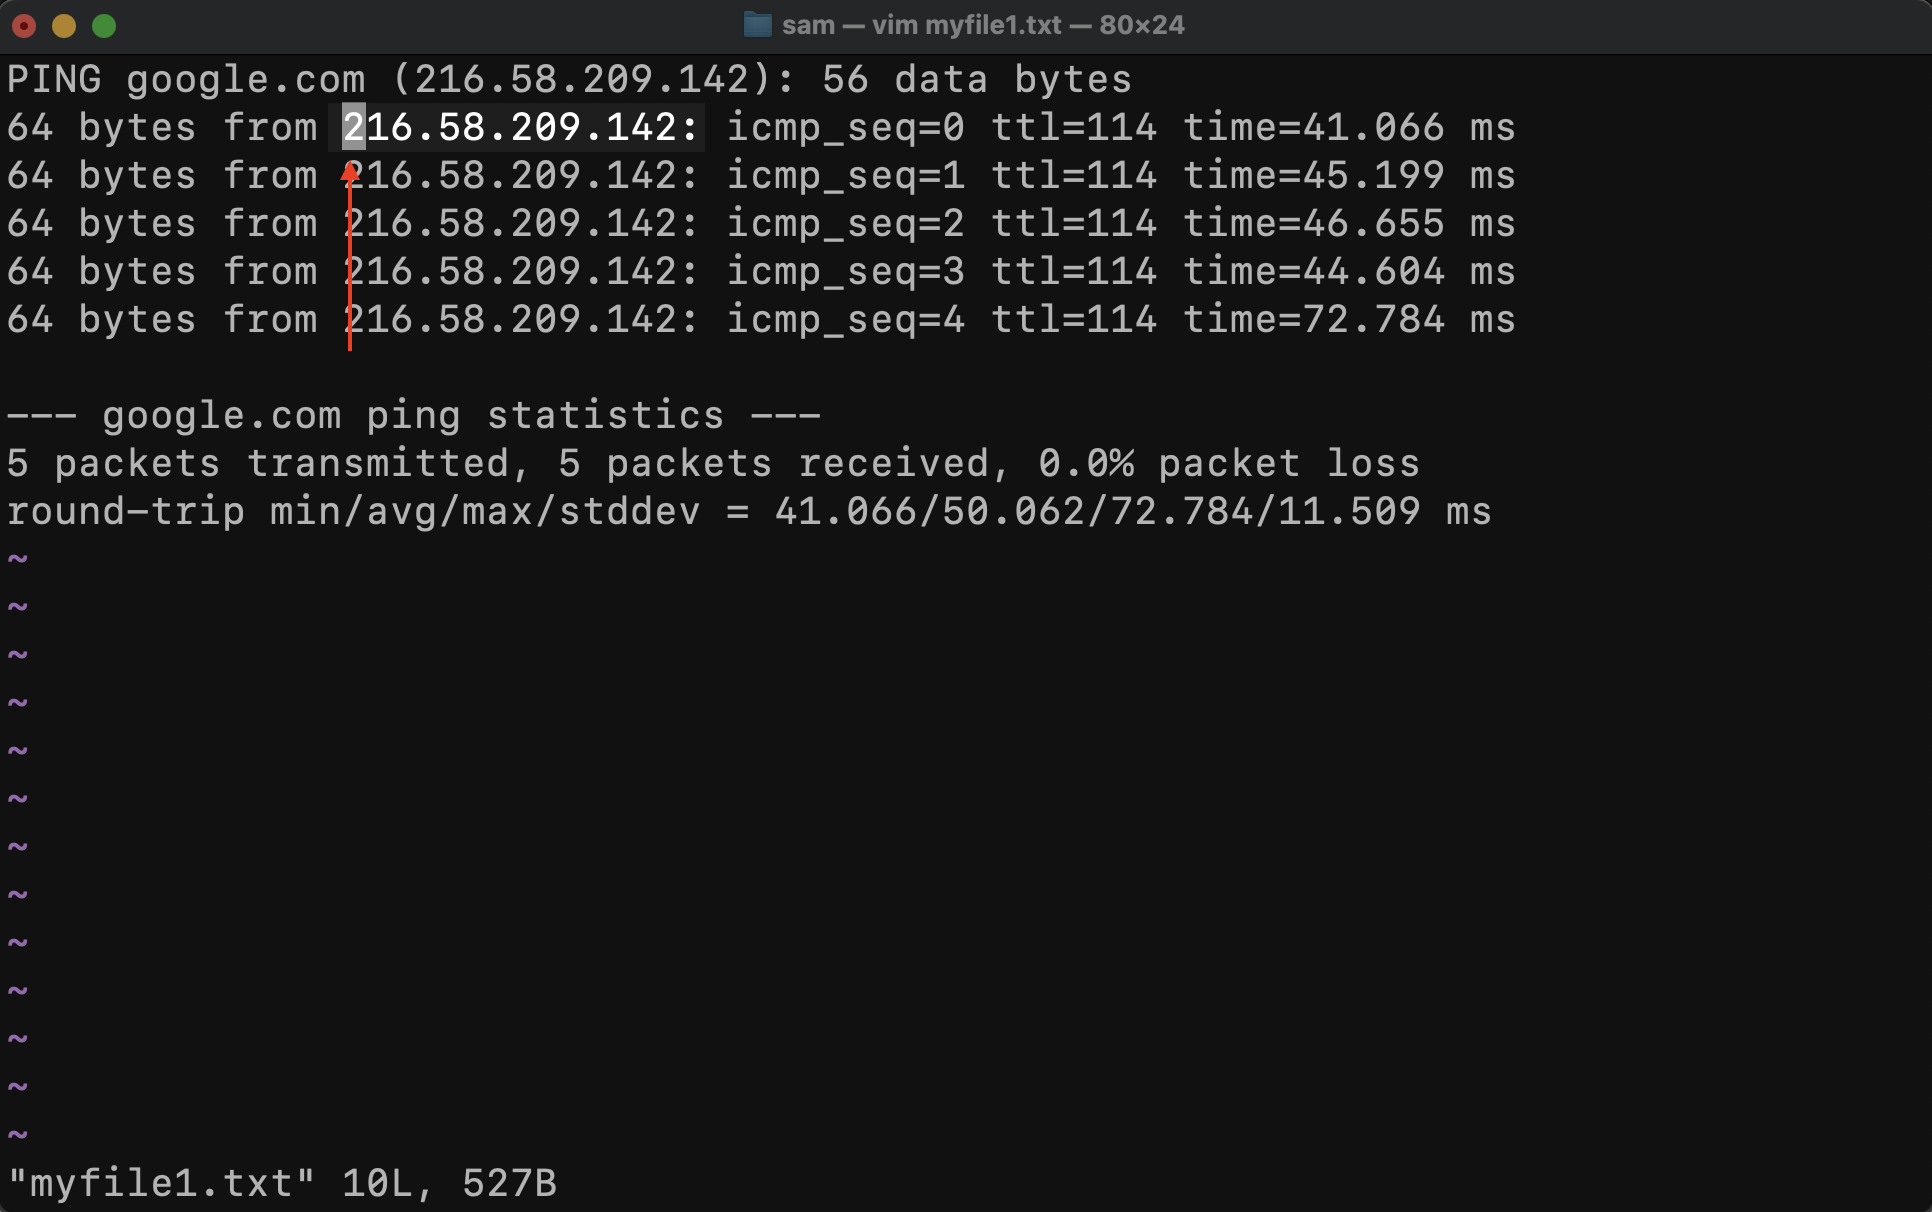
In the following file, let’s insert the values in bits before the from column.
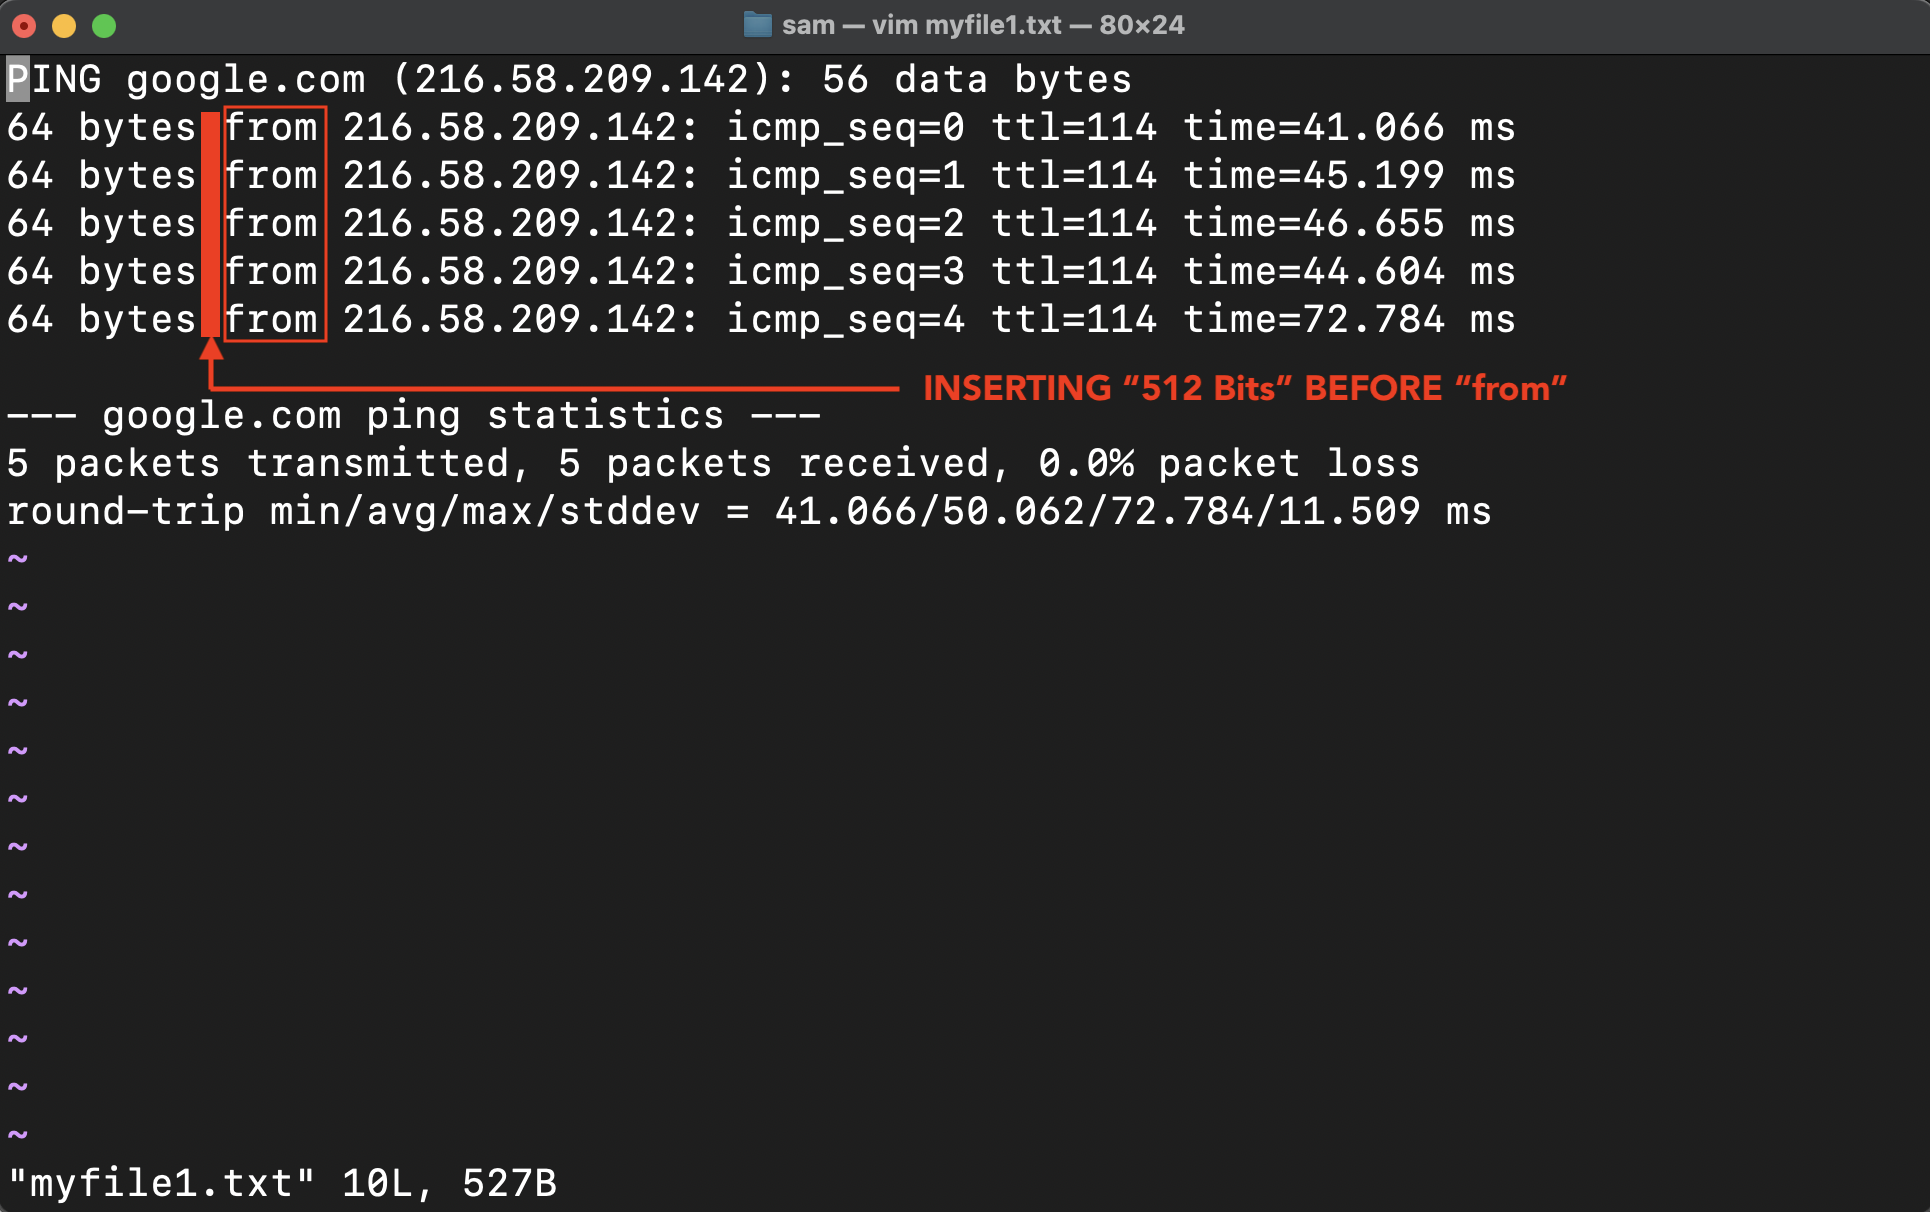
To edit columns in the Vim editor; bring the cursor on the first from and press ctrl+v to enter the VISUAL BLOCK mode.
After that, select the column/columns using the directional keys or Vim’s default key bindings h, j, k, and l.
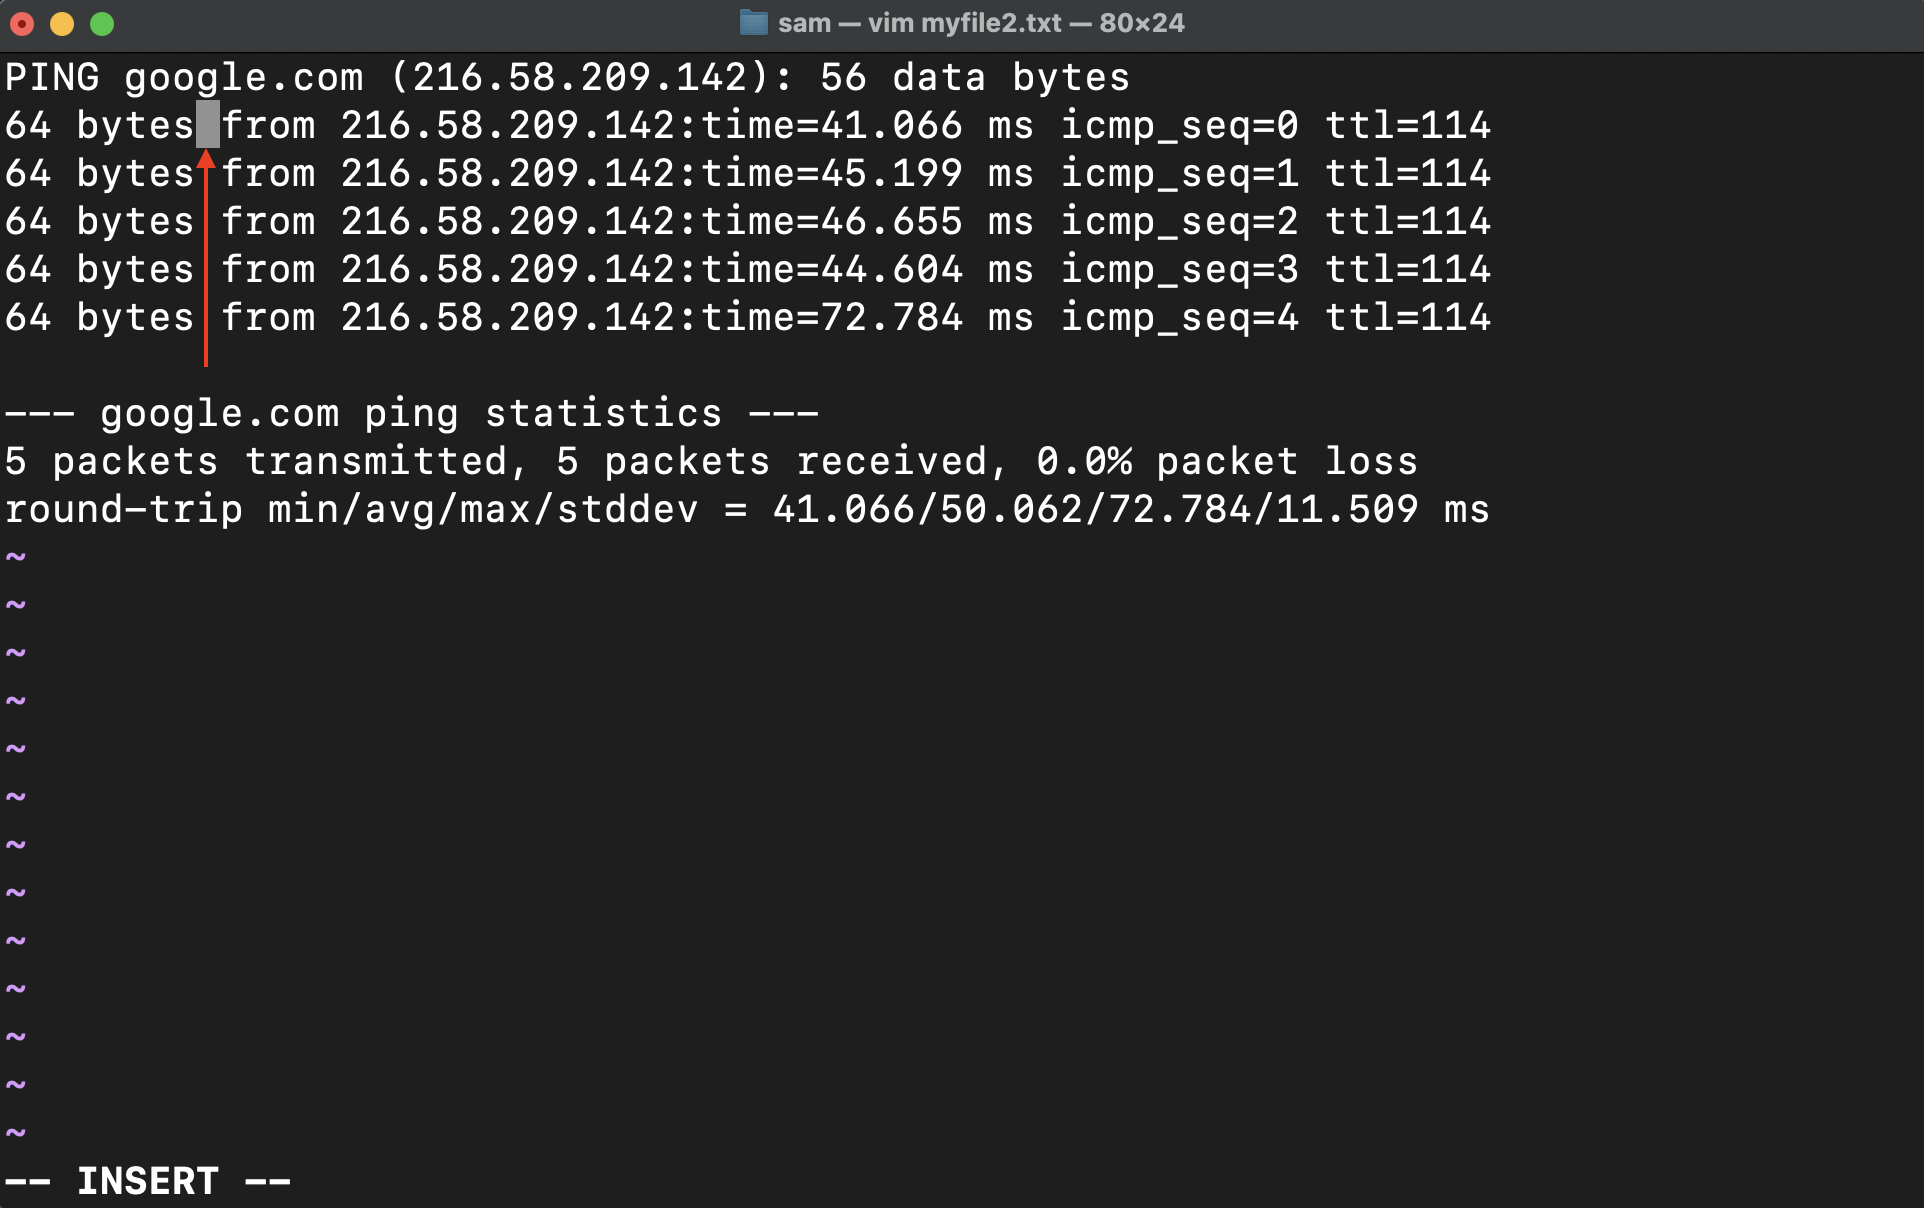
To insert the text, press shift+i to enter the INSERT mode.

You will be in INSERT mode and the cursor will go back to its starting position.
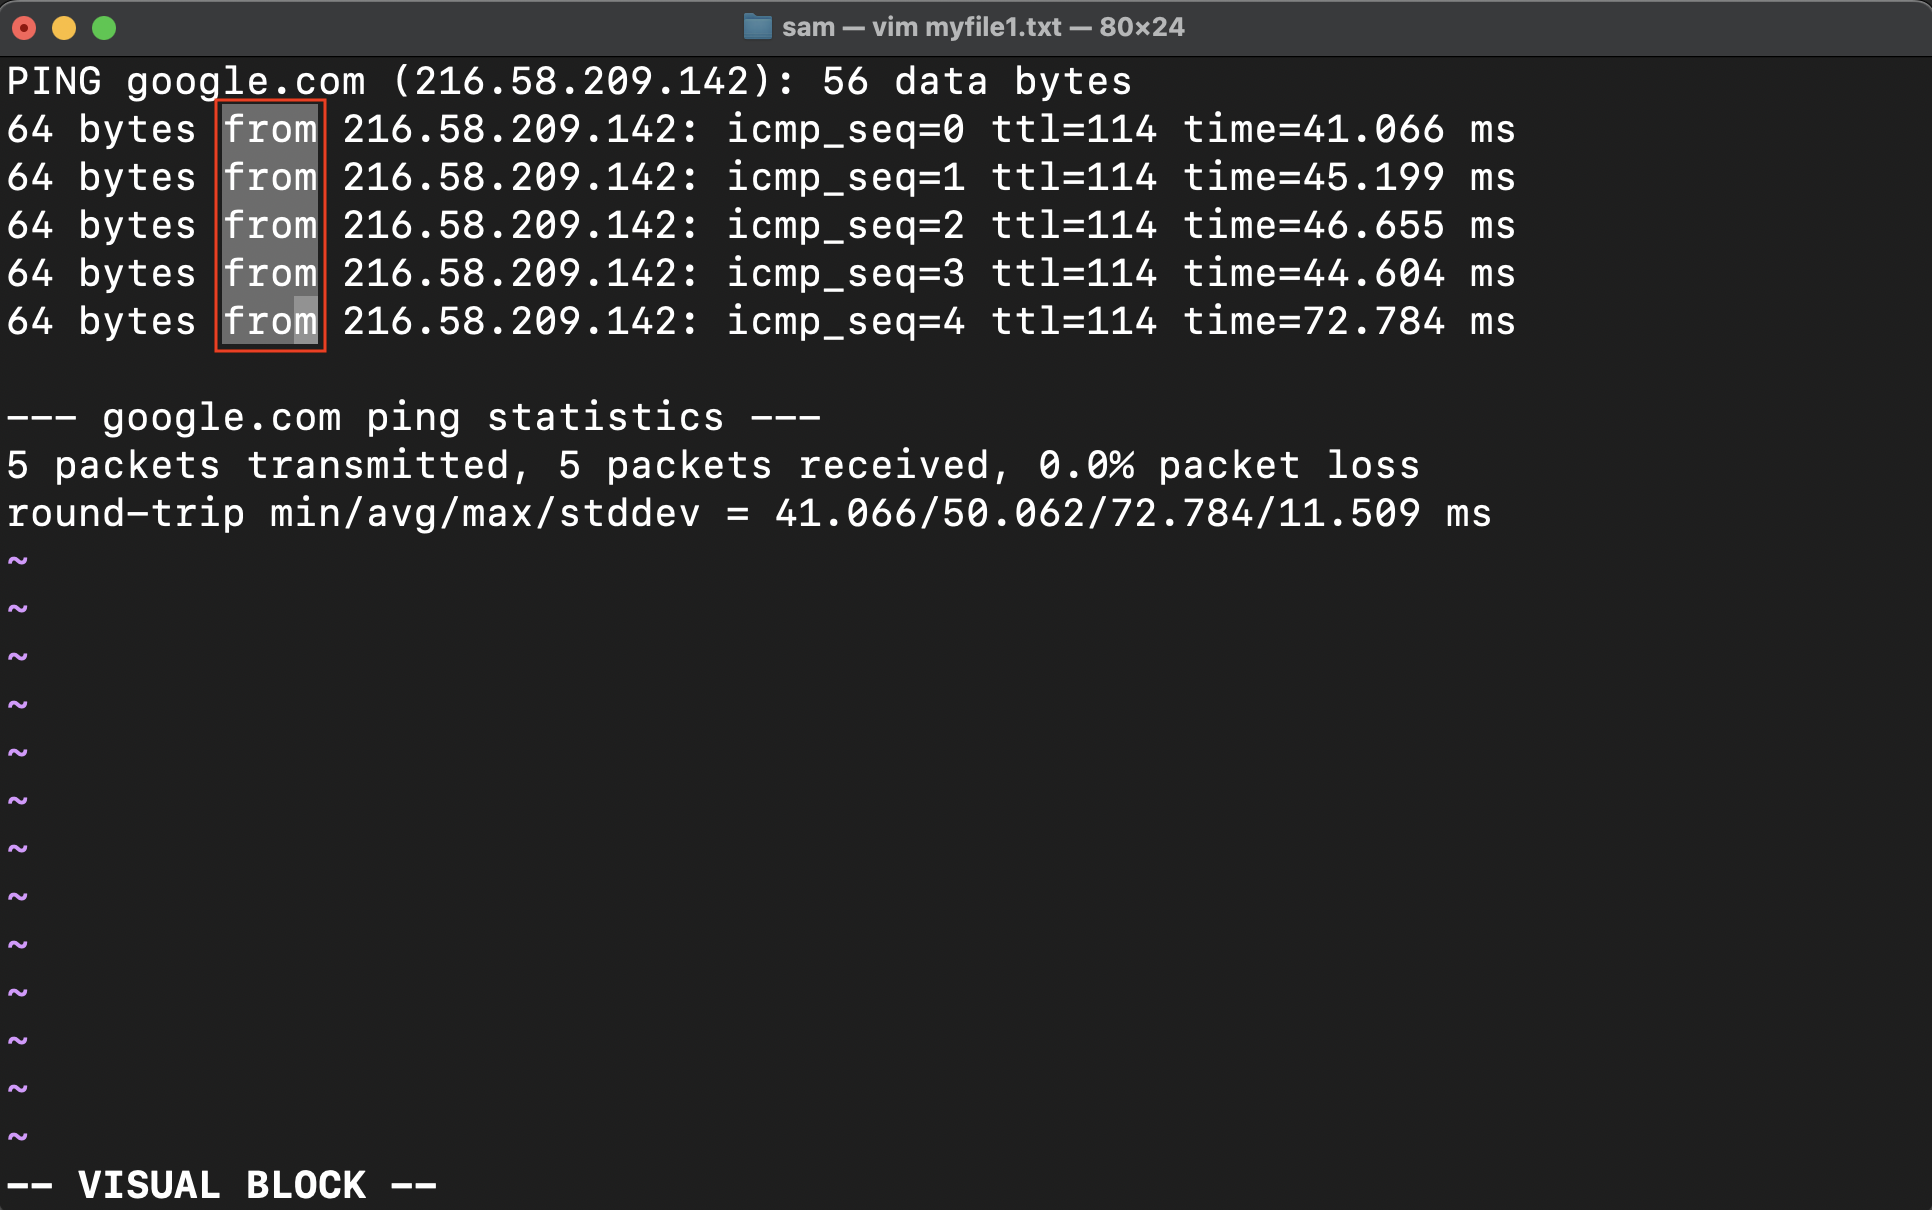
Note: In VISUAL BLOCK mode, you need to press the shift+i keys instead of i because only i key will not work.
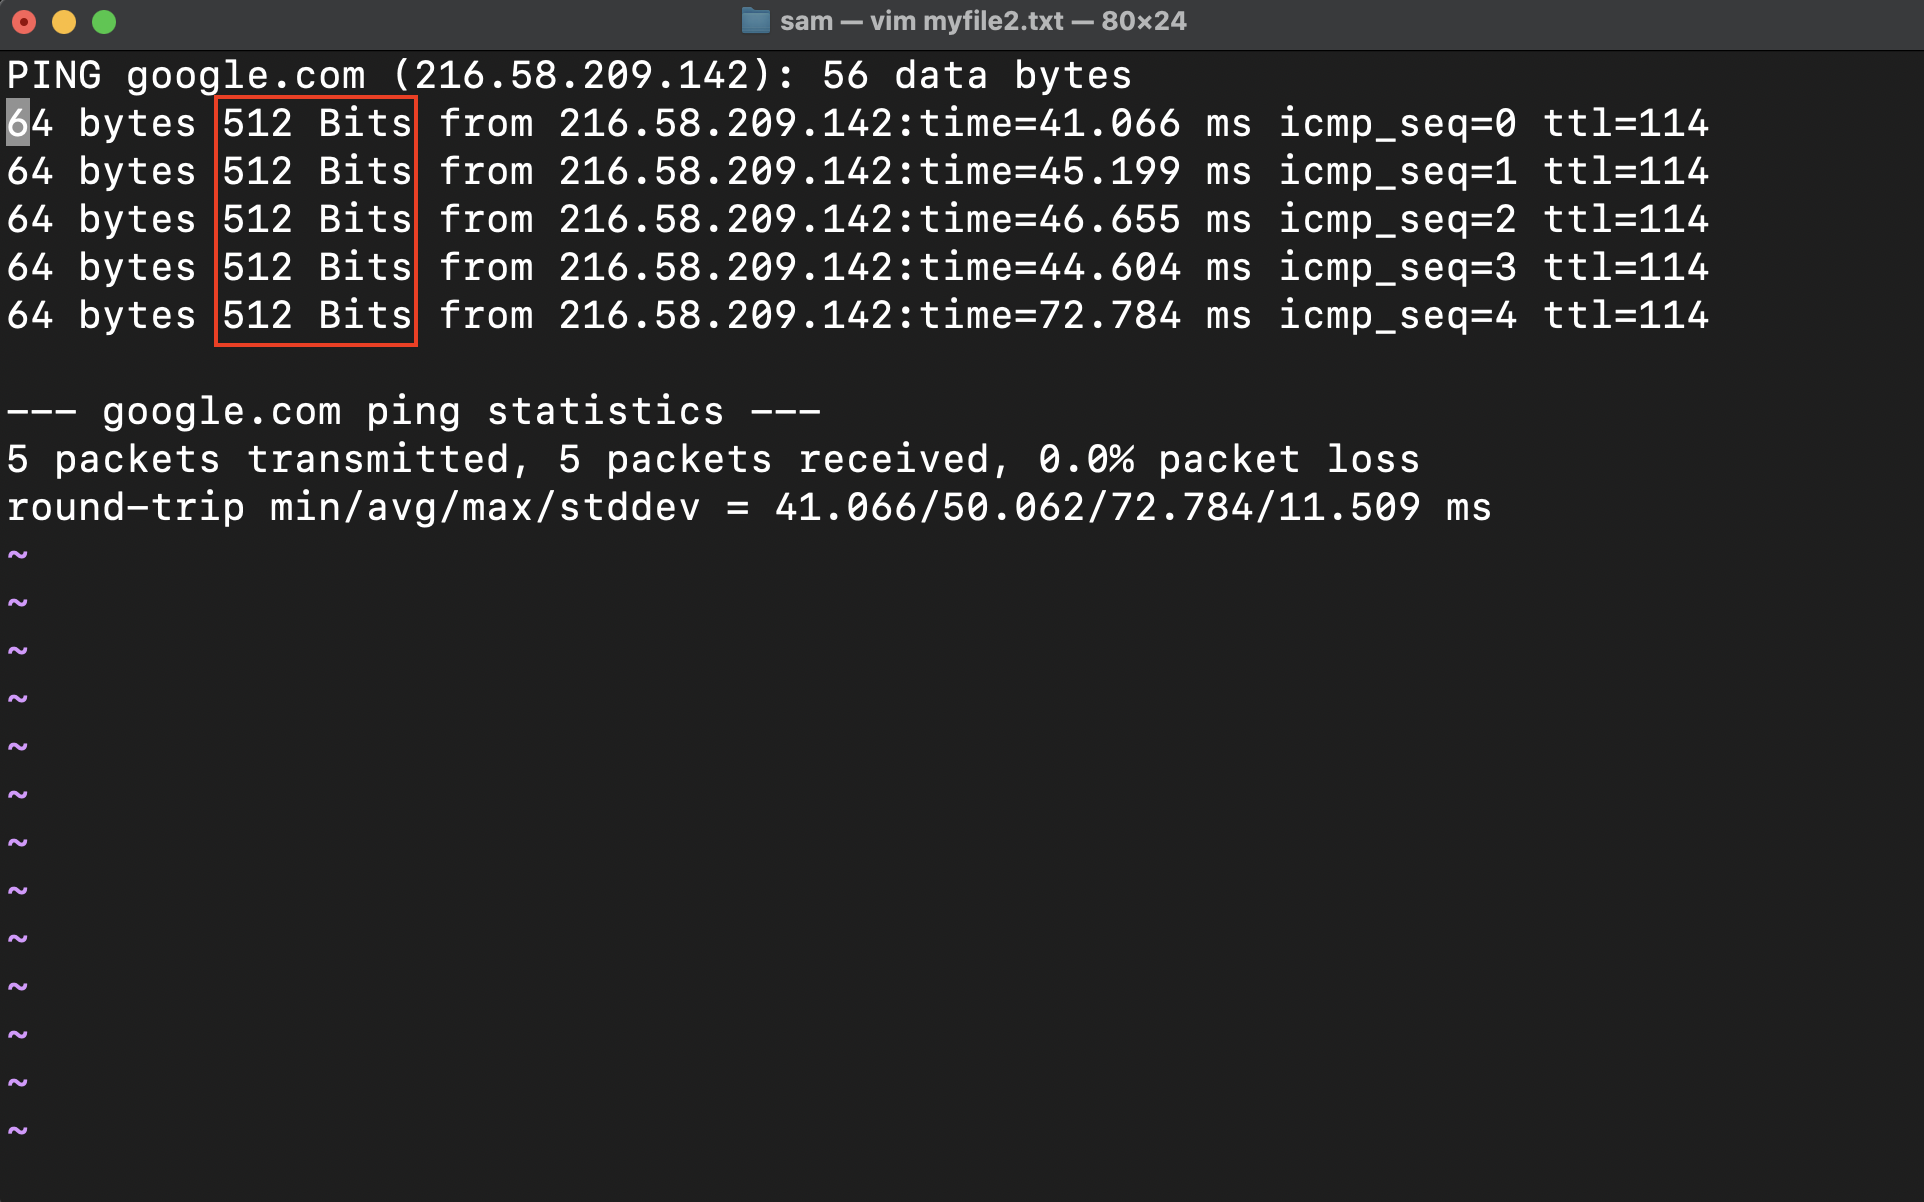
Lastly, type the desired text. In this case, I am entering ‘512 Bits’ with a space character.
Note: In VISUAL BLOCK insert mode, you can see typing only in one line where the cursor was.
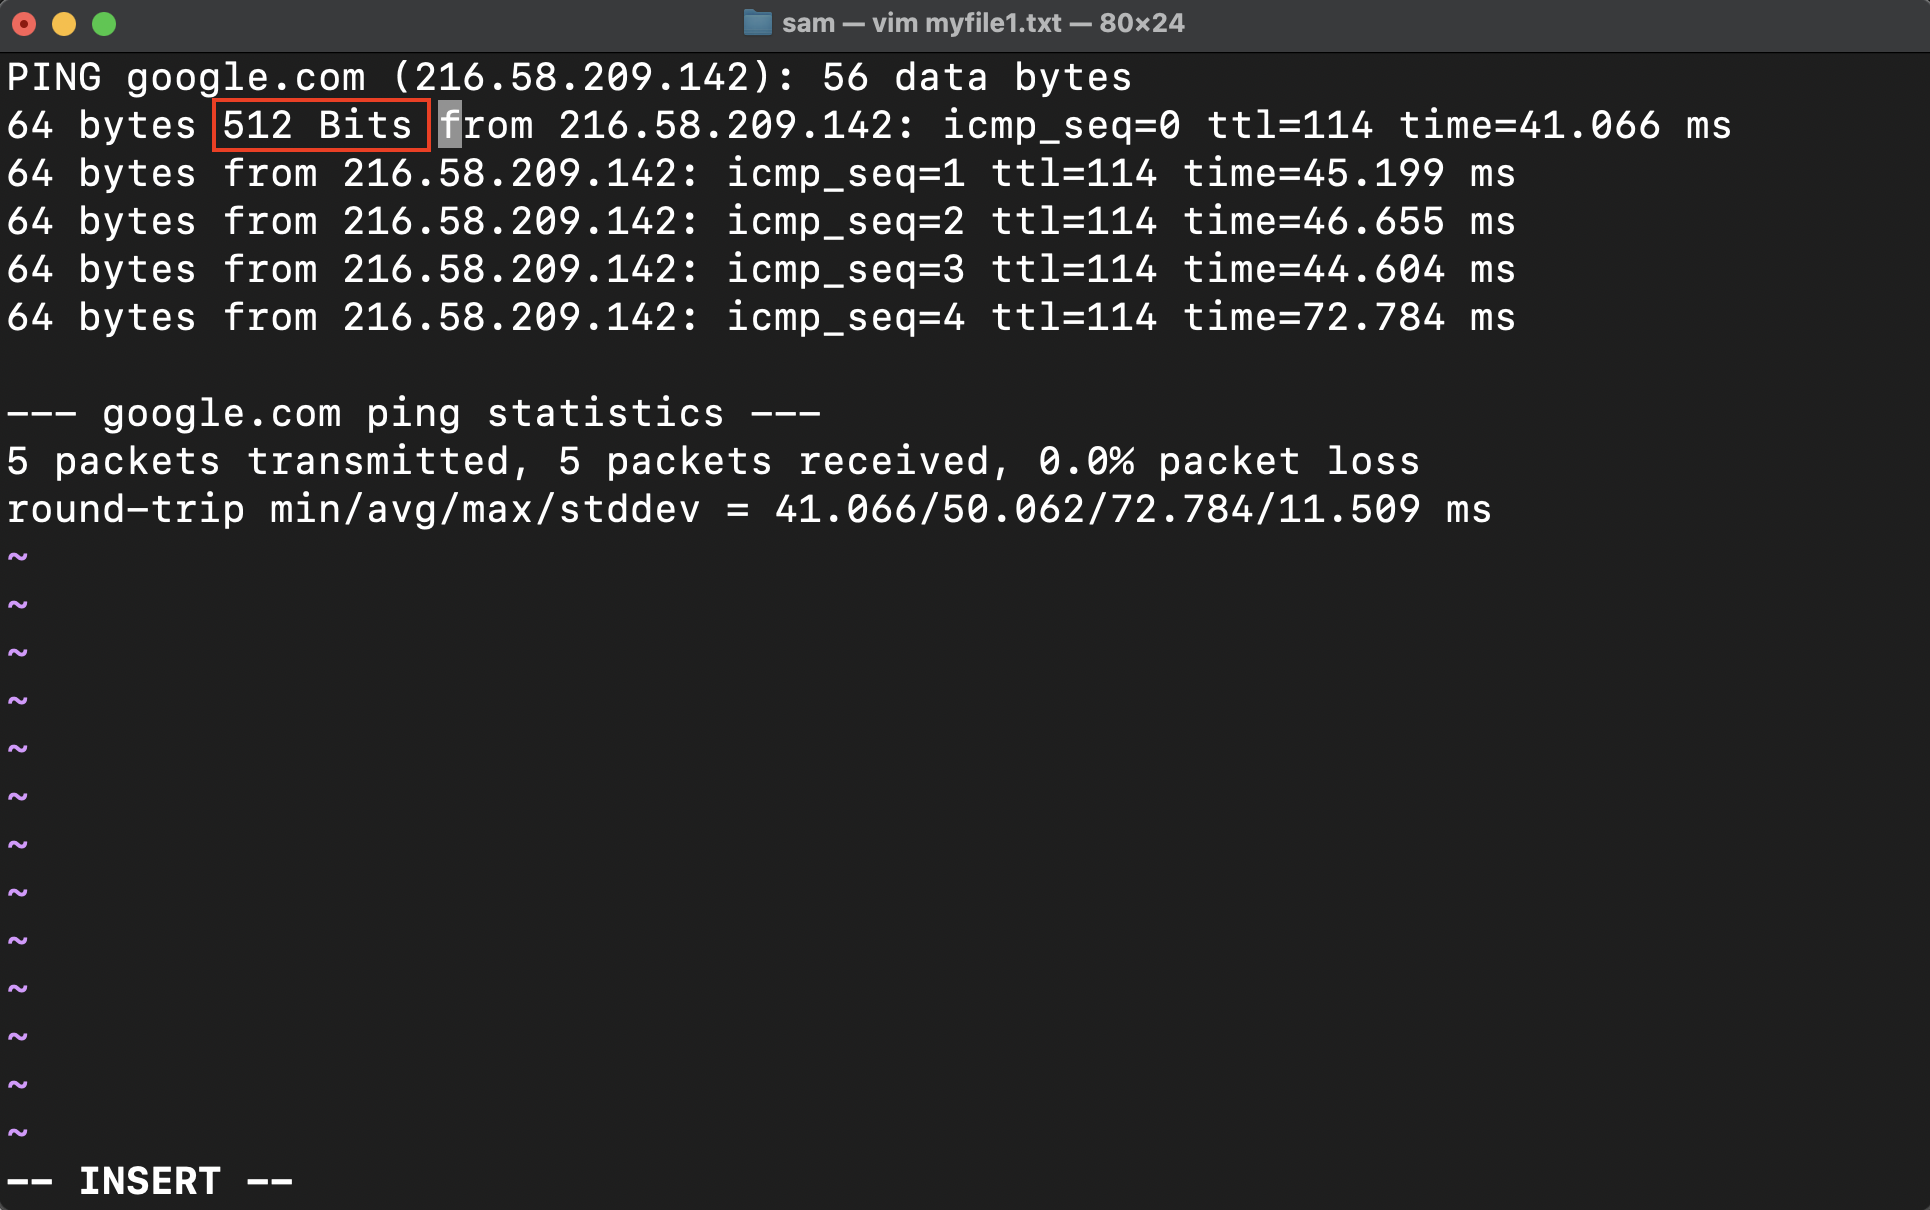
Press the Esc key to implement the modifications to all the selected columns.

The text will be inserted before the selected columns.
Let’s learn what else we can do with the columns in the Vim editor.
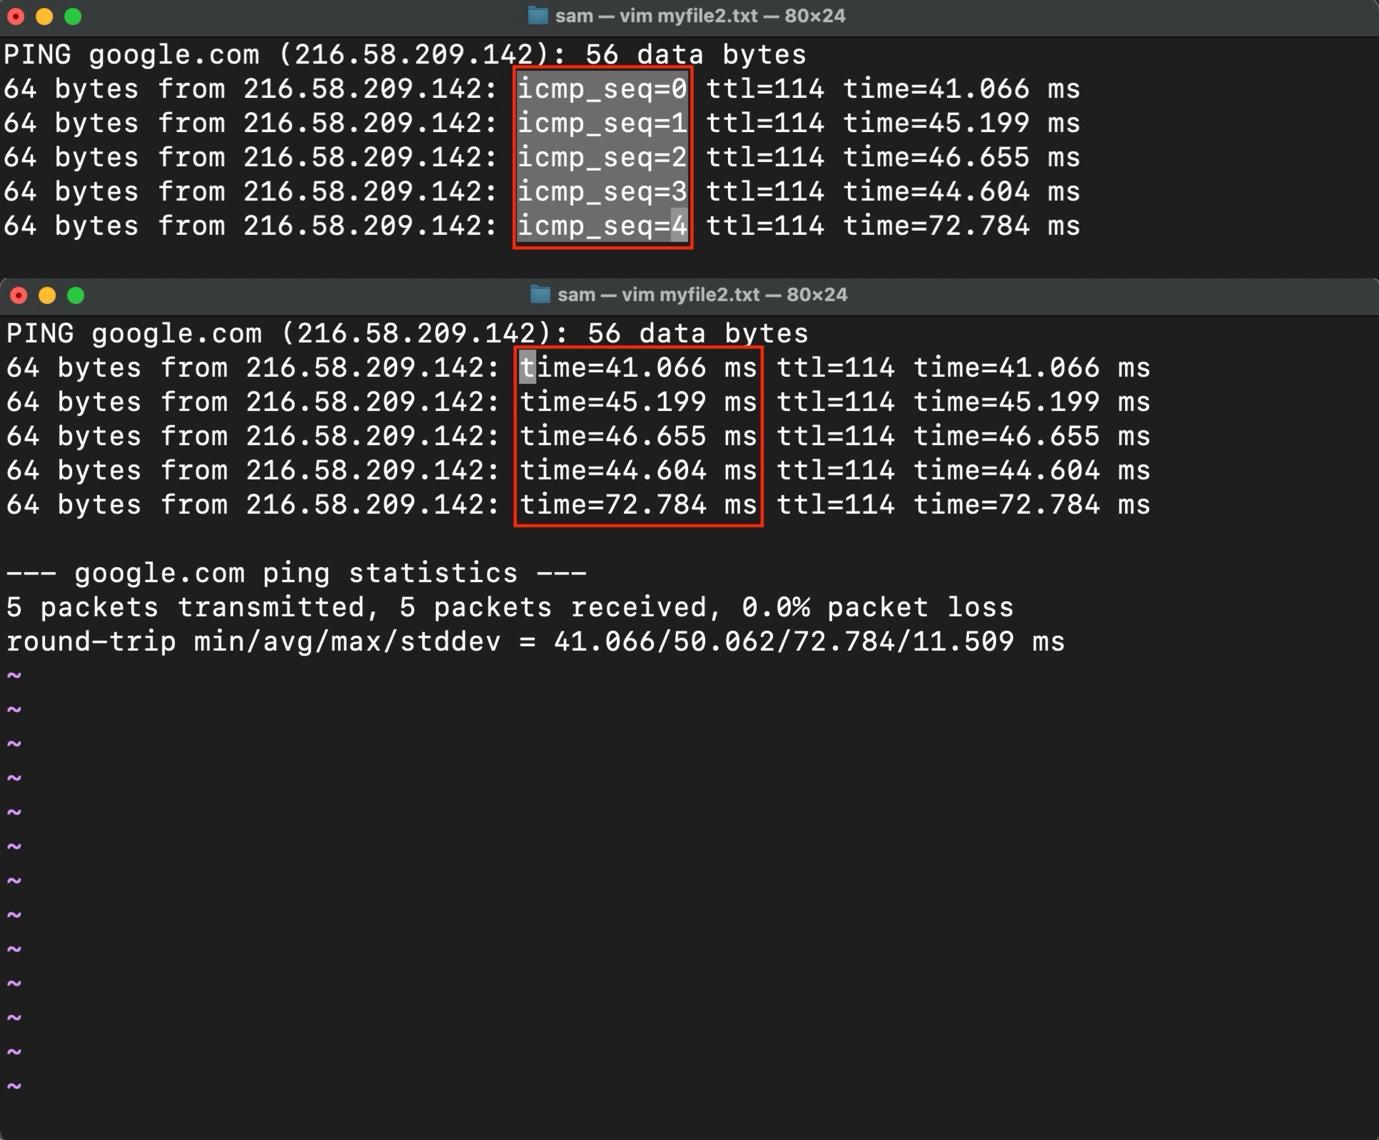
Replacing the Columns
There is no direct way to select the replace columns in Vim when in VISUAL BLOCK mode. You first have to select and delete the columns and insert the value that you want to replace the column values with.
To replace the column values, enter into the VISUAL BLOCK editing mode and select the columns:
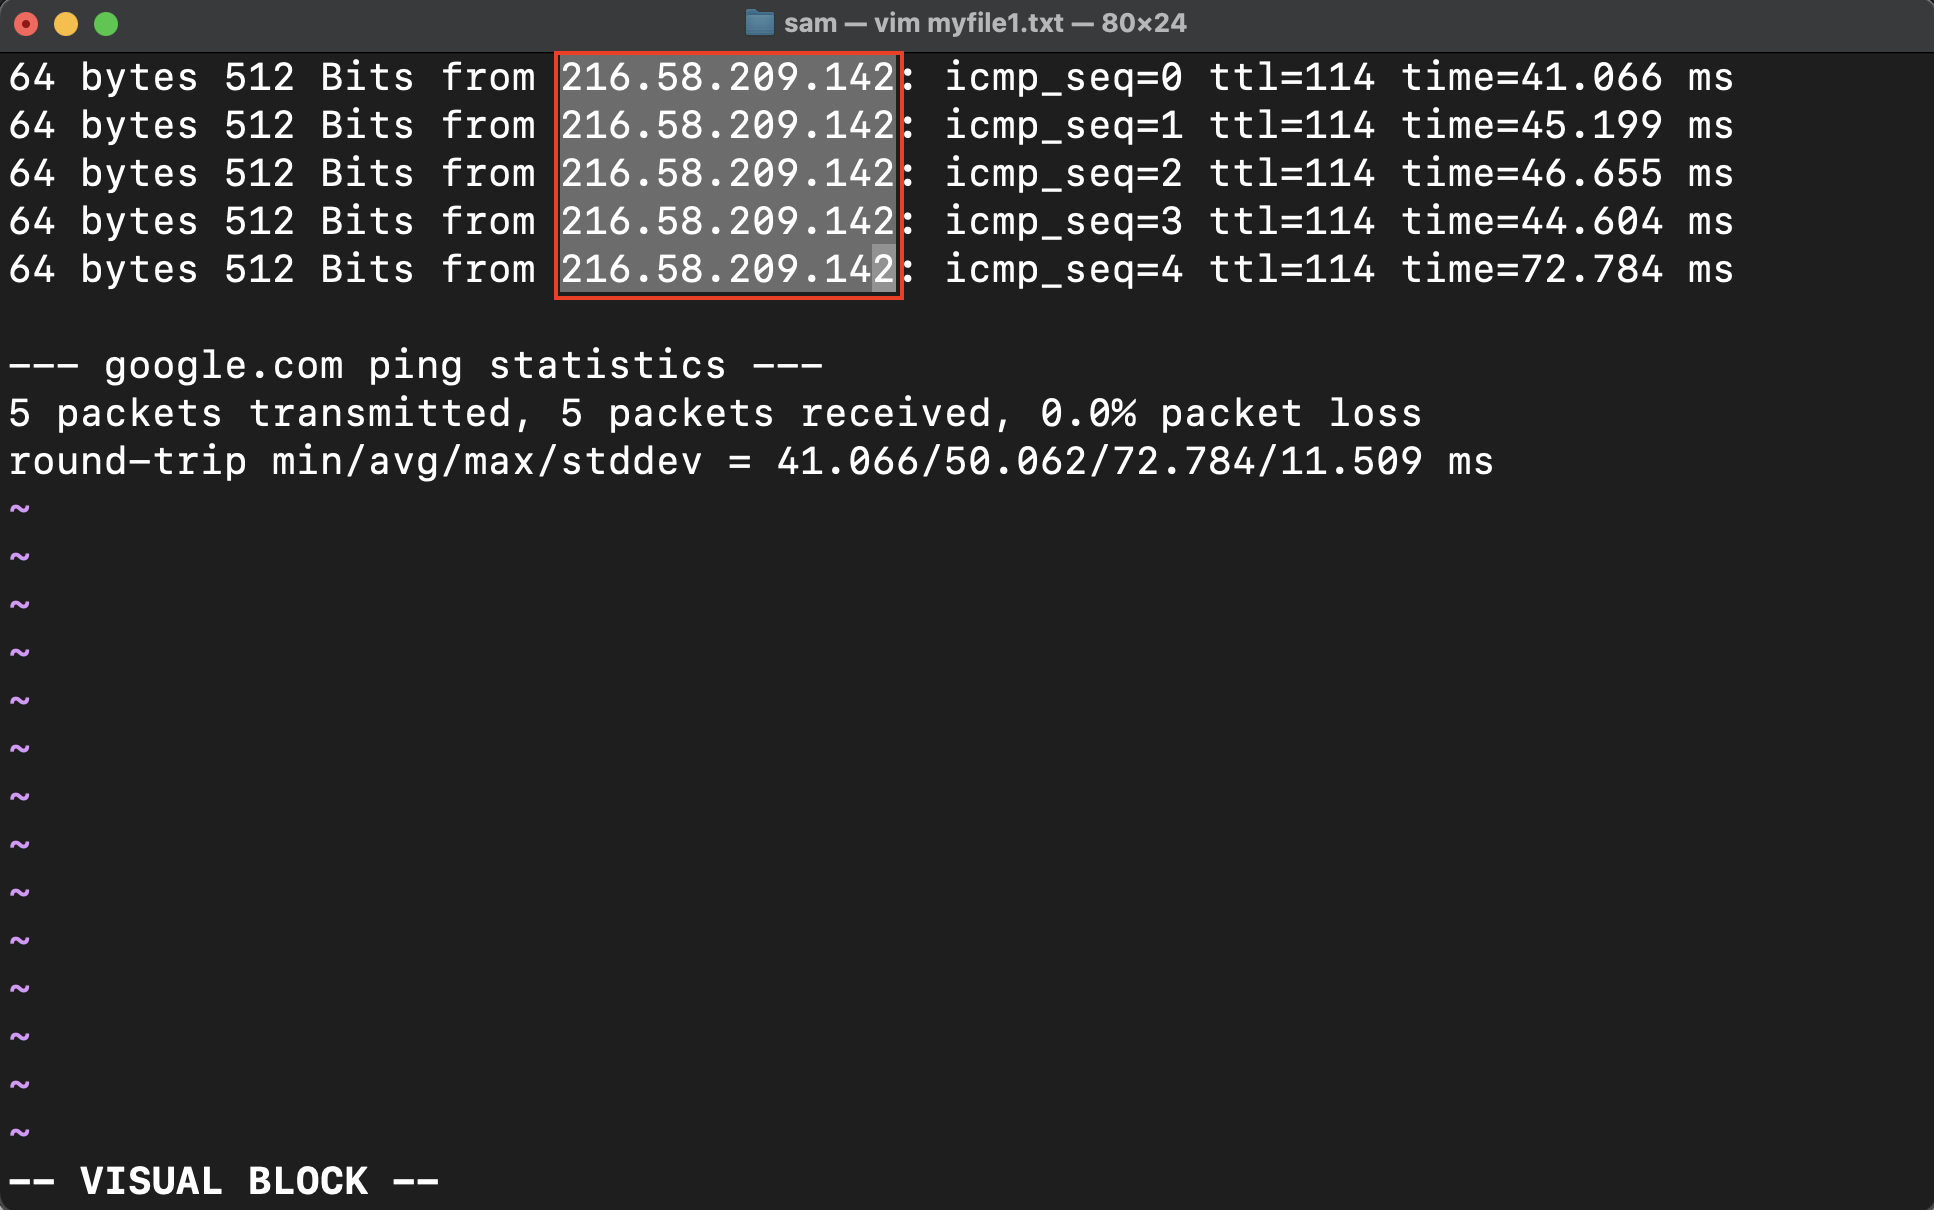
Press c to delete the columns. The c key binding will automatically begin the INSERT mode.
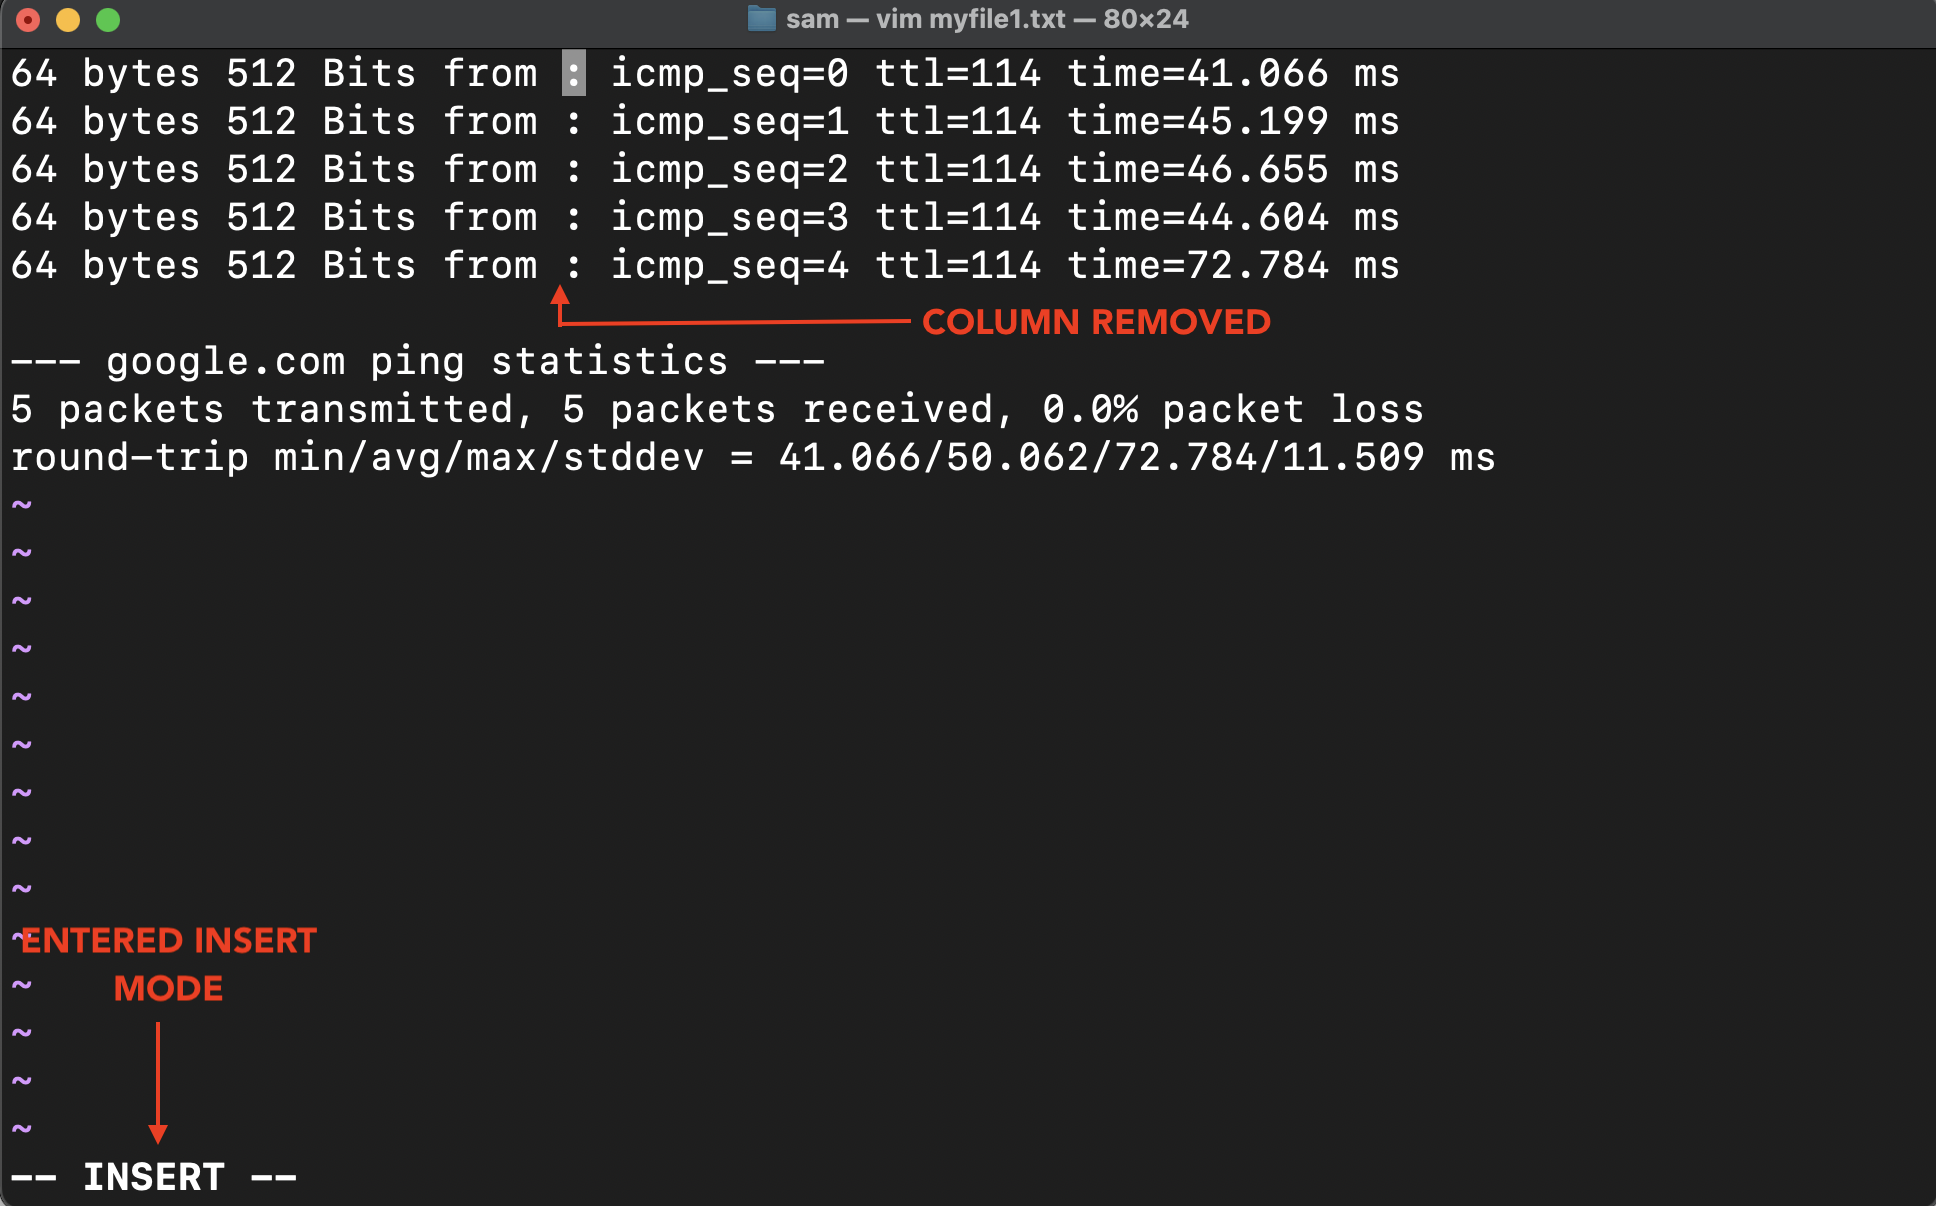
Type the text:
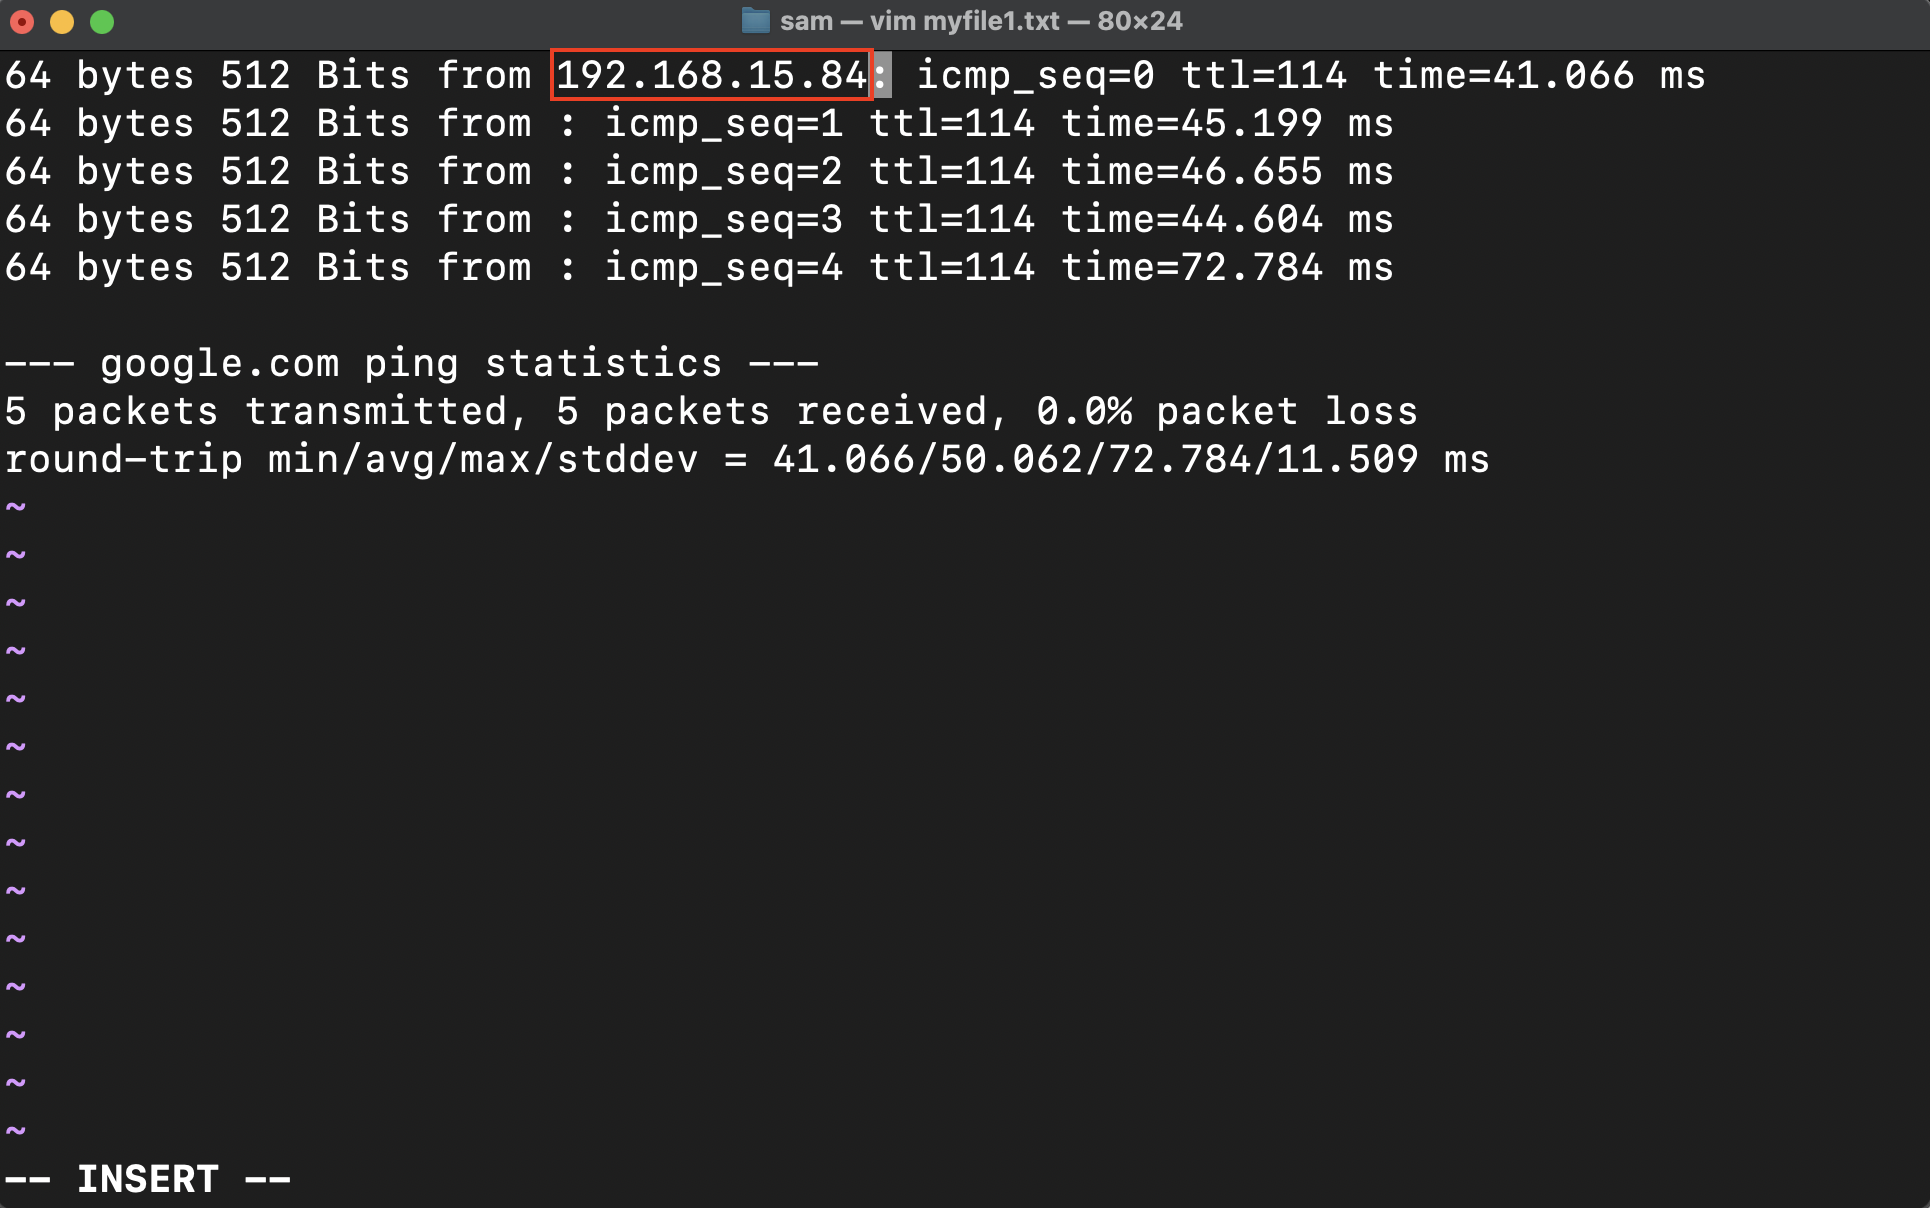
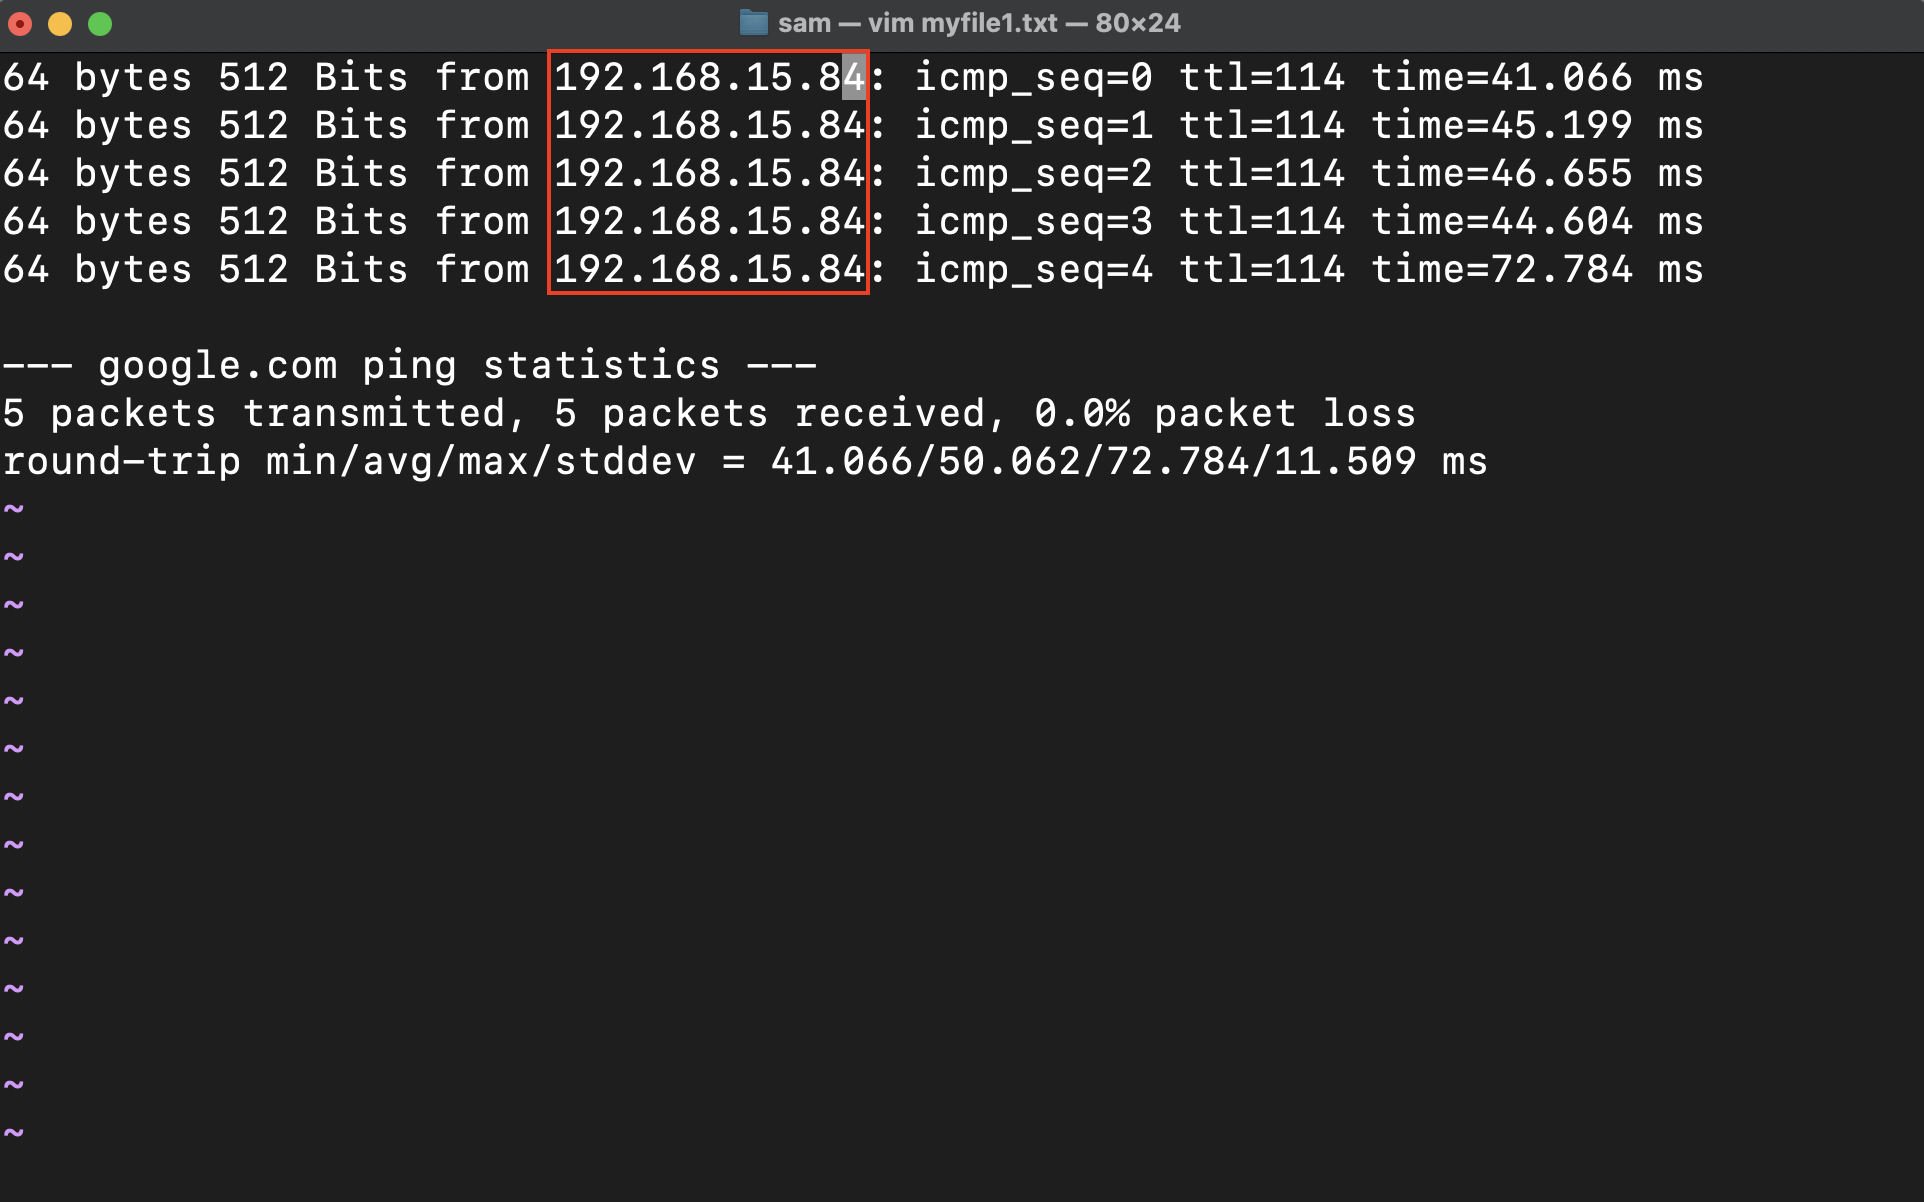
Press the Esc key to replace the typed text with the entire column.
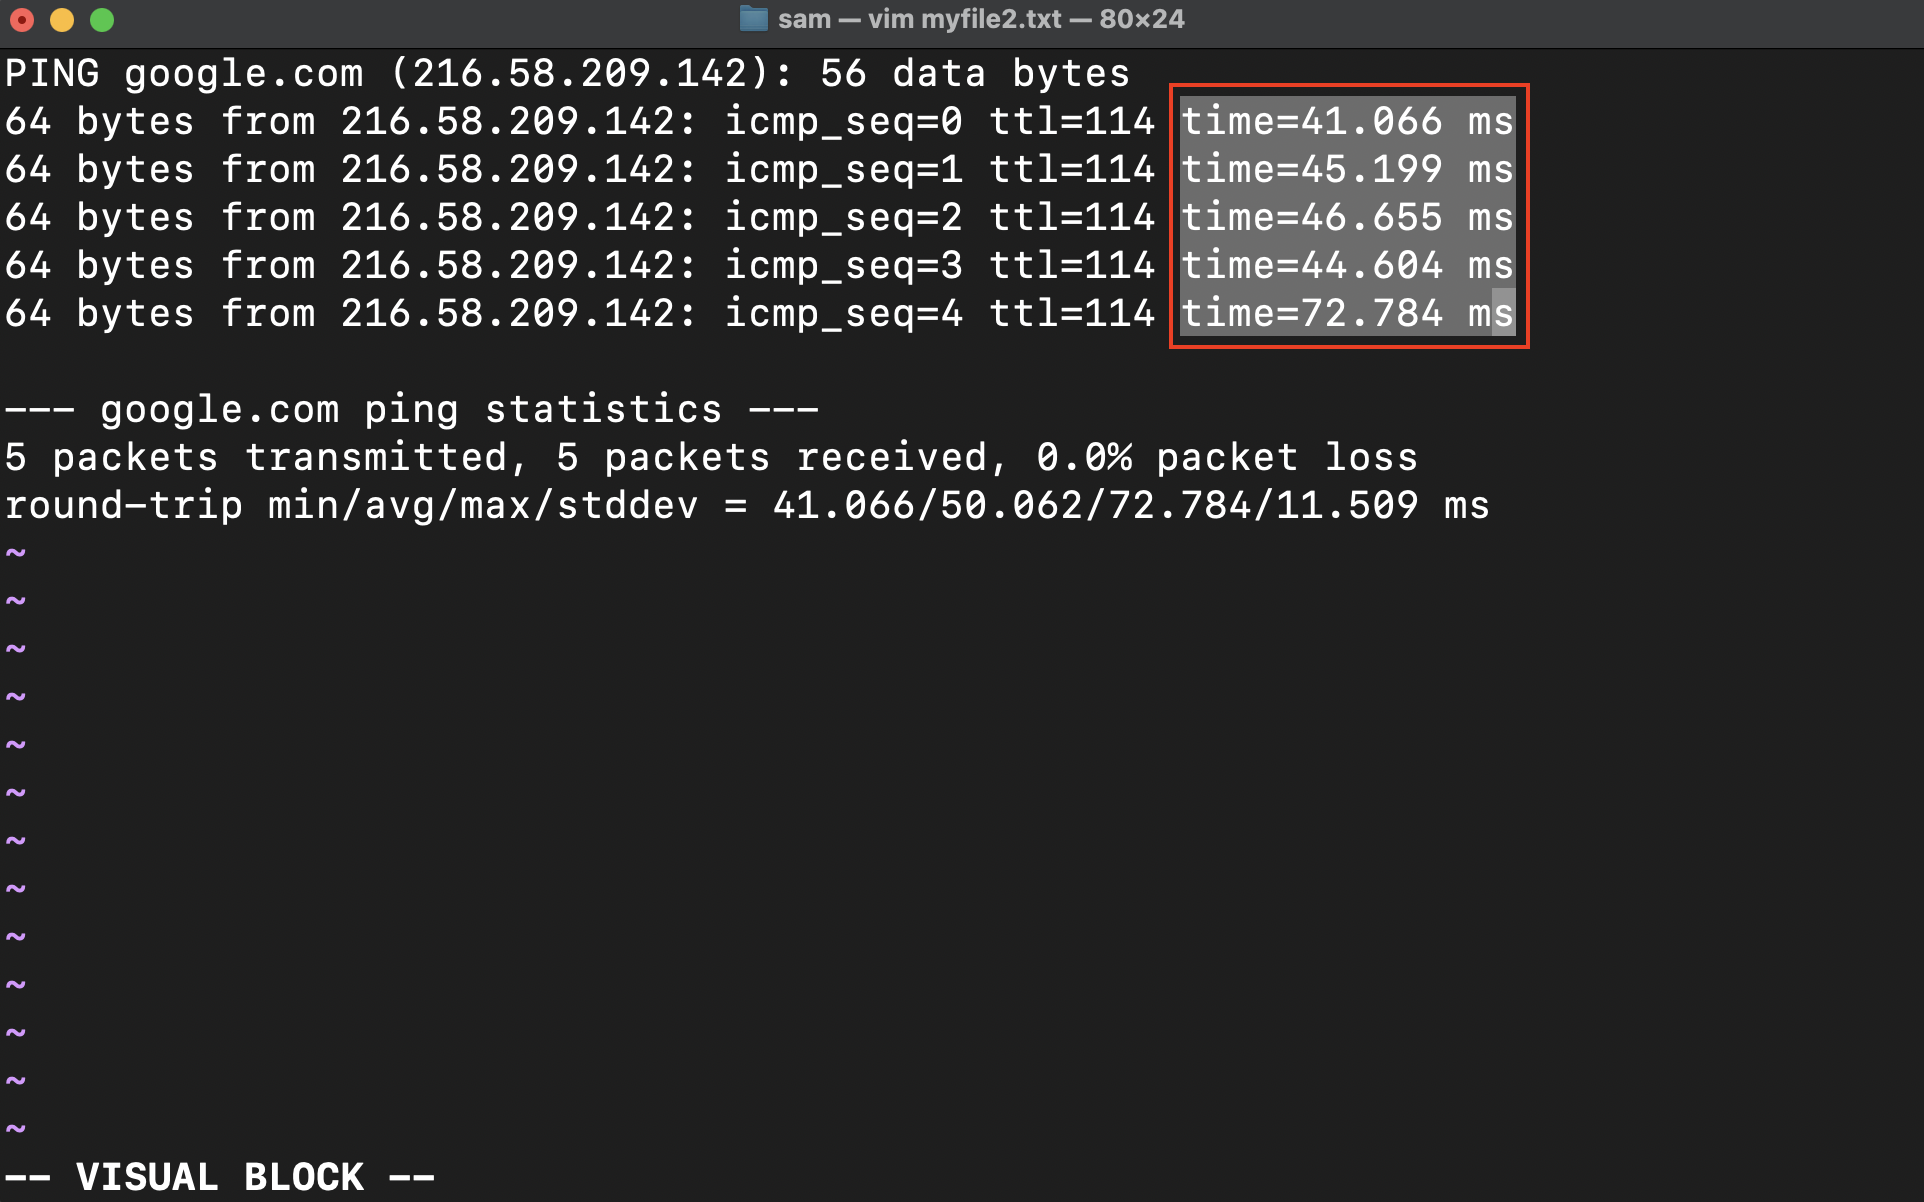
Copy and Paste the Columns
Copying and pasting the columns in Vim is another way of editing the columns. To copy & paste, first open the file in Vim and enter the VISUAL BLOCK mode.
In Vim the copy and paste are similar to the yank and put operations.
Select the columns and press y/Y to copy the columns:
Now, get the cursor to the place where you want to paste the column and press the p(put below or put after)/P(put above or put before) keys to paste the text.

You can also select the columns in VISUAL BLOCK mode and press p/P to replace the selected columns.
Cut and Paste the Columns
To cut the column from a file first select it in the VISUAL BLOCK mode.
Press the d key to remove the column which is equivalent to cut.
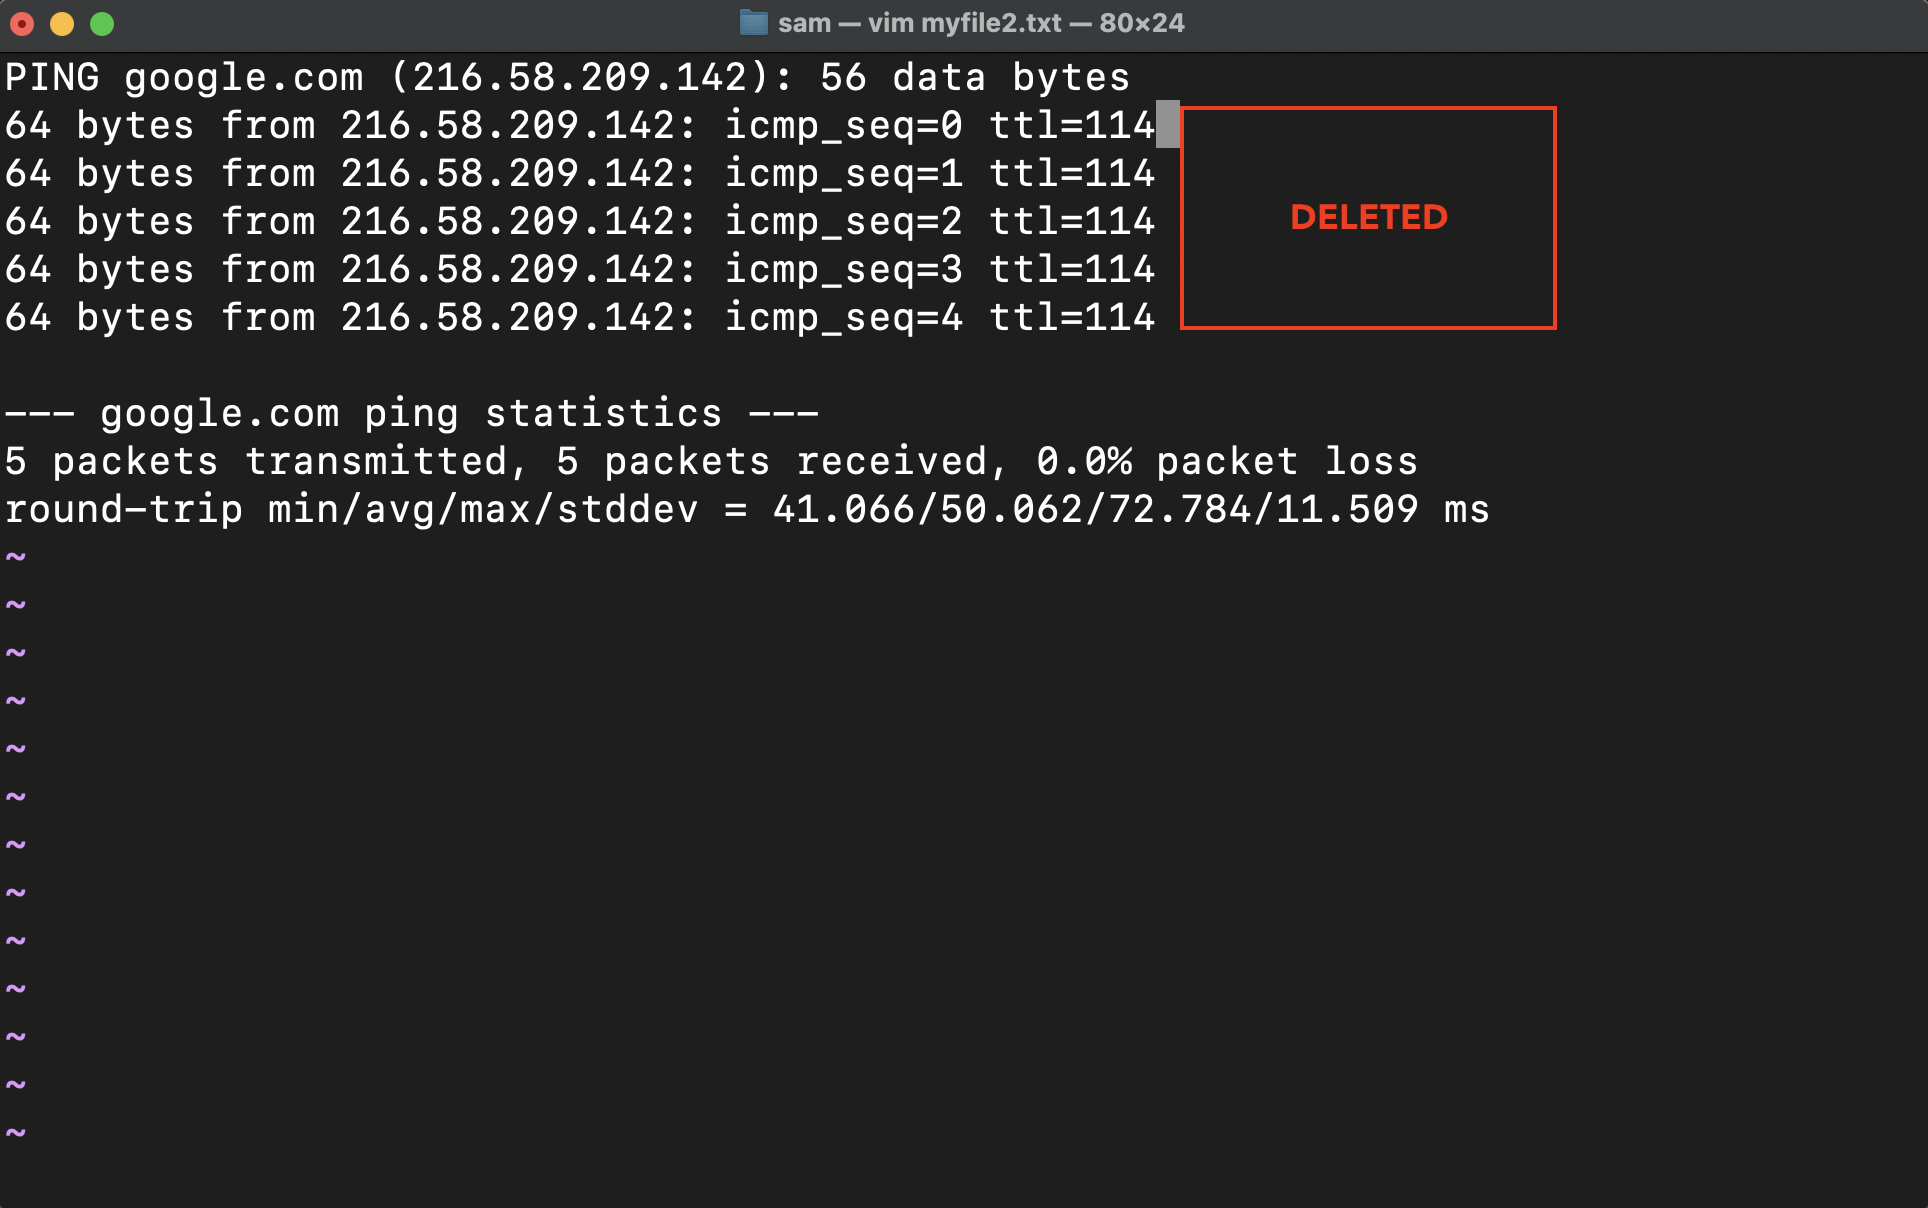
Now, get the cursor where you want to paste the column and press the p(put below or put after)/P(put above or put before) keys.
In Vim, cut and paste is similar to delete and paste.
Appending Text to the Columns
To append the text to the columns, first select the columns in the VISUAL BLOCK mode. Let’s add 512 Bits after 64 Bytes, select the 64 Bytes column:

Press shift+a and type the text that you want to append. The cursor will go after the first entry of the column:
I have typed 512 Bits and added spaces before and after the string.

Press the Esc key to insert the values into the entire column.
Note: Upon pressing shift+a the Vim editor will be entered into INSERT mode automatically.
Why Can’t I Use r to Replace Columns in Vim?
The r key binding in Vim VISUAL BLOCK mode is used simply to replace the selection with a character. Thus, it cannot be used to replace the column values, unless you want to replace them with a single character.

Vim Cheat Sheet For Editing Columns
Commonly used Vim elements to edit columns are given in the following table.
| ctrl+v | Entering the VISUAL BLOCK mode. |
| h, j, k, and l | Left, down, up, and right. |
| shift+a | To append the text. |
| c | Delete the text and begin the INSERT mode. |
| y/Y | Copying or yanking the line or lines. |
| p | Pasting or putting text below and after. |
| P | Pasting or putting text above and before. |
| u | Undo. |
| r | Replace the selection with a character. |
| Esc | Apply changes in the VISUAL BLOCK mode. |
| e/b | Navigating cursor, word forward/word Backward. |
Conclusion
The Vim editor is full of many functionalities that you can only expect from a high-end GUI-based editor. These functionalities include different editing modes such as VISUAL BLOCK mode which helps in editing the selected area of text. If you want to edit the columns in files then you can do it in VISUAL BLOCK mode. Press ctrl+v to enable this mode, select the columns and perform the desired command to copy, paste, delete, and replace them.
Source: linuxhint.com