How to Create and Preview Vim Markdown Files
Vim can be used to create, edit, and execute markdown files directly from the terminal. Multiple plugins allow you to type the markdown and live preview the output.
This guide will explore Vim’s capabilities to create, modify, and preview markdown files.
- Installing the Dependencies
- Prerequisites to Preview Vim Markdown
- Installing VimPlug Plugin Manager for Vim
- Installing the Markdown Live Preview Plugin
- Creating a Markdown File in Vim
- Previewing the Vim Markdown File
- Previewing the Vim Markdown in the Terminal
- Exporting the Markdown File into Different Formats Using Vim
- Markdown Cheat Sheet
- Conclusion
Note: For the instructions in this tutorial, I am using Linux (Ubuntu 22.04).
Vim does not preview the markdown files out of the box. It requires a complete setup to render the markup file. To enable the live preview of markdown files in Vim, certain dependencies and prerequisites need to be installed.
Installing the Dependencies
To run the markdown files using Vim you need to have the following program installed on Linux:
- Node.js
- NPM
To install Node.js on Linux use:
Then you need to install the Node Package Manager (npm), using the following command:
To verify the Node.js version use the node -v command and for the package manager use npm -v. The npm is used to install mini Node.js servers that are required for different Vim markdown file previewing plugins.
Prerequisites to View Vim Markdown
To prepare Vim for rendering the markdown file you need to use the plugins. The best way to install the plugins to Vim is using the Vim plugin manager. Various plugin managers can be installed on Vim such as VimPlug, Pathogen, Neobundle, or Vundle. I am installing the VimPlug, however, it is up to personal preference.
Installing VimPlug Plugin Manager for Vim
First, execute the command mentioned below:
https://raw.githubusercontent.com/junegunn/vim–plug/master/plug.vim

The above command the –create-dirs creates the autoload directory if it does not exist and downloads the VimPlug file there.
Installing the Markdown Live Preview Plugin
Many plugins are there that offer a live preview of the markdown file. A list of such plugins is given below:
All the plugins do their jobs very efficiently. For this tutorial, I will be installing the Vim-Instant-Markdown plugin because it opens the browser to live preview the file as soon as you open any markdown file in Vim.
Click here to open the VimAwesome Vim-Instant-Markdown plugin webpage and copy the code for VimPlug.

Open the file vimrc file with sudo privileges:
Well, it is not recommended to edit the system files, therefore, create a user-specific vimrc file using the following command.
Place the following lines in the file.
Plug ‘suan/vim-instant-markdown’
call plug#end()
You can install any plugin by placing the plugin code between call plug#begin() and call plug#end() tags in the vimrc file. Save the file using the SHIFT+zz keys or use :wq command in the Vim command mode.
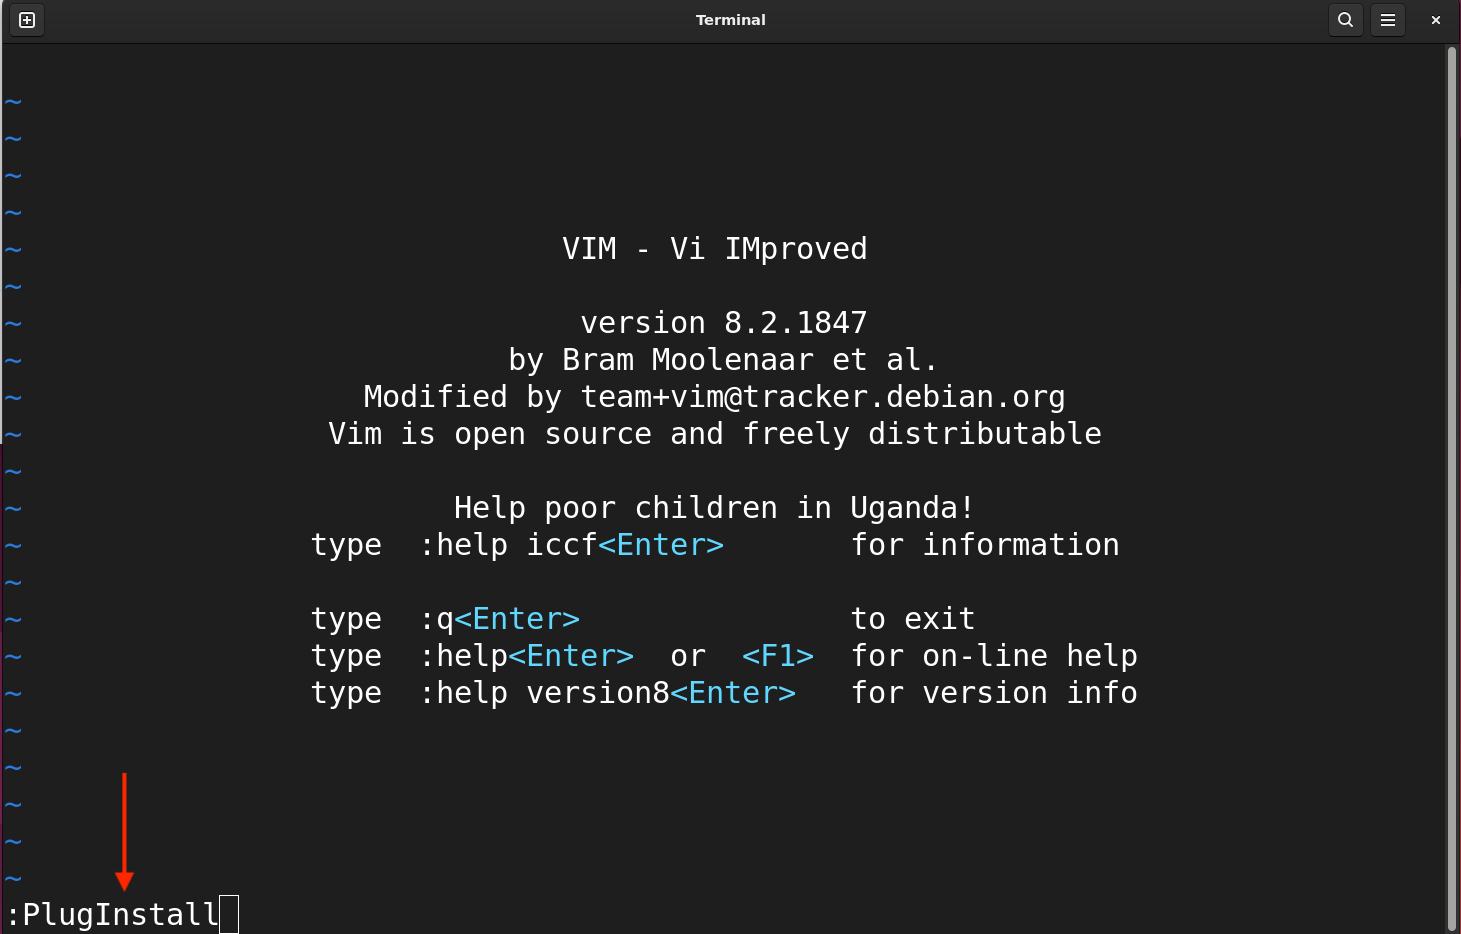
Now, open the Vim editor using the vim command and run :PlugInstall in command mode.
It will install the plugin and you are all set to create the markdown file and live preview it in the Vim editor.
Creating a Markdown File in Vim
The latest Vim provides markdown file syntax highlighting out of the box.
To create the markdown file in Vim, use the following syntax:
You can use different extensions for a markdown file, such as:
- md
- mkd
- markdown
Let’s create a markdown file.
**This is Linuxhint**
>A website that offers tutorials related to Linux and open–source software.
## Popular Categories
1. Ubuntu
2. Linux Commands
3. Vim
### Command to Install Node.js on Linux
`sudo apt install nodejs`
### Java Hello World Code
“`
class HelloWorld {
public static void main(String[] args) {
System.out.println("Hello, World!");
}
}
“`
Visit [Linuxhint](www.linuxhint.com) Now!
In the above file, the hash (#, ##, ###) signs are used to add headings with different weights, The greater than (>) symbol is used to add blockquote, and ticks (`, “`) are used to add the commands or code blocks, for more markdown file elements see the cheat sheet in the following section.
Previewing the Vim Markdown File
To view the markdown file, you need a renderer that can translate the file and provide the output as instructed. Just like an HTML file that requires a web browser to render it, a markdown file also needs an application to view it.
There are many renderer apps available that can view a markdown file, for this tutorial we have installed a Vim plugin that can help us live preview the markdown file.
So, when you open any markdown file the Vim-Instant-Markdown plugin opens up the browser to a live preview rendered version of the markdown file in Vim.
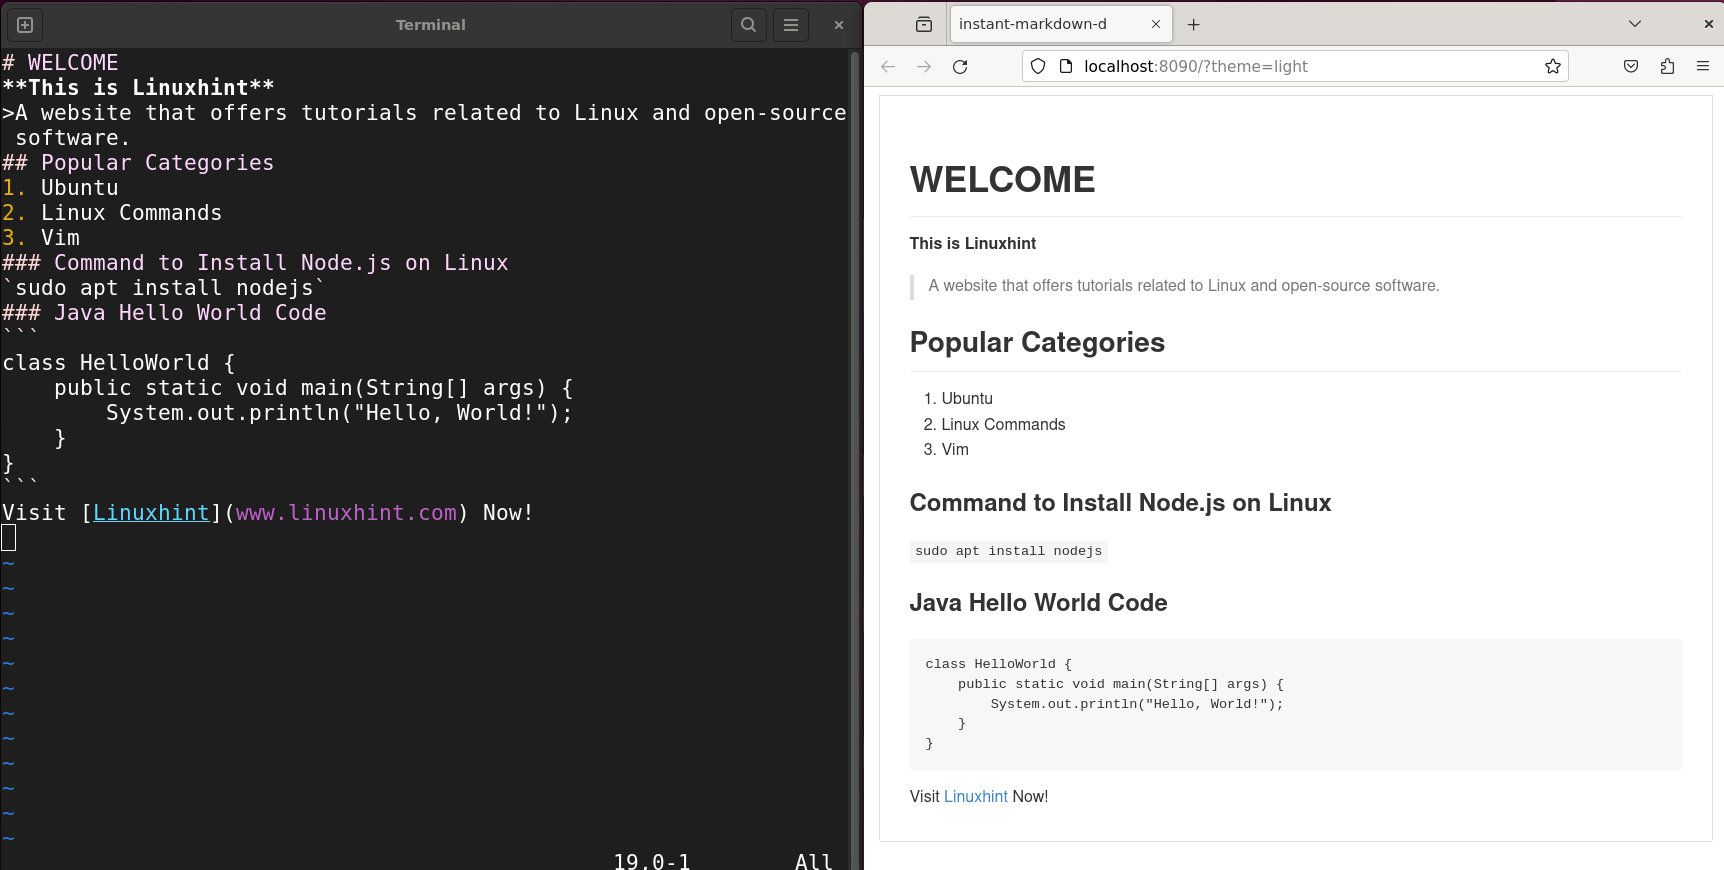
As you edit the file in Vim, the plugin will translate the instructions on runtime and give a live preview on the browser.
Previewing the Vim Markdown in the Terminal
The markdown files can be read in the terminal using different markdown renderers such as Pandoc or Glow. Let’s install Glow, using Snap on Linux:
Now, to view a markdown file in the terminal use:
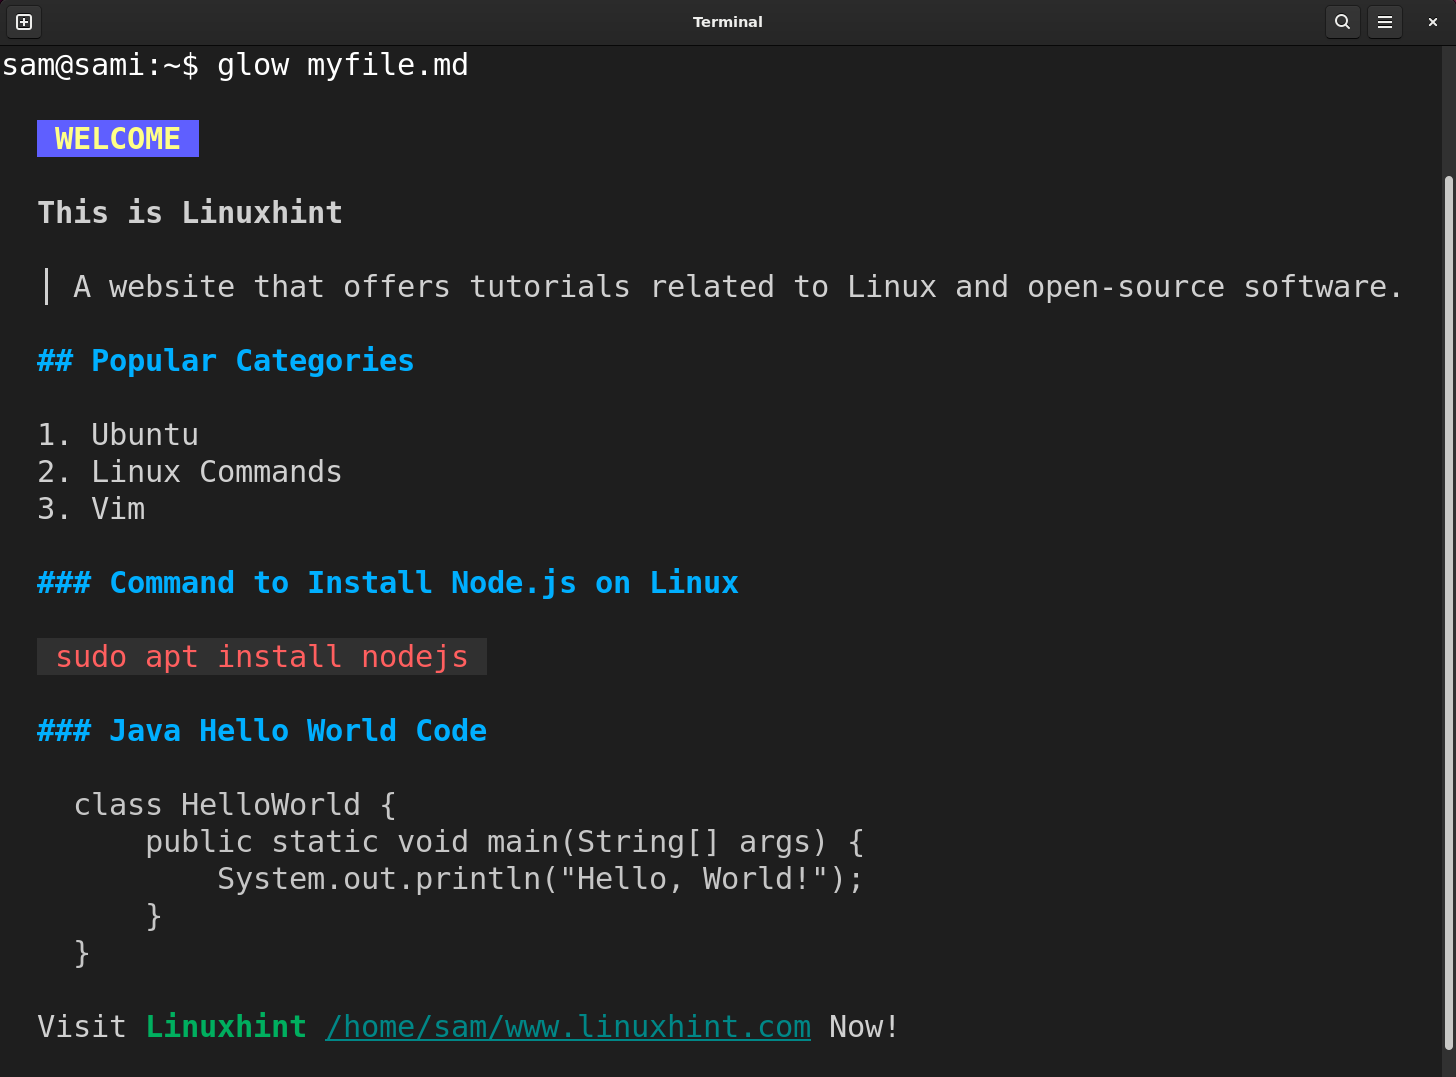
However, these readers only interpret a limited number of Markdown elements and may not support all features. In my opinion, viewing markdown from the terminal is not a good choice.
Exporting the Markdown File into Different Formats using Vim
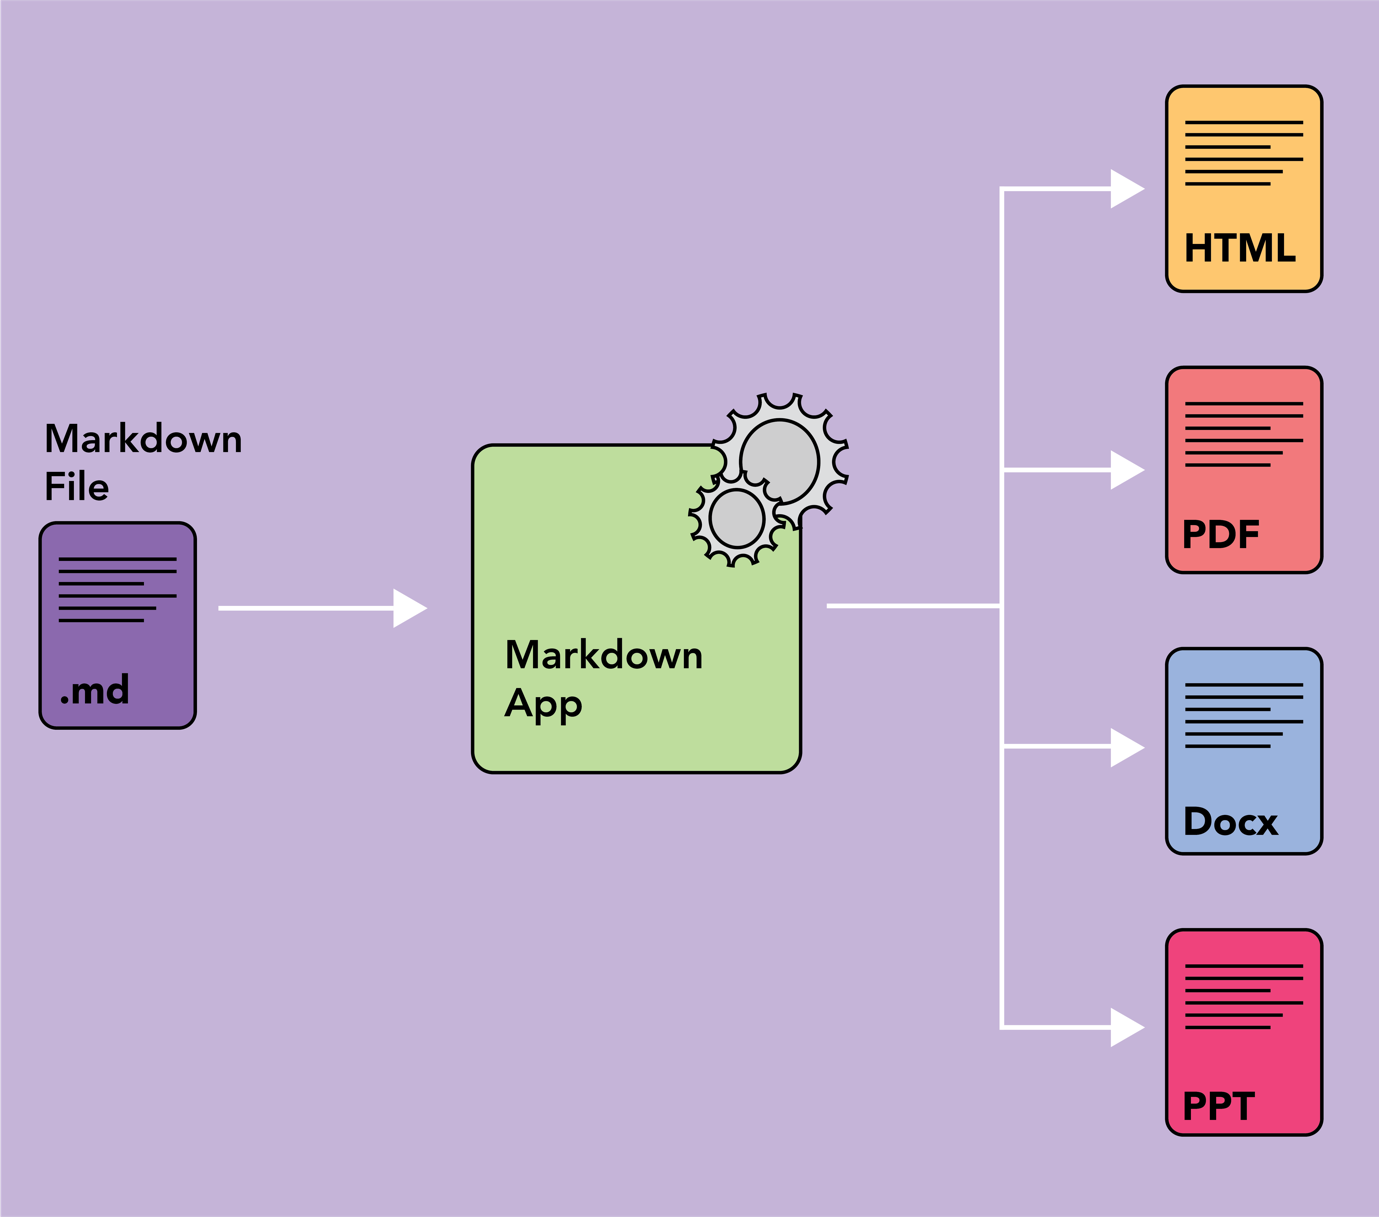
A good feature of markdown files is that you can export them to different file formats such as docs, PDFs, and HTML. For that, you need to install a utility called pandoc.
To install the pandoc on Linux, use:
For PDF conversion you may need extra utilities mentioned in the above command.
Note: Make sure to save the file before you execute commands for exporting the markdown files to a different format.
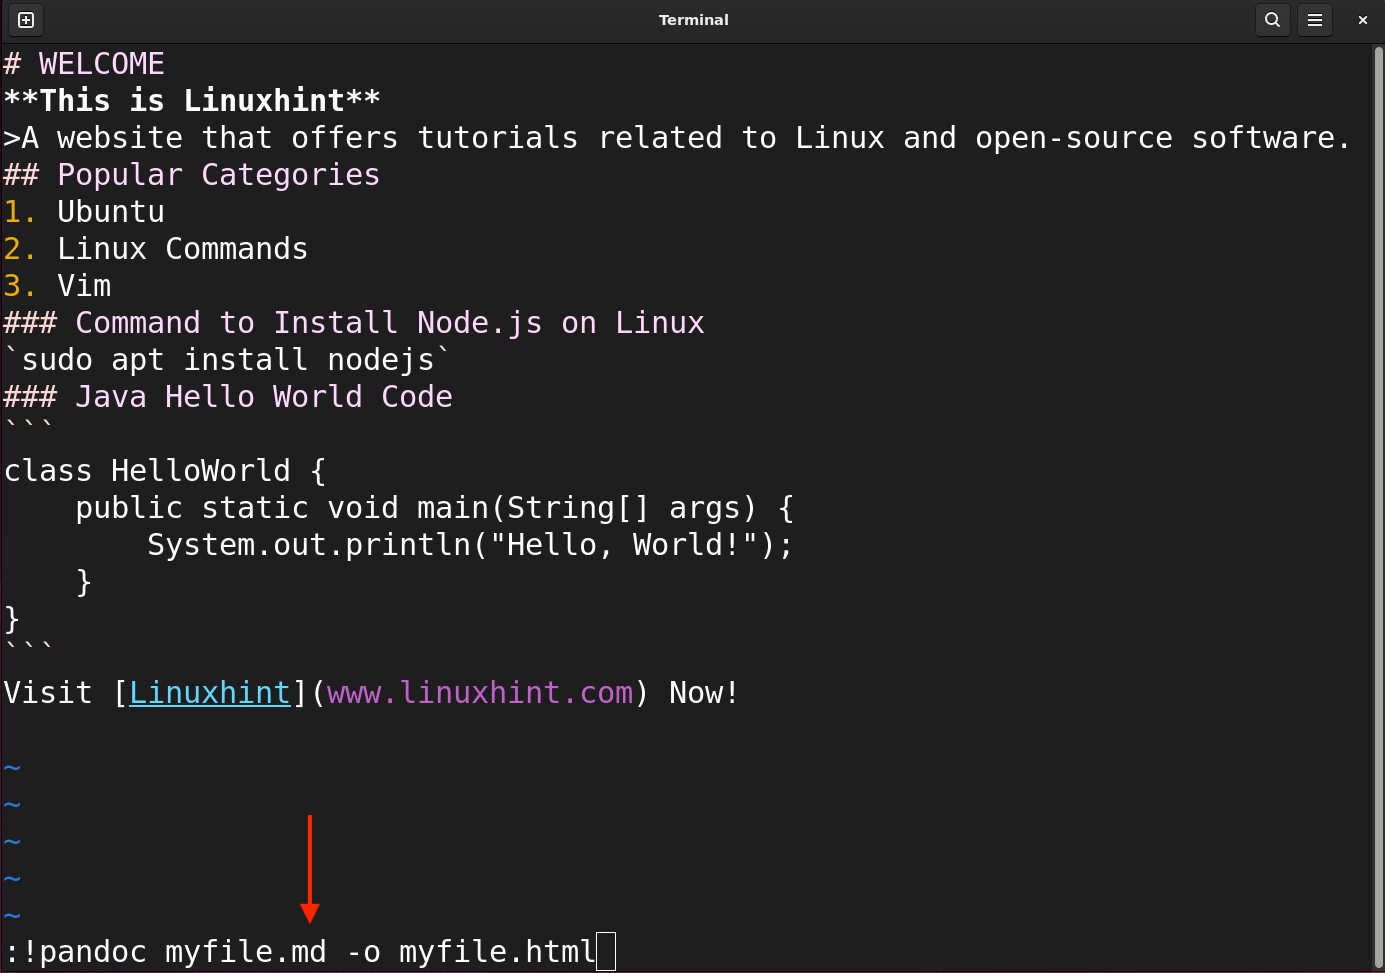
Converting a Markdown File to HTML
Use the command given below to convert a markdown file to HTML.
Note: Using ! sign any external command can be executed in the Vim editor.
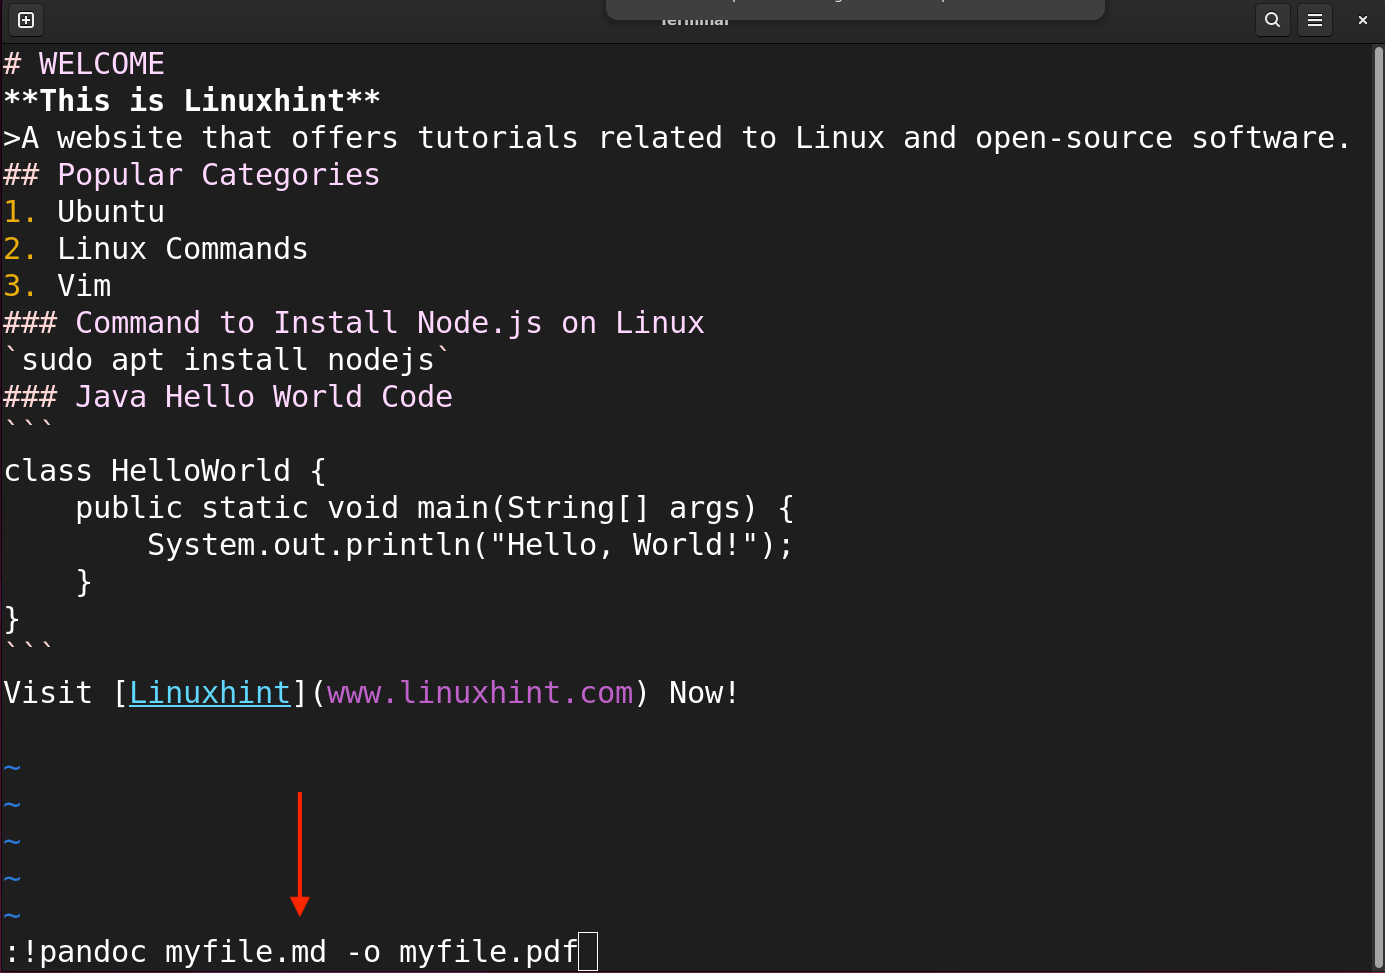
Converting a Markdown File to PDF
PDF is a widely accepted file format; to convert a markdown file to a PDF use the command mentioned below:
Converting a Markdown File to Docx
Docx is another file format a markdown file can be converted.
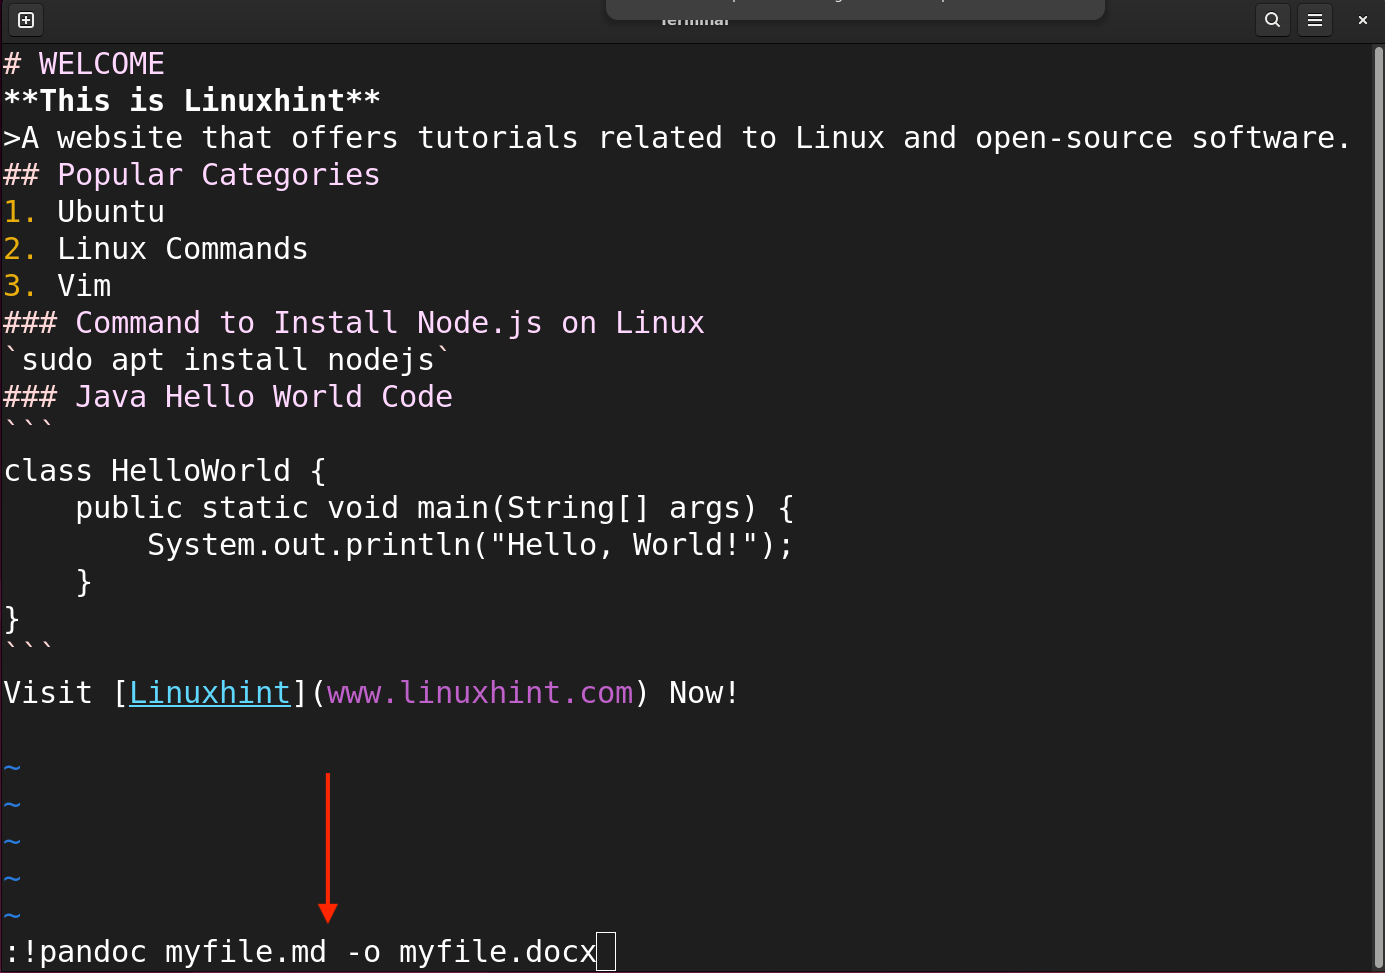
Replace the [filename] in the above commands with the file names that you want to convert.
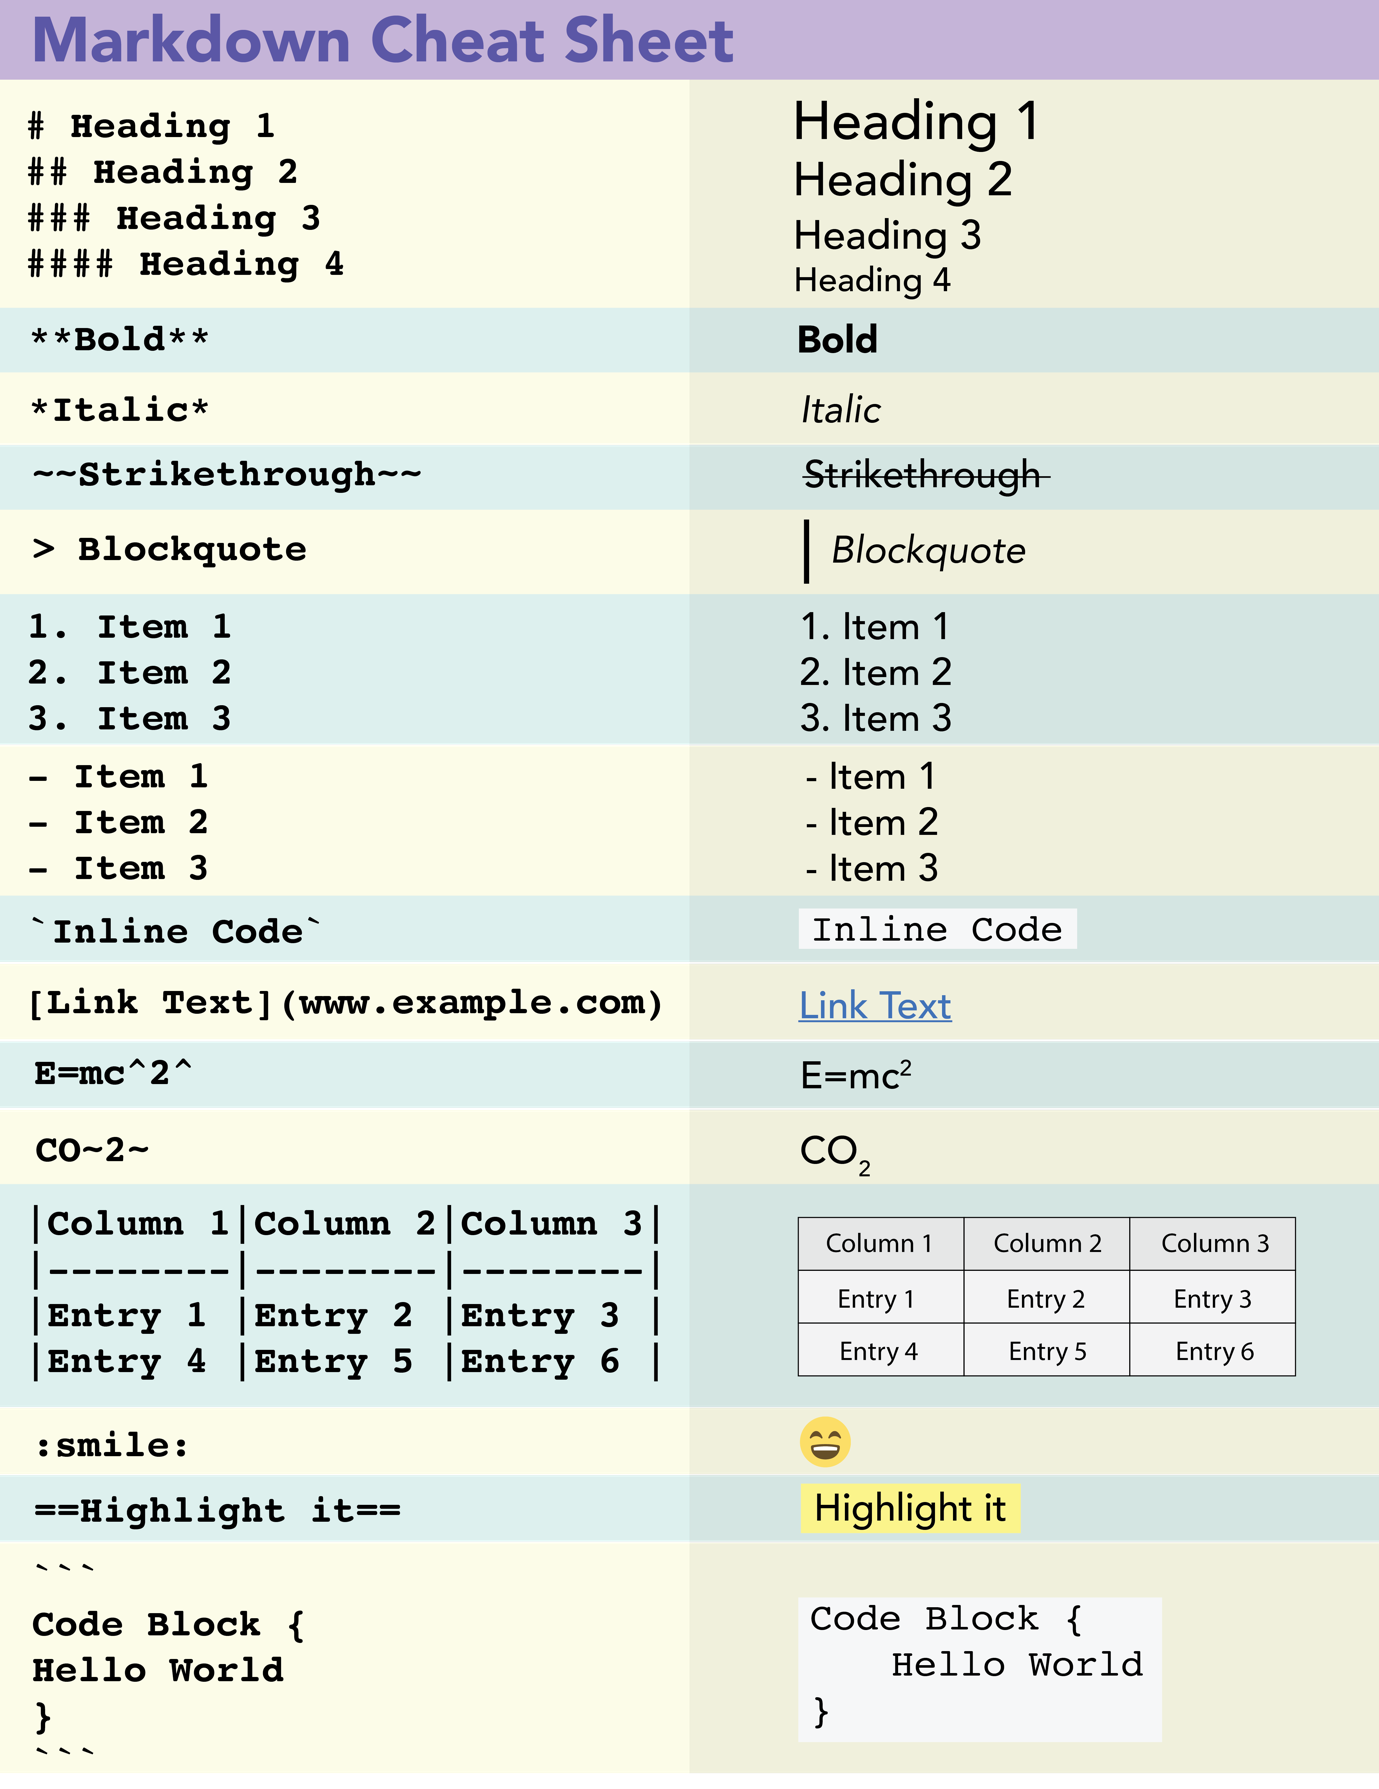
Markdown Cheat Sheet
Commonly used markdown elements are given in the following image:
Conclusion
Vim is a powerful editor that with the help of plugins becomes an even better option. Vim provides the basic syntax highlighting of the markdown files, so they can easily be edited in the editor. Additionally, to preview the rendered form of the Markdown file, you need to install a plugin, such as Vim-Instant-Markdown. With the help of Linux utilities such as pandoc markdown files can be exported into different file formats.
Source: linuxhint.com