How to Create Your First Flask Web Application
The following steps will show how to develop the first Flask web application:
Install Python
Python can be downloaded and installed from the official website. After installation, set the “Path” variable in environmental variables using the Windows operating system.
Install Flask
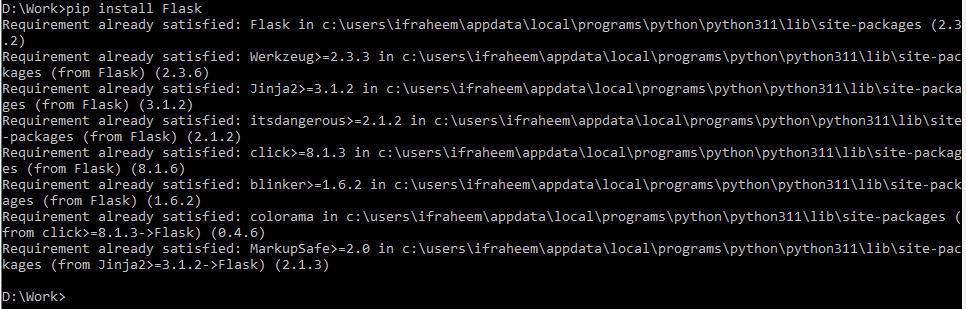
First, check to see if Python is setup on your machine. Using the following command at the terminal or command prompt after installing Python, we can use pip to install Flask:
The following screenshot shows that we already have Flash on our working machine:
Create a New Directory for the Flask Project
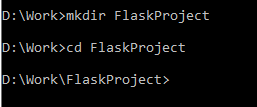
The Flask project should be placed in a new directory. The operating system’s file explorer can help us with this, or we can use the “mkdir” command in the terminal window. In the following screen, we established a directory with FlashProject which employs the command prompt:
Set Up the Project Structure (Recommended but Optional)
Create the following structure inside the project directory:
index.html
myFirstApp.py
- /FlaskProject: This is the project’s main directory.
- /templates: This directory stores our HTML templates.
- index.html: This is a sample HTML template.
- myFirstApp.py: This is our Flask application script. The Flask application code is written here.

The Flask module’s “Flask” class should be imported.
Make a Basic Flask Application
Create a straightforward Flask application by opening “myFirstApp.py” in a text editor: either Notepad++ or an integrated development environment (IDE).
MyFirstApp.py:
app_flask = flask_obj(__name__)
@app_flask.route('/')
def home_render():
return rtemp('index.html')
if __name__ == '__main__':
app_flask.run(debug=True)
Create an HTML Template
In the “/templates” directory, create an “index.html” file with some essential HTML content.
For example, this code displays a table with three columns: Rank, Country, and Market Share. The top five countries in electronics products are displayed in the table, with the country with the highest market share at the top.
Index.html:
<html><head> <title>Top 5 Countries in Electronics Products</title>
<style> body {
font-family: sans-serif;
} table {
border-collapse: collapse;
width: 100%;
} th, td {
border: 1px solid black;
padding: 5px;
} th {
background-color: #ccc;
}
</style>
</head>
<body>
<h1>Top 5 Countries in Electronics Products</h1>
<table>
<thead>
<th>Country</th> <th>Market Share</th>
<td>37%
</tr>
<tr>
<td>15%
<td>10%
<td>9%
</tr>
<tr>
<td>8%
</tr>
</tbody>
</table>
</body>
</html>
Run the Flask App
Open the terminal or command prompt, navigate to your project directory (/FlaskProject), and run the following command:

We should see an output which indicates that the Flask app is running. By default, it should be accessible at http://localhost:5000 in the web browser window:
Access Your Flask App
Examples 1:
Open a web browser and go to http://localhost:5000. We should see our Flask web application that displays the list of top five countries in “Electronics” products in the world in tabular format.

Congratulations! Our initial Flask web application has been developed and running successfully. Starting from this point, we may develop more intricate web applications by including routes, managing the form submissions, and integrating the databases as necessary.
Example 2:
This application displays the “Hello, Congratulations, You have successfully created Flask Application!” message whenever a request is made to the root URL (/). You can run this application by following the given steps.
MyFlaskApp.py:
app_flash = flask_obj(__name__)
@app_flash.route('/')
def Display_Success_Message():
return 'Hello, Congratulations, You are successfully created Flask Application!'
if __name__ == '__main__':
app_flash.run(debug=True)
Here is the working screenshot of the Flask application:

Example 3:
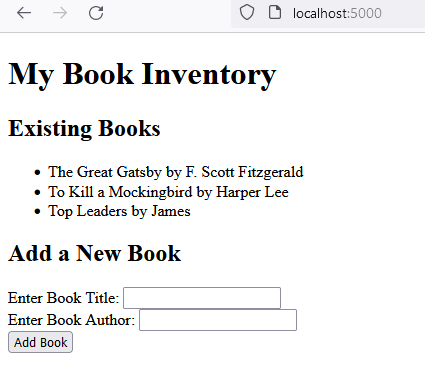
Here’s an example of a unique Flask web application scenario: a “Book Inventory” web app where the users can add, view, and update the books in their inventory. The web app allows the users to browse their book collection and add new books using an HTML form. The book list dynamically displays the information. An “index.html” template is required for creating the form. The Flask web application simplifies the book inventory management:
This line imports the Flask class and other relevant modules from the Flask module.
from flask import Flask as flask_obj, render_template as rndTemp, request as obj_req, redirect, url_for
This line generates an object for a Flask application and assigns it to the app_book variable.
This line creates a list of books as the first book inventory for the online application.
books_list = [
{"book_id": 1, "book_title":
"The Great Gatsby",
"book_author": "F. Scott Fitzgerald"},
{"book_id": 2, "book_title":
"To Kill a Mockingbird",
"book_author": "Harper Lee"},
]
The @app_book.route() decorator directs Flask to call the book_home() method on requests to the root URL, displaying the book inventory in the “index.html” template, and allowing access to the books_list variable.
def book_home():
return rndTemp('index.html', books_list=books_list)
The /add_New_Book URL route is recognized by this line. The @app_book.route() decorator, which instructs Flask to call this method each time a request to the /add_New_Book URL is made, is added to the add_New_Book() function.
The add_New_Book obtains the book title and the author() method from the request form. A new book object is then created and added to the books_list. The user is then forwarded to the book’s home page (/).
def add_New_Book():
book_id = len(books_list) + 1
book_title = obj_req.form.get('book_title')
book_author = obj_req.form.get('book_author')
books_list.append({"book_id": book_id, "book_title": book_title, "book_author": book_author})
return redirect(url_for('book_home'))
This code determines whether the script is being run directly (as opposed to being imported as a module). If it is, the code starts the Flask development server.
app_book.run(debug=True)
BookFlask.py:
from flask import Flask as flask_obj, render_template as rndTemp, request as obj_req, redirect, url_for
app_book = flask_obj(__name__)
# Sample initial book inventory
books_list = [
{"book_id": 1, "book_title":
"The Great Gatsby",
"book_author": "F. Scott Fitzgerald"},
{"book_id": 2, "book_title":
"To Kill a Mockingbird",
"book_author": "Harper Lee"},
]
@app_book.route('/')
def book_home():
return rndTemp('index.html', books_list=books_list)
@app_book.route('/add_New_Book', methods=['POST'])
def add_New_Book():
book_id = len(books_list) + 1
book_title = obj_req.form.get('book_title')
book_author = obj_req.form.get('book_author')
books_list.append({"book_id": book_id, "book_title": book_title, "book_author": book_author})
return redirect(url_for('book_home'))
if __name__ == '__main__':
app_book.run(debug=True)
We should build an elementary HTML structure inside the “index.html” file for the Flask Book Inventory web application to display the list of books and give a form for adding new books. This template for “index.html” is simplistic.
<html>
<head>
</head>
<body>
<!-- Display existing books -->
<ul>
{% for book_obj in books_list %}
<li>{{ book_obj.book_title }} by {{ book_obj.book_author }}</li>
{% endfor %}
</ul>
<!-- Form to add a new book -->
<form method="POST" action="/add_New_Book">
<label for="title">Enter Book Title:</label>
<input type="text" id="book_title" name="book_title" required><br>
<label for="author">Enter Book Author:</label>
<input type="text" id="book_author" name="book_author" required><br>
<input type="submit" value="Add Book">
</form>
</body>
</html>
What this HTML template accomplishes is as follows:
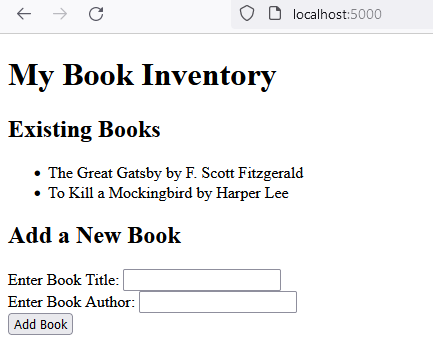
1. There is a header there that reads, “My Book Inventory”.
2. It gives the titles and authors of all the books that are currently published using a loop (% for book in books%).
3. It offers a form with fields for the title and author for adding a new book.
4. The form submits the data to the /add_book route in the Flask application using the POST method.
Here is the screenshot of the web-browser:
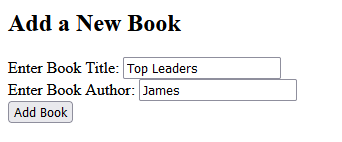
Adding a new book:
Conclusion
Python with Flask makes it easy and user-friendly to create web applications. With just a few lines of code, we can install Flask and build a project structure using templates to build a straightforward web application. We explained the different examples of creating the Flask applications in the system.
Source: linuxhint.com