How to Create Multiple NetworkManager Connection Profiles for the Same Network Interface on Linux and Switch Between Them
In this article, we will show you how to configure multiple NetworkManager connection profiles for the same network interface on Linux and how to switch between them when needed.
This article should work on the following listed Linux distributions and other Linux distributions (not listed) that use the NetworkManager to manage the networks and have the “nmcli” command-line tool available.
- Ubuntu
- Debian
- Linux Mint
- Elementary OS
- Fedora
- RHEL
- CentOS Stream
- AlmaLinux
- Rocky Linux
- openSUSE
- SUSE Linux Enterprise Server (SLES)
- Oracle Linux
Topic of Contents:
- Finding the Current IP Addressing Information of the Network Interface on Linux
- Creating Multiple NetworkManager Connection Profiles for the Same Network Interface Using Nmcli
- Switching Between NetworkManager Connection Profiles Using Nmcli
- Automatically Activating a NetworkManager Connection Profile for the Network Interface Using Nmcli
- Conclusion
Finding the Current IP Addressing Information of the Network Interface on Linux
While creating multiple NetworkManager connection profiles for the same network interface, learning about the current IP addressing information of that network interface may be helpful. You may want to create a NetworkManager connection profile for a static/fixed IP address, another one for DHCP, or others with different DNS server configurations, etc. So, most likely, the information will be the same across different NetworkManager connection profiles for the same network.
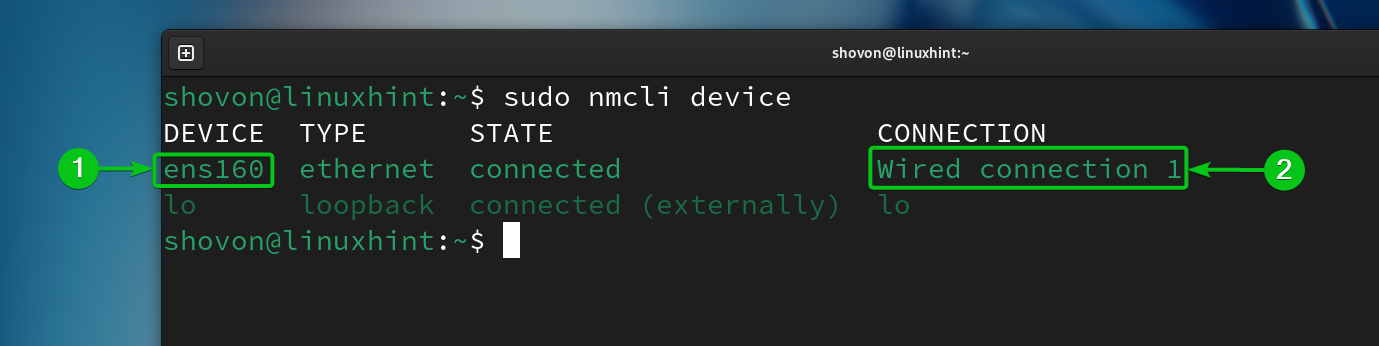
To find the name of the network interface for which you want to create multiple NetworkManager connection profiles, run the following command:
In our case, the network interface’s name is “ens160” and the currently active NetworkManager connection profile is “Wired connection 1”. Take a note of these information as you need them shortly.
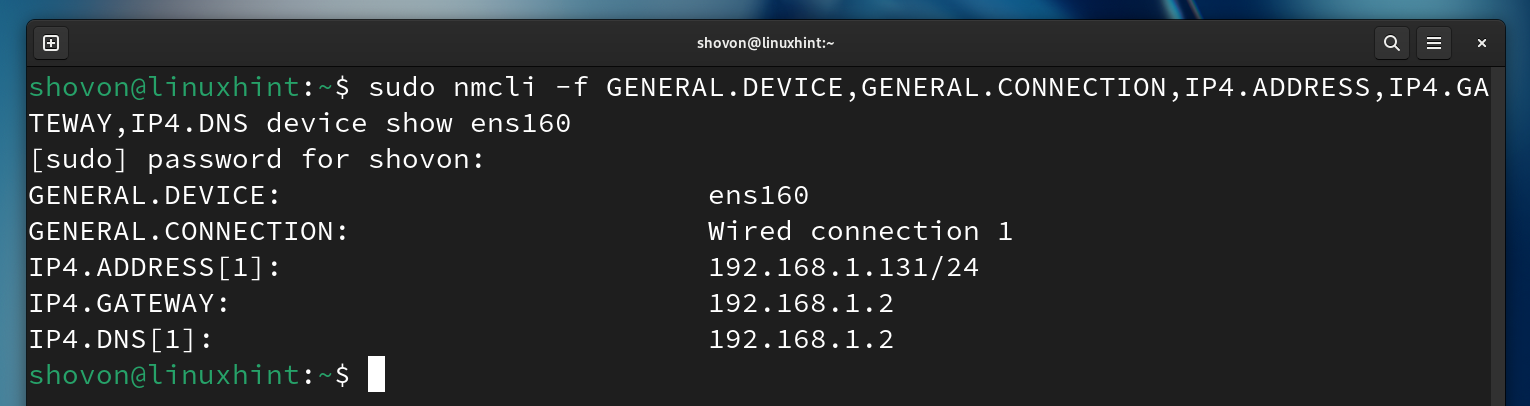
To find the currently configured IP addressing information (i.e. IP address, subnet mask, gateway, DNS server) of the “ens160” network interface, run the following command:
As you can see, the IP address that is assigned on the “ens160” network interface is 192.168.1.131, the subnet mask is /24 (or, 255.255.255.0), the gateway IP address (the IP address of the router) is 192.168.1.2, and the DNS server address is 192.168.1.2.
Creating Multiple NetworkManager Connection Profiles for the Same Network Interface Using Nmcli
You can create a new NetworkManager connection profile for a network interface by cloning an existing NetworkManager connection profile and modifying the required parameters.
You can also create a new NetworkManager connection profile for your desired network interface using the required IP addressing information.
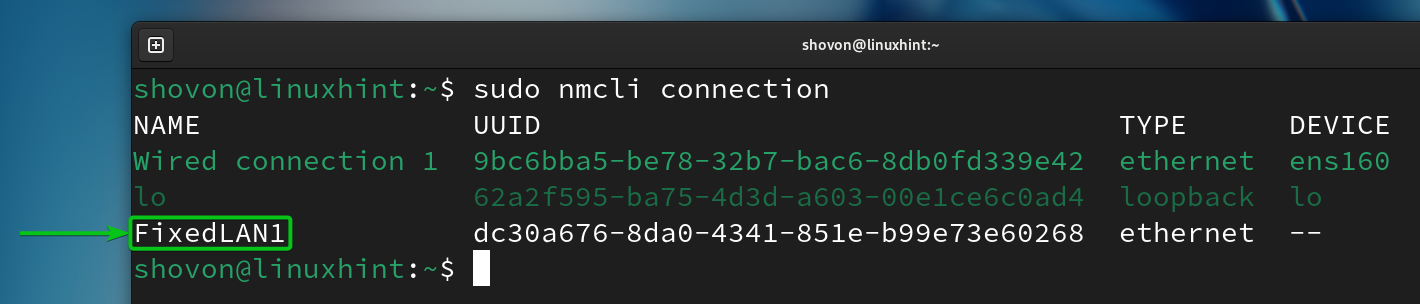
To clone an existing NetworkManager connection profile which is “Wired connection 1” and create a new connection profile named “FixedLAN1”, run the following command:

A new NetworkManager connection profile named “FixedLAN1” should be created.
Now, let’s set a static/fixed IP address 192.168.1.10 for the “FixedLAN1” NetworkManager connection profile.
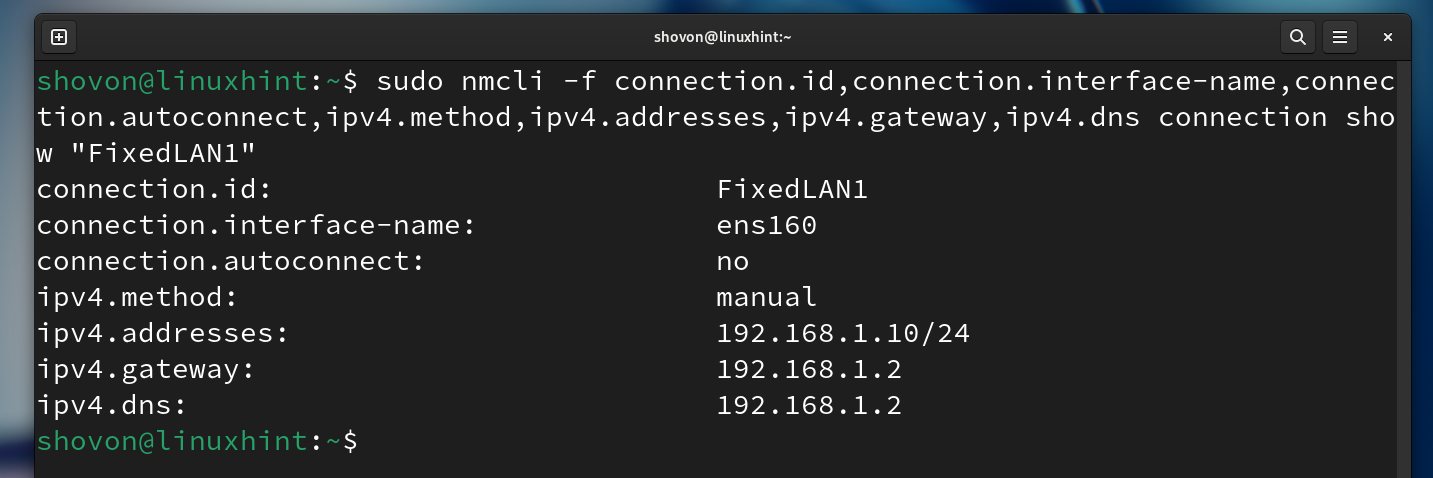
To set a static/fixed IP address 192.168.1.10 for the “FixedLAN1” NetworkManager connection profile, the required options of the “FixedLAN1” connection profile can be modified with the following command:
As you can see, the required IP parameters for the static/fixed IP address 192.168.1.10 are set for the “FixedLAN1” NetworkManager connection profile.
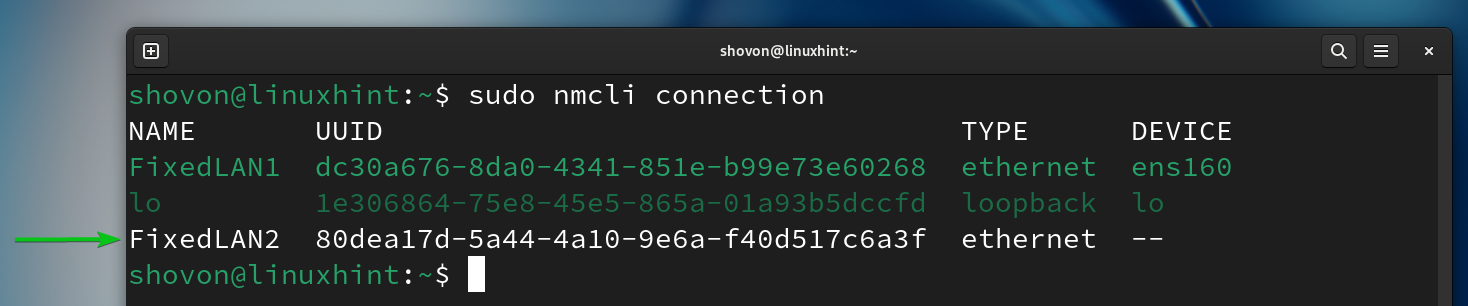
To create a new NetworkManager connection profile named “FixedLAN2” for the “ens130” network interface with the static/fixed IP address 192.168.1.20, run the following command:

A new NetworkManager connection profile named “FixedLAN2” should be created.
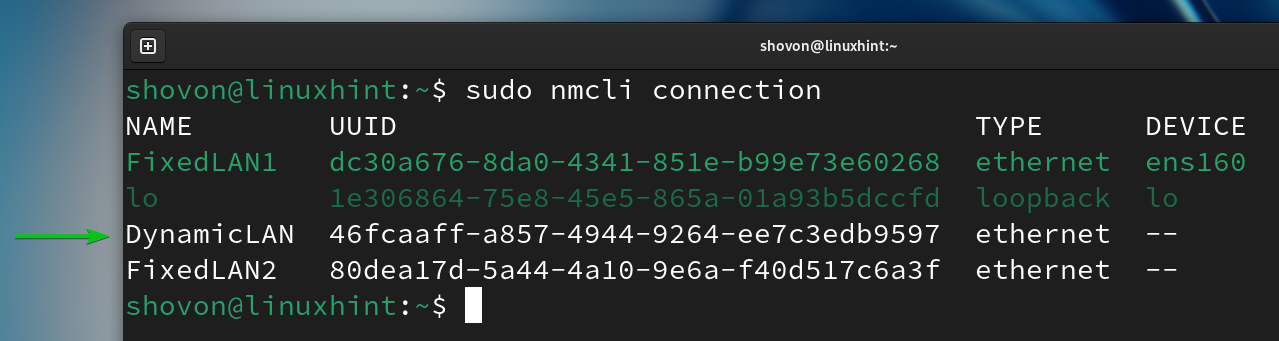
To create a new NetworkManager connection profile named “DynamicLAN” for the “ens130” network interface to get the IP addresses via DHCP, run the following command:

A new NetworkManager connection profile named “DynamicLAN” should be created.
Switching Between NetworkManager Connection Profiles Using Nmcli
You can easily switch between any of the NetworkManager connection profiles that you created for the “ens160” network interface.
For example, you can activate the “FixedLAN2” NetworkManager connection profile as follows:

As you can see, the “FixedLAN2” NetworkManager connection profile is activated and the correct IP information is applied to the “ens160” network interface.
$ ip a

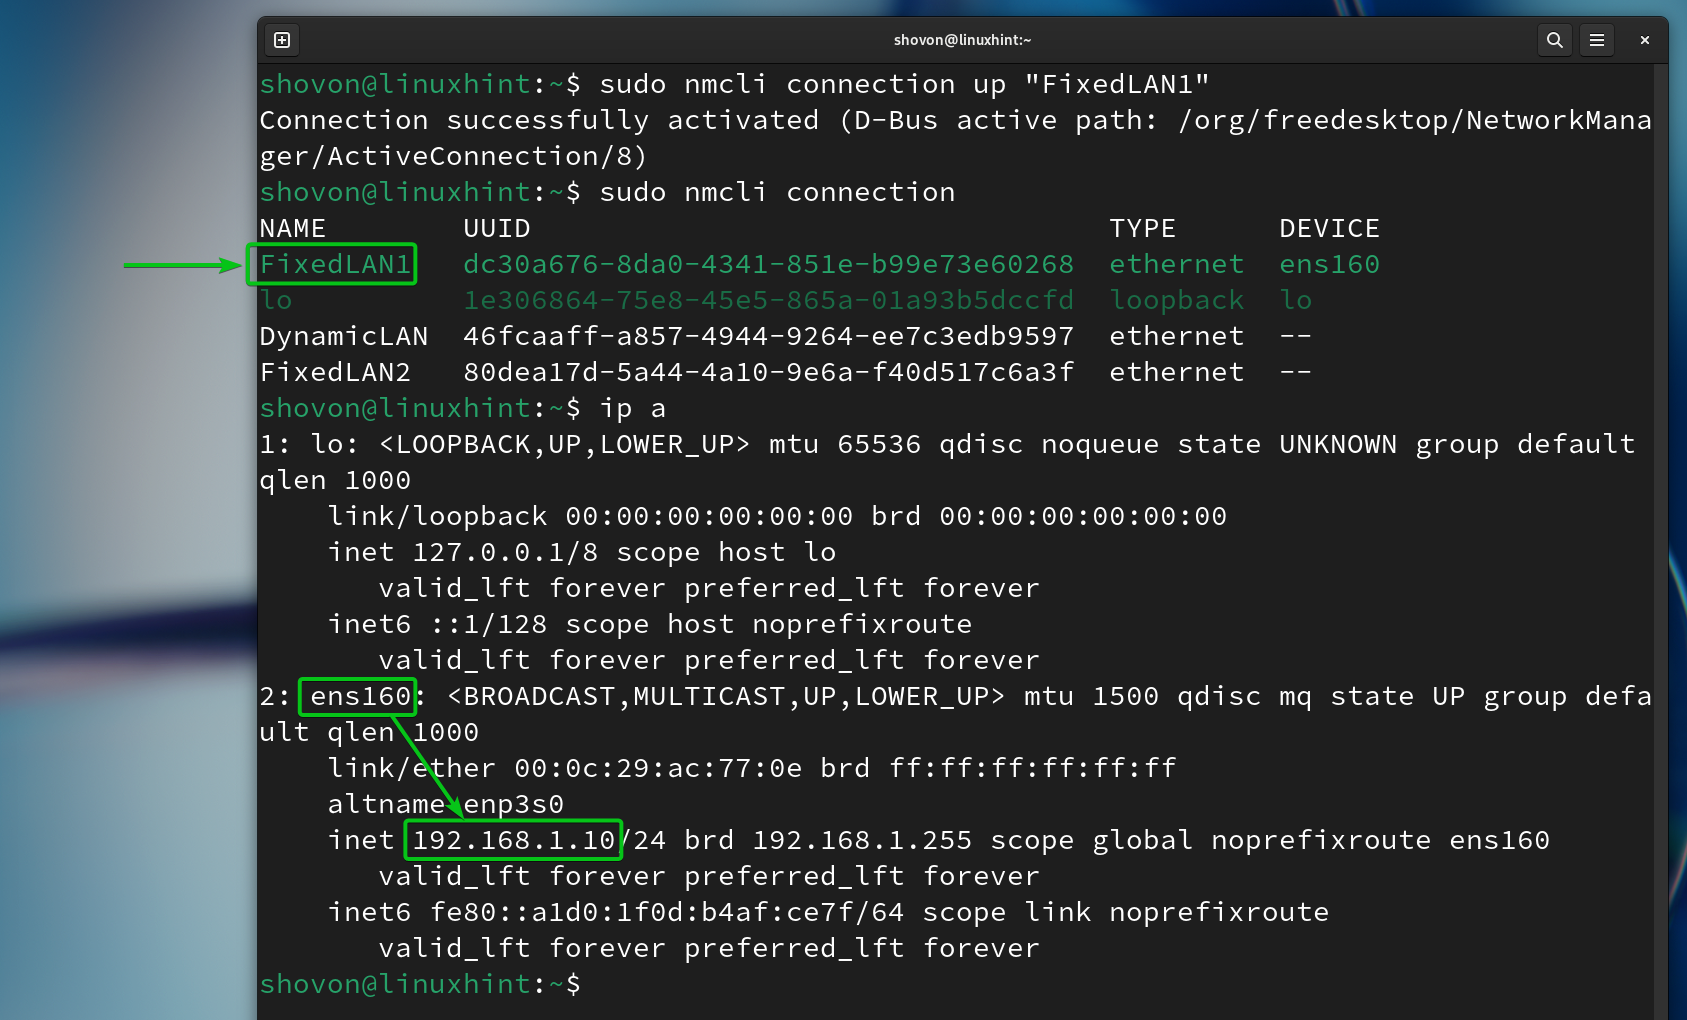
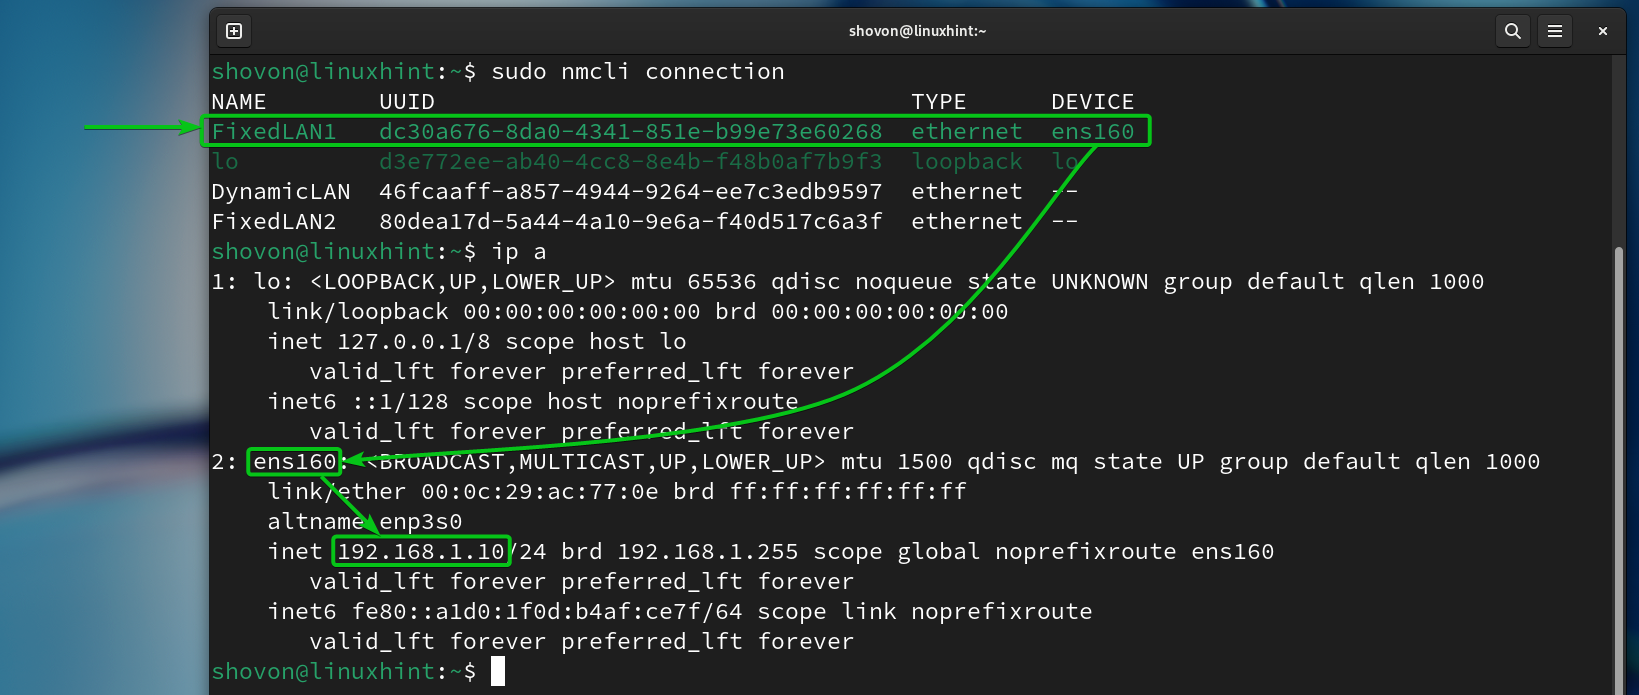
In the same way, you can activate the “FixedLAN1” NetworkManager connection profile.
$ sudo nmcli connection
$ ip a
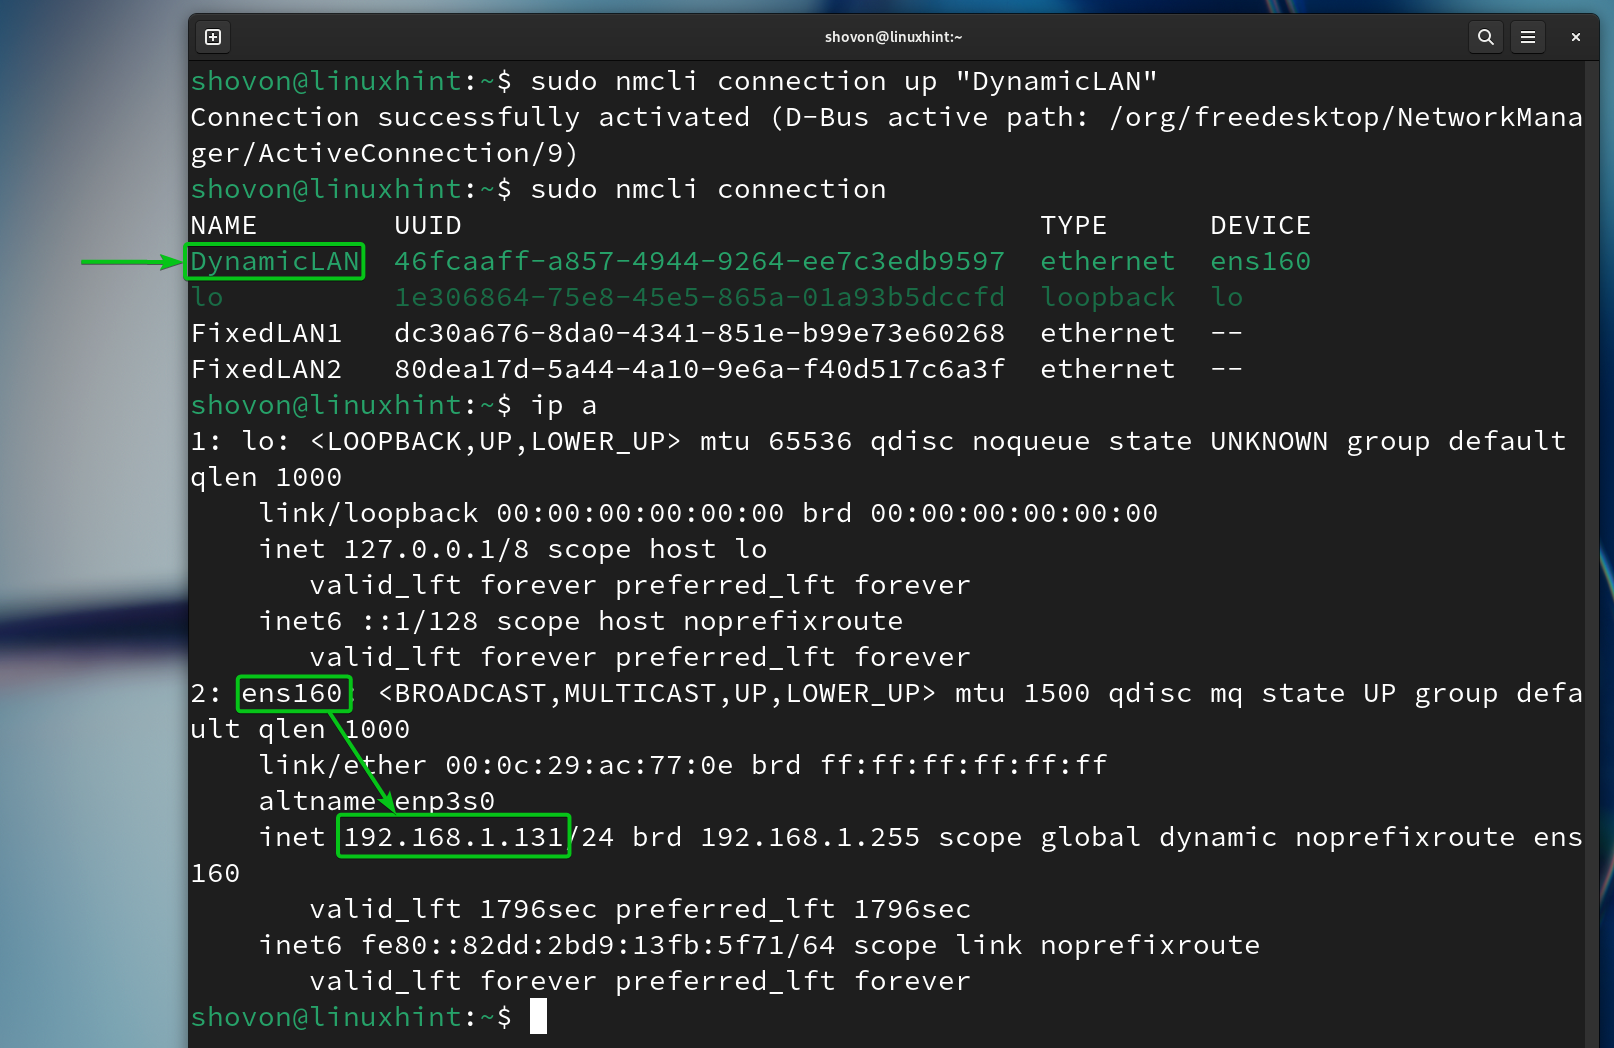
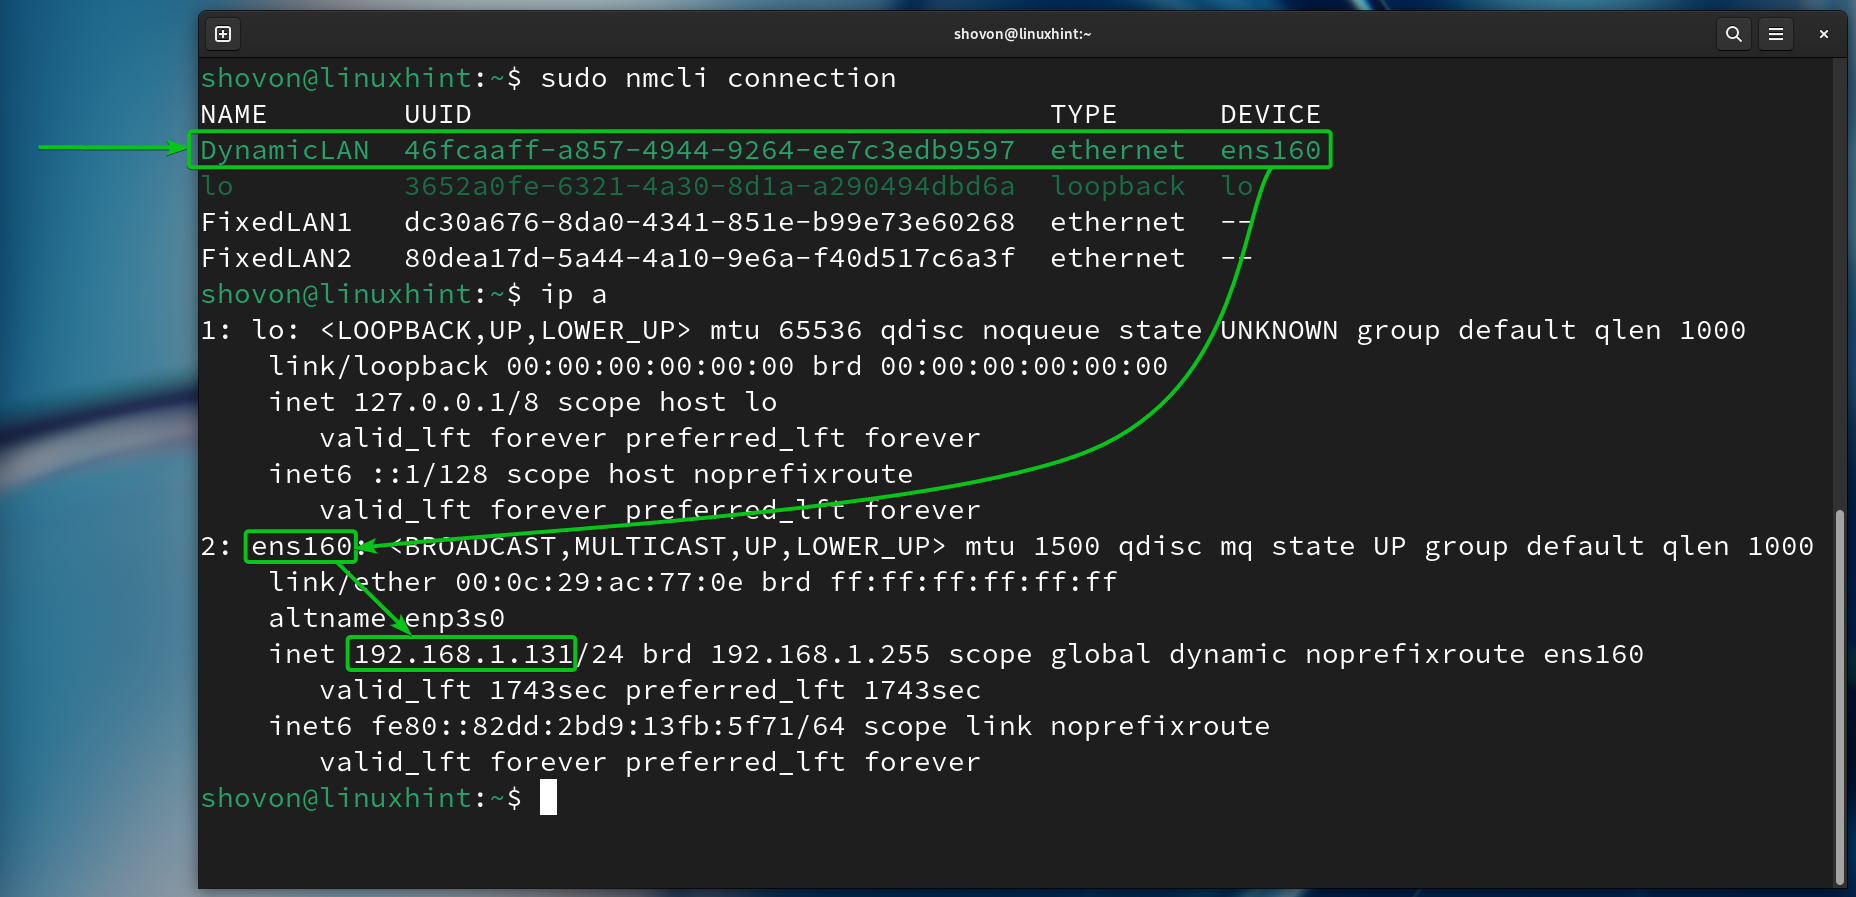
In the same way, you can activate the “DynamicLAN” NetworkManager connection profile as well.
$ sudo nmcli connection
$ ip a
Automatically Activating a NetworkManager Connection Profile for the Network Interface Using Nmcli
For the NetworkManager to automatically activate a connection profile for your desired network interface at boot time, you must enable the autoconnect property of the NetworkManager Connection profile for the network interface.
For example, we created three NetworkManager connection profiles for the “ens160” network interfaces: FixedLAN1, FixedLAN2, and DynamicLAN.
To activate the “FixedLAN1” connection profile automatically, you must enable the autoconnect for the “FixedLAN1” profile and disable the autoconnect for the “FixedLAN2” and “DynamicLAN” connection profiles.
$ sudo nmcli connection modify "FixedLAN2" autoconnect no
$ sudo nmcli connection modify "DynamicLAN" autoconnect no
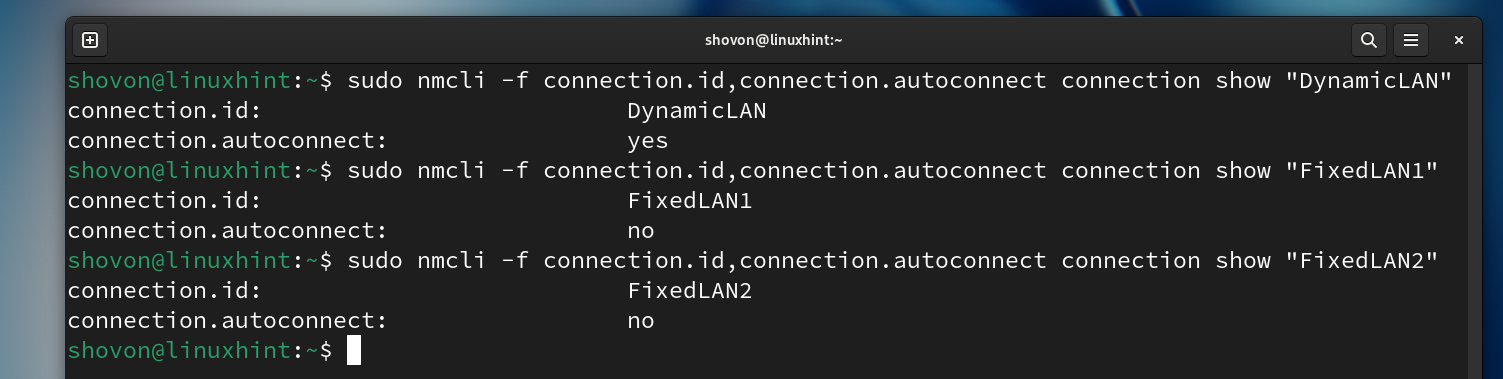
As you can see, autoconnect is enabled for only the “FixedLAN1” connection profile and disabled for other connection profiles of the “ens160” network interface.
$ sudo nmcli -f connection.id,connection.autoconnect connection show "FixedLAN2"
$ sudo nmcli -f connection.id,connection.autoconnect connection show "DynamicLAN"

Now, reboot your computer and you should see that the “FixedLAN1” NetworkManager connection is activated by default.
$ ip a
In the same way, you can enable the autoconnect for the “DynamicLAN” NetworkManager connection profile with the following commands:
$ sudo nmcli connection modify "FixedLAN1" autoconnect no
$ sudo nmcli connection modify "FixedLAN2" autoconnect no
As you can see, autoconnect is enabled for only the “DynamicLAN” connection profile and disabled for other connection profiles of the “ens160” network interface.
$ sudo nmcli -f connection.id,connection.autoconnect connection show "FixedLAN1"
$ sudo nmcli -f connection.id,connection.autoconnect connection show "FixedLAN2"
Now, reboot your computer. You should see that the “DynamicLAN” NetworkManager connection is activated by default.
$ ip a
Conclusion
In this article, we showed you how to create multiple NetworkManager connection profiles for the same network interface on Linux using the “nmcli” NetworkManager command-line tool. We also showed you how to switch between the NetworkManager connection profiles and how to automatically active a NetworkManager connection profile at boot time on Linux.

Source: linuxhint.com