How to Convert XML into JSON Using Node.js?
Quick Outline
- What is XML?
- What is JSON?
- Why is JSON Better Than XML?
- How to Convert XML into JSON Using Node.js?
- How to Convert XML to JSON as a Promise Using Node.js?
- Conclusion
First start with the basics of XML and JSON formats.
What is XML?
XML is an acronym for “eXtensible Markup Language” that is designed to define and transfer well-organized structured data among computers and the internet. It is a human as well as a machine-readable language. Its main objective is to concentrate on the structure of the data to make it understandable. It stores the content in a hierarchical(parent-node) format that shows the elements can contain further elements as its child.
What is JSON?
JSON stands for “JavaScript Object Notation” which stores and manages complex, object-oriented, and nested data. It is the most widely used common data format in all modern programming languages because of its self-describing nature. It stores and transfers the data into “key-value” format. In such a format, each “key” has its corresponding value.
Why is JSON Better Than XML?
Although JSON is similar to XML due to its self-describing nature, and hierarchical structure. However, on the below-stated basis, it is better than XML:
- JSON is smaller in size and faster in transmission.
- JSON is recommended for API because it prioritizes the file sizes due to its lightweight feature.
- JSON uses an array object type that XML does not support.
- JSOn is easy to read and write as a string value instead of a parent and child element.
After getting the basics of XML and JSON let’s jump into the conversion of XML to JSON.
How to Convert XML into JSON Using Node.js?
The conversion of XML to JSON is simple and quite easy. This section enlists step-by-step instructions to convert the XML into JSON using Node.js.
- Step 1: Create Node.js Application
- Step 2: Install “xml2js” Module
- Step 3: Convert XML to JSON
- Step 4: Deploy the Node.js Application(Verification)
Step 1: Create Node.js Application
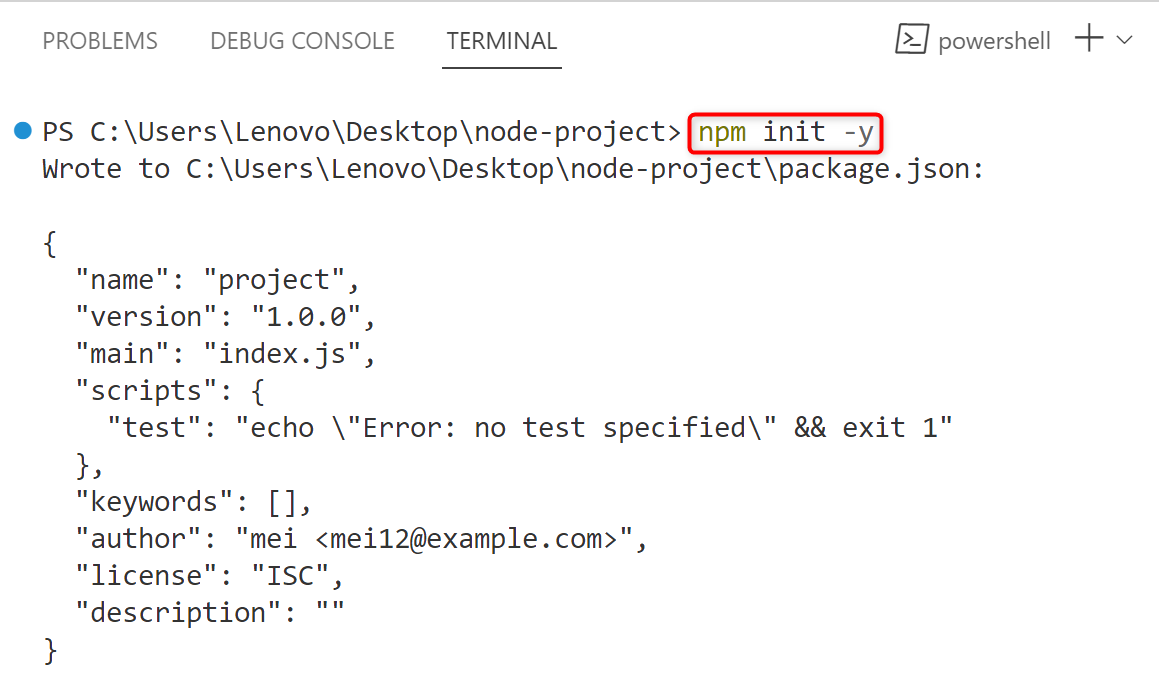
First, create a Node.js application with the help of the below-stated “npm(node package manager)” initialization command:
The below output shows that the Node.js application has been generated successfully containing the default “package.json” file having the following properties:
Step 2: Install “xml2js” Module
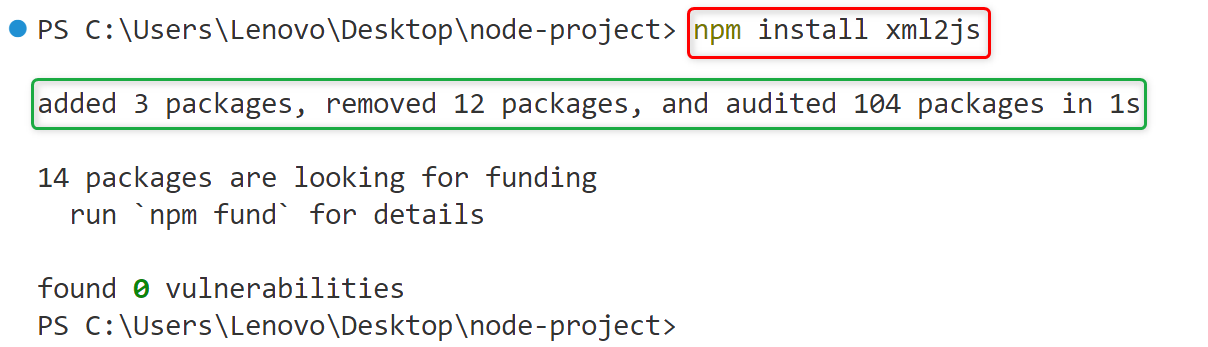
Next, install the “xml2js” module into the root directory of the Node.js application using the “npm” installation command:
The below output verifies that the “xml2js” module has been installed to the current Node.js project:
Install the “xml2json” Module Globally
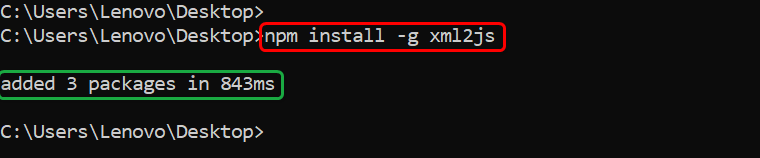
The user can also install the “xml2js” module globally in an operating system for all Node.js applications. For this purpose, execute the below-typed command:
Now, the “xml2js” module is added globally in the current Windows operating system:
Step 3: Convert XML to JSON
Once all is done, create a “.js” file extension in the Node.js application and insert the following code lines into it. This code will convert the XML content to JSON:
const xml = `< ?xml version="1.0" encoding="UTF-8" ?>
<employee>
<name>Joseph</name>
<id>tsl1</id>
<email>joseph@gmail.com</email>
<roles>
<role>Admin</role>
</roles>
<admin>true</admin>
</employee>`
xml2js.parseString(xml, (err, result) => {
if (err) {
console.error(err)
}
const json = JSON.stringify(result,null,2)
console.log("Converted Content: \n" + json)
})
The description of the above code block is written here:
- The “require()” method imports the “xml2js” module into the Node.js application.
- The “xml” object specifies the XML content. Inside it, the first line is the “optional preamble/prolog” that specifies the XML version and the encoding type “utf-8” which is human readable. After that, it contains a root element “<employee>” that is the parent of all given children and subchildren.
- The “parseString()” method now specifies the targeted XML content and a callback arrow function having “err” and the “result” arguments as its parameters. It parses the given XML content.
- Inside the callback arrow function, an “if-else” statement is utilized.
- The “if” statement further contains a code block that uses the “console.error()” method to display the error if occurs,
- If no error occurs then the “else” code block will execute that utilizes the “JSON.stringify()” method to convert the specified object(xml) into JSON string.
- The “JSON.stringify()” method also specifies the “replacer” parameter whose value is “null” which means there is nothing to replace and the “space” parameter to add the whitespaces in the output.
- The “if” condition also uses the “console.log()” method to display the converted content in the console.
Step 4: Deploy the Node.js Application(Verification)
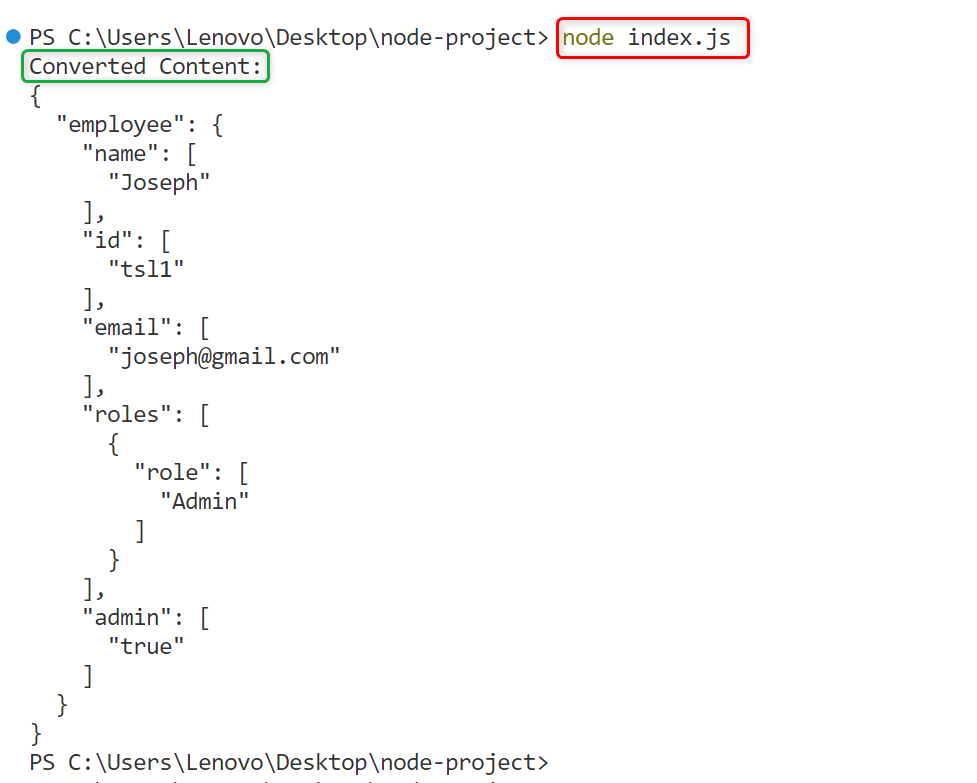
Once all is done, deploy the Node.js application with the help of the “node” keyword:
The above command executed successfully showing the converted XML content to JSON(key-value)format:
How to Write Converted Content into JSON File?
Apart from displaying the converted content in the console, the user can also save it into a particular file. To do so, the “fs.writeFile()” method can be used. It is an asynchronous method that writes data into a file without blocking the remaining program execution.
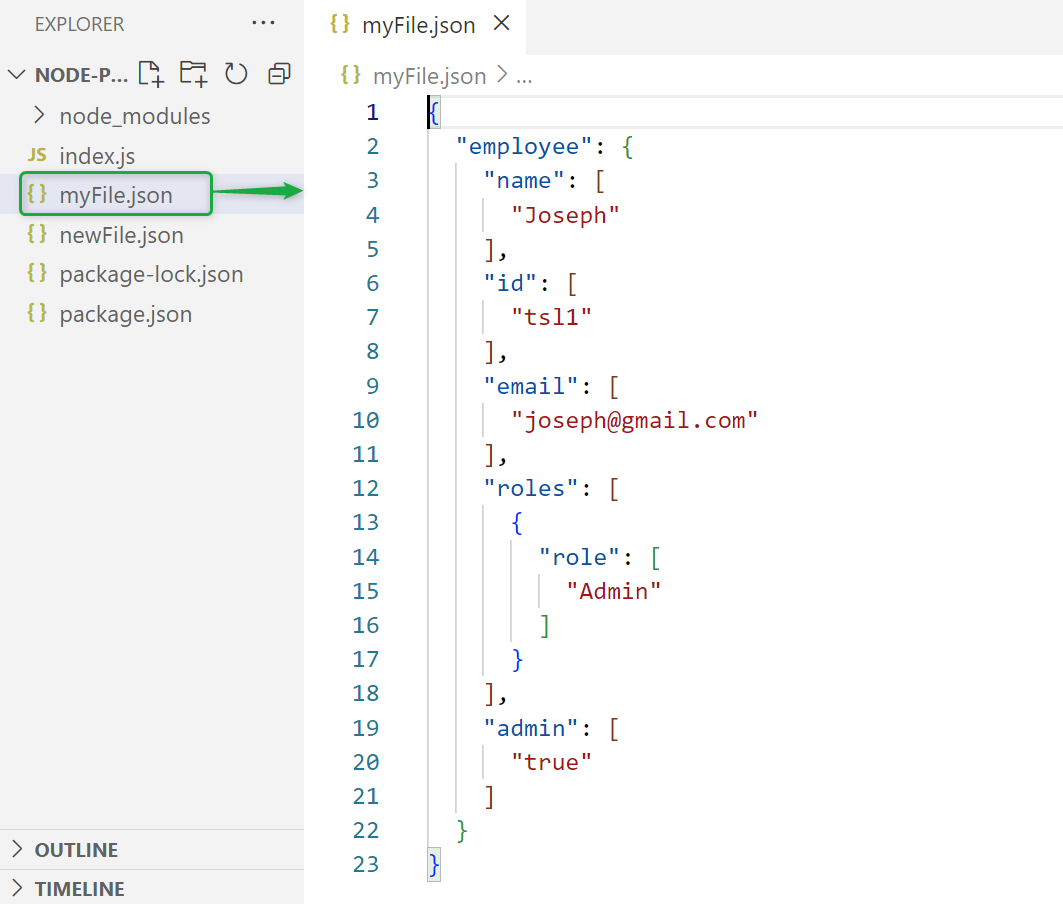
The below code snippet shows the practical implementation of the “fs.writeFile()” to save the converted XML content into the “myFile.json” file:
xml2js.parseString(xml, (err, result) => {
if (err) {
console.error(err)
}
const json = JSON.stringify(result, null, 4)
fs.writeFileSync(‘myFile.json’, json)
})
In this scenario,
- The “require()” method includes the “fs” module in the Node.js application to implement its built-in methods.
- The “fs.writeFile()” method specifies the file name to write the converted XML content into it.
Execute the “index.js” file again and then navigate to the current Node.js application’s root directory:

The below output shows that the “myFile.json” file has been created having the converted XML content to JSON:

How to Convert XML to JSON as a Promise?
It can be seen that in the above section, the “parseString()” method works asynchronously and offers the callback function. If it uses multiple callback functions then the callback hell issue can be faced. To avoid such a situation use the “parseString()” method as a promise. A promise is an object, holding a state of completion or failure of an asynchronous task
The user can use the “parseString()” method as a promise by following these two approaches:
- Approach 1: Using “parseStringPromise()” Method
- Approach 2: Using “async/await” Keywords
Approach 1: Using “parseStringPromise()” Method
The “parseStringPromise()” method parses the XML content sequentially line by line. If the promise is resolved then this method returns a promise containing the desired output otherwise it is rejected and returns the error object.
Here is its practical implementation:
const fs= require(‘fs’)
const xml = `<?xml version="1.0" encoding="UTF-8" ?>
<employee>
<name>Joseph</name>
<id>tsl1</id>
<email>joseph@gmail.com</email>
<roles>
<role>Admin</role>
</roles>
<admin>true</admin>
</employee>`
xml2js.parseStringPromise(xml)
.then(result =>{
const json = JSON.stringify(result,null,4)
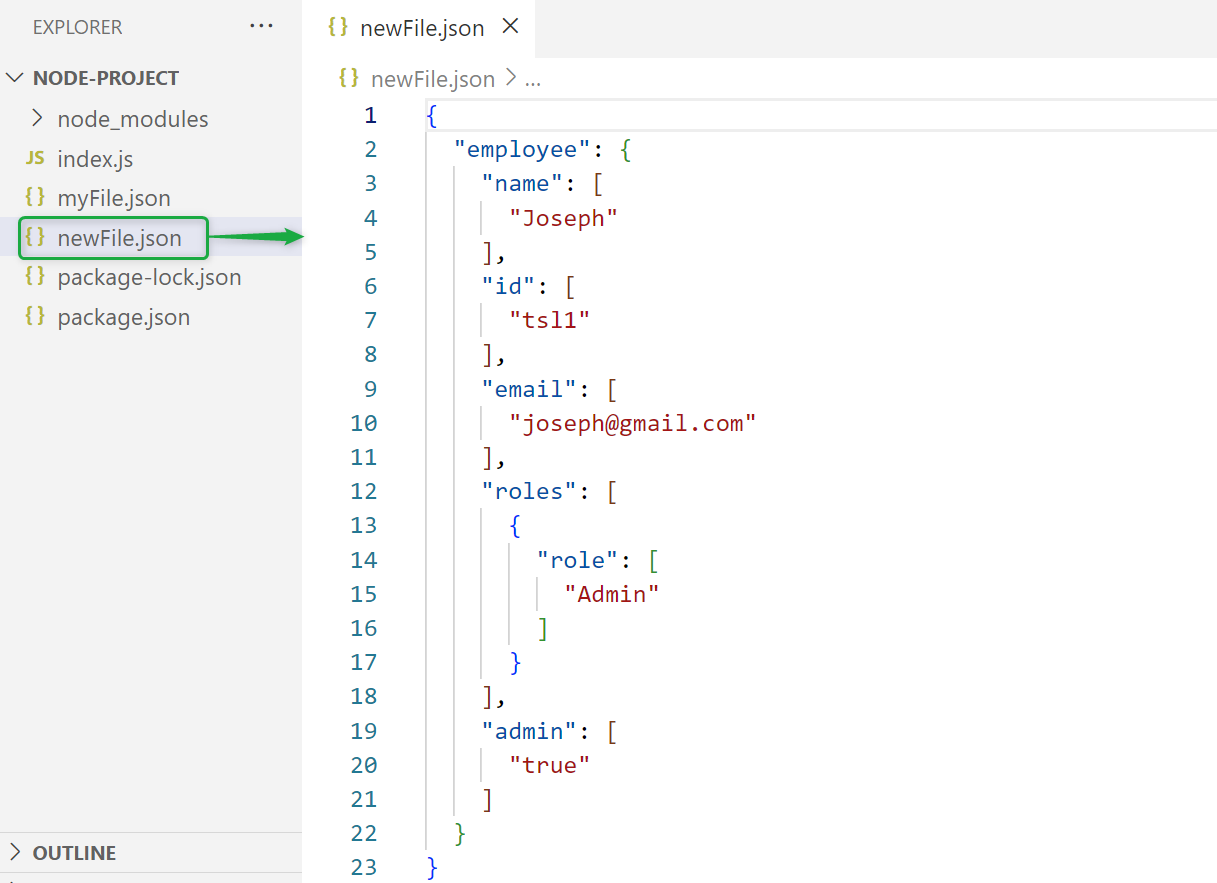
fs.writeFile(‘newFile.json’, json)
})
.catch(err => console.log(err))
In the above code lines:
- The “parseStringPromise()” method parses the specified XML content as a promise.
- The “.then()” method invokes when the above promise is resolved. It defines an arrow function that applies the “fs.JSON.stringify()” method to convert the object into JSON string and write them into the “newFile.json” via the “fs.writeFile()” method.
- If the promise is rejected then the “.catch()” method will execute to display the error using the “console.error()” method.
Output
Initiate the “index.js” file:
The above command executed successfully:

It is verified that the converted XML content is saved into the specified file:
Approach 2: Using “async/await” Keywords
Another approach to make the “parseString()” method a promise is using “async/await” keywords. The “async” keyword makes the specified function return a particular promise and the “await” keyword pauses that function execution until the promise is resolved.
The below code block shows the functionality of the “async/await” keyword practically:
const fs = require(‘fs’);
const xml = `<?xml version="1.0" encoding="UTF-8" ?>
<employee>
<name>Joseph</name>
<id>tsl1</id>
<email>joseph@gmail.com</email>
<roles>
<role>Admin</role>
</roles>
<admin>true</admin>
</employee>`
;(async () => {
try {
const result = await xml2js.parseStringPromise(xml)
const json = JSON.stringify(result)
fs.writeFile(‘myFile.json’, json)
} catch (err) {
console.log(err)
}
})()
In the above code snippet:
- The “async” keyword makes an empty arrow function a promise.
- Inside this function definition the “try” statement parses the XML content to JSON. If the given promise is resolved successfully then the “fs.writeFile()” method will save the converted content into the given file otherwise the “catch()” method will execute.
- The “parenthesis()” at the end of the code calls the above-defined asynchronous arrow function.
Output
Execute the “index.js” file:

The output is identical to the approach 1:
That’s all about converting XML into JSON.
Conclusion
In Node.js, to convert XML into JSON use the “xml2js” module. It is a third-party party module that the user can install easily with the help of the “npm”. Once it is installed, import it into the Node.js application using the “require()” method and then convert the XML content into JSON via the “JSON.stringify()” method. Before converting the “XML” content into JSON, parse it through the “parseString()” method. This post has demonstrated the complete process to convert XML into JSON.
Source: linuxhint.com