How to Add “Open Git Bash Here” Context Menu to the Windows Explorer?
This tutorial will explain the method for adding the “Open Git Bash Here” option to Windows Explorer.
How to Add the “Open Git Bash Here” Context Menu to the Windows Explorer?
To add the “Open Git Bash Here” context menu to Windows Explorer, follow the below-given step-by-step instructions:
- Open “Registry Editor” from the Start menu.
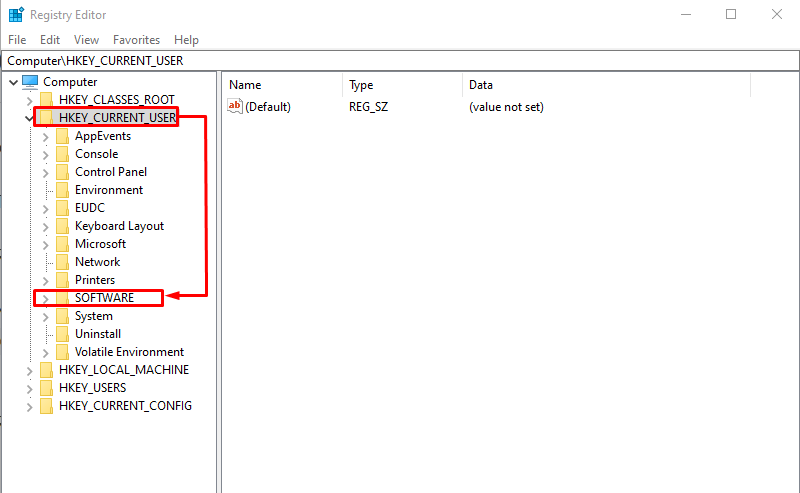
- Click on the “HKEY_CURRENT_USER” folder and move toward the “SOFTWARE” subfolder.
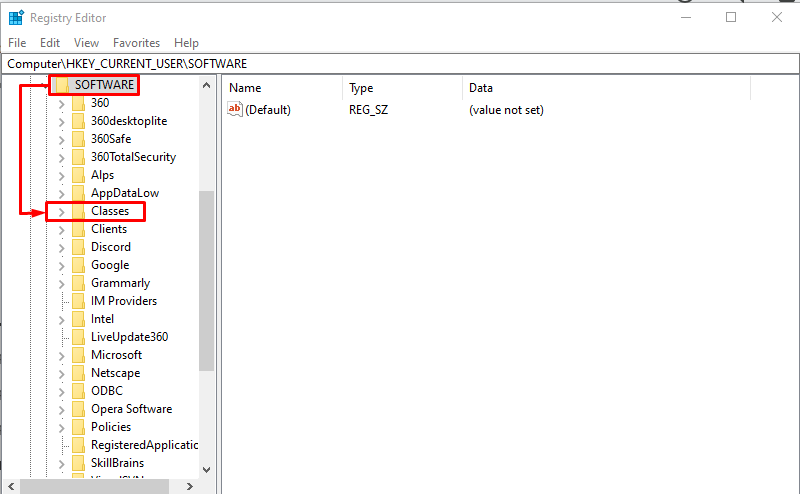
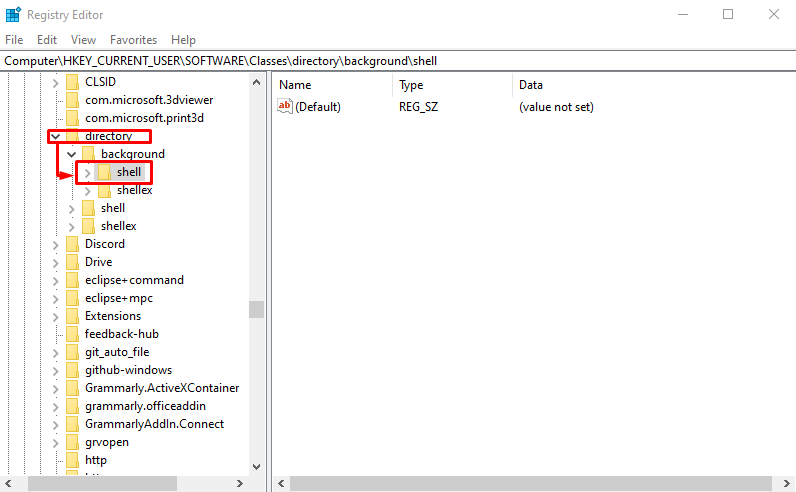
- Next, open “Classes” and go to the “directory>shell”.
- Create a new key by right clicking on the “shell” folder. Then modify the value data.
- Next, make another new key inside the “Bash” with a particular name and save it.
- On the desktop, make right-click to launch the drop-down menu. Hit the “Open Git Bash Here” option.
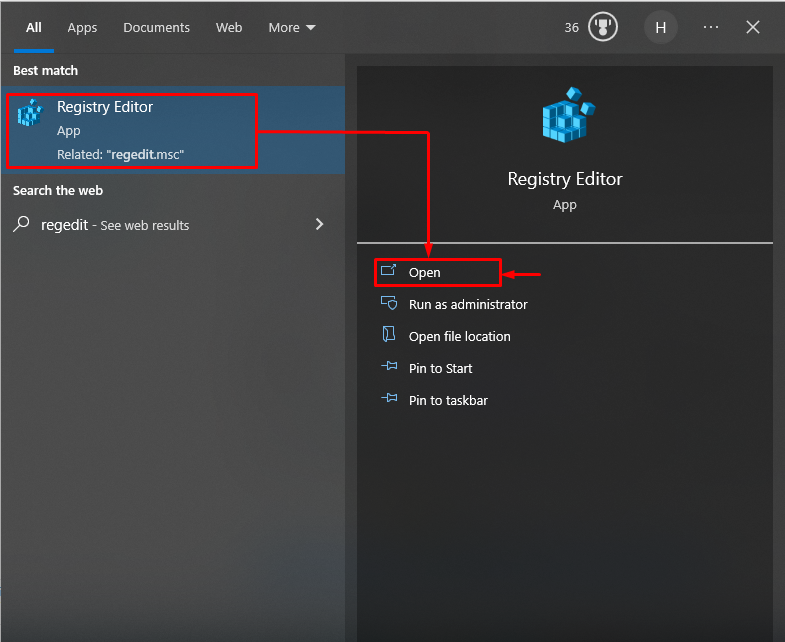
Step 1: Launch Registry Editor
First of all, open the Start menu and search for “Registry Editor” to launch on your system:
Step 2: Open the “HKEY_CURRENT_USER” Folder
Navigate toward the “HKEY_CURRENT_USER” folder and click on the “SOFTWARE” subfolder:
Step 3: Navigate Toward “Classes” Under “SOFTWARE”
Inside the “SOFTWARE” folder, move toward the “Classes” subfolder:
Next, navigate to the “directory>shell”:
Step 4: Create a New Key
Next, right-click on the “shell” folder and hit the “New” option from the appeared drop-down menu to create a new key:
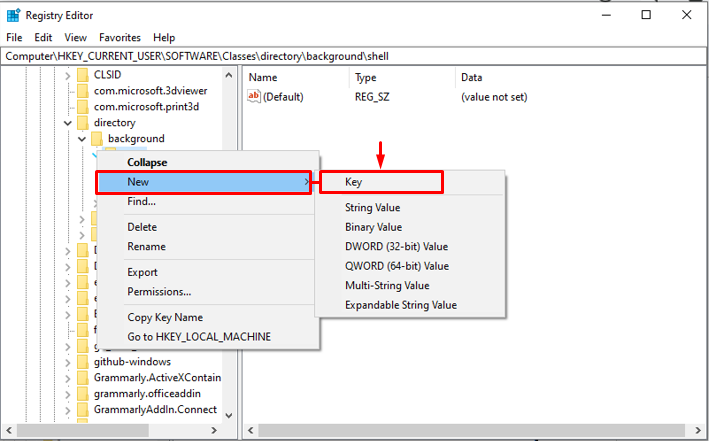
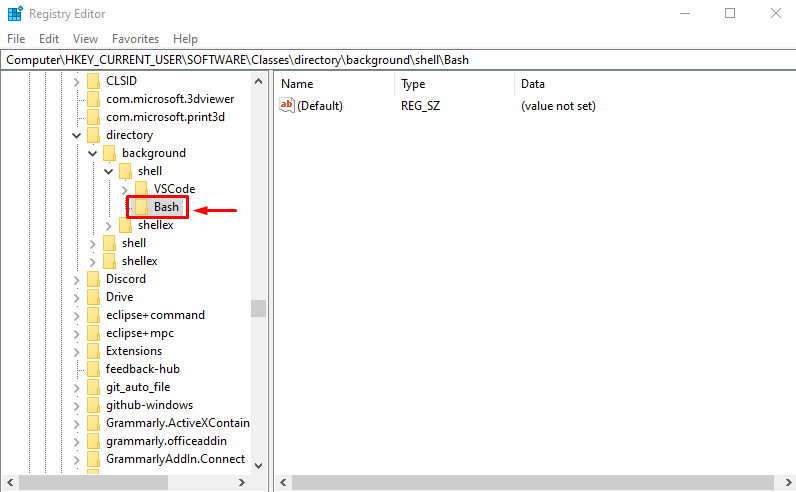
A prompt will appear to, simply enter the name of the directory which will contain the key. The resultant image shows that a new key “Bash” has been generated successfully:
Step 5: Modify Binary Data for Key
Then, open the drop-down menu by right-clicking on the “Default” and selecting the “Modify…” option:

A small window will appear on the screen, enter the value data as “Open Git Bash Here” in the specified place and hit the “OK” button to save it:

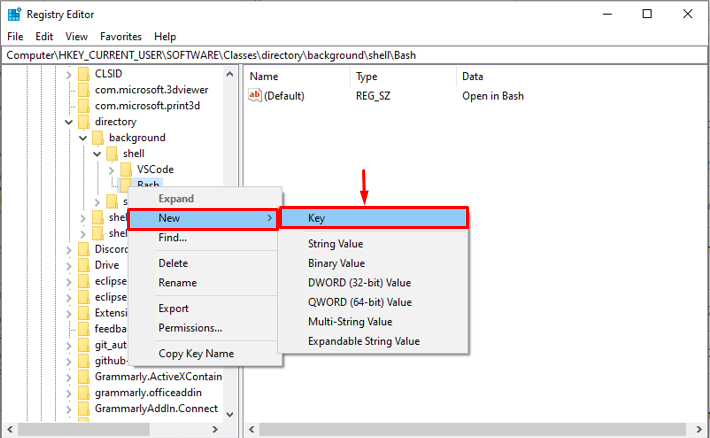
Step 6: Make another Key
Next, make another key inside the “Bash” with a name. In our case, we will set “Command” as the new key:
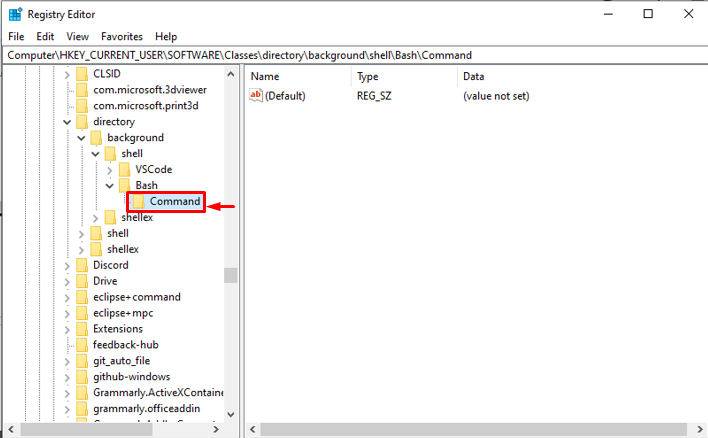
The below-stated image indicates that the new key has been generated successfully:
Follow the same procedure to modify the value data by hitting on the “Modify…” option from the drop-down menu:
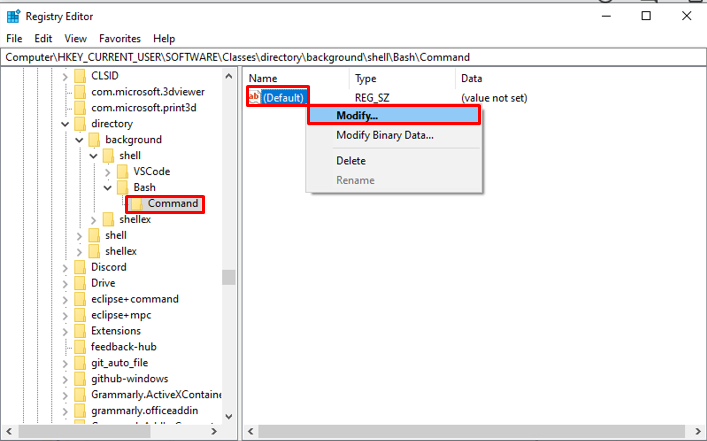
Next, set the path of Git as value data of the “Command” key:
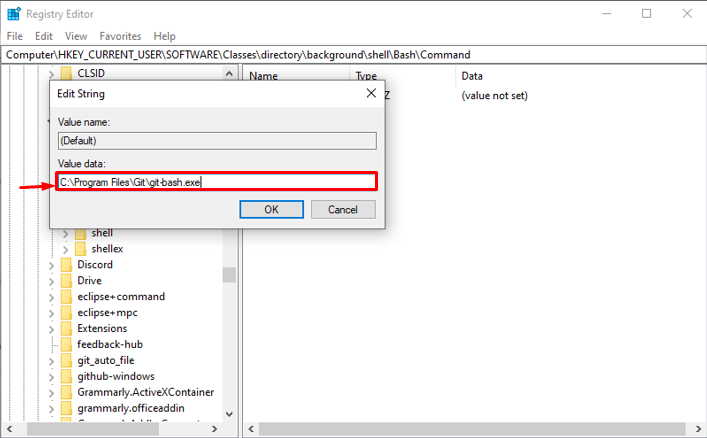
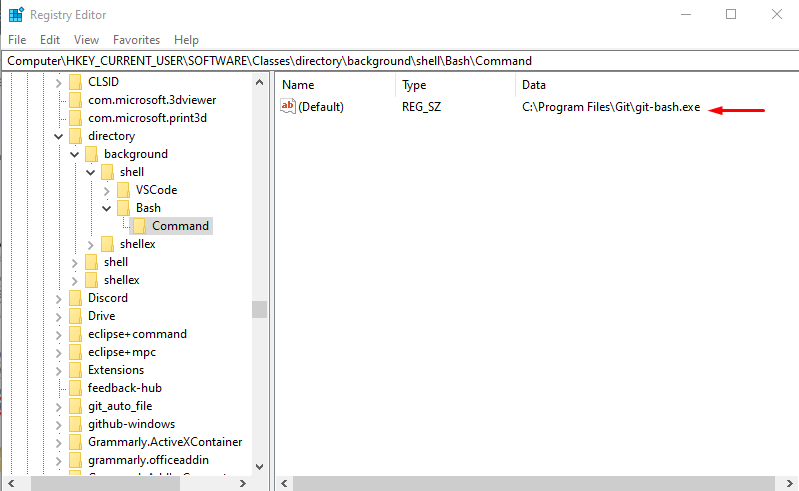
The resultant image shows that the path has been added successfully as the value data:
Step 7: Verify the “Open Git Bash Here” Context Menu
Navigate back to the main desktop to verify the added “Open Git Bash Here” context menu to the Windows Explorer. For that purpose, right-click on the desktop, and the drop-down menu will appear on the screen where you can observe the added “Open Git Bash Here” option:
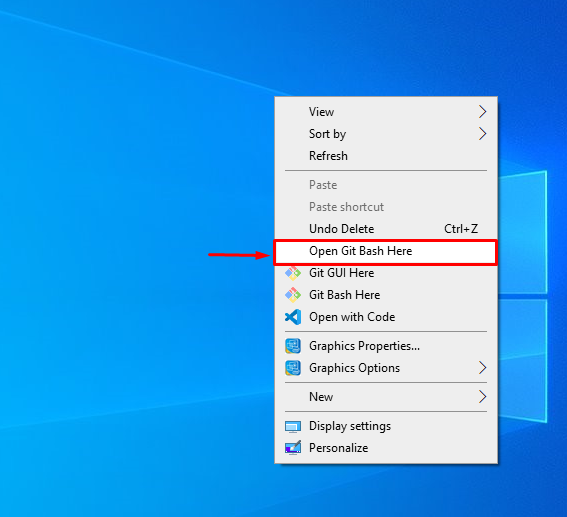
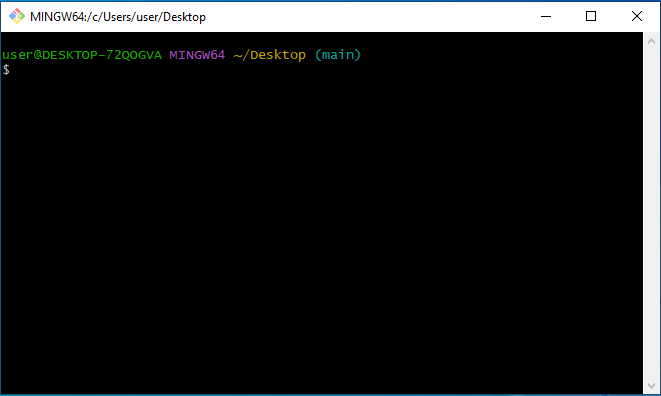
Click on the highlighted option to launch the Git Bash for desktop:
That’s all about adding the “Open Git Bash Here” context menu to the window explorer.
Conclusion
To add the “Open Git Bash Here” context menu to Windows Explorer, first, open “Registry Editor>HKEY_CURRENT_USER>SOFTWARE>Classes>directory>shell”. Make a right-click on the “shell” folder to create a new key and modify value data. After that, make another new key inside the “Bash” with a particular name and save it. On the desktop, right-click to launch the drop-down menu. Hit on “Open Git Bash Here”.
Source: linuxhint.com