How to Add Arduino Libraries in Arduino Web Editor
The Web Editor also supports the use of Arduino libraries, which are pre-written code modules that provide additional functionality to your projects. This writeup covers the process of adding Arduino libraries in the Arduino Web Editor.
How to Add Arduino Library in Arduino Web Editor
You can easily transfer your sketches and libraries from the desktop version of Arduino to the online Arduino Web Editor. This allows access to Arduino projects from anywhere.
You can import single sketches or zipped folders containing sketches and libraries. Just make sure your all-installed libraries are in a folder called “libraries”. Make sure the Arduino sketches and libraries have separate folders.
You can upload sketches and libraries into the Arduino Web Editor in various formats, such as:
- Single sketches in .ino, .pde and .zip format.
- Libraries in .zip format.
- Zipped folders containing sketches and libraries.
Now we will discuss two different ways of adding Libraries in Arduino Web Editor:
- Adding the Pre-Installed Libraries in Arduino Web Editor
- Adding the Zip Library in Arduino Web Editor
- Install Arduino Libraries Using Library Manager Search Option
1: Adding the Pre-Installed Libraries in Arduino Web Editor
To add a pre-installed library in your Arduino Web Editor, follow the steps given below:
Step 1: Open Arduino Web Editor and login to your account.

Step 2: After opening your Arduino Web Editor the following interface will open to make sure the Arduino Create Agent is installed in your PC. Otherwise, you will be unable to upload sketches to Arduino boards.
Check the complete guide on How to Program Arduino Using Web Editor.

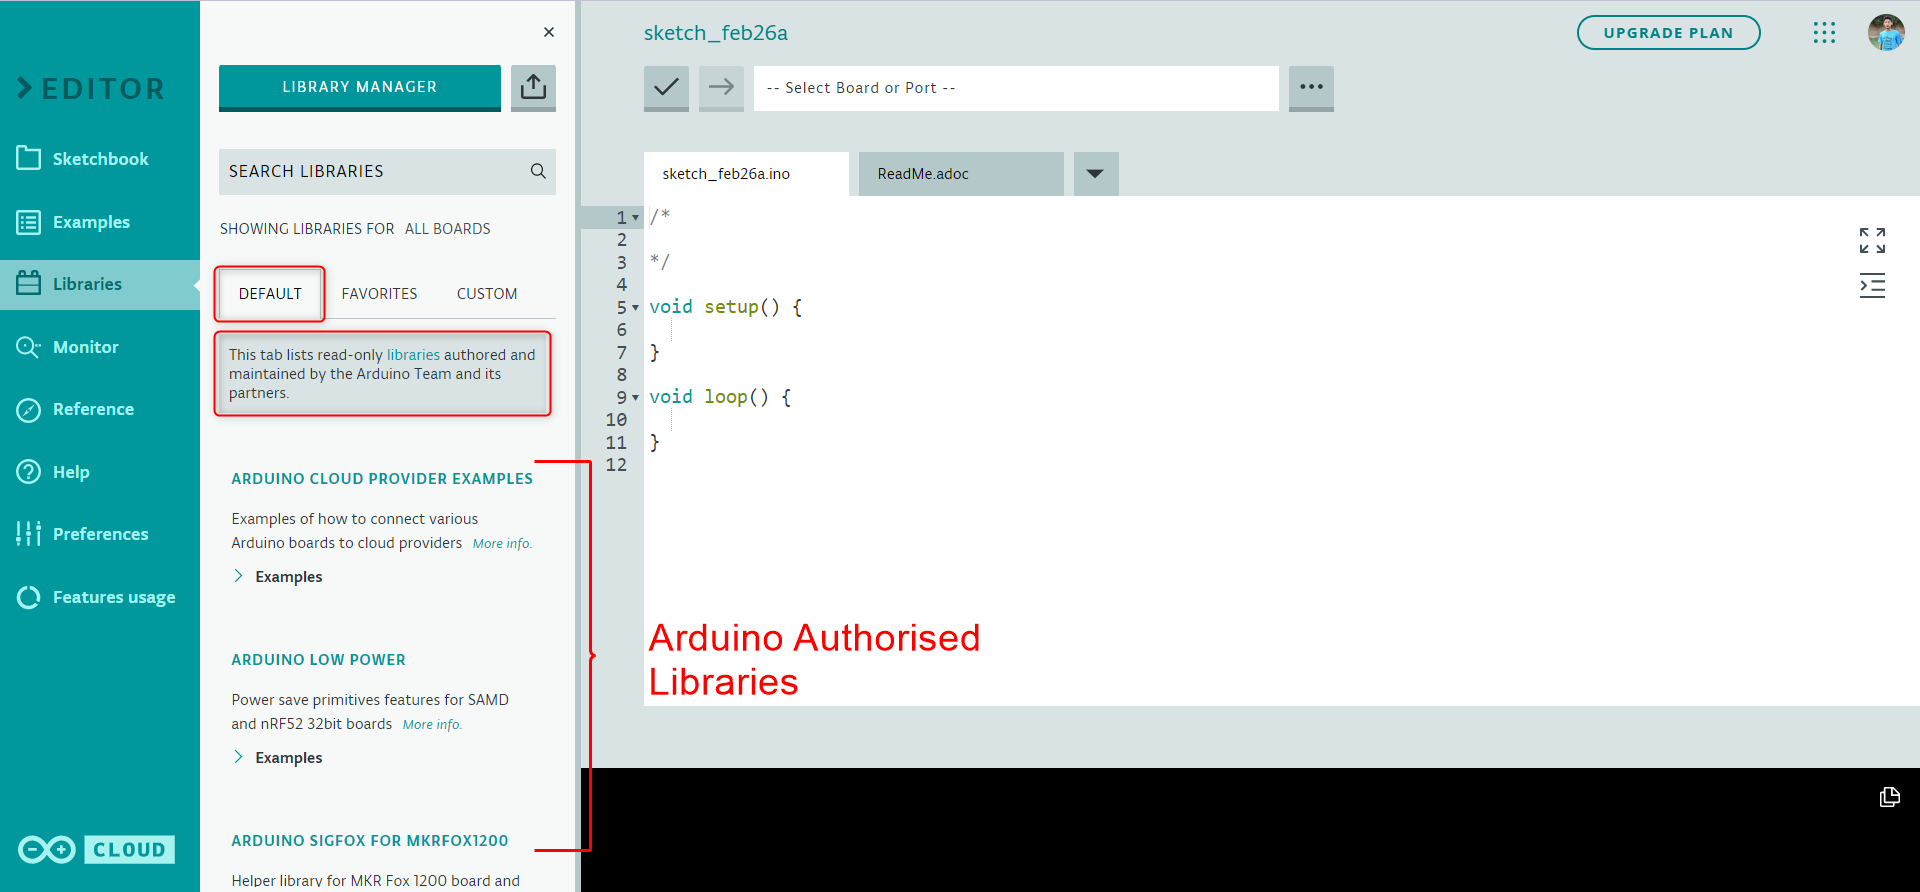
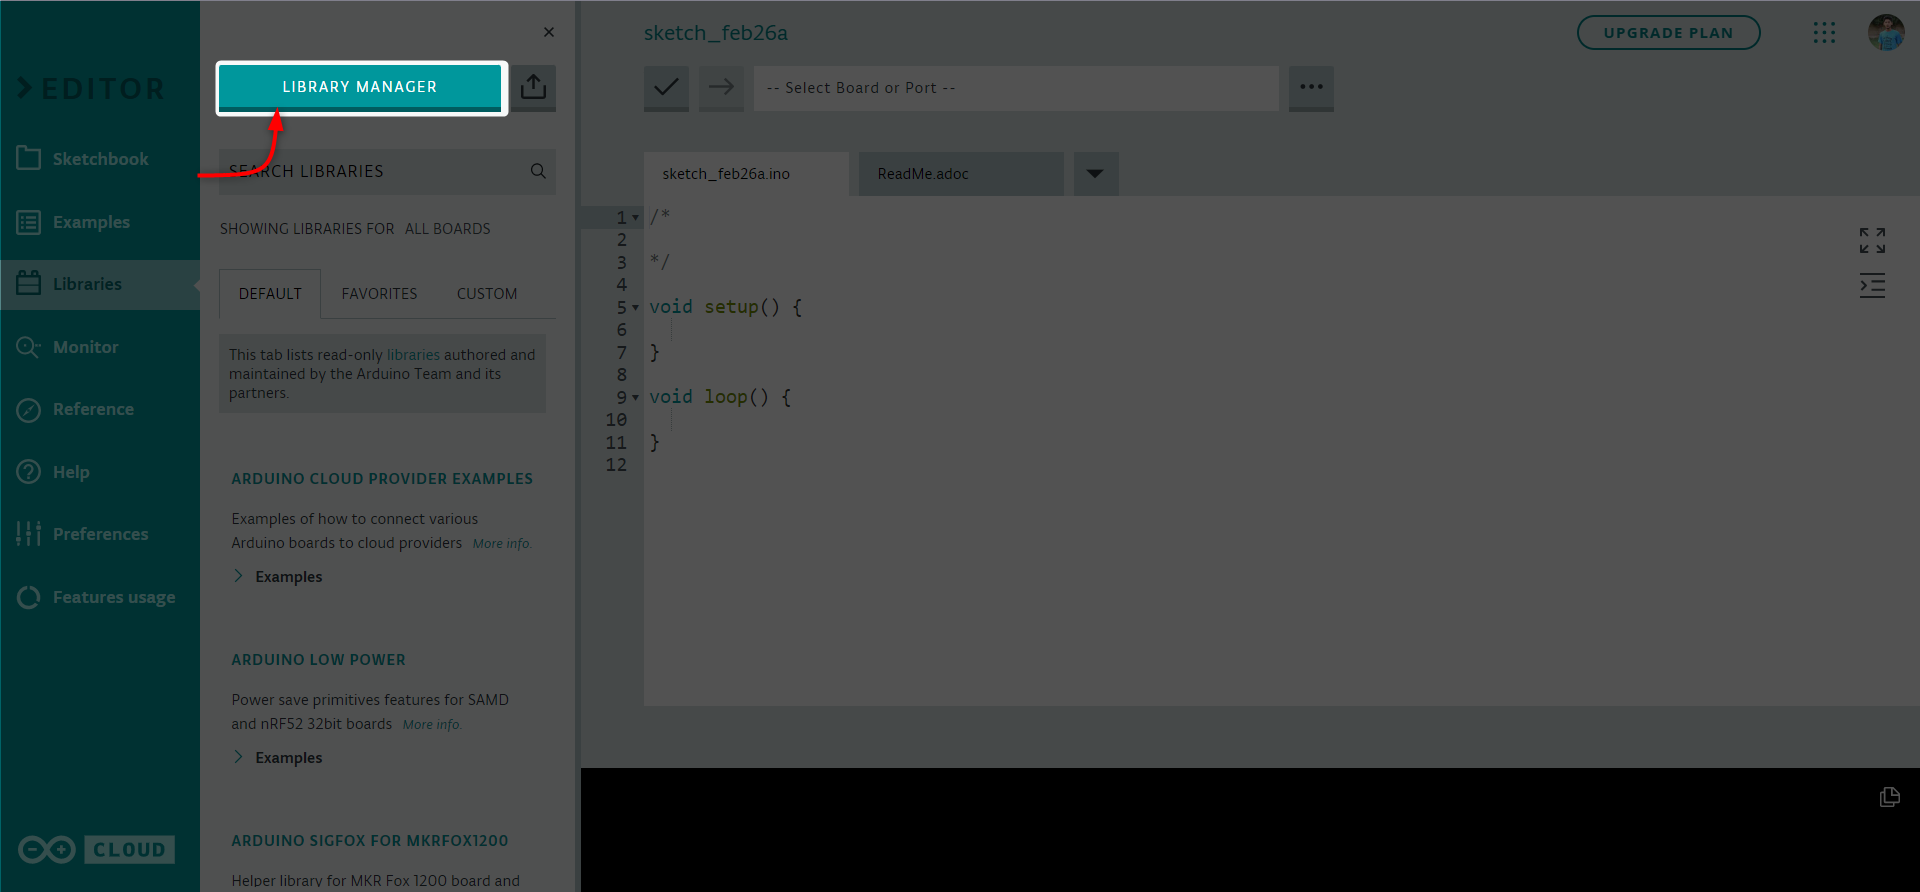
Step 3: To access the libraries in Arduino Web Editor, select the library icon from the left menu, and a new window will appear. In this window, you can find the library section for Arduino Web Editor, which is similar to the offline Arduino IDE editor.
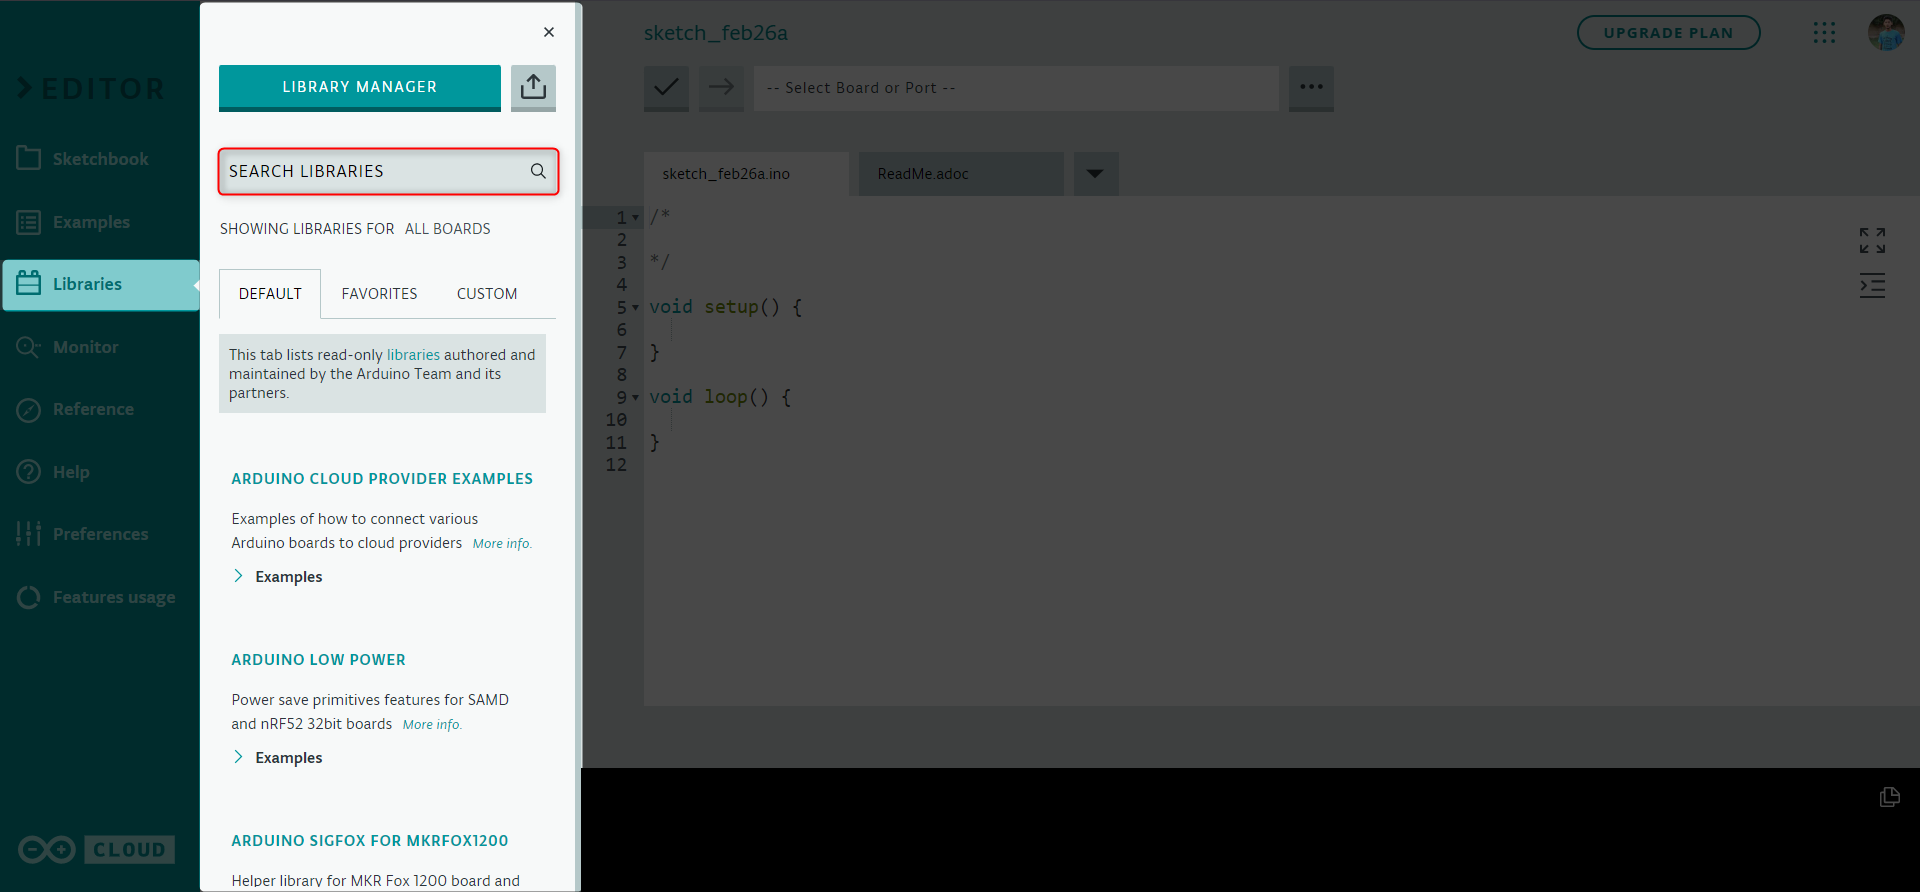
Step 4: Arduino Web Editor has some pre-installed libraries which are managed by the Arduino team and its authorized partner. You can add these libraries in your sketch by going to the Default window.
Now we will continue to the next step of installing the custom zip libraries in Arduino Web Editor IDE.
2: Adding the Zip Library in Arduino Web Editor
Adding Zip libraries to Arduino Web Editor allows us to program hardware other than Arduino boards. In the Arduino community hundreds of free libraries are available that can increase Arduino compatibility with other sensors and actuators. Follow the steps to install a custom Arduino library in Arduino Web Editor.
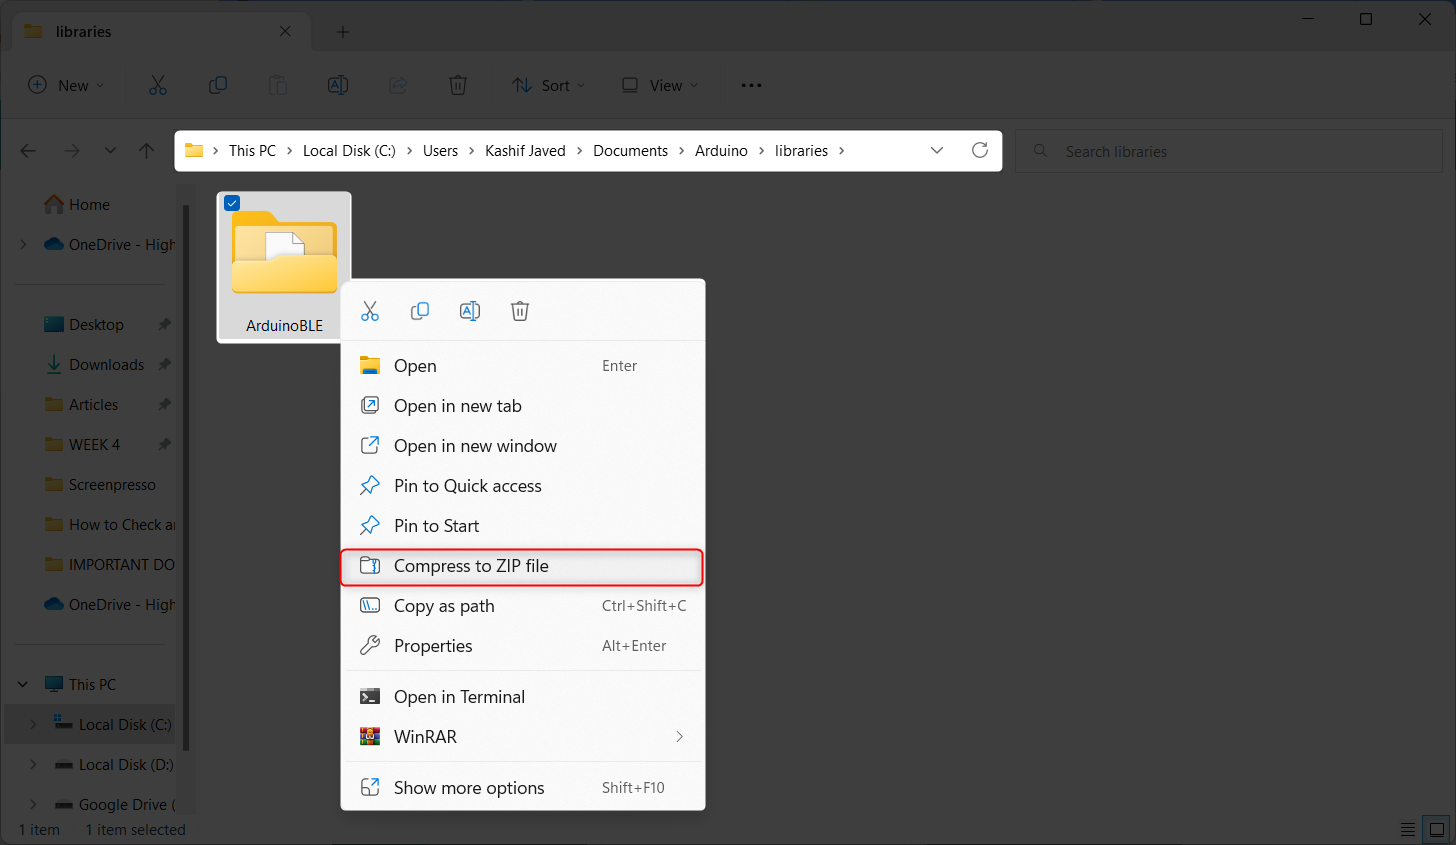
Step 1: Go to the Arduino Library folder and compress the library file which you want to upload. You can find the Arduino Library installed in your Arduino IDE in the given location.
For macOS: User/Documents/Arduino
For Linux system: $HOME/Arduino
Note: You can install any library in the Arduino Web Editor by compressing it. Also, you can compress all library files in one folder and upload them all at once.
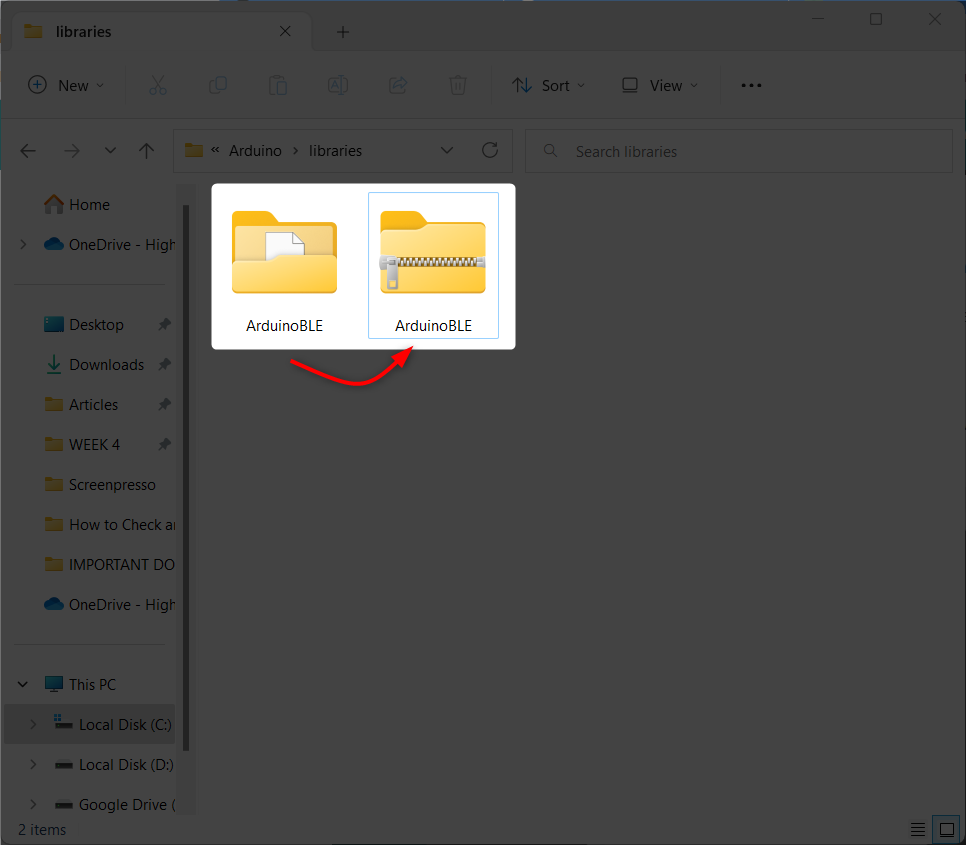
Step 2: After compressing the library file a new file will be generated as follows:
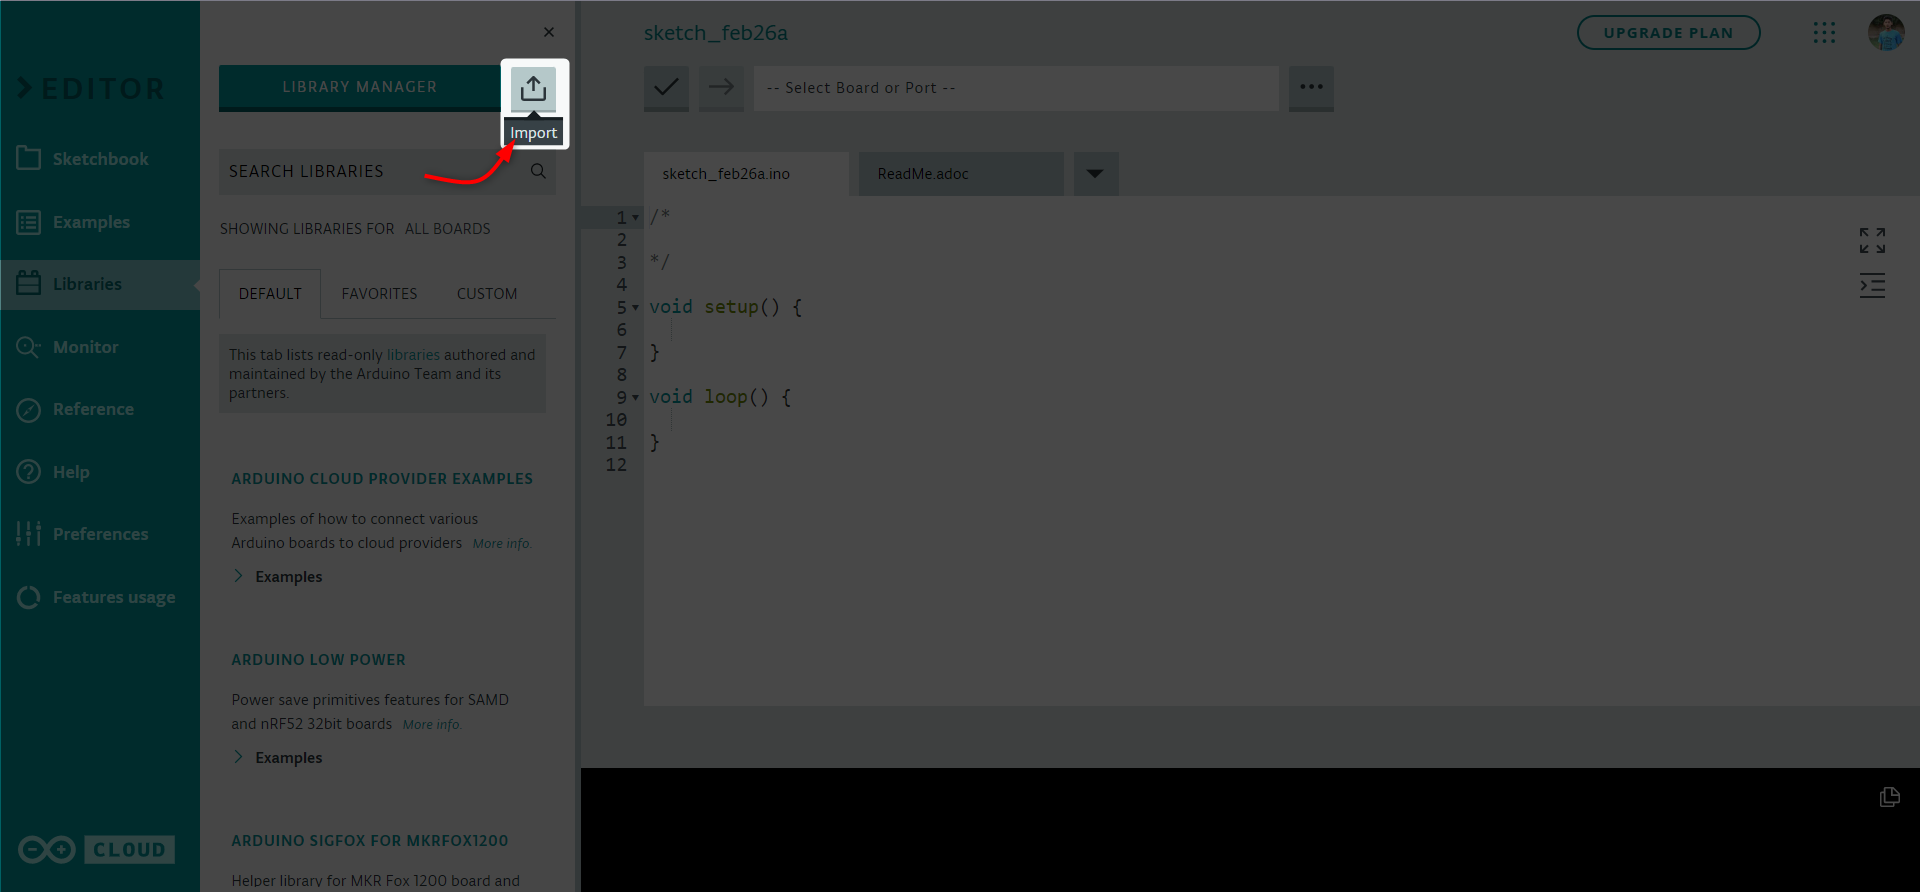
Step 3: Now open the Arduino Web Editor and select the “Import” option.
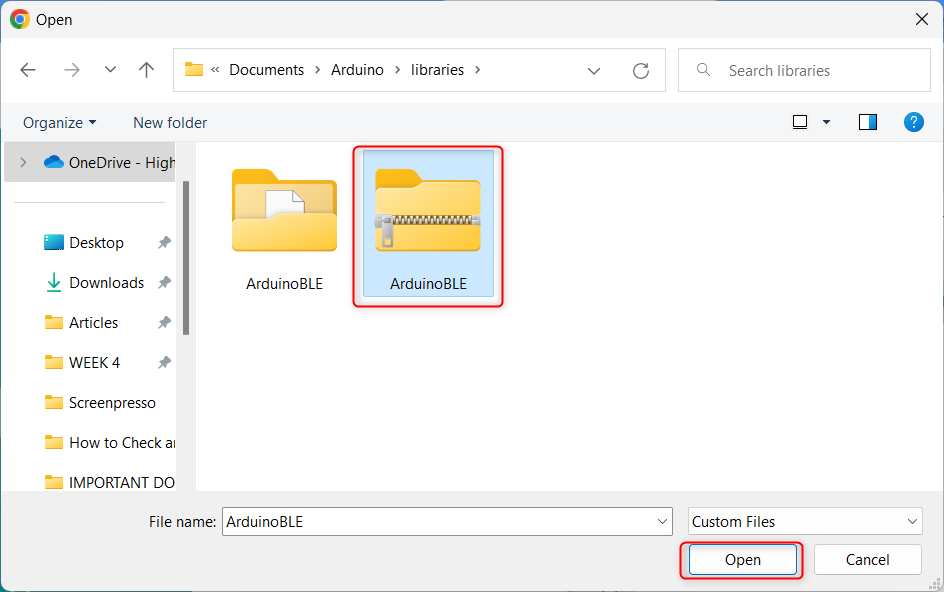
Step 4: Now select the zip file and click open.
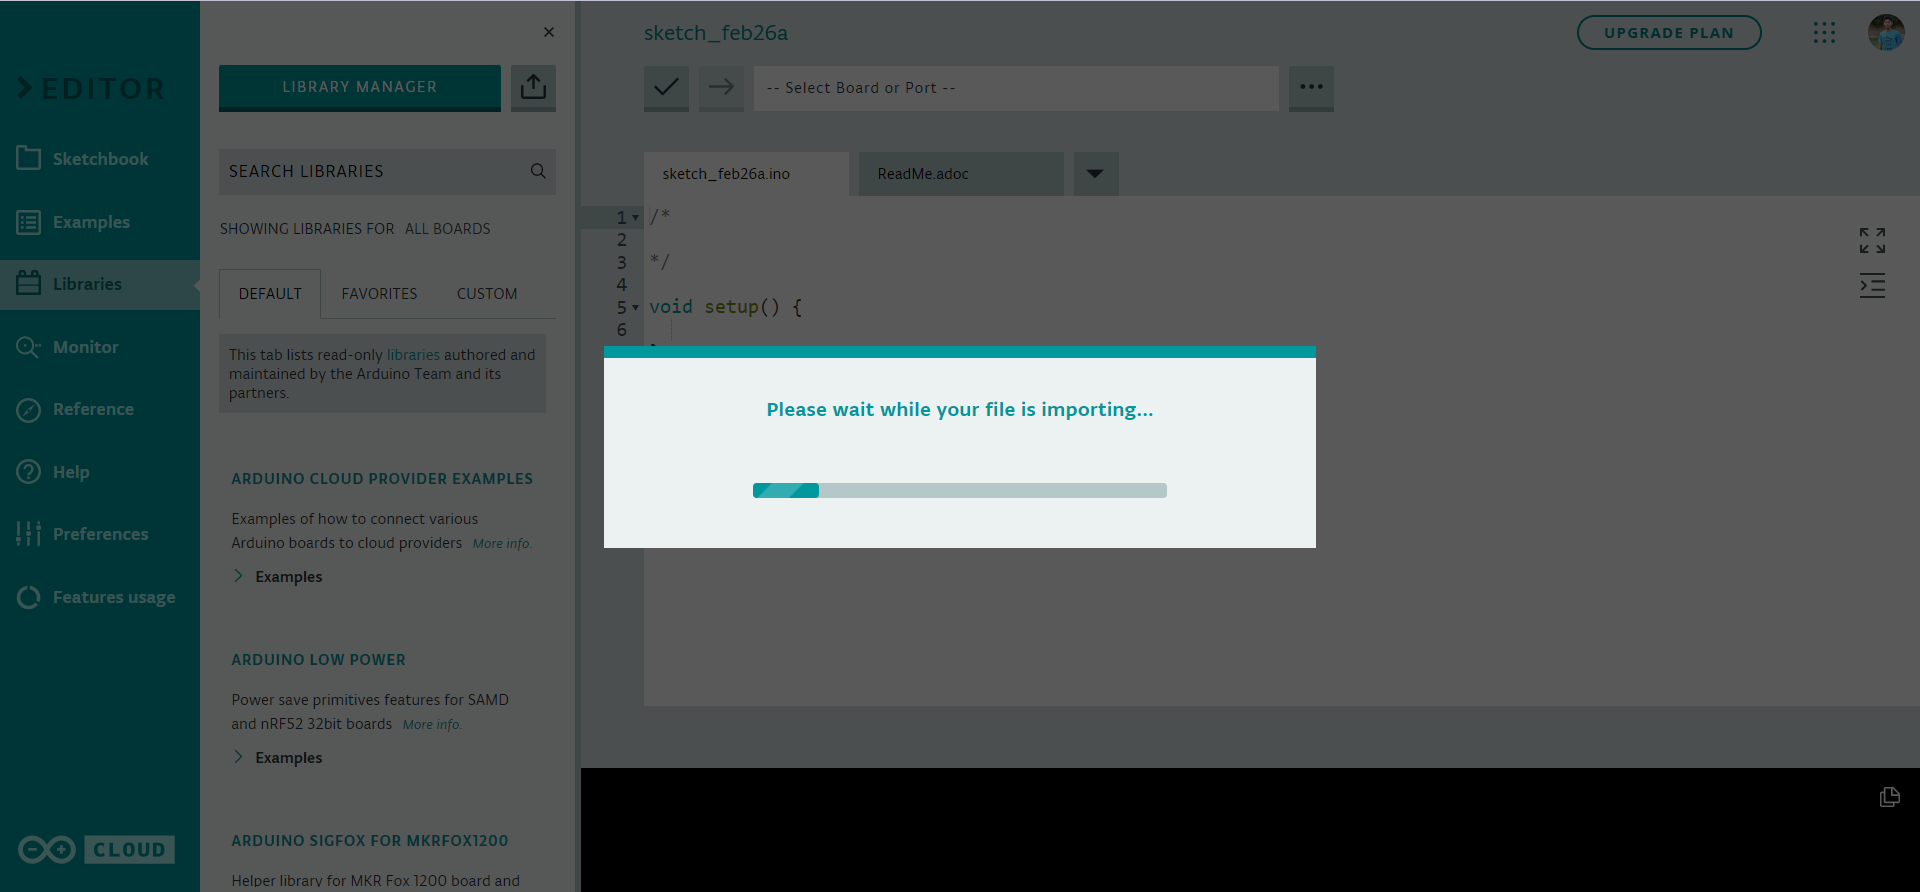
Step 5: After that the library will start uploading into the Arduino Web Editor.
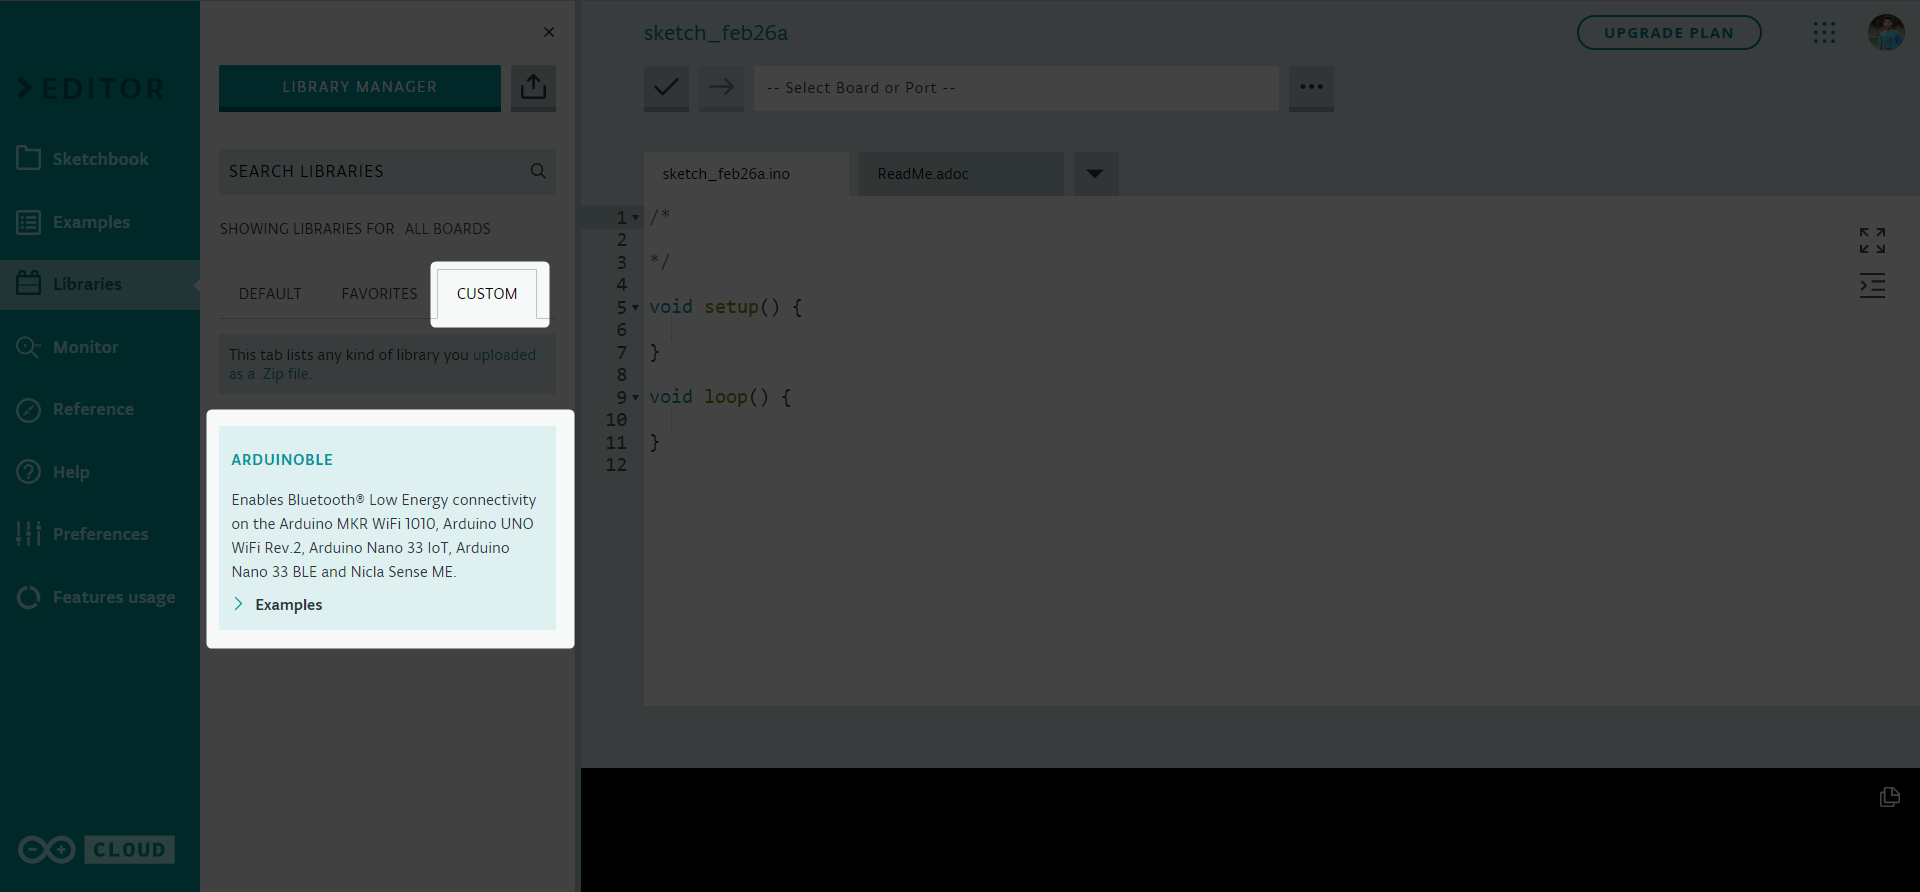
Step 6: After successful installation you can find all installed libraries under the “CUSTOM” menu.
After completing the import process a report will be generated for libraries.
If you have libraries in your sketchbook, a report will show which ones were successfully imported. If you have custom libraries with the same names, you will be prompted to overwrite them, so be careful when proceeding.
We have successfully added a zip library in the Arduino Web Editor. Now we will see how we can use the Arduino Library Manager to search and install libraries.
3: Install Arduino Libraries Using Library Manager Search Option
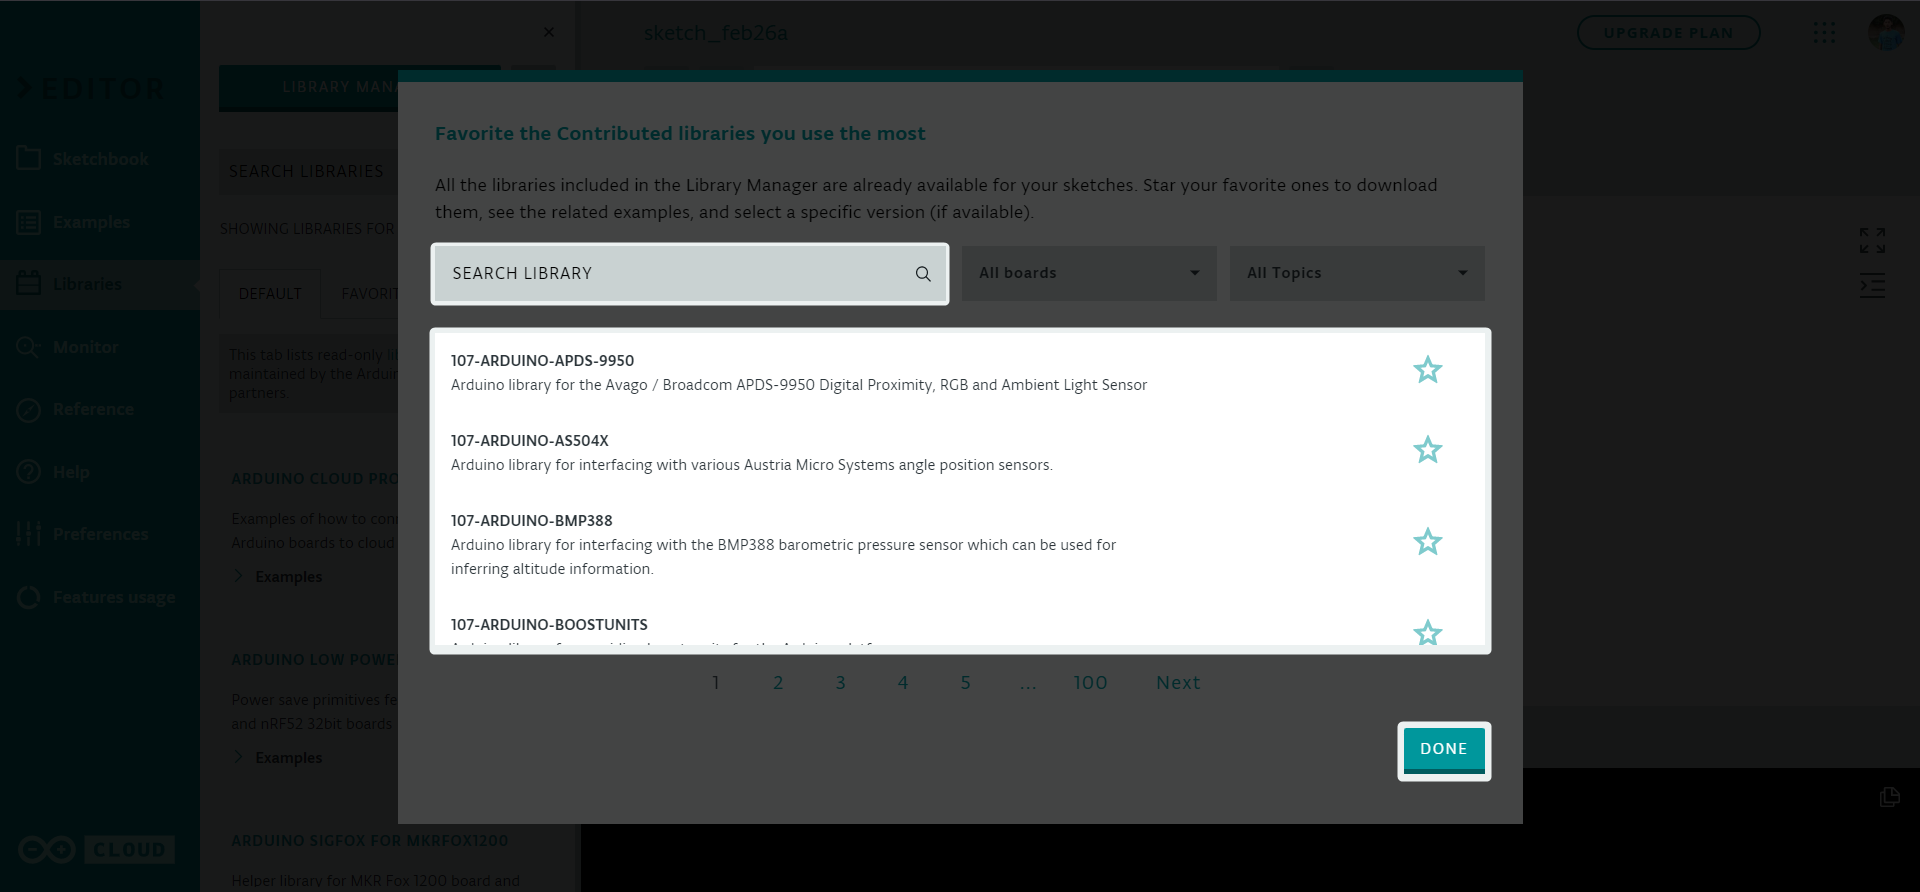
The Library Manager in the Arduino IDE makes it easy to search for and install libraries without having to manually download and install them. Follow steps to search and install hundreds of libraries in Arduino Web Editor:
Step 1: Select the Library Manager.
Step 2: Following window will open here you can search for hundreds of free and open-source libraries.
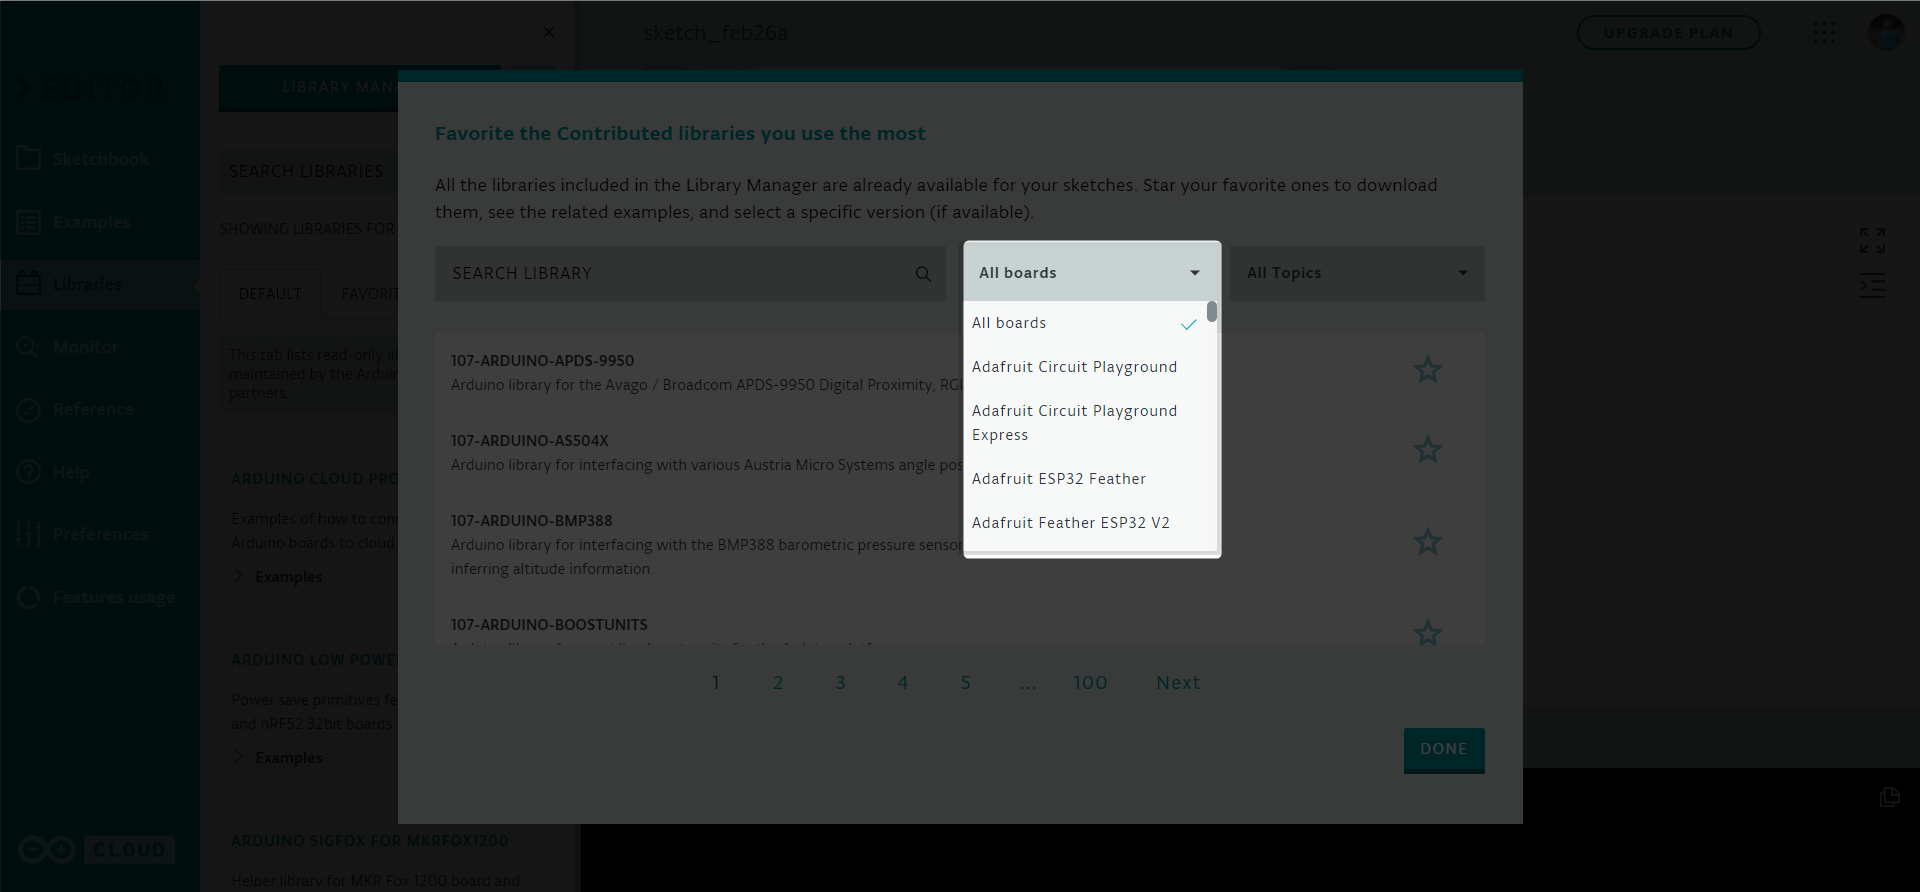
Step 3: Under the board menu you can filter the available libraries according to board type.
Step 4: There are different categories that can also allow us to filter the libraries according to the specific library topic.
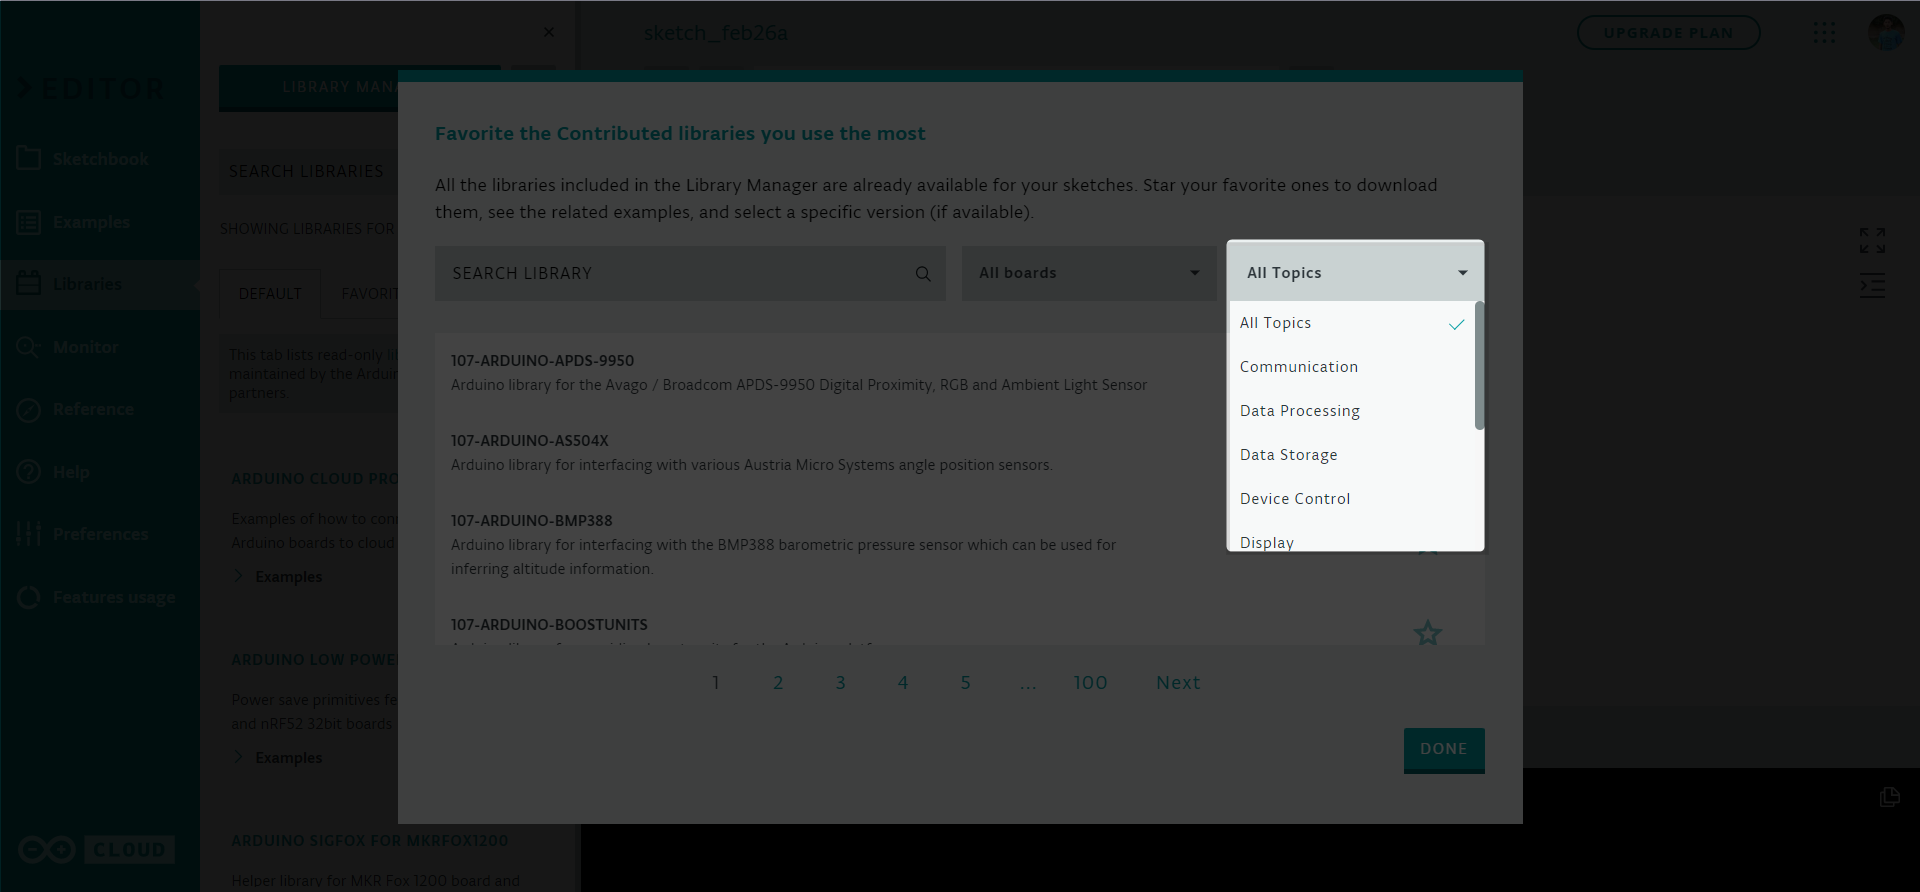
Using the above explained menu we can install libraries according to need.
Conclusion
Adding libraries to the Arduino Web Editor is a simple process that enhances the functionality of the platform by providing pre-written code for various sensors and modules. By following the steps outlined above, users can easily import libraries in the appropriate format and access them from any computer.
Source: linuxhint.com