For Auto in C++
Example 1:
The “iostream” is the first header file here where the functions of C++ are declared. Then, we add the “vector” header file which is included here so that we may work with the vector and function to operate on vectors. Then, “std” is the namespace that we insert here, so we don’t need to put this “std” with all functions individually in this code. Then, the “main()” is invoked here. Underneath this, we create a vector of “int” data type with the name “myNewData” and insert some integer values in it.
After this, we place the “for” loop and utilize this “auto” keyword inside it. Now, this iterator will detect the data type of the values here. We get the values of the “myNewData” vector and save them in the “data” variable and also display them here as we add this “data” in the “cout”.
Code 1:
#include <vector>
using namespace std;
int main() {
vector<int> myNewData {11, 22, 33, 44, 55, 66};
for (auto data: myNewData) {
cout << data << endl;
}
}
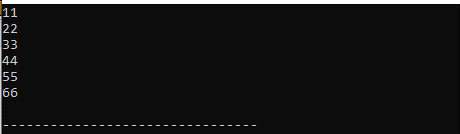
Output:
We have seen all the values of this vector which are printed here. We print these values by utilizing the “for” loop and placing the “auto” keyword inside it.
Example 2:
Here, we add the “bits/stdc++.h” as it contains all function declarations. Then, we put the “std” namespace here and then invoke the “main()”. Below this, we initialize a “set” of “string” and name it as “myString”. Then, in the next line, we insert the string data in it. We insert some fruit names in this set using the “insert()” method.
We use the “for” loop underneath this and place the “auto” keyword inside it. After this, we initialize an iterator with the name “my_it” with the “auto” keyword and assign “myString” to this along with the “begin()” function.
Then, we place a condition which is “my_it” not equal to “myString.end()” and increment the value of the iterator using “my_it++”. After this, we place the ”*my_it” into the “cout”. Now, it prints the fruit names according to the alphabetic sequence, and the data type is detected automatically as we placed the “auto” keyword here.
Code 2:
using namespace std;
int main()
{
set<string> myString;
myString.insert({ "Grapes", "Orange", "Banana", "Pear", "Apple" });
for (auto my_it = myString.begin(); my_it != myString.end(); my_it++)
cout << *my_it << " ";
return 0;
}
Output:
Here, we can notice that the fruit names are displayed in an alphabetic sequence. All data is rendered here which we inserted in the string set because we utilized “for” and “auto” in the previous code.
![]()
Example 3:
Since “bits/stdc++.h” already has all function declarations, we add it here. After adding the “std” namespace, we call “main()” from this location. The “set” of “int” that we established in the following is called “myIntegers”. Then, we add the integer data in the line that followed. We use the “insert()” method to add a few integers to this list. The “auto” keyword is now inserted into the “for” loop that is utilized underneath this.
Next, we use the “auto” keyword to initialize an iterator with the name “new_it”, assigning the “myIntegers” and the “begin()” functions to it. Next, we set up a condition that states that “my_it” must not be equal to “myIntegers.end()” and use “new_it++” to increase the iterator’s value. Next, we insert the “*new_it” into this “cout” section. It prints the integers ascendingly. As the “auto” keyword is inserted, it automatically detects the data type.
Code 3:
using namespace std;
int main()
{
set<int> myIntegers;
myIntegers.insert({ 45, 31, 87, 14, 97, 21, 55 });
for (auto new_it = myIntegers.begin(); new_it != myIntegers.end();new_it++)
cout << *new_it << " ";
return 0;
}
Output:
The integers are shown here in ascending order as seen in the following. Since we used the terms “for” and “auto” in the previous code, all the data that we placed into the integer set is rendered here.
![]()
Example 4:
The “iostream” and the “vector” header files are included as we work with the vectors here. The “std” namespace is then added and we then call the “main()”. Then, we initialize a vector of “int” data type with the name “myVectorV1” and add some values to this vector. Now, we place the “for” loop and utilize “auto” here to detect the data type. We access by values of the vector and then print them by placing “valueOfVector” in the “cout”.
After this, we place another “for” and the “auto” inside it and initialize it with “&& valueOfVector : myVectorV1”. Here, we access by the reference and then print all the values by putting “valueOfVector” in the “cout”. Now, we don’t need to insert the data type for both loops as we utilize the “auto” keyword inside the loop.
Code 4:
#include <vector>
using namespace std;
int main() {
vector<int> myVectorV1 = {0, 1, 2, 3, 4, 5, 6, 7, 8, 9, 10};
for (auto valueOfVector : myVectorV1)
cout << valueOfVector << ' ';
cout << endl;
for (auto&& valueOfVector : myVectorV1)
cout << valueOfVector << ' ';
cout << endl;
return 0;
}
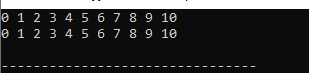
Output:
All the data of the vector is displayed. The numbers that are displayed in the first line are those that we accessed by values, and the numbers that are displayed in the second line are those that we accessed by reference in the code.
Example 5:
After calling the “main()” method in this code, we initialize two arrays which are “myFirstArray” of the size “7” with the “int” data type and “mySecondArray” with the size “7” of the “double” data type. We insert the values to both arrays. In the first array, we insert the “integer” values. In the second array, we add the “double” values. After this, we utilize the “for” and insert the “auto” in this loop.
Here, we use a “range base for” loop for the “myFirstArray”. Then, we place “myVar” in the “cout”. Below this, we place a loop again and utilize the “range base for” loop. This loop is for the “mySecondArray” and then we also print the values of that array.
Code 5:
using namespace std;
int main ()
{
int myFirstArray [7] = { 15, 25, 35, 45, 55, 65, 75};
double mySecondArray [7] = { 2.64, 6.45, 8.5, 2.5, 4.5, 6.7, 8.9 };
for ( const auto &myVar: myFirstArray )
{
cout << myVar << " " ;
}
cout << endl;
for ( const auto &myVar: mySecondArray )
{
cout << myVar << " " ;
}
return 0;
}
Output:
All the data of both vectors are displayed in this outcome here.

Conclusion
The “for auto” concept is studied thoroughly in this article. We explained that “auto” detects the data type without mentioning it. We explored multiple examples in this article and also provided the code explanation here. We deeply explained the working of this “for auto” concept in this article.
Source: linuxhint.com