Docker exec -it
Docker is a well-known containerization tool that packages and ships the applications and services inside the containers. The containers are the core part of Docker that encapsulates application configuration settings, source code, and required dependencies.
However, while executing the container, the user may need to make some changes in an application running in the container or to run an essential command inside the container. Thanks to the “docker exec -it” command that enables us to access the container shell and make changes.
This blog will demonstrate:
- What is “docker exec” Command?
- Prerequisite: Create and Start a Docker Container
- How to Use the “docker exec -it” Command to Open Container Shell?
- How to Create New File in a Docker Container Using the “docker exec -it” Command?
- How to Read File From Container Non-interactively Using “docker exec” Command?
- How to Run Command in Different Directory of Docker Container?
- How to Access the Container as a Different User?
- How to Set the Environment Variable Using the “docker exec” Command?
- Conclusion
What is “docker exec” Command?
The “docker exec” is a Docker command line utility that is used to access the container shell interactively and run the external commands inside the container. Users can use it to access the container components such as files, usernames, environment variables, networking information, and so on. It is also used for debugging purposes and making modifications.
Syntax
Options
Following are the options that are used to use the “docker exec” command differently:
| Options | Description |
| -d, –detach | Run the command in the detached mode (background). |
| -e, –env | It is utilized to set the container’s environment variables. |
| -i, –interactive | It keeps the container’s standard input open. |
| –privileged | Execute the container’s shell with root privileges. |
| -t, –tty | Allocate or launch the pseudo-TTY terminal
|
| -u, –user | Specify the user |
| -w, –workdir | Run the command in a working or specific directory |
Prerequisite: Create and Start the Docker Container
The container interactive shell is only accessible when the container is in an executing state. To create and start the container, go through the following instructions.
Step 1: Create Dockerfile
First, create a Dockerfile that will provide the build context to create the container template or image. For this purpose, paste the following code into the Dockerfile:
COPY index.html /usr/share/nginx/html/index.html
ENTRYPOINT ["nginx", "-g", "daemon off;"]
In the above snipped:
- “FROM” command is utilized to define the base image for the container.
- “COPY” command will copy the program file into the container.
- “ENTRYPOINT” command will set the container’s executables.
Step 2: Make Program File
Next, create a simple HTML web page in the “index.html” file. For this purpose, paste the following snippet into the file:
<head>
<style>
body{
background-color:rgb(9, 4, 4);
}
h1{
color:rgb(221, 219, 226);
font-style: italic;
}
</style>
</head>
<body>
<h1> This is First HTML page </h1>
</body>
</html>
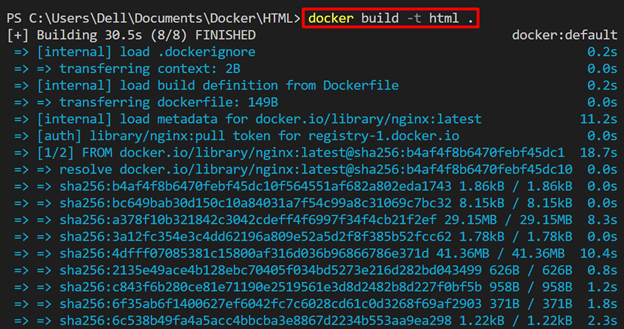
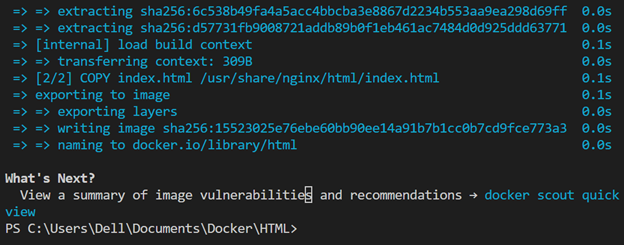
Step 3: Build Docker Image
Now, read the build context from the Docker file and create a new image (container template). To do so, execute the below command in the directory where the Dockerfile exists:
Step 4: Start Docker Container
Now, run the Docker container using a newly created image. Here, the “-p” option defines the container exposing port, “-d” runs the container in detached mode, and “–name” sets the name of the container:

For verification, list down the running containers using the “docker ps” command:

How to Use “docker exec -it” Command to Open Container Shell?
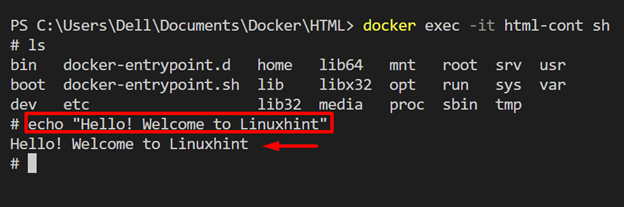
To open the container shell, first, start the container. After that, run the “docker exec -it <cont-id/cont-name> sh” command to run the container shell. Here “-it” option is utilized to launch the TTY terminal interactively:

In the container interactive shell, the user can run commands. In order to view the container folder structure, run the “ls” command:

Let’s take another example and print some string or sentence on the terminal console. For instance, we have used the “echo” command:
How to Create New File in Docker Container Using the “docker exec -it” Command?
Sometimes, after building the container, the user may be required to configure a new configuration or to create a new file inside the container. In such a scenario, they can create a new container and create a file or add other configurations using Dockerfile. Still, this approach is not very efficient as creating a new container from scratch is not a good idea.
To resolve this issue, the user can access the container shell to make modifications and create new files and folders inside the container with the help of the container interactive shell.
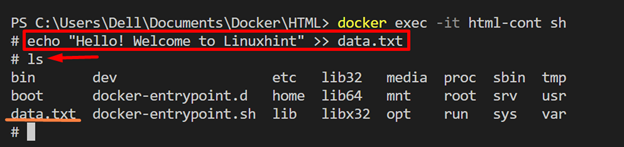
To open the container interactive shell, utilize the “docker exec -it” command as used in the above section. After that, run the “echo” command to create a new file and save the defined content into the file:
In the above command we have created the “data.txt” file and saved the dummy text into the file:
How to Read File From Container Non-interactively Using “docker exec” Command?
To read the file without opening the container shell, utilize the “docker exec <cont-name> cat <path to file>” command. For illustration, we have read the “data.txt” file that is created in the above section:

How to Run Command in Different Directory of Docker Container?
Users can access any container directory or run the command in the specific directory through the “docker exec –workdir <path to directory> <container-name> <arg/command>” command:

How to Access the Container as a Different User?
The “docker exec” command is also used to access the container as a different user with the help of the “–user” option. But that user must be present in a user group. To add the other user to the Docker container and to access the container as a different user, go through the following steps.
Step 1: Check Default or Current User of Container
First, check the current or default user of the Docker container. For this purpose, run the “docker exec <cont-name> whoami” command:
Here, you can see we are currently using a Docker container as the “root” user:

Step 2: Add New User in Usergroup of Container
Access the container interactive shell and add the new user in the container’s user group. To access the container shell run the below command:
Register the new user in the container’s user group with the help of the “useradd <username>” command:

Step 3: Access the Container as a Different User
Now, access the container as a different user using the “docker exec –user” command. Here “–user” option is utilized to specify the username:
The output indicates that we have successfully accessed the container as a different user:

How to Set the Environment Variable Using the “docker exec” Command?
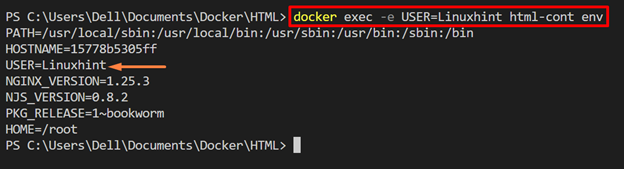
The “docker exec” command is also used to set the environment variable of the Docker container. To do so, use the “-e” option along with the “docker exec” command:
In the above command, we have set the “USER” environment variable for “html-cont” container:
That is all about the “docker exec” command in Docker.
Conclusion
The “docker exec” command is a Docker command line utility that is used to access the container and perform different actions inside the container. It supports different options to behave differently such as the “-it” option is used to access the container shell iteratively, the “-e” option sets the container’s environment variables, “–workdir” is used to access or run the command in a specific directory, “–user” option is used to access the container as a different user and so on. This write-up has demonstrated what the “docker exec -it” command is and how to use it.
Source: linuxhint.com