Conda Installation Process on Ubuntu
Prerequisites:
To install Anaconda on Ubuntu, you need the following:
- A superuser-privileged terminal window or CLI
- 3GB or more of available disk space
Why Use Conda?
Conda is a popular choice for managing the Python packages because it offers several benefits, including the following:
- Reproducibility: Conda environments can be easily reproduced which is essential for data science, AI, and machine learning projects.
- Isolation: Conda environments are separated from one another which helps to prevent the package conflicts.
- Dependency management: You don’t need to install the packages because Conda manually manages the package dependencies.
- Performance: Conda packages are pre-compiled which makes them faster to install and run.
Anaconda Installation on Ubuntu
Step 1: Get Anaconda
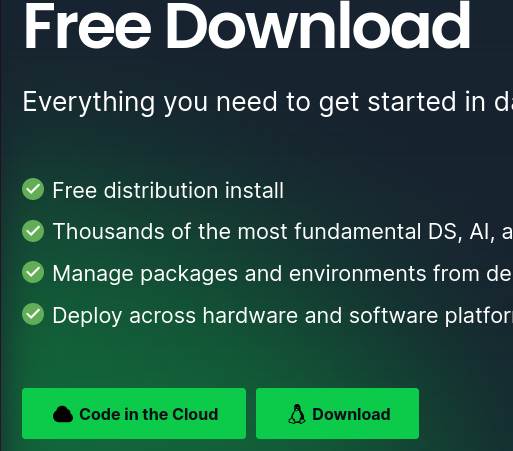
To get Anaconda, download the installer from the Anaconda website. Open your computer browser and go to “https://www.anaconda.com/products/individual” to download Anaconda.
Scroll down until you reach the Linux section on the Anaconda individual edition page. Then, click on the “Download” button after selecting the required version of Anaconda for your machine.
Step 2: Install Anaconda
After downloading, launch the Ubuntu terminal and go to the directory/folder that contains the Anaconda installation file.
Run the following command if the file is downloaded and stored in your system’s “Downloads” directory:
Then, use the following command to make the Anaconda installation file executable:
It should be noted that the version number may change based on the version that you downloaded. It might be beneficial if you change or use a different filename for the “Anaconda3-2023.09-0-Linux-x86_64.sh” installation file that you downloaded.
Now, execute the command to begin the Anaconda installation.
Replace the version number again with the exact filename of the installation file that you downloaded.
Step 3: Follow the Installation Wizard’s Instructions
After performing the previously mentioned command, you will be prompted to accept the Anaconda license agreement. To proceed, type “yes” and press “Enter”.

After that, you will be requested to pick a location for installation. Since the default location is the most suitable option, press “Enter” to move forward.
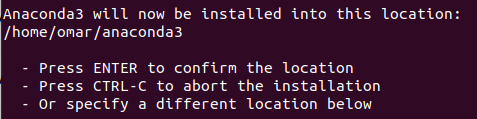
After following these steps, Anaconda will be installed on your system.
![]()
Step 4: Verify the Anaconda Installation
To check the installation, run the following command:
This shows a list of every package and the Anaconda library installs by default.
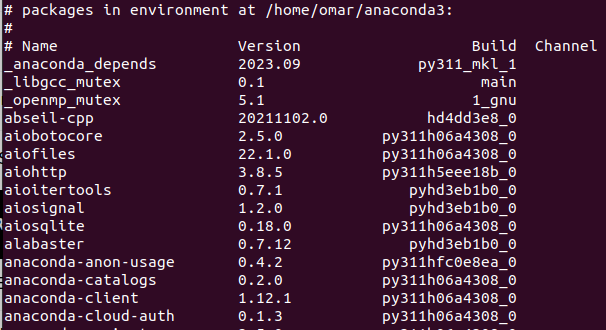
As seen in the output, Anaconda is installed successfully.
Step 5: Create and Activate an Isolated Environment
Anaconda allows you to build the isolated environments in which the specified versions of libraries and packages can be installed. This is useful when working on numerous projects with various requirements. This command can be used to create a new environment:
Output:

Substitute your preferred environment name in place of “myenv”. Additionally, you can select the release of Python or any other programs that you want to include in this environment.
To make the environment active, execute the following command:
Output:
![]()
Now, in this environment, you can include any package or module.
Step 6: Install the Libraries and Packages
Depending on the needs of your project, you might need to install the extra packages and libraries, even if Anaconda has many of them already included.
![]()
To install a specific package, replace <package_name> with the package name. The version number and any additional dependencies that you wish to install alongside the package can also be specified.
Example:
Output:
Step 7: Update Anaconda
Your Anaconda installation should always include the most recent packages and libraries. The command to update Anaconda is as follows:

All of the packages and libraries that come with Anaconda by default will be updated. Additionally, you can update specific packages by naming them.
Step 8: Use Pip to Install the Packages
Even though using Conda is an excellent way to manage the Python packages, pip, the built-in Python package manager, may occasionally be required for package installation. In the Anaconda environment, pip can also be used to install the packages:
![]()
Substitute “package_name” with the name of the package that you require. You can also specify the version number and any other dependencies that you intend to include with the package.
Example:

Step 9: Create an Environment File
If your Anaconda environment contains many installed packages and libraries, you may wish to make a file to keep track of all the dependencies. You can make an environment file using the following command:
Output:
Uninstall Anaconda
To permanently delete or uninstall Anaconda from the machine, run this command:
![]()
Your system will no longer have the Anaconda installation directory.
Difference Between Conda, Anaconda, and Miniconda
Conda, Anaconda, and Miniconda are all related to the Python package management.
- Conda is a package and environment manager for multiple programming languages, including Python and R. It allows you to manage, install, and update the packages and their dependencies in a reproducible and isolated environment.
- Anaconda is a software distribution that includes Conda and a large collection of pre-installed machine learning and data science packages.
- Miniconda is a minimal Anaconda distribution that includes Conda and a small set of essential packages.
Conclusion
In this post, we demonstrated how to install Conda on Ubuntu. Additionally, we discussed how to install the packages and libraries, configure the environments, update Anaconda, and remove Anaconda from your machine. You should be able to begin utilizing Anaconda for your data science, ML, and AI projects after reading this article.
Source: linuxhint.com