What is AWK NF?
The “AWK” function is a Linux utility that is used for text analysis that offers strong data control. To use the Linux computer program and “AWK” function, users can evaluate, modify, and generate the prepared results. The “AWK NF” variable is used to show how many files, elements, or other items are contained in a line of any file.
Working of AWK NF
The “AWK” program operates on programs that contain the rules which are made up of various patterns and actions that are carried out on text that matches the pattern. A pattern and action make up a rule together. The entire “AWK” program is then enclosed in a single quote.
Now, we just use a simple example to demonstrate what happens when we type “who” in the Ubuntu 20.04 terminal. This command displays an information about the user as well as the current time and date.
We run this command by clicking enter on the keyboard which prints the date and time as “2022-12-08” and “15:06”, respectively, before publishing some whitespace and the user’s name as “Linux”.
![]()
By default, “AWK” interprets a field as a string of characters that are enclosed in whitespace at the beginning and end of a line. Here, we demonstrate how to write a command using the “AWK” parameters and “who” to retrieve the first field using the dollar sign and the number 1 ($1). If we wish to retrieve the first field from a text file or other data, we utilize the “$1” dollar sign with one. For this, we use the command in which we first write “who”. Then, we use this “|” bar. Then, we put space by pressing the space bar on the keyboard. We then write “awk”. Then, we use an inverted comma, followed by curly brackets. Finally, we use the “print” word and the “$1” symbol inside of these brackets.
As you can see in the previous output image, when we only use “who” in the terminal and run this, it displays the user name along with the necessary information which includes the date and time. However, because we use the “print $1” with “AWK” in the previous command, it only prints the first field because the “$1” is used to print the first field of the file among other things.
![]()
Creating a Text File on the Desktop Using the Terminal and Printing All of Its Content with “AWK”
Since “AWK” is used to print the entire contents of a file on the terminal, we create a text file as the first step and print the information of the file on the terminal. Here, we create a text file on the desktop using the terminal. For this, we write the command in which we write “nano” as a text editor. Then, we use the symbol (~) followed by the slash “/”. Then, we write “Desktop” because we create a file on the desktop followed by the slash “/”. Again, we then write the name of the file which we want to create. Finally, we create a file named “textfile” with the “.txt” extension because it is a text file.
Therefore, a terminal displays a blank screen to us when we input this command, as demonstrated in the following image:

We input the data by typing it into the terminal that we want to store in the text file. To do this, we create five lines. The first of which contains the word “Hello”. The second contains “hey”. The third contains “hi”. The fourth contains two elements, “goodbye” and “123”. And the fifth line is empty, as shown in the following image:

When we press “Ctrl-x” after entering the data in the “textfile.txt” file, the “yes” or “No” choice appears on the screen. We know that we want to save the file. So, we press “Ctrl-y” to save the file, and the file is successfully created.

The following image shows the file shown:

As we know, the file is saved on the desktop. We must first add a directory to the desktop using the “cd Desktop/” command and then press the enter key.
Now, we use the “AWK” function to retrieve the contents of the newly created file, “textfile.txt”, and display them on the screen. To do this, we use the command in which first we write “awk”. Then, we use the inverted commas inside of this. We put the curly brackets and write “print $0”. After which, we use a space. Finally, we write the file name, “textfile.txt”.
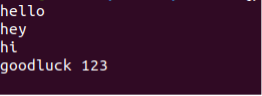
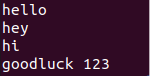
Now, when we execute this command, the contents of the text file is shown as you can see in the following image. The first line of this file has the word “hello” followed by “hey”. The word “hi” appears on the third line. Two items are listed on the fourth line. And the fifth line is blank.
Displaying the File’s Content with Line Numbers
Using the “NR” variable in the command, we print the contents of the file together with the line number in the next part. To do this, we use the command in which we first write “awk”. Then, after a space, we use an inverted comma. Inside of which, we place the curly brackets. Then, we write print. Finally, we write “NR”. After which, we put a comma and write “$0”. Then, we exit from the bracket and inverted comma. Lastly, we write the file name, “textfile.txt”.
As you can see in the result, the file’s content is displayed with line numbers which show that it contains “5” lines.

Displaying the Overall Amount of Data Per Line Using NF
In this section, we’ll show the total number of elements in each line. To do this, we use the command in which we first write “awk” and then follow the same steps as in the previous command, but we use the “NF” variable after writing the “print” parameter. Next, we close the curly brackets and inverted commas. Then, we write the file name, “textfile.txt”.
The number of items that are present in the file is now shown in the output. The first three lines include “1” elements. The fourth line contains “2” elements. And the last line is empty in the file. Therefore, it displays “0”.

Eliminating the Blank Lines
In this section, we delete the empty line from the file. To do this, we use the command in which we first use “awk”. Then, we use “NF>0” which is the condition that says to print the line if the number of elements is greater than “0”. Otherwise, the line won’t show it. Then, we use the same procedure as we did in the previous section.
Since line five of the file is empty, it is not displayed on the screen. Instead, only the lines that contain the items or elements are shown. Therefore, the first four lines of the file are displayed because they contain the data, while the last line is deleted because it has no data.
Conclusion
In this article, we talked about how to utilize the “AWK NF” function in Ubuntu 20.04 to print the data or information of the text files. In the first step, we demonstrated how the “AWK” function operates. In the second step, we created a text file on the desktop and used the “AWK” function’s various parameters such as “NR” to print the lines of the file with numbers. Next, we used “NF” to count the number of elements that are present in each line of the file. In the final step, we deleted the empty line from the file by applying a condition using “NF”.
Source: linuxhint.com