Validation of File Size While Uploading Using JavaScript / jQuery
Data validation is an essential part of any web application as it helps ensure that the data being uploaded fits certain requirements imposed by the developers. Data can be validated on both server and client side but client-side validation often saves users’ time and proves nicer, smoother user experience. Client-side data validation can be done easily and consumes much less time.
In this how-to-do guide we will go through the process of creating a form using HTML, JavaScript/jQuery which validates the file of the size as it is being uploaded. The benefit of this validation is that we can restrict users to upload only a certain size of files and make sure that they strictly follow our requirements. If the file is of the wrong size, we can prompt a message to the user without uploading the file to the server which saves precious time.
Create Webpage
First, we’ll create a simple HTML webpage:
<html>
<head>
<title>
Validation of file size while uploading using JavaScript / jQuery
</title>
</head>
<body style="padding-top: 10px; text-align:center;">
<p>Upload a file</p>
<input id="file" type="file" style="padding-left: 95px;"/>
<br><br>
<button onclick="sizeValidation()">Upload</button>
</body>
</html>

Understanding the Code:
In the body of the webpage, we have simply used a <p>, <input>, <br> and a <button> tag. The <input> tag is used so the user can choose a file and then upload it using the button displayed by using the <button> tag.
The <button> tag calls the sizeValidation() function on click event which then determines the size of the file and prints an appropriate alert depending on the size of the file.
Define JavaScript sizeValidation() Function
Now let’s write the JavaScript code which defines the sizeValidation() function.
function sizeValidation() {
var input = document.getElementById(‘file’);
var file = input.files;
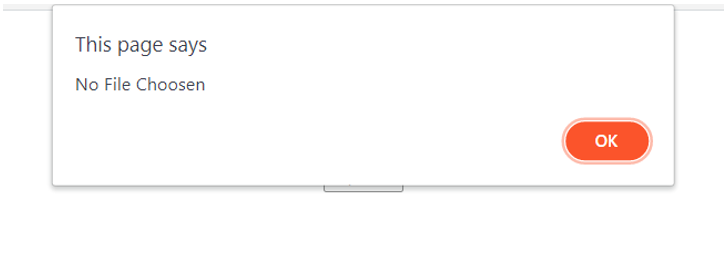
if(file.length==0){
alert("No File Chosen");
return false;
}
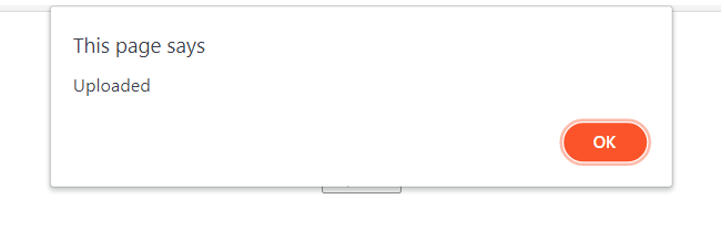
var fileSize = Math.round((file[0].size / 1024));
if (fileSize <= 5*1024) {
alert("Uploaded");
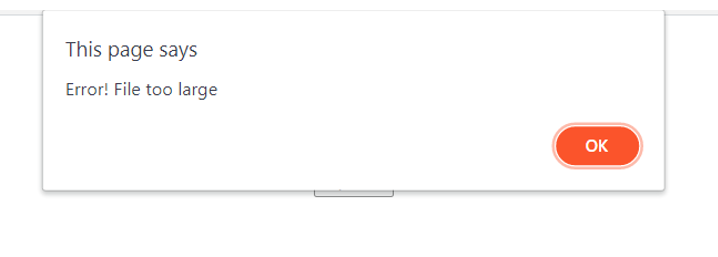
} else {
alert(
"Error! File too large");
}
}
</script>
Understanding the Code:
Inside the body of the sizeValidation() function we first get the <input id=”file” /> tag and then use the var file = inputElement.files; line so we can get access to the file being uploaded. Then we check if a file has been uploaded, if not, we will prompt an error message and get out of the function by returning false.
We then use some mathematics to determine the size of the file. If the file is of appropriate size i.e., 5MB (in this case), it is uploaded.
Otherwise, a pop-up containing an error message is displayed.
Conclusion
Even though client-side validation is a lot more efficient, it is still not a substitute for server-side validation and can be circumvented in most cases. It is always a best practice to implement both server and client-side validation so that you can ensure both efficiency and accuracy of your application.
Source: linuxhint.com