Upgrade Kernel on Linux Mint
Upgrading the kernel on Linux Mint is a comparatively straightforward process that can be completed through the terminal and Update Manager. Upgrading the kernel can bring new features and bug fixes, but it can also cause compatibility issues with certain software and hardware. Therefore, before starting the upgrade, it is essential to back up the key data. This guide covers two methods to upgrade the Linux Mint kernel.
Check the Current Kernel Version
Before upgrading the kernel, it is a good idea to check the current version of the kernel that runs on the system. The “uname -r” command can be employed to achieve this. The “uname -r” is a command that displays the current version of the kernel (the core part of the operating system) that the system is running on. The “-r” option specifically tells the uname command to display only the release version of the kernel.
This command outputs the current kernel version – “5.15.0.56-generic”. This tells us that the current version of the kernel is 5.15.0 and the specific build is 56. The “generic” at the end indicates that this is a standard version of the kernel, as opposed to a specific version which is tailored for a particular hardware architecture.
Upgrade Using the Update Manager
Upgrading the Linux Mint kernel using the Update Manager is a straightforward process. First, open the Update Manager by searching for it in the Mint menu or by running the “mintupdate” command in the terminal.
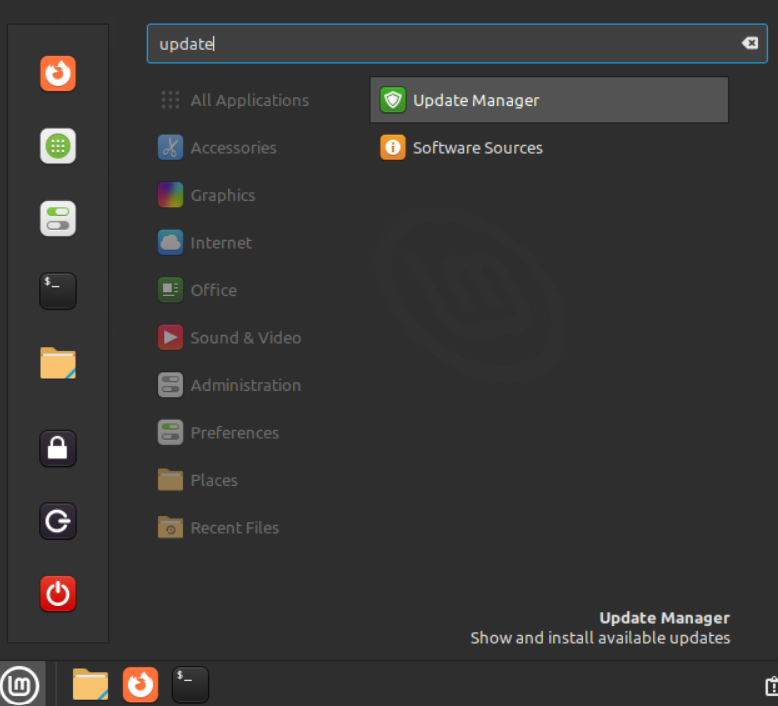
The Update Manager is launched within seconds on your Linux Mint screen. In the Update Manager, click on the “View” button in the top right corner as displayed from the attached image and select the 4th option which is “Linux kernels”.

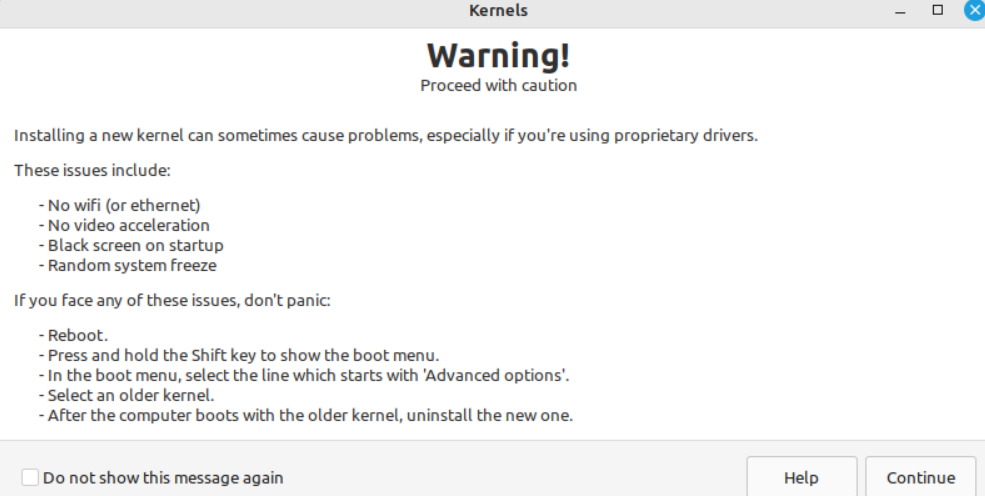
The very next screen displays a warning to proceed with the kernel update. It explains the issues that you can encounter after upgrading a kernel and the instructions to perform if you face any of the listed ones. You need to proceed with this step by utilizing the “Continue” button at the bottom.
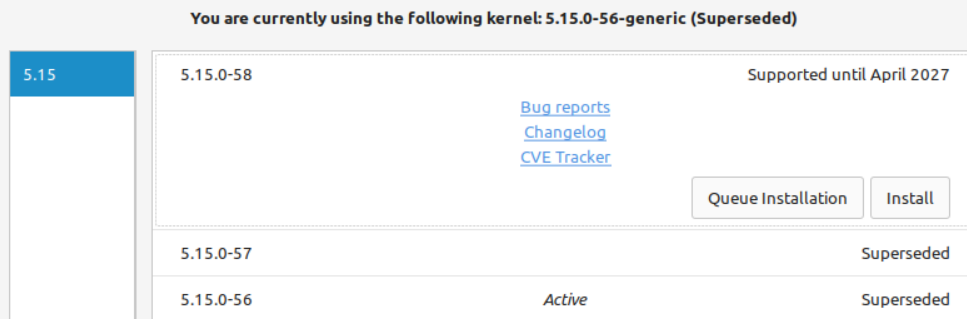
After continuing, the very next “Kernels” screen shows you a list of available kernel updates. The kernel version with its “Active” status is your currently in-use kernel. Tap on the kernel version that you would like to upgrade to and hit the “Install” button to begin the installation process.
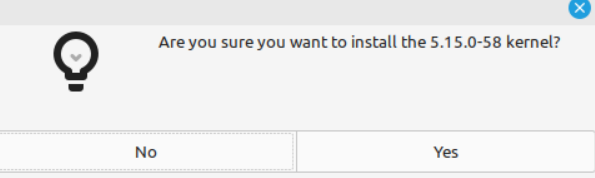
Before the initialization of a kernel upgrade process, the pop-up dialog appears to reassure you that you’re going to upgrade to the newest kernel version. Tap “Yes” to proceed. The process of upgrading might take more than 5 minutes. Wait and relax until then. Once the installation is completed, reboot your system and your new kernel will be in use.
Upgrade Using the Wget Utility
The “wget” command is used to download the latest kernel file for the Linux Mint system from a GitHub repository. The file that is being downloaded is called “ubuntu-mainline-kernel.sh” and is located in the “master” branch of the “pimlie/ubuntu-mainline-kernel.sh” repository on GitHub. When the command is executed, the computer first attempts to resolve the “raw.githubusercontent.com” URL to an IP address.
The server responds with a status code of 200, indicating that the file is found and is being sent back to the computer. The computer receives the file and saves it under the same name as the server-side file in a local directory. In this case, the file is saved as “ubuntu-mainline-kernel.sh” in the current working directory. The file size is 26474 bytes, and the download speed is 1.90 MB/s.
–2023-01-16 13:51:48— https://raw.githubusercontent.com/pimlie/ubuntu-mainline-kernel.sh/master/ubuntu-mainline-kernel.sh
Resolving raw.githubusercontent.com (raw.githubusercontent.com)… 185.199.111.133, 185.199.110.133, 185.199.108.133, …
Connecting to raw.githubusercontent.com (raw.githubusercontent.com)|185.199.111.133|:443… connected.
HTTP request sent, awaiting response… 200 OK
Length: 26474 (26K) [text/plain]
Saving to: ‘ubuntu-mainline-kernel.sh’
ubuntu-mainline-kernel.s 100%[================================>] 25.85K –.-KB/s in 0.01s
2023-01-16 13:51:48 (1.90 MB/s) – ‘ubuntu-mainline-kernel.sh’ saved [26474/26474]
To display the directories and files in the current working directory, the “ls” command is used. In this case, the “omar” user is in their home directory, represented by the “~” symbol. The output of the command shows a list of the items in the directory including “ubuntu-mainline-kernel.sh” which is likely a shell script file with the “ubuntu-mainline-kernel” name.
Desktop Downloads new.txt Public ubuntu-mainline-kernel.sh Warpinator
Documents Music Pictures Templates Videos
The downloaded latest kernel file from a GitHub repository using the wget command contains the shell script to install the newest kernel version. You can open this file in the VIM editor and have a look at the script as shown in the following image:

The “/usr/local/bin/” directory is used to store the locally installed executable files. It is a good practice to install the locally created scripts in this directory so that they can be easily accessed by all users on the system. The following command is used to install a file called “ubuntu-mainline-kernel.sh” in the “/usr/local/bin/” directory. The “sudo” keyword is used to run the subsequent di with superuser privileges. This is necessary because the “/usr/local/bin/” directory is a system directory and the regular users do not have permission to write to it.
When the command is executed, it copies the “ubuntu-mainline-kernel.sh” file from its current location to the “/usr/local/bin/” directory and set the appropriate permissions for that file so that it can be executed by any user on the system.
[sudo] password for omar:
The following command uses the “ubuntu-mainline-kernel.sh” script to install a new version of the Linux kernel on an Ubuntu system. The installation process begins with the “-i” flag. When the command is executed, the system prompts for the user’s password and confirmation of the process proceeding (by typing “y” and pressing Enter). The new kernel version is installed and is accessible on the system after this is accomplished. The updated kernel won’t take effect until the user reboots the computer.
[sudo] password for omar:
Finding latest version available on kernel.ubuntu.com
Latest version is: v6.1.6, continue? (y/N)
Will download 6 files from kernel.ubuntu.com:
Downloading amd64/linux-headers-6.1.6-060106-generic_6.1.6-060106.202301141035_amd64.deb: 100%
Downloading amd64/linux-headers-6.1.6-060106_6.1.6-060106.202301141035_all.deb: 100%
Downloading amd64/linux-image-unsigned-6.1.6-060106-generic_6.1.6-060106.202301141035_amd64.deb: 100%
Downloading amd64/linux-modules-6.1.6-060106-generic_6.1.6-060106.202301141035_amd64.deb: 100%
Downloading amd64/CHECKSUMS: 100%
Downloading amd64/CHECKSUMS.gpg: 100%
Importing kernel-ppa gpg key ok
Signature of checksum file has been successfully verified
Checksums of deb files have been successfully verified with sha256sum
Installing 4 packages
Cleaning up the work folder
Now, run the uname-r command again on the Linux Mint terminal to see the kernel version. You will see that the Linux Mint kernel is upgraded to 6.1.6-060106-generic without causing any issues during the upgrade process.
6.1.6-060106-generic
Conclusion
Upgrading the kernel on Linux Mint is a simple process that can be done through the terminal via the wget instruction and using the Update Manager of your Linux Mint system. Please note that before upgrading, you should make sure that all your software is compatible with the new kernel and also make a backup of your important data.
Source: linuxhint.com