Touch Command in Ubuntu 22.04
Every Linux distro has numerous commands, and many of them are astonishingly helpful. One is the “touch” command which has many uses but mainly alters the timestamp on any file, including access and modification time.
This article will go through all the basic and advanced touch commands to help you change your file’s timestamp in Ubuntu 22.04.
Prerequisites
To use the touch command, you will have to make sure that you have the following:
- A Linux distro (Ubuntu 22.04 preferred)
- A little bit knowledge about the terminal
How to Use Touch Command in Ubuntu 22.04
Before moving forward, you should know the syntax of the touch command.
touch <options> <file or directory name>
Touch is also called a utility with different command formats, which we will discuss in the following:
Touch Command Options
Let’s explore the functionalities that the touch command provides you with, as in the following table:
| Options | Functionality |
|---|---|
| touch <filename> | Creates a new file. |
| -a | Let’s you change the access time. |
| -d=<string> | Changes the timestamp using the specified date. |
| -m | To change the modification time of the file. |
| -r=<file> | Alters the timestamp according to the reference file’s timestamp. |
| -t | To alter the date/time stamp. |
| –help | Used to open the help menu. |
| -v | Shows you the version of your program. |
The practical examples of the touch command are as follows:
Create File(s) Using Touch Command in Ubuntu 22.04
You can either create a single file or multiple files using the touch command like:
Create a Single File:
*fileTest is my file name*
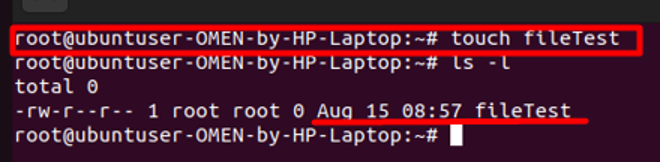
You can use the following command to see a list of files:
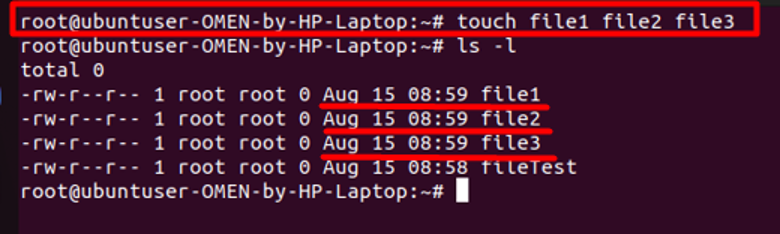
You can create multiple files using the following commands:
*You can change the names of your files accordingly*
You can also create the files in a sequence of names like testFile1 to testFile20:
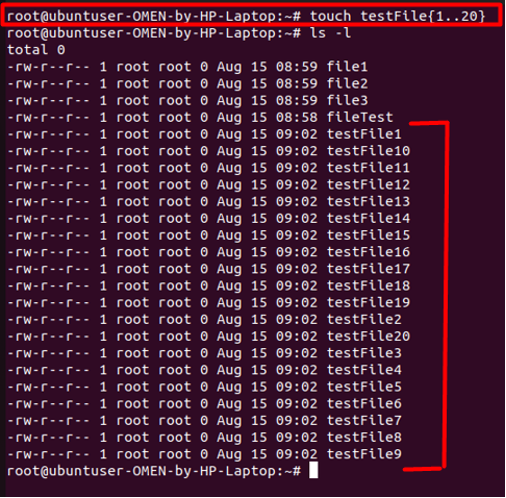
You can also use alphabets in the same format.
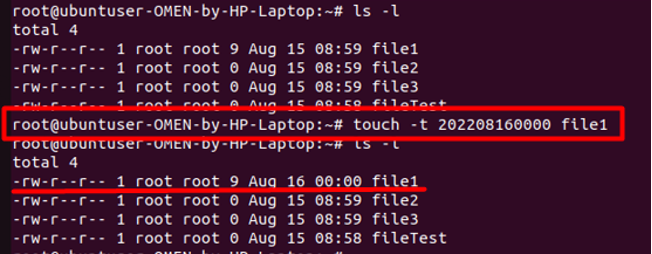
Setting a Specific Timestamp
You can set a specific timestamp for a file using the following command:
You can also use the format “[[CC]YY]MMDDhhmm[.ss]” where:
- CC stands for the first two digits of a year
- YY is the last two digits of a year
- MM is a month
- DD is called the day
- hh is hours
- mm is minutes
- ss is seconds
Setting a Timestamp Using a Date String
Using the following command, you can set the timestamp of a file using a date string:
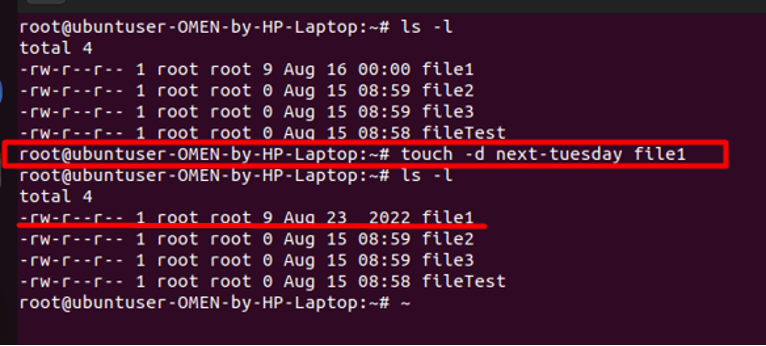
You can use also use any of the following:
- Date in the calendar like 14 August 2021
- Time of the day, like 9:10 am
- Day of the week like Tuesday, Friday, etc.
- Relative time like 10 years ago, next Friday, etc.
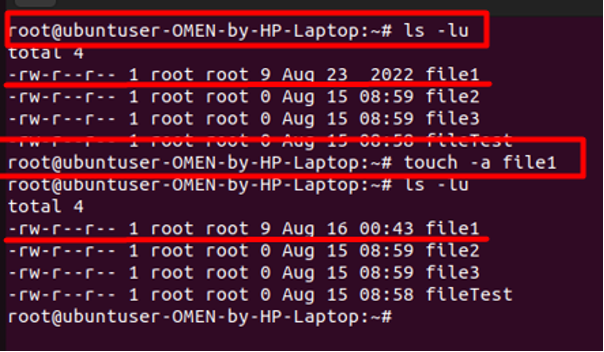
Changing Access Time to Current Time
You can change the access time to the current time using the following commands:
*Shows you the access time of the file*
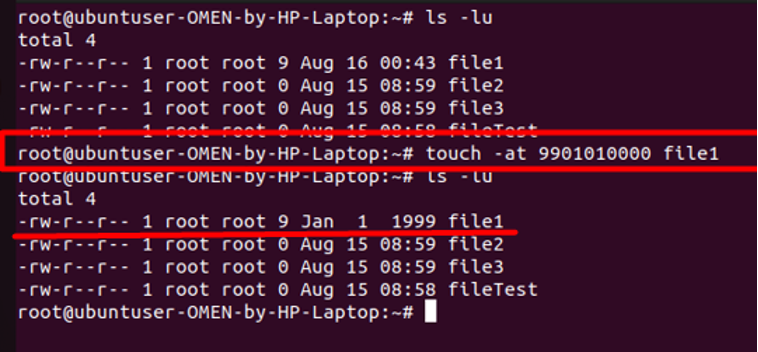
Change Access Time to Specific Time
You can set the access timestamp using the following command to a specific time:
*Same time format as shown before*
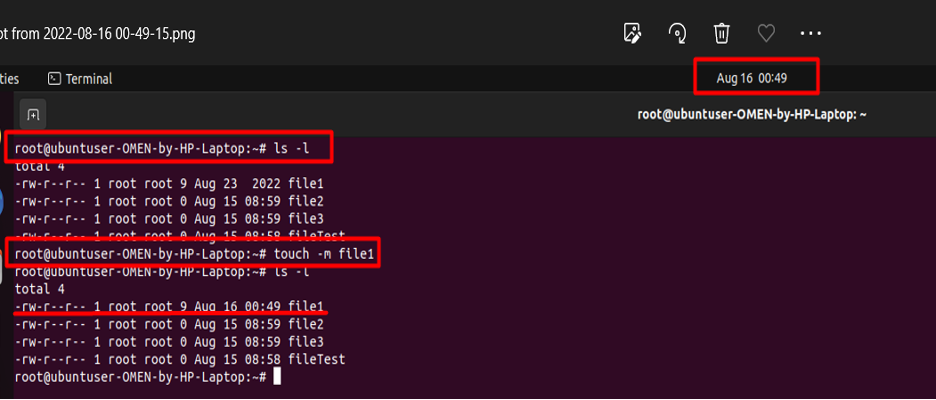
Alter Modification Time to Current Time
You can use the following command to set the modification time to the current timestamp:
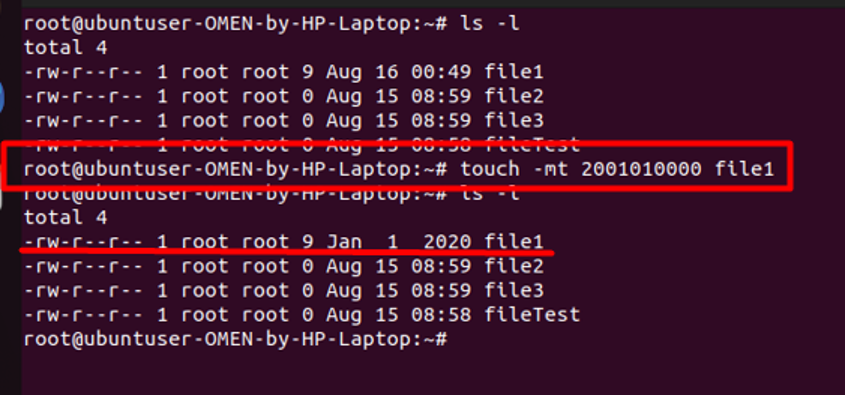
Changing Modification Time According to Your Choice
By combining “-m” and “-t” tags, you can change the modification time to the timestamp of your choice by using them in the command like this:
*We set the modification time to Jan 1, 2020. *
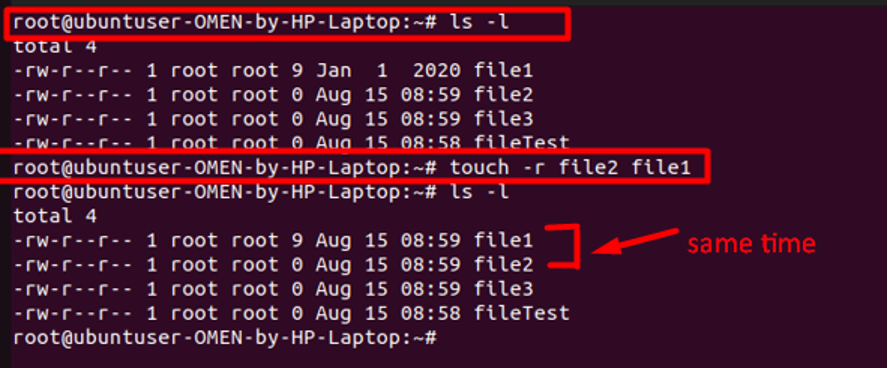
Change Timestamp Using a Reference File
You can use a reference file to set the time of any file according to the other file.
Conclusion
The “touch” command lets you do wonders as it is one of the vital terminal programs that can be helpful while working with files in the Linux bases systems. This article sheds light on using the touch command and its correct syntax to your advantage.
Source: linuxhint.com