Those Blinking LEDs on Your Raspberry Pi Have Special Meanings
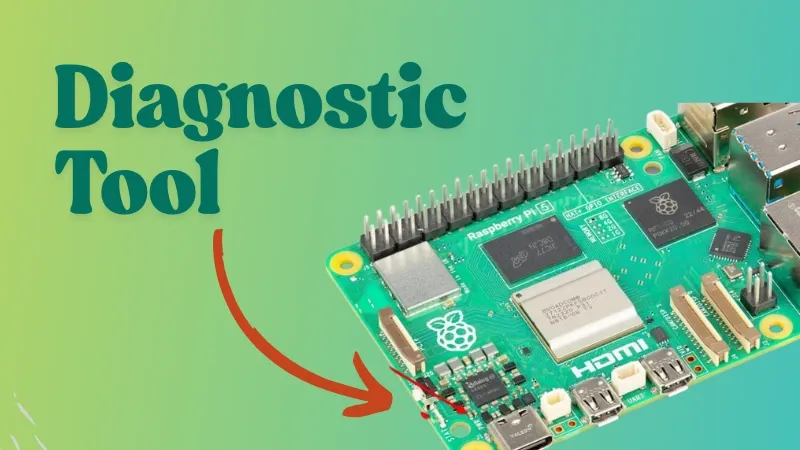
While setting up a Raspberry Pi 5 for a new project, I decided to go with a headless setup - no display, keyboard, or mouse. I flashed the SD card, connected power, and waited for the Pi to appear on my network.
But nothing showed up. I scanned my network, double-checked the router’s client list, still no sign of the Pi. Without access to a display, I had no immediate way to see what was happening under the hood.
Then I noticed something: the green status LED was blinking in a repeating pattern. It wasn’t random, it looked deliberate. That small detail led me down a rabbit hole, and what I found was surprisingly useful.
The Raspberry Pi’s onboard LEDs aren’t just indicators, they’re diagnostic tools. When the Pi fails to boot, it can signal the cause through specific blink patterns.
If you know how to read them, you can identify problems like missing boot files, SD card issues, or hardware faults without plugging in a monitor.
In this guide, we’ll decode what those LED signals mean and how to use them effectively in your troubleshooting process.
Raspberry Pi 5
The Raspberry Pi 5 is a major step up in terms of power and architecture. It packs a 2.4GHz quad-core ARM Cortex-A76 CPU, supports up to 16GB of LPDDR4X RAM, and includes PCIe, RTC, and power button support.
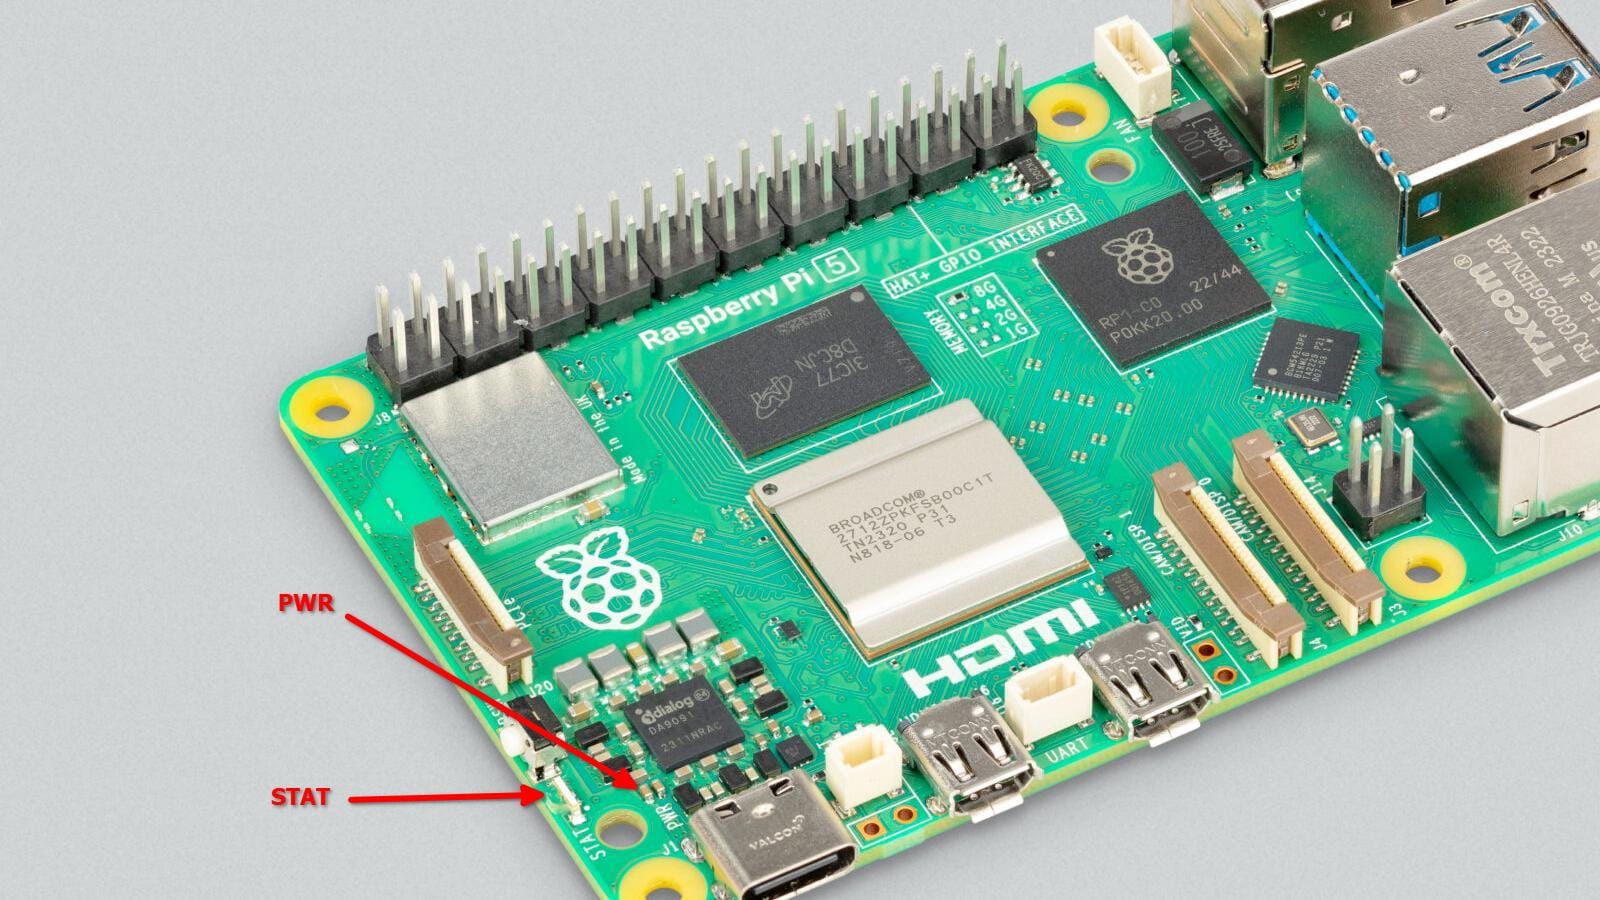
But when it comes to diagnostics, the big upgrade is in the STAT LED.
On the Pi 5:
- Red LED (PWR): Shows power issues (not always ON by default!)
- Green LED (STAT): Shows SD card activity and blink codes
- Ethernet LEDs: Show network status
Here’s what the green LED blink codes mean:
| Long Flash | Short Flash | Meaning |
|---|---|---|
| 0 | 3 | Generic failure to boot |
| 0 | 4 | start.elf not found |
| 0 | 7 | kernel.img not found |
| 0 | 8 | SDRAM failure |
| 0 | 9 | Insufficient SDRAM |
| 0 | 10 | In HALT state |
| 2 | 1 | Boot device not FAT formatted |
| 2 | 2 | Failed to read boot partition |
| 2 | 3 | Extended partition not FAT |
| 2 | 4 | File signature/hash mismatch |
| 3 | 1 | SPI EEPROM error |
| 3 | 2 | SPI EEPROM write protected |
| 3 | 3 | I2C error |
| 3 | 4 | Invalid secure boot configuration |
| 4 | 3 | RP1 not found |
| 4 | 4 | Unsupported board type |
| 4 | 5 | Fatal firmware error |
| 4 | 6 | Power failure Type A |
| 4 | 7 | Power failure Type B |
Thanks to the bootloader residing on the onboard EEPROM (Electrically Erasable Programmable Read-Only Memory), the Raspberry Pi 5 can perform much more detailed self-checks right from the start.
Raspberry Pi 4 & 400
The Raspberry Pi 4 and the keyboard-integrated Raspberry Pi 400 also feature sophisticated LED diagnostics, similar in many ways to the Pi 5.
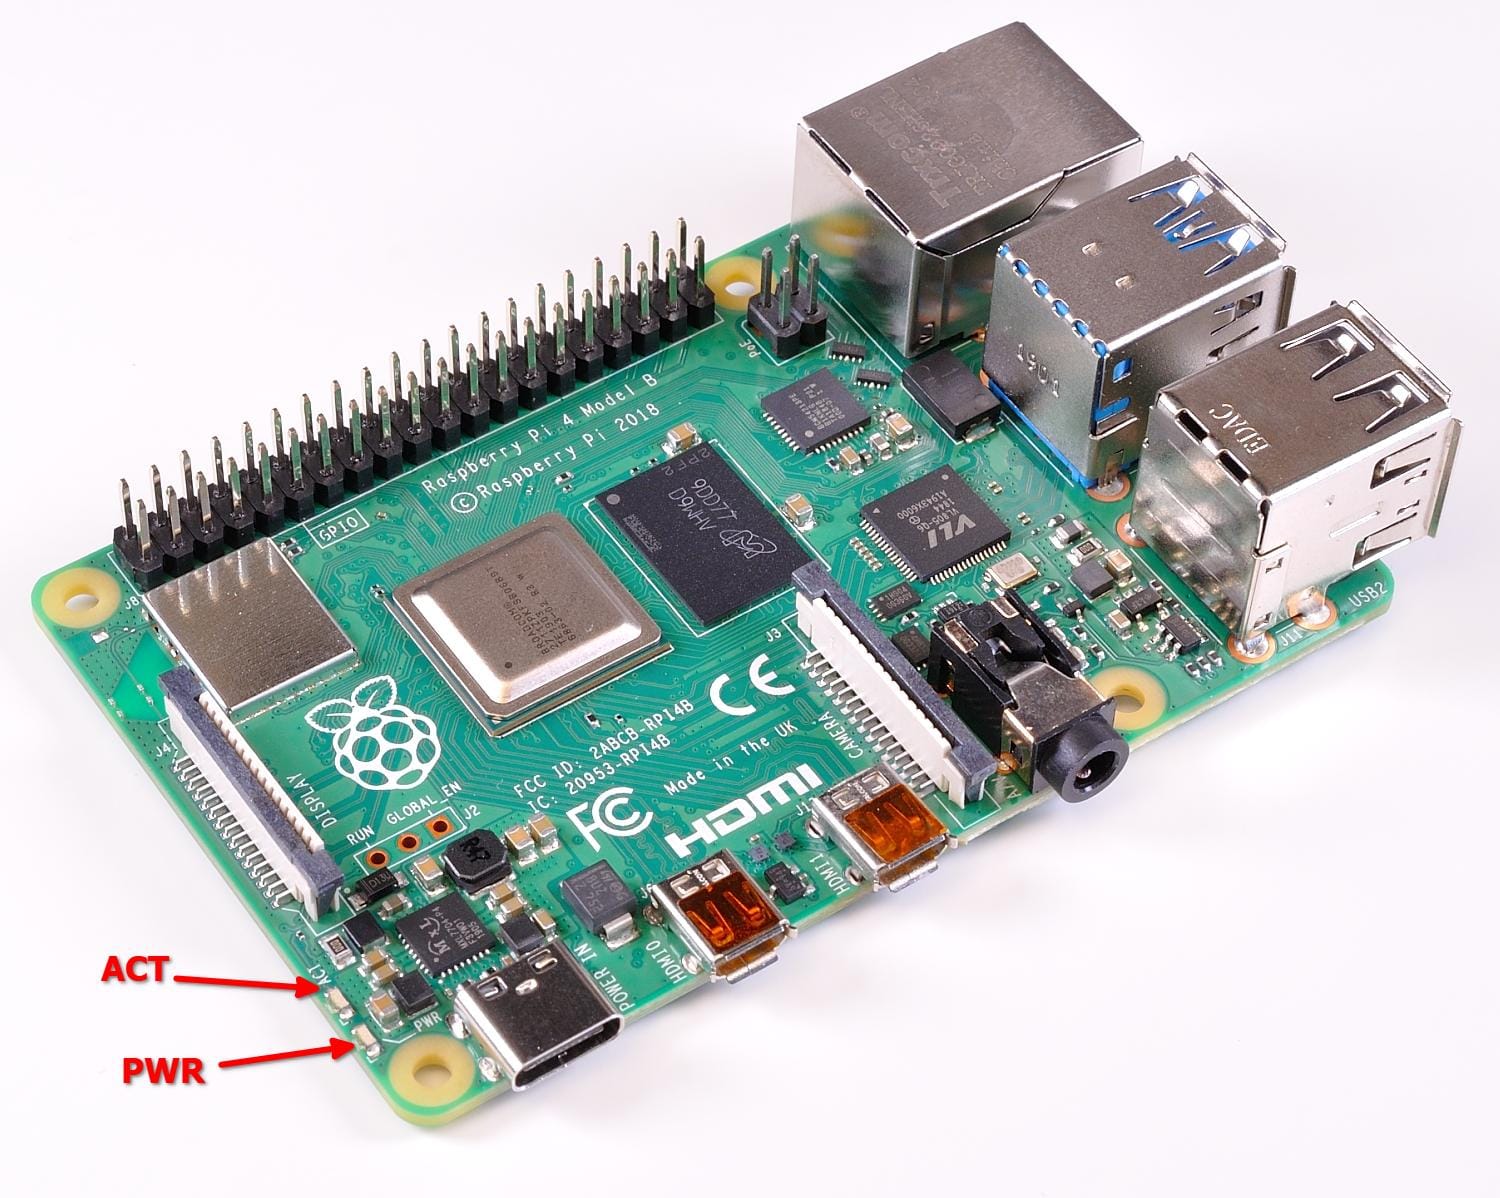
The Raspberry Pi’s onboard LEDs aren’t just indicators, they’re diagnostic tools. They typically have:
- Red LED (PWR): Indicates power status. On the Pi 4/400, this LED is solid ON when the board is receiving sufficient power. If it's off or flickering, suspect a power issue.
- Green LED (ACT): The activity LED. While showing SD card activity, like the Pi 5, it also flashes specific patterns to indicate boot issues.
- Ethernet LEDs: Found on the Ethernet port (Pi 4 only), showing network link and activity.
Like the Pi 5, the Raspberry Pi 4 and 400 boot from onboard EEPROM, enabling them to run more detailed diagnostics than older models.
The flash codes for the green ACT LED on the Raspberry Pi 4 and 400 are identical to the Pi 5 codes listed above.
| Long Flash | Short Flash | Meaning |
|---|---|---|
| 0 | 3 | Generic failure to boot |
| 0 | 4 | start.elf not found |
| 0 | 7 | kernel.img not found |
| 0 | 8 | SDRAM failure |
| 0 | 9 | Insufficient SDRAM |
| 0 | 10 | In HALT state |
| 2 | 1 | Boot device not FAT formatted |
| 2 | 2 | Failed to read boot partition |
| 2 | 3 | Extended partition not FAT |
| 2 | 4 | File signature/hash mismatch |
| 3 | 1 | SPI EEPROM error |
| 3 | 2 | SPI EEPROM write protected |
| 3 | 3 | I2C error |
| 3 | 4 | Invalid secure boot configuration |
| 4 | 3 | RP1 not found |
| 4 | 4 | Unsupported board type |
| 4 | 5 | Fatal firmware error |
| 4 | 6 | Power failure Type A |
| 4 | 7 | Power failure Type B |
Raspberry Pi 3 Model B, B+, and A+
Moving back a generation, the Raspberry Pi 3 models were popular for their performance and features.
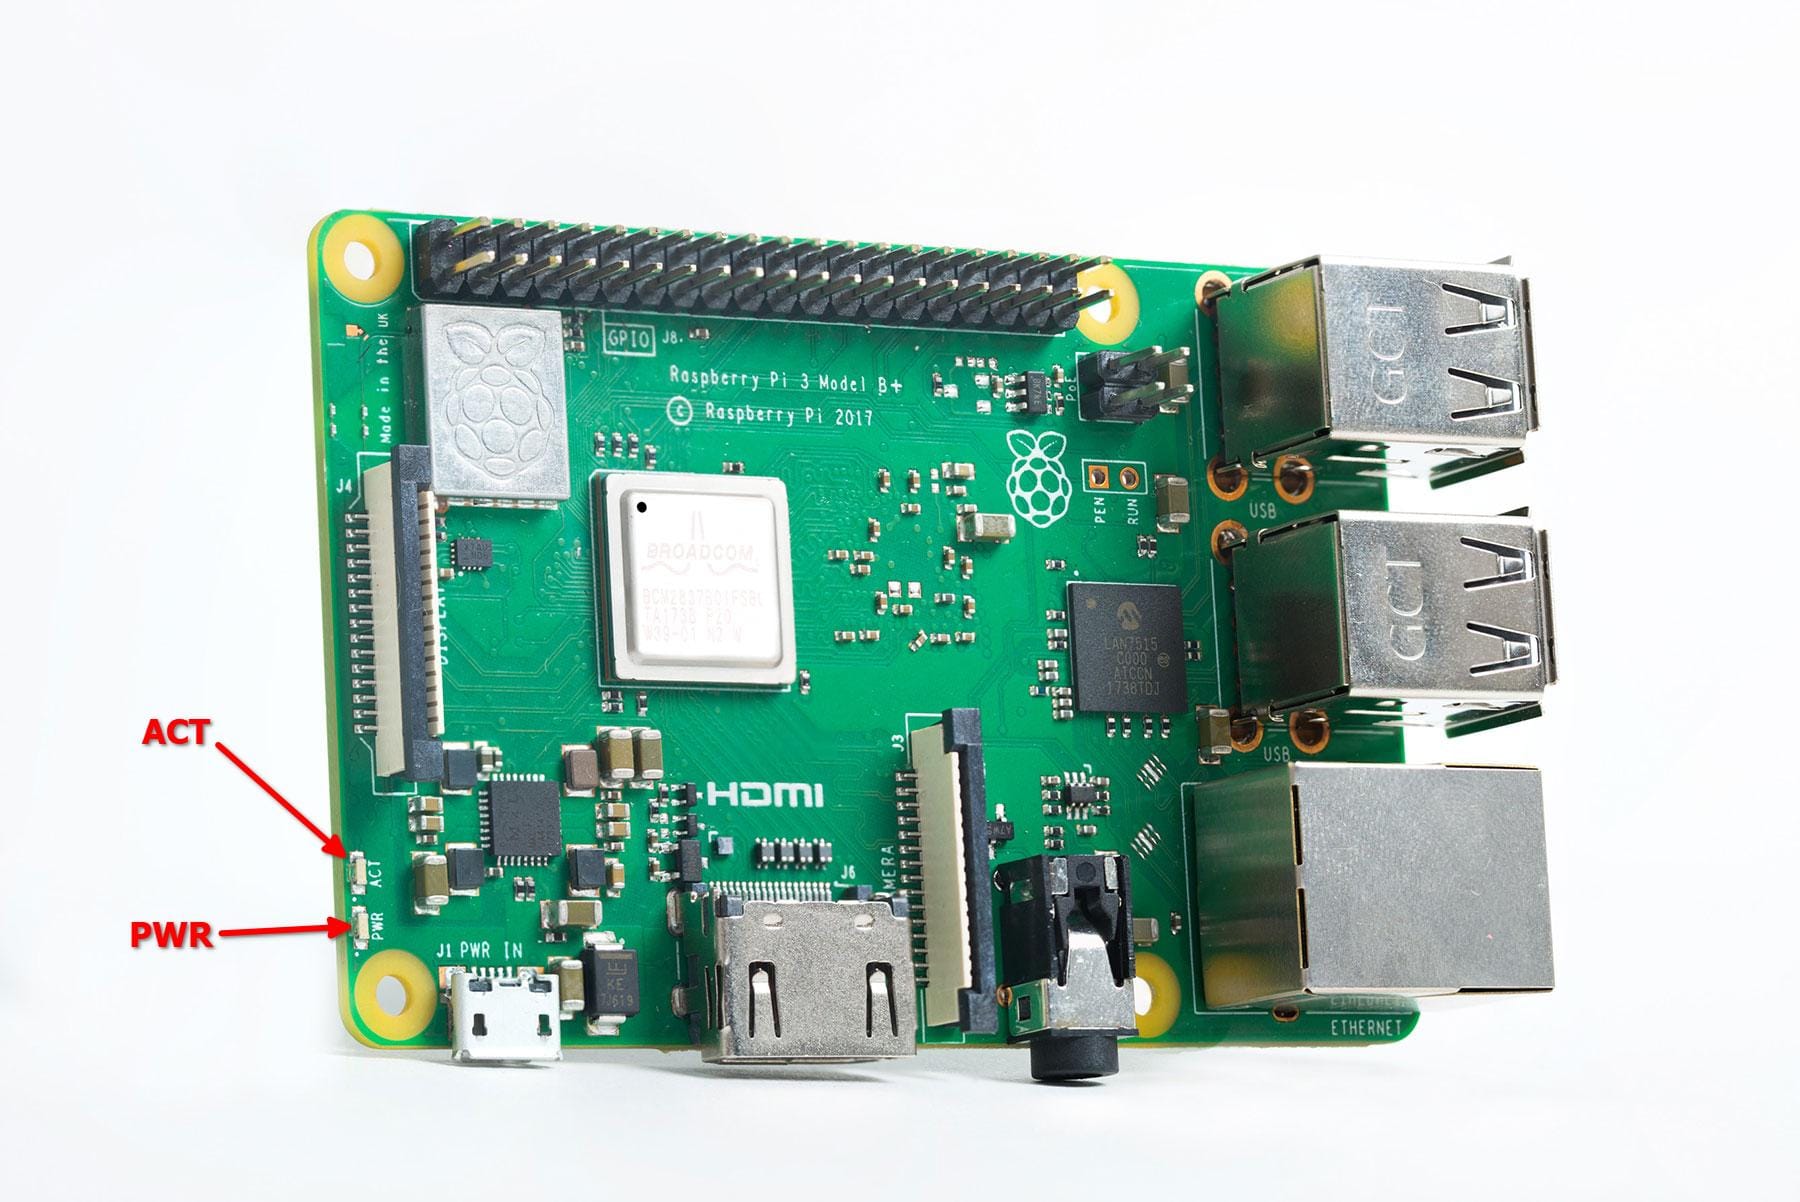
These boards typically have:
- Red LED (PWR): Solid ON when receiving adequate power. Off or flickering suggests a power problem.
- Green LED (ACT): Indicates SD card activity. It also flashes error codes if the boot process fails.
- Ethernet LEDs: Found on the Ethernet port (Model B and B+), showing network link and activity. The slimline Model A+ lacks the Ethernet port and thus these LEDs.
Unlike the Pi 4 and 5, the Raspberry Pi 3 boards rely entirely on the SD card for the initial boot process (there's no onboard EEPROM bootloader).
This means the diagnostic capabilities are slightly less extensive, but the green ACT LED still provides valuable clues about common boot problems.
Here's what the green ACT LED flashes mean on the Raspberry Pi 3 models:
| Flashes | Meaning |
|---|---|
| 3 | start.elf not found |
| 4 | start.elf corrupt |
| 7 | kernel.img not found |
| 8 | SDRAM not recognized (bad image or damaged RAM) |
| Irregular | Normal read/write activity |
Raspberry Pi 2 and Pi 1 (Model B, B+, A, A+)
This group covers some of the earlier but still widely used Raspberry Pi boards, including the Raspberry Pi 2 Model B, and the various iterations of the original Raspberry Pi 1 (Model B, Model B+, Model A, Model A+).
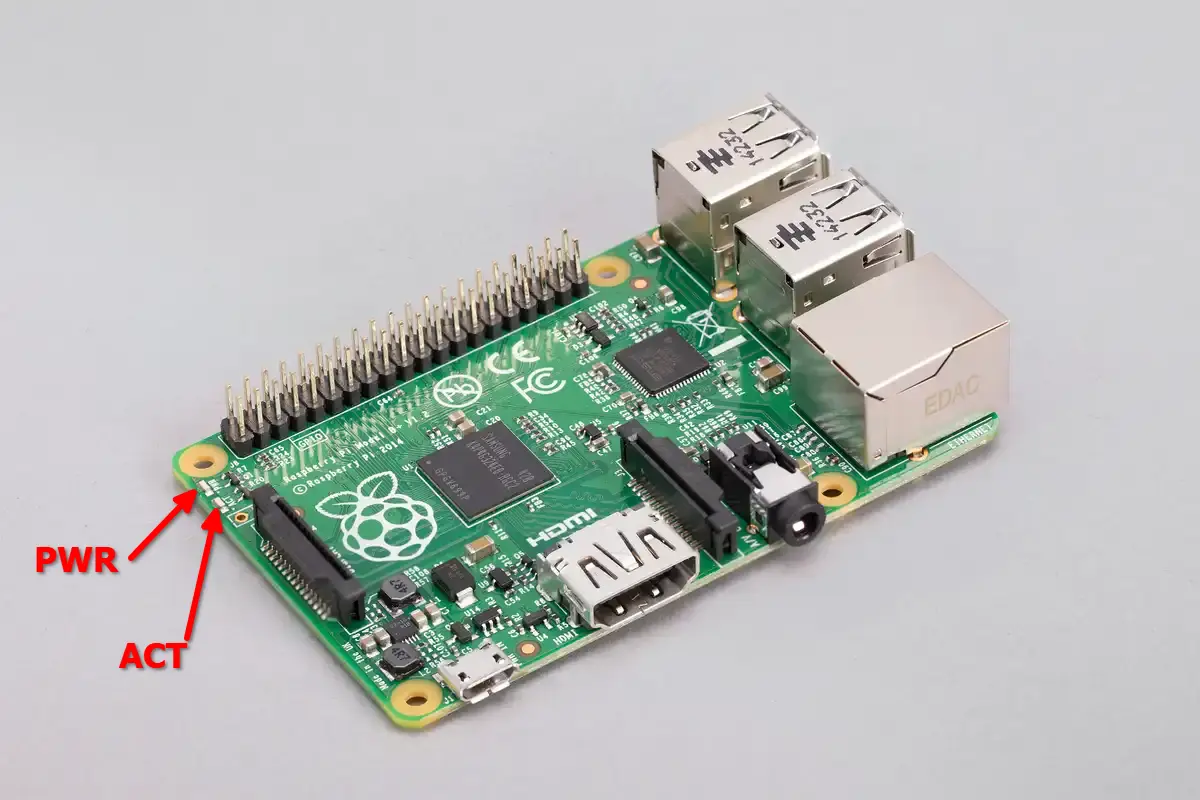
Their LED setups are similar to the Pi 3:
- Red LED (PWR): Solid ON for sufficient power. Off or flickering indicates a power problem.
- Green LED (ACT): Shows SD card activity and signals boot errors.
- Ethernet LEDs: Present on models with an Ethernet port (Pi 2 B, Pi 1 B, Pi 1 B+).
They lack advanced diagnostics and rely on the same basic LED flash codes as the Pi 3 series:
| Flashes | Meaning |
|---|---|
| 3 | start.elf not found |
| 4 | start.elf corrupt |
| 7 | kernel.img not found |
| 8 | SDRAM not recognized |
| Irregular | Normal SD card activity |
Raspberry Pi Zero and Zero W
The incredibly compact Raspberry Pi Zero and Zero W models are known for their minimalist design, and this extends to their LEDs as well.
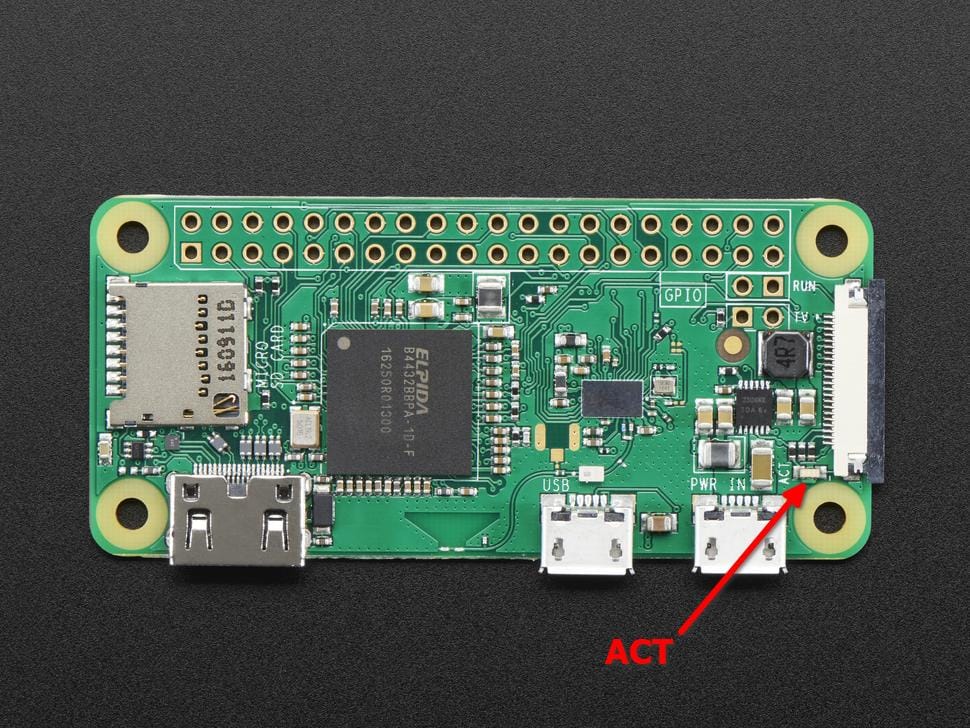
The most significant difference here is the absence of the Red (PWR) LED. The Pi Zero series only features:
- Green LED (ACT): This is the only status LED. It indicates SD card activity and, importantly, signals boot errors.
| Flashes | Meaning |
|---|---|
| 3 | start.elf not found |
| 4 | start.elf corrupt |
| 7 | kernel.img not found |
| 8 | SDRAM not recognized |
| Irregular | Normal SD activity |
Since there's no PWR LED, diagnosing power issues can be slightly trickier initially. If the green ACT LED doesn't light up at all, it could mean no power, an improperly inserted SD card, or a corrupted image preventing any activity.
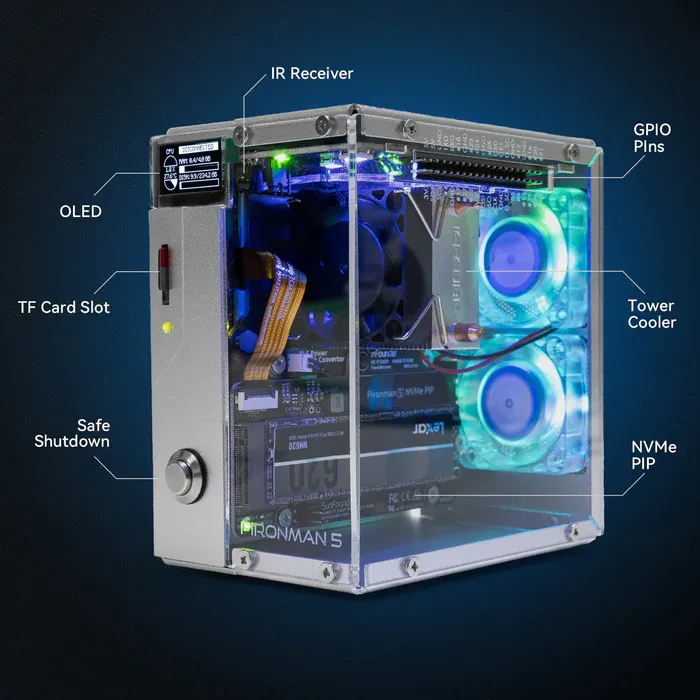
Pironman 5 Case With Tower Cooler and Fan
This dope Raspberry Pi 5 case has a tower cooler and dual RGB fans to keep the device cool. It also extends your Pi 5 with M.2 SSD slot and 2 standard HDMI ports.
Conclusion
In conclusion, Raspberry Pi’s status LEDs are a surprisingly powerful diagnostic tool, especially for headless setups.
They allow you to troubleshoot and pinpoint issues without needing a screen or direct access to the Pi.
It’s an intriguing feature that makes the Pi even more versatile for remote projects, as long as you know what the blink codes mean.
After all, knowing the code is half the battle, without it, those flashing lights might as well be a mystery show.
You can take your debugging to the next step by adding a UART to your Pi and fetch the debugging data in your computer.
In the same context, knowing the Raspberry Pi pinout is always helpful.

What do you think? Have you ever used the Pi’s LEDs to diagnose an issue? Drop a comment below and share your experiences.
Source: It's FOSS

